Contribute to the docs
Note: In order to contribute, you must have a GitHub account.
Edit an existing doc
Find the doc you'd like to edit.
Select Contribute to this topic
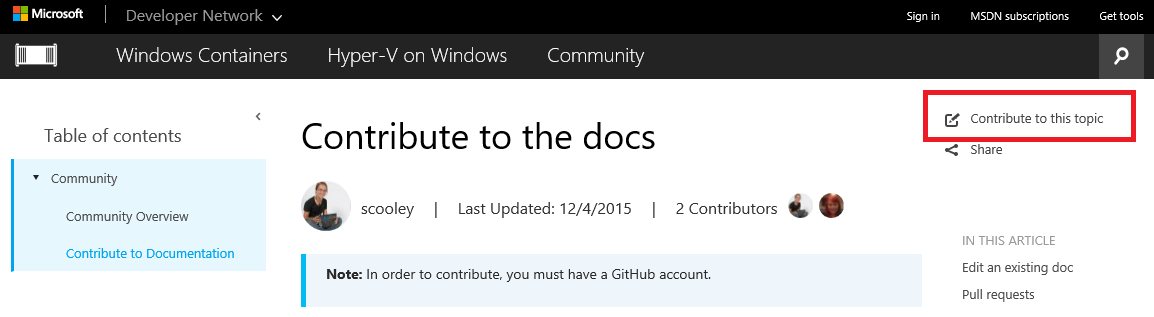
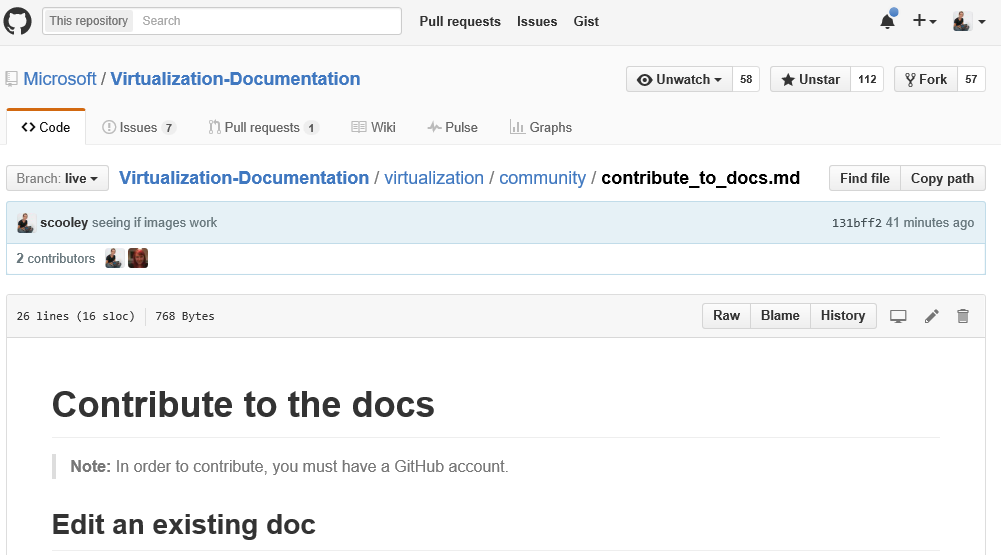
This will automatically redirect you to the markdown file in GitHub associated with this file.
Make sure you are signed into GitHub. If not, either sign in or create a GitHub account.
- Select the edit icon to edit with the in browser editor.
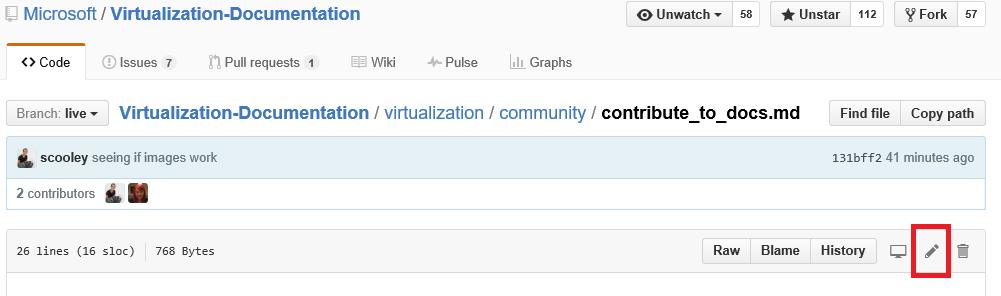
- Make changes inline.
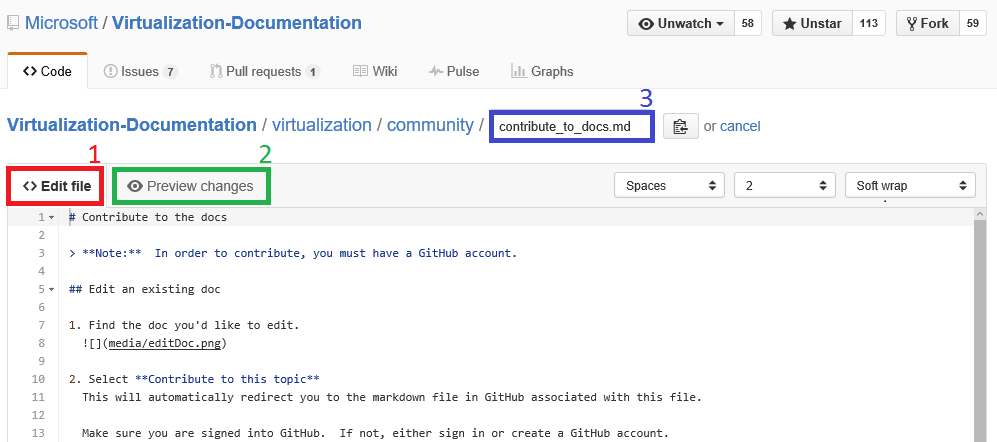
Possible actions:
- Edit file
- Preview changes
- Rename the file (it's very unlikely you'll want to do this)
- Propose your changes as a pull request
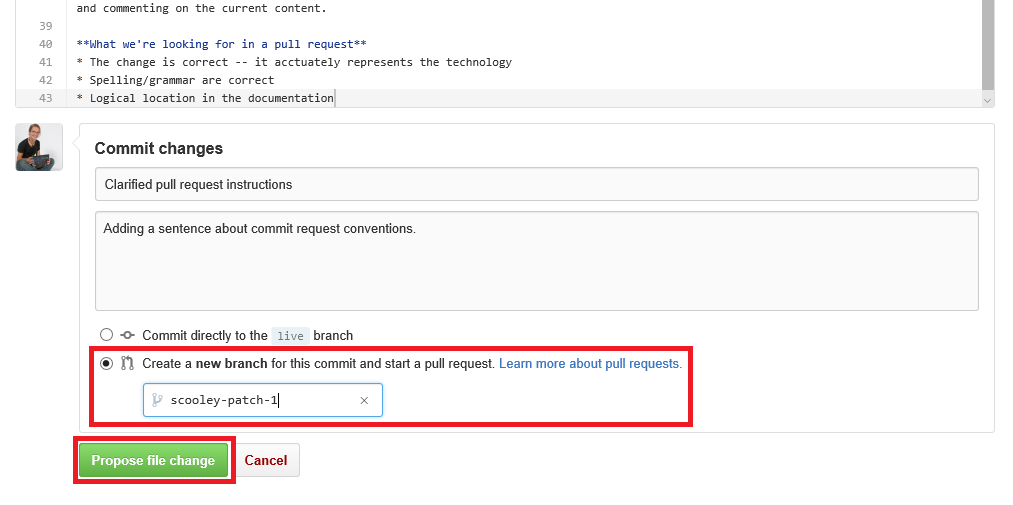
- Review your changes
What we're looking for in a pull request
- The change is correct -- it accurately represents the technology
- Spelling/grammar are correct
- Logical location in the documentation
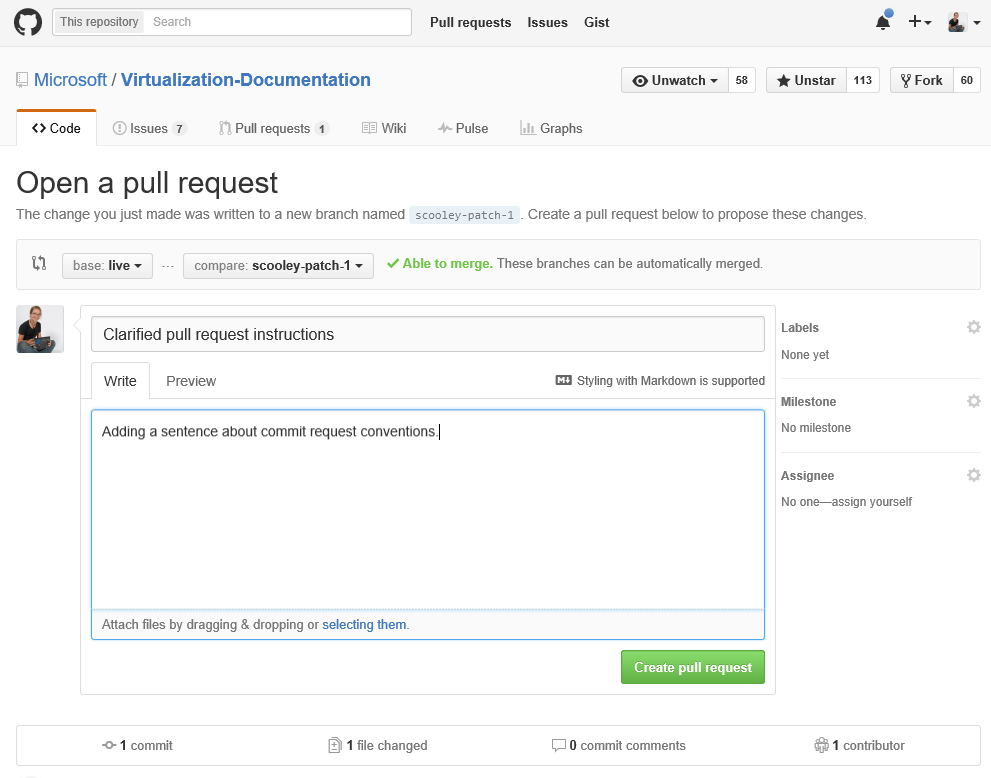
- Create a pull request
Pull requests
Most changes will be committed via pull request. A pull request is a way of reviewing a change set with multiple reviewers, changing, and commenting on the current content.
Fork the repo and edit locally
For long term doc work Clone the repository locally and work on your machine.
The following guide shows you how to emulate my (Sarah Cooley's) set up. There are many alternative setups that work equally well.
Note: All of these doc tools work equally well on Linux/OSX. If you want other guides, ask.
This is broken into three sections:
- Set up git
- git installation
- initial set up
- forking the documentation repo
- cloning your copy to your local machine
- Initial credential management
- information about stashing credentials and cred helper.
- Set up doc environment
- install VSCode
- VSCode for Git walk through some handy features
- Make first commit.
Set up Git
- Install git (on Windows) from here
There is only one value in the installation you need to change:
Adjusting your PATH environment Use Git from the Windows Command Prompt
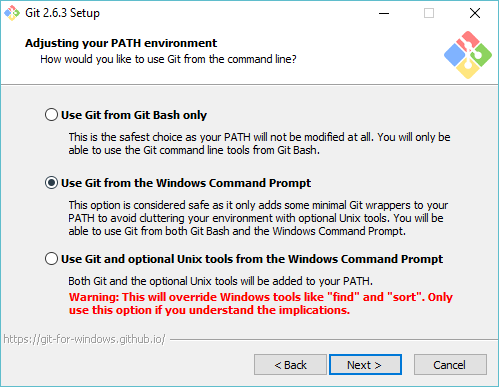
This lets you use git commands in the PowerShell console/in any Windows console.
- Configure your git identity
Open a PowerShell Window and run:
git config --global user.name "User Name"
git config --global user.email username@microsoft.com
Git uses these values to label your commits.
If recieved the following error git probably isn't installed properly or you need to relaunch PowerShell.
PowerShell git : The term 'git' is not recognized as the name of a cmdlet, function, script file, or operable program. Check the spelling of the name, or if a path was included, verify that the path is correct and try again.
Configure your git environment
Set up a credential helper so you only need to enter username and password once (at least on this machine). I use this basic Windows cred helper
Once that is installed, run the following to enable the credential helper and set your push behavior:
git config --global credential.helper manager
git config --global push.default simple
The first time you need to authenticate against GitHub - you will be prompted for your username, and the two-factor authcode if you have it enabled. Example:
C:\Users\plang\Source\Repos\Virtualization-Documentation [master]> git pull
Please enter your GitHub credentials for https://github.com/
username: <username>@contoso.com
password:
authcode (app): 562689
This will automatically a Personal Access Token with the right permissions on GitHub, then store that token securely on the local machine. You shouldn't be prompted again in the future.
Fork the repository
Clone the repository
Git clone makes a local copy of the git repository with the right hooks to sync with other clones of the same repository.
By default, clone will create a folder with the same name as the repository in the current directory. I keep all of my git repos in my user directory. Read more about git clone here.
cd ~
git clone https://github.com/Microsoft/Virtualization-Documentation.git
If successful, you now have a Virtualization-Documentation folder.
cd Virtualization-Documentation
- [Optional] Set up Posh-Git
Posh-Git is a community created PowerShell module that makes using Git in PowerShell a little friendlier. It adds tab completion for Git in PowerShell, and can also make your prompt display useful about branching and file state. Read more about it here. You can install Posh-Git by running the following in an Administrator PowerShell console.
Install-Module -Name posh-git
To make Posh-Git work automatically each time you start PowerShell, add the following code to your PowerShell Profile (e.g. %UserProfile%\My Documents\WindowsPowerShell\profile.ps1 )
Import-Module posh-git

function global:prompt {
  $realLASTEXITCODE = $LASTEXITCODE

  Write-Host($pwd.ProviderPath) -nonewline

  Write-VcsStatus

  $global:LASTEXITCODE = $realLASTEXITCODE
  return "> "
}
Validate and stash credentials
To validate that the repository is set up correctly, try pulling new content.
git pull
Set up markdown editing environment
Download VSCode
Make a test commit. If your credentials are stashed correctly, it should all work perfectly.
Обратная связь
Ожидается в ближайшее время: в течение 2024 года мы постепенно откажемся от GitHub Issues как механизма обратной связи для контента и заменим его новой системой обратной связи. Дополнительные сведения см. в разделе https://aka.ms/ContentUserFeedback.
Отправить и просмотреть отзыв по