Use actions with custom copilots in Copilot Studio (preview)
Important
Power Virtual Agents capabilities and features are now part of Microsoft Copilot Studio following significant investments in generative AI and enhanced integrations across Microsoft Copilot.
Some articles and screenshots may refer to Power Virtual Agents while we update documentation and training content.
You can extend the capabilities of your copilot by adding one or more actions. Actions are used by your copilot to respond to users automatically, using generative actions, or you can call them explicitly from within a topic.
[This article is prerelease documentation and is subject to change.]
Core action types
If you turn on generative mode, your copilot can automatically select the most appropriate action or topic, to respond to a user at runtime.
In classic mode, a copilot can only use topics to respond to the user. However, you can still design your copilot to call actions explicitly from within topics.
Actions are based on one of the following core action types:
- Prebuilt connector action
- Custom connector action
- Power Automate cloud flow
- AI Builder prompts
- Bot Framework skill
Important
You can't use conversational actions created in Copilot Studio as actions with custom copilots.
Each core action has additional information that describes its purpose, allowing the copilot to use genrative AI to generate questions. These questions are required to fill the inputs needed to perform the action. Therefore, you don't need to manually author question nodes to gather all inputs needed, such as the inputs on a flow. Inputs are handled for you during runtime.
Actions can generate a contextual response to a user's query, using the results of the action. Alternatively, you can explicitly author a response for the action.
Tip
When using generated questions from a action, inform your users that some of the conversation is generated by AI.
For example, add an extra message in the Conversation Start system topic. This topic determines the message shown to your users when a new conversation starts.
Add an action
Open your custom copilot by choosing Copilots in the left hand navigation pane and selecting your copilot from the list.
Select Actions to view actions for the copilot.
Select + Add an action.
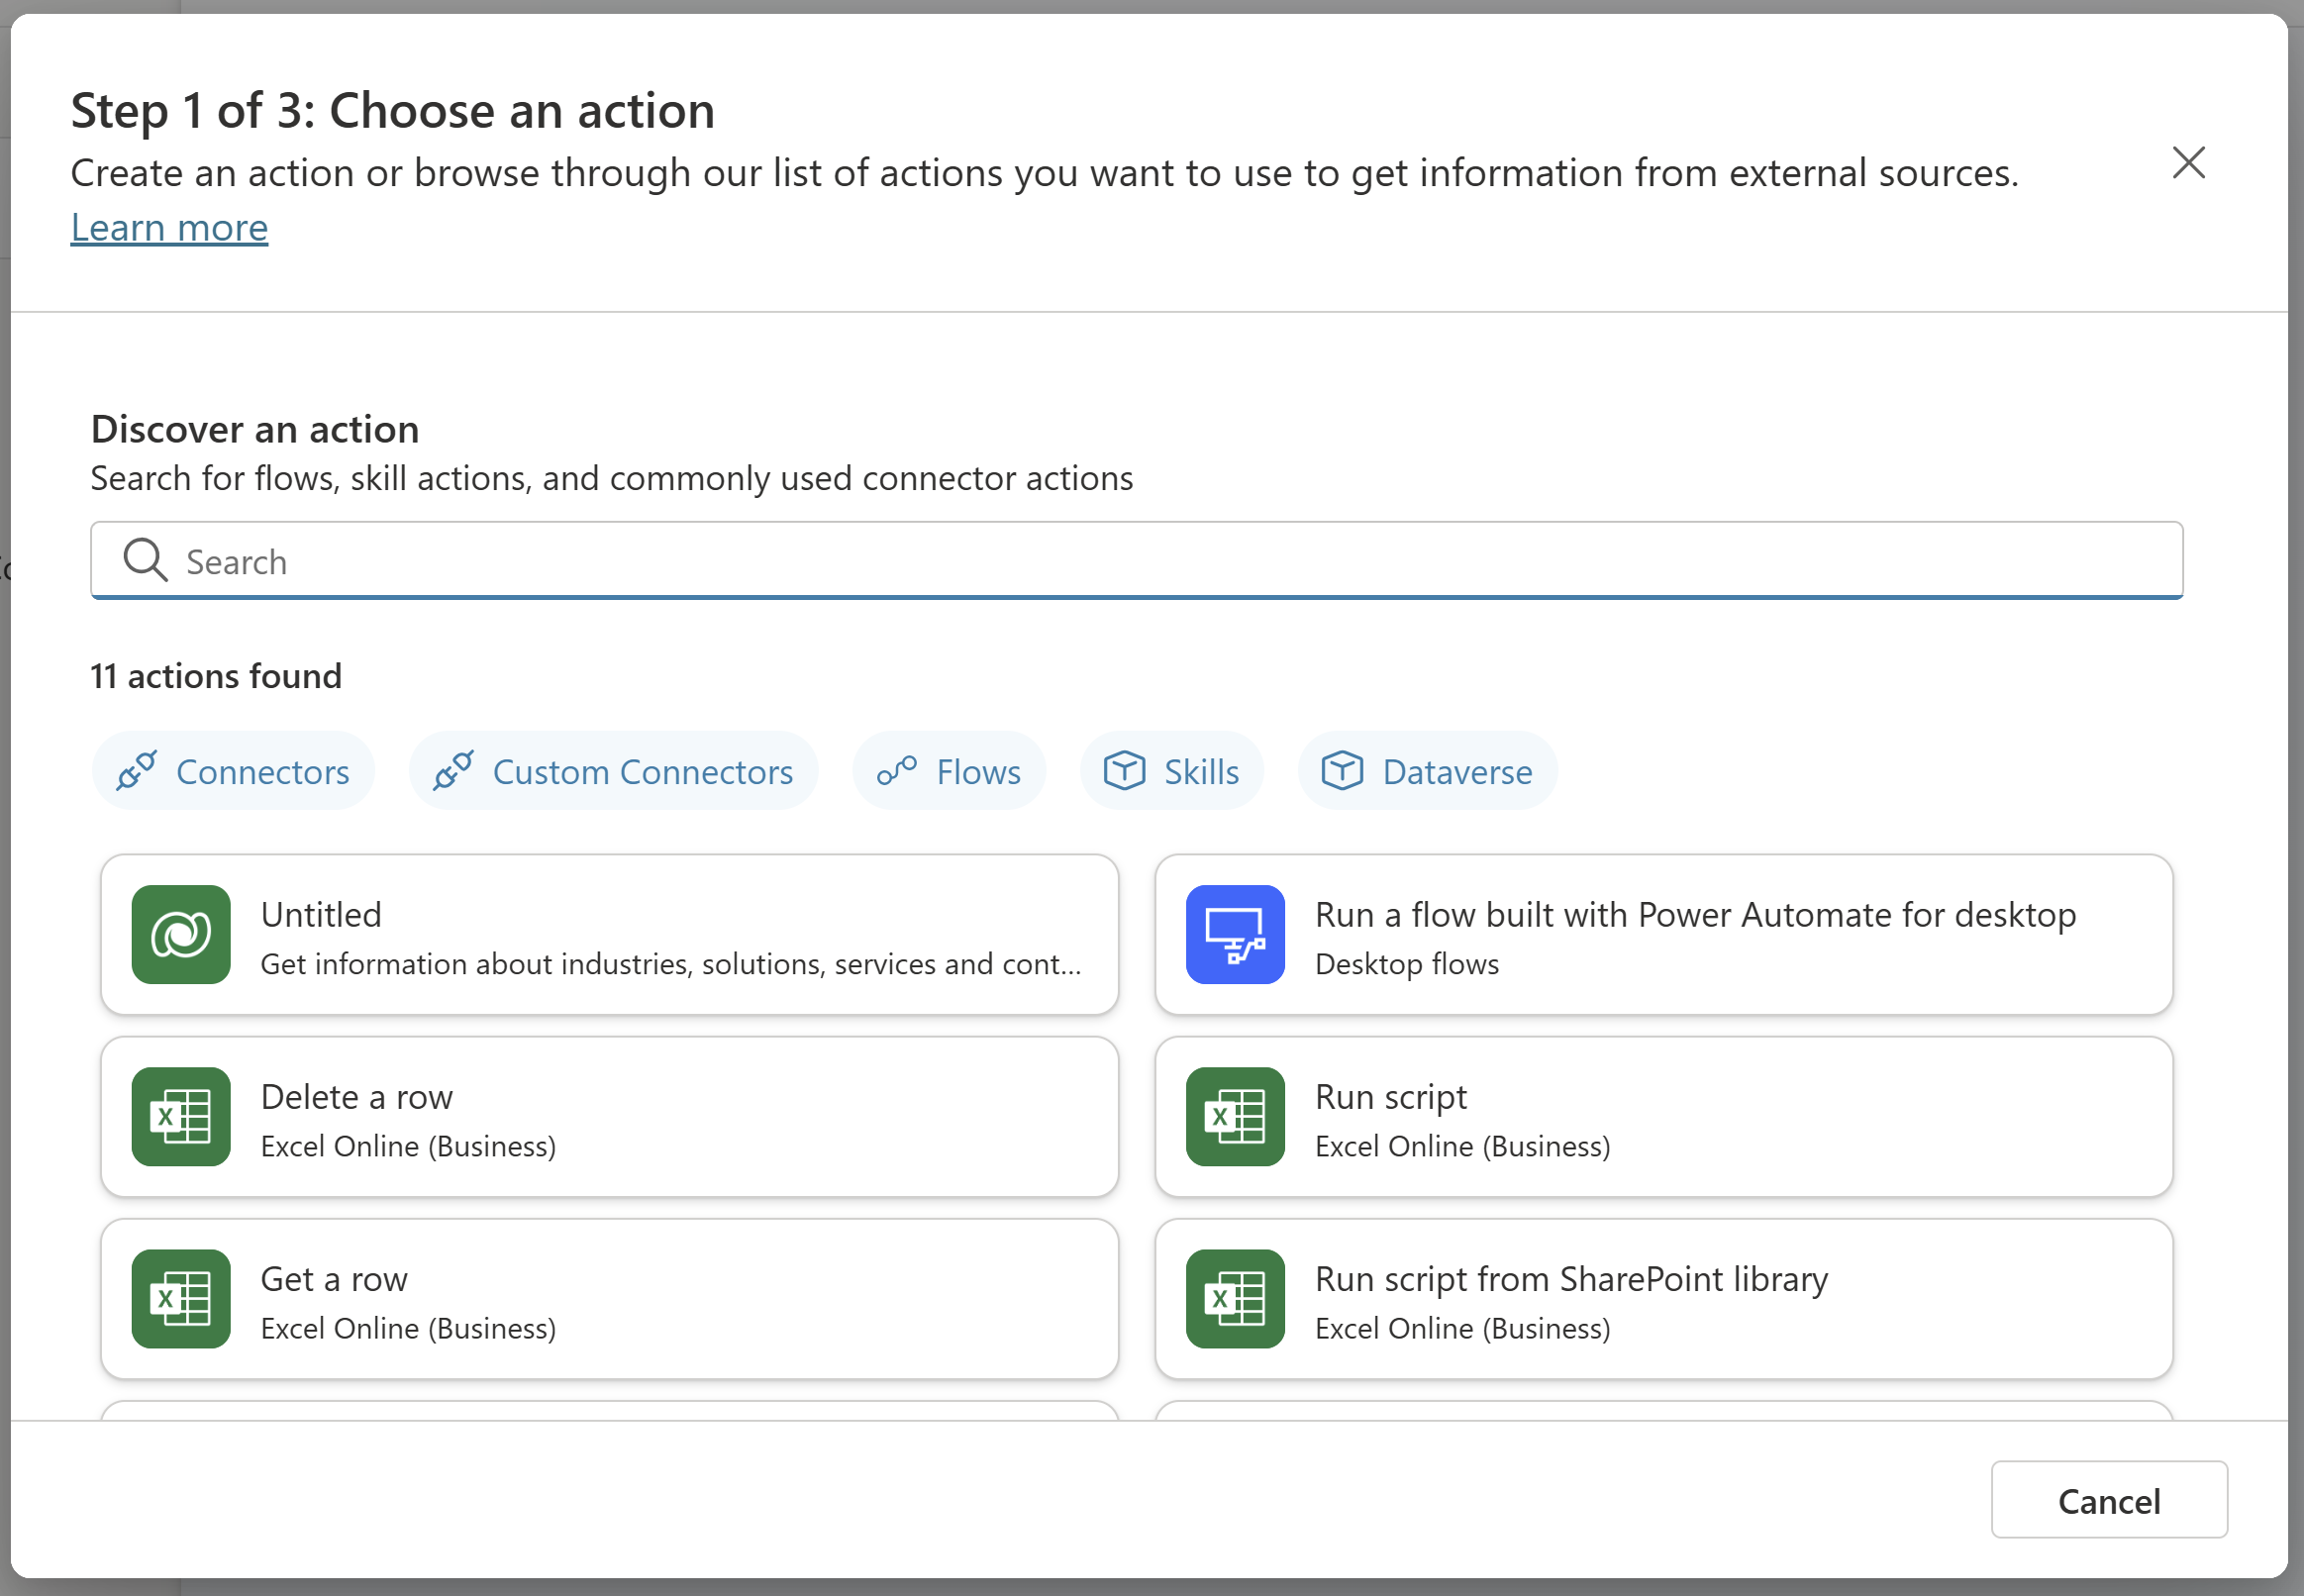
In the Choose an action (preview) wizard, search for an action you want to use and select it.
The default list shown has Power Automate Flows and custom connectors available within your environment. This list includes commonly used prebuilt connectors and Bot Framework Skills that are registered with your copilot.
Important
Some actions created from AI Plugins, such as Dynamic Prompts and those based on Dataverse APIs, require authentication.

Depending on the action, your connection is automatically configured, as shown in the example. Alternatively, you're required to configure the connection if instructions are given in the wizard. Once your connection is successfully configured, select Next.
Review and make changes to your plugin actions configuration if needed. Select Finish to add the action to your copilot.
Select Next.

Call an action
If you enabled generative actions, your action is called automatically in response to a relevant user query.
Alternatively, you can call an action explicitly from within a topic.
Test your action
Calling an action
Your copilot selects and runs your action based on the name and description. You can author high quality descriptions, using the dedicated tracing mode to see which actions your copilot selected from the generative actions page.
Alternatively, if you added an to a topic, you can test it by entering a message similar to one of the trigger phrases for that topic.
You can see a weather action being tested in this screenshot:

Alternatively, if you added an action to a topic, you can test by triggering your topic with a suitable trigger phrase.
Configuring inputs and outputs for an action
Make changes to your action configuration
There are many ways to configure your action. On the final step of the action wizard, called Review and Finish, you can make changes to your action's configuration by clicking Edit next to the appropriate section.
Action details
Here you can configure details about your action, including the Model display name and Model description for your action. Usually, the name and description are prepopulated for you based on the action you selected.
The Display name and Description properties for each input help the copilot understand the purpose of the input, to generate an appropriate question for the user, and to recognize the correct value in a user's response. For example, the following are the default name and description of the location input parameter for the MSN Weather connector.
- Name: Location
- Description: The location search query. Valid inputs are City, Region, State, Country, Landmark, Postal Code, latitude and longitude
When asking the user for a location, the copilot generates a question similar to, What is the location you would like to check the weather for? You can enter a city, region, state, country, landmark, or postal code.
You can change the Identify as option to a specific entity type, depending on the input being collected, which can help the copilot accurately extract a value from a user's response.
By default, each input is set to Dynamically fill with the best option. The copilot tries to populate the value from available context, such as extracting a value from the user's message. If no appropriate value is found, it generates a question to ask the user for a value. You can override an input with a value instead of asking the user. To override, change the How will the copilot fill this input? dropdown to Set as a value, then enter a value. This value can be a literal value, an existing variable, or a Power Fx formula.

To control your copilot's behavior when asking for a value or validating a user's answer, you can configure additional properties for inputs.
Outputs
By default, your action is configured to automatically generate a contextual response for a user, based on their query and the result of the action. For example, if a user asks, "What is the current temperature in London?", a contextual reply is generated using GPT, such as "The current temperature in London is 9 degrees Celsius."
Alternatively, you can choose to author a specific response for your action to return. As with the confirmation editor, you can insert references to output variables from the action using the variable picker, as shown in this example.

Call action from within a topic
You can call an action explicitly from within a topic, similar to calling other action types like Power Automate Flows. Depending on your use case, you might use your Flow as part of a wider topic, which uses more nodes. Or, like in the weather example, adding a single action node to a topic might be all you need.
To call an action from within a topic:
In Copilot Studio, go to the Topics for the copilot you want to edit.
Create a new topic, and name it Get weather.
Add the following Trigger phrases:
- will it rain
- today's forecast
- get weather
- what's the weather

Select Add node (+) and then select Call an action. Switch to the Plugin actions (preview) tab and then select the action you created earlier, Get weather forecast.

Your Plugin action (preview) node is now added to your topic.

Select Save.
Override inputs when calling an action from a topic
By default, when your action runs, your copilot generates questions for the user to populate the required inputs. However, you might want to override one or more inputs and provide an explicit value instead of asking the user. You can override in the plugin action configuration within the Inputs section. Or, you might override values only when your action is used from a specific topic:
Select Set value on the node and choose the input you would like to override.

Enter the value for the input by typing a value, selecting a variable, or using a formula.

Now that this input is overridden, the copilot doesn't ask the user for a value.
Enable authentication for AI actions
Some actions, when created based on AI actions, require authentication to work correctly, such as Dynamic Prompt or others that call a Dataverse API.
Actions are always run in the Microsoft Copilot runtime in the end-user context and can't be run unless authentication is enabled. Two types of authentication methods are supported:
Go to the connector action properties.
Under End user authentication, select Copilot author authentication.
Publish and test the experience in the copilot test pane, or in a desired channel.

Use flow actions with end-user credentials
Flow actions can be configured to use end-user credentials. If you use the flow in a supported channel, this requires no special configuration in your copilot dialog, and end users are able to manage their connections for a given flow in a provided experience.
Authentication for actions based on plugins in your library
When created based on AI plugins, actions require authentication to work correctly. This is most commonly seen with actions based on prompts or others that call Dataverse APIs. Actions based on plugins are always run in the end-user context and can't be run unless authentication is enabled. Two types of authentication methods are supported:
Integrated authentication (Teams and Power Apps): You can use this authentication method if you want to publish your copilot to a Teams channel. This method also works for copilots embedded in any Power Platform app that uses tokens built with the PPAPI standard.
Manual authentication (third-party copilots): This authentication method involves the setup of a Microsoft Entra ID connection.
To create a manual authentication connection:
Set up a Microsoft Entra ID app.
Set up manual authentication for your Copilot Studio copilot.
Allow your app to use delegation to fetch a token on behalf of the user. Be sure to add any necessary scopes.

Pripomienky
Pripravujeme: V priebehu roka 2024 postupne zrušíme službu Problémy v službe GitHub ako mechanizmus pripomienok týkajúcich sa obsahu a nahradíme ju novým systémom pripomienok. Ďalšie informácie nájdete na stránke: https://aka.ms/ContentUserFeedback.
Odoslať a zobraziť pripomienky pre