Add SQL Server Reporting Services Report Viewer web part to a SharePoint page
Applies to: ![]() SQL Server 2016 (13.x) Reporting Services and later
SQL Server 2016 (13.x) Reporting Services and later ![]() Power BI Report Server
Power BI Report Server ![]() SharePoint 2013 and later ❌ SharePoint Online
SharePoint 2013 and later ❌ SharePoint Online
Display a report, from SQL Server Reporting Services or Power BI Report Server, by adding a Report Viewer web part to a SharePoint page.
Prerequisites
For reports to load successfully, the Claims to Windows Token Service (C2WTS) needs to be configured for Kerberos constrained delegation. For more information on how to configure C2WTS, see Claims to Windows Token Service (C2WTS) and Reporting Services.
The Report Viewer web part must be deployed to your SharePoint farm. For information on how to deploy the Report Viewer web part solution project, see Deploy the Report Viewer web part on a SharePoint site.
To add a web part to a web page, you must have the Add and Customize Pages permission at the site level. If you use default security settings, this permission is granted to members of the Owners group who have the Full Control level of permission.
Add web part
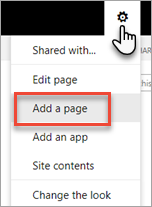
In your SharePoint site, select the gear icon in the upper left and choose Add a page.
Give your page a name and select Create.
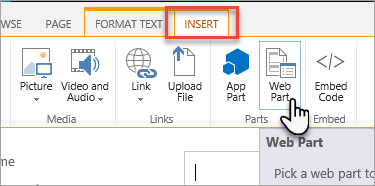
Within the page designer, select the Insert tab in the ribbon. Then choose web part within the Parts section.
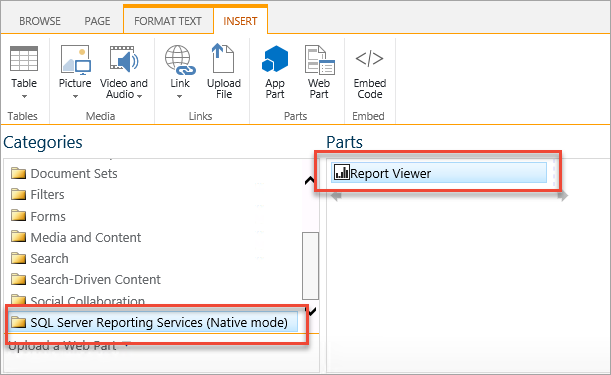
Under Categories, select SQL Server Reporting Services (Native mode). Under Parts, select Report Viewer. Then choose Add.
You might initially see an error. The error is because the default report server URL is set to
https://localhostand might not be available at that location.
Configure the Report Viewer web part
To configure the web part to point to your specific report, do the following steps.
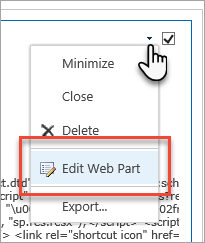
When editing the SharePoint page, select the down arrow in the upper right of the web part and choose Edit web part.
Enter the Report Server URL for the report server hosting your report. The URL should look similar to
https://myrsserver/reportserver.Enter the path and name of the report you want to display within the web part. It looks similar to
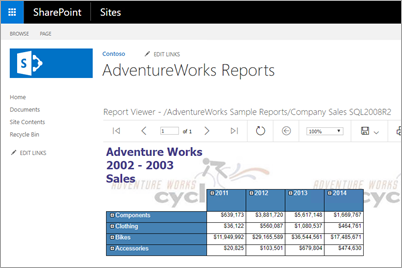
/AdventureWorks Sample Reports/Company Sales. In this example, the report Company Sales is in a folder called AdventureWorks Sample Reports.If your report requires parameters, after you supply the report server URL and the name of the report, select Load Parameters within the Parameters section.
Select Ok to save your changes to the web part configuration.
Select Save, within the Office ribbon, to save the changes to the SharePoint page.
Considerations and limitations
- The Report Viewer web part can't be used on modern pages within SharePoint.
- Power BI reports can't be used with the Report Viewer web part.
- If you don't see the Report Viewer web part, to add to your page, make sure you deployed the Report Viewer web part.
More questions? Try asking the Reporting Services forum
Feedback
Coming soon: Throughout 2024 we will be phasing out GitHub Issues as the feedback mechanism for content and replacing it with a new feedback system. For more information see: https://aka.ms/ContentUserFeedback.
Submit and view feedback for