Set up Microsoft Defender for Endpoint deployment
Applies to:
- Microsoft Defender for Endpoint Plan 1
- Microsoft Defender for Endpoint Plan 2
- Microsoft Defender XDR
Want to experience Microsoft Defender for Endpoint? Sign up for a free trial.
The first step when deploying Microsoft Defender for Endpoint is to set up your Defender for Endpoint environment.
In this deployment scenario, you're guided through the steps on:
- Licensing validation
- Tenant configuration
- Network configuration
Note
For the purpose of guiding you through a typical deployment, this scenario will only cover the use of Microsoft Configuration Manager. Defender for Endpoint supports the use of other onboarding tools but we won't cover those scenarios in the deployment guide. For more information, see Identify Defender for Endpoint architecture and deployment method.
Check license state
Checking for the license state and whether it was properly provisioned can be done through the admin center or through the Microsoft Azure portal.
To view your licenses, go to the Microsoft Azure portal and navigate to the Microsoft Azure portal license section.

Alternately, in the admin center, navigate to Billing > Subscriptions.
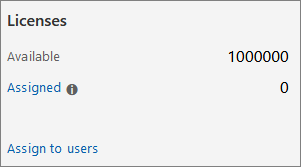
On the screen, you see all the provisioned licenses and their current Status.

Cloud Service Provider validation
To gain access into which licenses are provisioned to your company, and to check the state of the licenses, go to the admin center.
From the Partner portal, select Administer services > Office 365.
Clicking on the Partner portal link opens the Admin on behalf option and gives you access to the customer admin center.


Tenant Configuration
Initiating Microsoft Defender for Endpoint tenant is easy. From the navigation menu, select any item under the Endpoints section, or any Microsoft Defender XDR feature such as Incidents, Hunting, Action center, or Threat analytics to start the tenant creation process.
From a web browser, navigate to the Microsoft Defender portal.
Data center location
Microsoft Defender for Endpoint stores and process data in the same location as used by Microsoft Defender XDR. If Microsoft Defender XDR hasn't been turned on yet, onboarding to Defender for Endpoint also turns on Defender XDR, and a new data center location is automatically selected based on the location of active Microsoft 365 security services. The selected data center location is shown on the screen.
Network configuration
Ensure devices can connect to the Defender for Endpoint cloud services. The use of a proxy is recommended.
STEP 1: Configure your network environment to ensure connectivity with Defender for Endpoint service. STEP 2: Configure your devices to connect to the Defender for Endpoint service using a proxy. STEP 3: Verify client connectivity to Microsoft Defender for Endpoint service URLs.
In certain scenarios, you might want to allow traffic to IP addresses. Not all services are accessible in this way and you need to evaluate how to address this potential issue in your environment - for example, by centrally downloading then distributing updates. For more information, see Option 2: Configure connectivity using static IP ranges.
Next step
- Continue to Step 2 - Assign roles and permissions
Tip
Do you want to learn more? Engage with the Microsoft Security community in our Tech Community: Microsoft Defender for Endpoint Tech Community.
Povratne informacije
Stiže uskoro: Tokom 2024. godine postepeno ćemo ukidati probleme sa uslugom GitHub kao mehanizam povratnih informacija za sadržaj i zameniti ga novim sistemom povratnih informacija. Dodatne informacije potražite u članku: https://aka.ms/ContentUserFeedback.
Prosledite i prikažite povratne informacije za