Självstudie: Skapa en iOS-app som startar Avancerad läsare med innehåll från ett foto (Swift)
Avancerad läsare är ett inkluderande verktyg som implementerar beprövade tekniker för att förbättra läsförståelsen.
Läs-API:et för Azure AI Vision identifierar textinnehåll i en bild med hjälp av Microsofts senaste igenkänningsmodeller och konverterar den identifierade texten till en maskinläsbar teckenström.
I den här självstudien skapar du en iOS-app från grunden och integrerar Läs-API:et och Avancerad läsare med hjälp av Avancerad läsare SDK. Ett fullständigt fungerande exempel på den här självstudien finns på GitHub.
Förutsättningar
- En Azure-prenumeration. Du kan skapa en kostnadsfritt.
- MacOS och Xcode.
- En Avancerad läsare resurs som konfigurerats för Microsoft Entra-autentisering. Följ de här anvisningarna för att konfigurera.
- En prenumeration på Azure AI Vision-tjänsten. Skapa en Azure AI Vision-resurs i Azure-portalen.
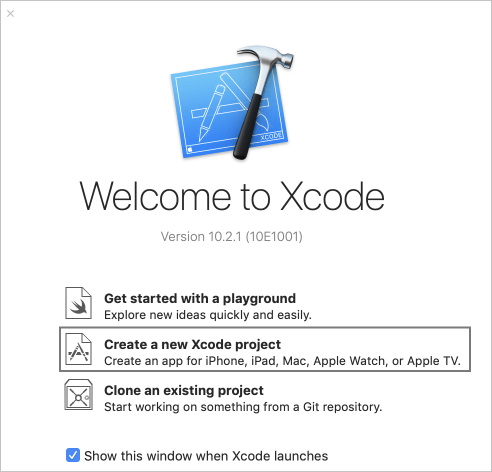
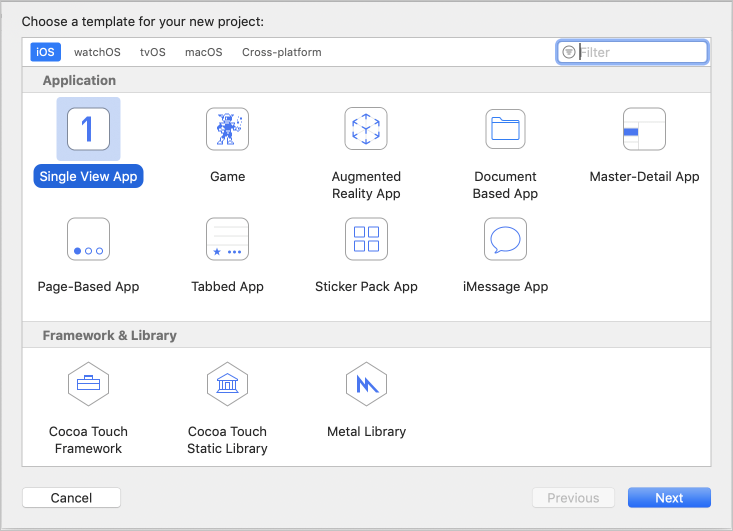
Skapa ett Xcode-projekt
Skapa ett nytt projekt i Xcode.
Välj En vyapp.
Hämta SDK CocoaPod
Det enklaste sättet att använda Avancerad läsare SDK är via CocoaPods. Så här installerar du via Cocoapods:
Följ guiden för att installera Cocoapods.
Skapa en Podfile genom att köra
pod initi Xcode-projektets rotkatalog.Lägg till CocoaPod i poddfilen genom att lägga till
pod 'immersive-reader-sdk', :path => 'https://github.com/microsoft/immersive-reader-sdk/tree/master/iOS/immersive-reader-sdk'. Podfile bör se ut så här, med målets namn som ersätter picture-to-immersive-reader-swift:platform :ios, '9.0' target 'picture-to-immersive-reader-swift' do use_frameworks! # Pods for picture-to-immersive-reader-swift pod 'immersive-reader-sdk', :git => 'https://github.com/microsoft/immersive-reader-sdk.git' endKör kommandot
pod installi katalogen för Xcode-projektet i terminalen för att installera Avancerad läsare SDK-podden.Lägg till
import immersive_reader_sdki alla filer som behöver referera till SDK:et.Se till att öppna projektet genom att öppna
.xcworkspacefilen och inte.xcodeprojfilen.
Skaffa en Microsoft Entra-autentiseringstoken
Du behöver några värden från konfigurationssteget för Microsoft Entra-autentisering i avsnittet förutsättningar. Gå tillbaka till textfilen som du sparade från den sessionen.
TenantId     => Azure subscription TenantId
ClientId     => Microsoft Entra ApplicationId
ClientSecret => Microsoft Entra Application Service Principal password
Subdomain    => Immersive Reader resource subdomain (resource 'Name' if the resource was created in the Azure portal, or 'CustomSubDomain' option if the resource was created with Azure CLI PowerShell. Check the Azure portal for the subdomain on the Endpoint in the resource Overview page, for example, 'https://[SUBDOMAIN].cognitiveservices.azure.com/')
I huvudprojektmappen , som innehåller filen ViewController.swift , skapar du en Swift-klassfil med namnet Constants.swift. Ersätt klassen med följande kod och lägg till i dina värden där det är tillämpligt. Behåll den här filen som en lokal fil som bara finns på datorn och se till att du inte checkar in filen i källkontrollen eftersom den innehåller hemligheter som inte bör offentliggöras. Vi rekommenderar att du inte lagrar hemligheter i din app. Använd i stället en serverdelstjänst för att hämta token, där hemligheterna kan lagras utanför appen och utanför enheten. Serverdels-API-slutpunkten bör skyddas bakom någon form av autentisering (till exempel OAuth) för att förhindra att obehöriga användare hämtar token som ska användas mot din Avancerad läsare-tjänst och fakturering. Det arbetet ligger utanför omfånget för den här självstudien.
Konfigurera appen så att den körs utan en storyboard
Öppna AppDelegate.swift och ersätt filen med följande kod.
import UIKit

@UIApplicationMain
class AppDelegate: UIResponder, UIApplicationDelegate {

    var window: UIWindow?

    var navigationController: UINavigationController?

    func application(_ application: UIApplication, didFinishLaunchingWithOptions launchOptions: [UIApplication.LaunchOptionsKey: Any]?) -> Bool {
        // Override point for customization after application launch.

        window = UIWindow(frame: UIScreen.main.bounds)

        // Allow the app run without a storyboard
        if let window = window {
            let mainViewController = PictureLaunchViewController()
            navigationController = UINavigationController(rootViewController: mainViewController)
            window.rootViewController = navigationController
            window.makeKeyAndVisible()
        }
        return true
    }

    func applicationWillResignActive(_ application: UIApplication) {
        // Sent when the application is about to move from active to inactive state. This can occur for certain types of temporary interruptions (such as an incoming phone call or SMS message) or when the user quits the application and it begins the transition to the background state.
        // Use this method to pause ongoing tasks, disable timers, and invalidate graphics rendering callbacks. Games should use this method to pause the game.
    }

    func applicationDidEnterBackground(_ application: UIApplication) {
        // Use this method to release shared resources, save user data, invalidate timers, and store enough application state information to restore your application to its current state in case it is terminated later.
        // If your application supports background execution, this method is called instead of applicationWillTerminate: when the user quits.
    }

    func applicationWillEnterForeground(_ application: UIApplication) {
        // Called as part of the transition from the background to the active state; here you can undo many of the changes made on entering the background.
    }

    func applicationDidBecomeActive(_ application: UIApplication) {
        // Restart any tasks that were paused (or not yet started) while the application was inactive. If the application was previously in the background, optionally refresh the user interface.
    }

    func applicationWillTerminate(_ application: UIApplication) {
        // Called when the application is about to terminate. Save data if appropriate. See also applicationDidEnterBackground:.
    }

}
Lägga till funktioner för att ta och ladda upp foton
Byt namn på ViewController.swift till PictureLaunchViewController.swift och ersätt filen med följande kod.
import UIKit
import immersive_reader_sdk

class PictureLaunchViewController: UIViewController, UINavigationControllerDelegate, UIImagePickerControllerDelegate {

    private var photoButton: UIButton!
    private var cameraButton: UIButton!
    private var titleText: UILabel!
    private var bodyText: UILabel!
    private var sampleContent: Content!
    private var sampleChunk: Chunk!
    private var sampleOptions: Options!
    private var imagePicker: UIImagePickerController!
    private var spinner: UIActivityIndicatorView!
    private var activityIndicatorBackground: UIView!
    private var textURL = "vision/v2.0/read/core/asyncBatchAnalyze";

    override func viewDidLoad() {
        super.viewDidLoad()

        view.backgroundColor = .white

        titleText = UILabel()
        titleText.text = "Picture to Immersive Reader with OCR"
        titleText.font = UIFont.boldSystemFont(ofSize: 32)
        titleText.textAlignment = .center
        titleText.lineBreakMode = .byWordWrapping
        titleText.numberOfLines = 0
        view.addSubview(titleText)

        bodyText = UILabel()
        bodyText.text = "Capture or upload a photo of handprinted text on a piece of paper, handwriting, typed text, text on a computer screen, writing on a white board and many more, and watch it be presented to you in the Immersive Reader!"
        bodyText.font = UIFont.systemFont(ofSize: 18)
        bodyText.lineBreakMode = .byWordWrapping
        bodyText.numberOfLines = 0
        let screenSize = self.view.frame.height
        if screenSize <= 667 {
            // Font size for smaller iPhones.
            bodyText.font = bodyText.font.withSize(16)

        } else if screenSize <= 812.0 {
            // Font size for medium iPhones.
            bodyText.font = bodyText.font.withSize(18)

        } else if screenSize <= 896  {
            // Font size for larger iPhones.
            bodyText.font = bodyText.font.withSize(20)

        } else {
            // Font size for iPads.
            bodyText.font = bodyText.font.withSize(26)
        }
        view.addSubview(bodyText)

        photoButton = UIButton()
        photoButton.backgroundColor = .darkGray
        photoButton.contentEdgeInsets = UIEdgeInsets(top: 10, left: 5, bottom: 10, right: 5)
        photoButton.layer.cornerRadius = 5
        photoButton.setTitleColor(.white, for: .normal)
        photoButton.setTitle("Choose Photo from Library", for: .normal)
        photoButton.titleLabel?.font = UIFont.systemFont(ofSize: 18, weight: .bold)
        photoButton.addTarget(self, action: #selector(selectPhotoButton(sender:)), for: .touchUpInside)
        view.addSubview(photoButton)

        cameraButton = UIButton()
        cameraButton.backgroundColor = .darkGray
        cameraButton.contentEdgeInsets = UIEdgeInsets(top: 10, left: 5, bottom: 10, right: 5)
        cameraButton.layer.cornerRadius = 5
        cameraButton.setTitleColor(.white, for: .normal)
        cameraButton.setTitle("Take Photo", for: .normal)
        cameraButton.titleLabel?.font = UIFont.systemFont(ofSize: 18, weight: .bold)
        cameraButton.addTarget(self, action: #selector(takePhotoButton(sender:)), for: .touchUpInside)
        view.addSubview(cameraButton)

        activityIndicatorBackground = UIView()
        activityIndicatorBackground.backgroundColor = UIColor.black
        activityIndicatorBackground.alpha = 0
        view.addSubview(activityIndicatorBackground)
        view.bringSubviewToFront(_: activityIndicatorBackground)

        spinner = UIActivityIndicatorView(style: .whiteLarge)
        view.addSubview(spinner)

        let layoutGuide = view.safeAreaLayoutGuide

        titleText.translatesAutoresizingMaskIntoConstraints = false
        titleText.topAnchor.constraint(equalTo: layoutGuide.topAnchor, constant: 25).isActive = true
        titleText.leadingAnchor.constraint(equalTo: layoutGuide.leadingAnchor, constant: 20).isActive = true
        titleText.trailingAnchor.constraint(equalTo: layoutGuide.trailingAnchor, constant: -20).isActive = true

        bodyText.translatesAutoresizingMaskIntoConstraints = false
        bodyText.topAnchor.constraint(equalTo: titleText.bottomAnchor, constant: 35).isActive = true
        bodyText.leadingAnchor.constraint(equalTo: layoutGuide.leadingAnchor, constant: 20).isActive = true
        bodyText.trailingAnchor.constraint(equalTo: layoutGuide.trailingAnchor, constant: -20).isActive = true

        cameraButton.translatesAutoresizingMaskIntoConstraints = false
        if screenSize > 896  {
            // Constraints for iPads.
            cameraButton.heightAnchor.constraint(equalToConstant: 150).isActive = true
            cameraButton.leadingAnchor.constraint(equalTo: layoutGuide.leadingAnchor, constant: 60).isActive = true
            cameraButton.trailingAnchor.constraint(equalTo: layoutGuide.trailingAnchor, constant: -60).isActive = true
            cameraButton.topAnchor.constraint(equalTo: bodyText.bottomAnchor, constant: 150).isActive = true
        } else {
            // Constraints for iPhones.
            cameraButton.heightAnchor.constraint(equalToConstant: 100).isActive = true
            cameraButton.leadingAnchor.constraint(equalTo: layoutGuide.leadingAnchor, constant: 30).isActive = true
            cameraButton.trailingAnchor.constraint(equalTo: layoutGuide.trailingAnchor, constant: -30).isActive = true
            cameraButton.topAnchor.constraint(equalTo: bodyText.bottomAnchor, constant: 100).isActive = true
        }
        cameraButton.bottomAnchor.constraint(equalTo: photoButton.topAnchor, constant: -40).isActive = true

        photoButton.translatesAutoresizingMaskIntoConstraints = false
        if screenSize > 896  {
            // Constraints for iPads.
            photoButton.heightAnchor.constraint(equalToConstant: 150).isActive = true
            photoButton.leadingAnchor.constraint(equalTo: layoutGuide.leadingAnchor, constant: 60).isActive = true
            photoButton.trailingAnchor.constraint(equalTo: layoutGuide.trailingAnchor, constant: -60).isActive = true
        } else {
            // Constraints for iPhones.
            photoButton.heightAnchor.constraint(equalToConstant: 100).isActive = true
            photoButton.leadingAnchor.constraint(equalTo: layoutGuide.leadingAnchor, constant: 30).isActive = true
            photoButton.trailingAnchor.constraint(equalTo: layoutGuide.trailingAnchor, constant: -30).isActive = true
        }

        spinner.translatesAutoresizingMaskIntoConstraints = false
        spinner.centerXAnchor.constraint(equalTo: view.centerXAnchor).isActive = true
        spinner.centerYAnchor.constraint(equalTo: view.centerYAnchor).isActive = true

        activityIndicatorBackground.translatesAutoresizingMaskIntoConstraints = false
        activityIndicatorBackground.topAnchor.constraint(equalTo: layoutGuide.topAnchor).isActive = true
        activityIndicatorBackground.bottomAnchor.constraint(equalTo: layoutGuide.bottomAnchor).isActive = true
        activityIndicatorBackground.leadingAnchor.constraint(equalTo: layoutGuide.leadingAnchor).isActive = true
        activityIndicatorBackground.trailingAnchor.constraint(equalTo: layoutGuide.trailingAnchor).isActive = true

        // Create content and options.
        sampleChunk = Chunk(content: bodyText.text!, lang: nil, mimeType: nil)
        sampleContent = Content(title: titleText.text!, chunks: [sampleChunk])
        sampleOptions = Options(uiLang: nil, timeout: nil, uiZIndex: nil)
    }

    @IBAction func selectPhotoButton(sender: AnyObject) {
            // Launch the photo picker.
            imagePicker =  UIImagePickerController()
            imagePicker.delegate = self
            self.imagePicker.sourceType = .photoLibrary
            self.imagePicker.allowsEditing = true
            self.present(self.imagePicker, animated: true, completion: nil)
            self.photoButton.isEnabled = true
    }

    @IBAction func takePhotoButton(sender: AnyObject) {
        if !UIImagePickerController.isSourceTypeAvailable(.camera) {
            // If there is no camera on the device, disable the button
            self.cameraButton.backgroundColor = .gray
            self.cameraButton.isEnabled = true

        } else {
            // Launch the camera.
            imagePicker =  UIImagePickerController()
            imagePicker.delegate = self
            self.imagePicker.sourceType = .camera
            self.present(self.imagePicker, animated: true, completion: nil)
            self.cameraButton.isEnabled = true
        }
    }

    func imagePickerController(_ picker: UIImagePickerController, didFinishPickingMediaWithInfo info: [UIImagePickerController.InfoKey : Any]) {
        imagePicker.dismiss(animated: true, completion: nil)
        photoButton.isEnabled = false
        cameraButton.isEnabled = false
        self.spinner.startAnimating()
        activityIndicatorBackground.alpha = 0.6

        // Retrieve the image.
        let image = (info[.originalImage] as? UIImage)!

        // Retrieve the byte array from image.
        let imageByteArray = image.jpegData(compressionQuality: 1.0)

        // Call the getTextFromImage function passing in the image the user takes or chooses.
        getTextFromImage(subscriptionKey: Constants.computerVisionSubscriptionKey, getTextUrl: Constants.computerVisionEndPoint + textURL, pngImage: imageByteArray!, onSuccess: { cognitiveText in
            print("cognitive text is: \(cognitiveText)")
            DispatchQueue.main.async {
                self.photoButton.isEnabled = true
                self.cameraButton.isEnabled = true
            }

            // Create content and options with the text from the image.
            let sampleImageChunk = Chunk(content: cognitiveText, lang: nil, mimeType: nil)
            let sampleImageContent = Content(title: "Text from image", chunks: [sampleImageChunk])
            let sampleImageOptions = Options(uiLang: nil, timeout: nil, uiZIndex: nil)

            // Callback to get token for Immersive Reader.
            self.getToken(onSuccess: {cognitiveToken in

                DispatchQueue.main.async {

                    launchImmersiveReader(navController: self.navigationController!, token: cognitiveToken, subdomain: Constants.subdomain, content: sampleImageContent, options: sampleImageOptions, onSuccess: {
                        self.spinner.stopAnimating()
                        self.activityIndicatorBackground.alpha = 0
                        self.photoButton.isEnabled = true
                        self.cameraButton.isEnabled = true

                    }, onFailure: { error in
                        print("An error occurred launching the Immersive Reader: \(error)")
                        self.spinner.stopAnimating()
                        self.activityIndicatorBackground.alpha = 0
                        self.photoButton.isEnabled = true
                        self.cameraButton.isEnabled = true

                    })
                }

            }, onFailure: { error in
                DispatchQueue.main.async {
                    self.photoButton.isEnabled = true
                    self.cameraButton.isEnabled = true

                }
                print("An error occurred retrieving the token: \(error)")
            })

        }, onFailure: { error in
            DispatchQueue.main.async {
                self.photoButton.isEnabled = true
                self.cameraButton.isEnabled = true
            }

        })
    }

    /// Retrieves the token for the Immersive Reader using Microsoft Entra authentication
    ///
    /// - Parameters:
    ///     -onSuccess: A closure that gets called when the token is successfully received using Microsoft Entra authentication.
    ///     -theToken: The token for the Immersive Reader received using Microsoft Entra authentication.
    ///     -onFailure: A closure that gets called when the token fails to be obtained from the Microsoft Entra authentication.
    ///     -theError: The error that occurred when the token fails to be obtained from the Microsoft Entra authentication.
    func getToken(onSuccess: @escaping (_ theToken: String) -> Void, onFailure: @escaping ( _ theError: String) -> Void) {

        let tokenForm = "grant_type=client_credentials&resource=https://cognitiveservices.azure.com/&client_id=" + Constants.clientId + "&client_secret=" + Constants.clientSecret
        let tokenUrl = "https://login.windows.net/" + Constants.tenantId + "/oauth2/token"

        var responseTokenString: String = "0"

        let url = URL(string: tokenUrl)!
        var request = URLRequest(url: url)
        request.httpBody = tokenForm.data(using: .utf8)
        request.httpMethod = "POST"

        let task = URLSession.shared.dataTask(with: request) { data, response, error in
            guard let data = data,
                let response = response as? HTTPURLResponse,
                // Check for networking errors.
                error == nil else {
                    print("error", error ?? "Unknown error")
                    onFailure("Error")
                    return
            }

            // Check for http errors.
            guard (200 ... 299) ~= response.statusCode else {
                print("statusCode should be 2xx, but is \(response.statusCode)")
                print("response = \(response)")
                onFailure(String(response.statusCode))
                return
            }

            let responseString = String(data: data, encoding: .utf8)
            print("responseString = \(String(describing: responseString!))")

            let jsonResponse = try? JSONSerialization.jsonObject(with: data, options: [])
            guard let jsonDictonary = jsonResponse as? [String: Any] else {
                onFailure("Error parsing JSON response.")
                return
            }
            guard let responseToken = jsonDictonary["access_token"] as? String else {
                onFailure("Error retrieving token from JSON response.")
                return
            }
            responseTokenString = responseToken
            onSuccess(responseTokenString)
        }

        task.resume()
    }

    /// Returns the text string after it has been extracted from an Image input.
    ///
    /// - Parameters:
    ///     -subscriptionKey: The Azure subscription key.
    ///     -pngImage: Image data in PNG format.
    /// - Returns: a string of text representing the
    func getTextFromImage(subscriptionKey: String, getTextUrl: String, pngImage: Data, onSuccess: @escaping (_ theToken: String) -> Void, onFailure: @escaping ( _ theError: String) -> Void) {

        let url = URL(string: getTextUrl)!
        var request = URLRequest(url: url)
        request.setValue(subscriptionKey, forHTTPHeaderField: "Ocp-Apim-Subscription-Key")
        request.setValue("application/octet-stream", forHTTPHeaderField: "Content-Type")

        // Two REST API calls are required to extract text. The first call is to submit the image for processing, and the next call is to retrieve the text found in the image.

        // Set the body to the image in byte array format.
        request.httpBody = pngImage

        request.httpMethod = "POST"

        let task = URLSession.shared.dataTask(with: request) { data, response, error in
            guard let data = data,
                let response = response as? HTTPURLResponse,
                // Check for networking errors.
                error == nil else {
                    print("error", error ?? "Unknown error")
                    onFailure("Error")
                    return
            }

            // Check for http errors.
            guard (200 ... 299) ~= response.statusCode else {
                print("statusCode should be 2xx, but is \(response.statusCode)")
                print("response = \(response)")
                onFailure(String(response.statusCode))
                return
            }

            let responseString = String(data: data, encoding: .utf8)
            print("responseString = \(String(describing: responseString!))")

            // Send the second call to the API. The first API call returns operationLocation which stores the URI for the second REST API call.
            let operationLocation = response.allHeaderFields["Operation-Location"] as? String

            if (operationLocation == nil) {
                print("Error retrieving operation location")
                return
            }

            // Wait 10 seconds for text recognition to be available as suggested by the Text API documentation.
            print("Text submitted. Waiting 10 seconds to retrieve the recognized text.")
            sleep(10)

            // HTTP GET request with the operationLocation url to retrieve the text.
            let getTextUrl = URL(string: operationLocation!)!
            var getTextRequest = URLRequest(url: getTextUrl)
            getTextRequest.setValue(subscriptionKey, forHTTPHeaderField: "Ocp-Apim-Subscription-Key")
            getTextRequest.httpMethod = "GET"

            // Send the GET request to retrieve the text.
            let taskGetText = URLSession.shared.dataTask(with: getTextRequest) { data, response, error in
                guard let data = data,
                    let response = response as? HTTPURLResponse,
                    // Check for networking errors.
                    error == nil else {
                        print("error", error ?? "Unknown error")
                        onFailure("Error")
                        return
                }

                // Check for http errors.
                guard (200 ... 299) ~= response.statusCode else {
                    print("statusCode should be 2xx, but is \(response.statusCode)")
                    print("response = \(response)")
                    onFailure(String(response.statusCode))
                    return
                }

                // Decode the JSON data into an object.
                let customDecoding = try! JSONDecoder().decode(TextApiResponse.self, from: data)

                // Loop through the lines to get all lines of text and concatenate them together.
                var textFromImage = ""
                for textLine in customDecoding.recognitionResults[0].lines {
                    textFromImage = textFromImage + textLine.text + " "
                }

                onSuccess(textFromImage)
            }
            taskGetText.resume()

        }

        task.resume()
    }

    // Structs used for decoding the Text API JSON response.
    struct TextApiResponse: Codable {
        let status: String
        let recognitionResults: [RecognitionResult]
    }

    struct RecognitionResult: Codable {
        let page: Int
        let clockwiseOrientation: Double
        let width, height: Int
        let unit: String
        let lines: [Line]
    }

    struct Line: Codable {
        let boundingBox: [Int]
        let text: String
        let words: [Word]
    }

    struct Word: Codable {
        let boundingBox: [Int]
        let text: String
        let confidence: String?
    }

}
Kompilera och köra appen
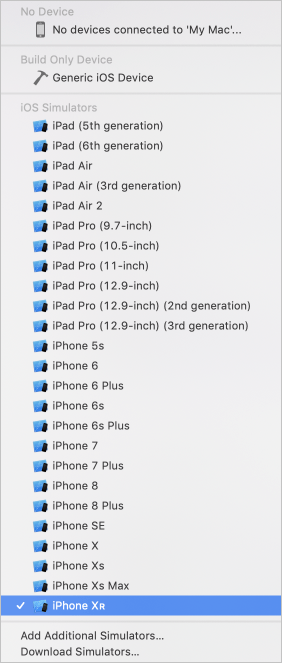
Ange arkivschemat i Xcode genom att välja en simulator eller ett enhetsmål.

Tryck på Ctrl+R i Xcode eller välj uppspelningsknappen för att köra projektet. Appen bör startas på den angivna simulatorn eller enheten.
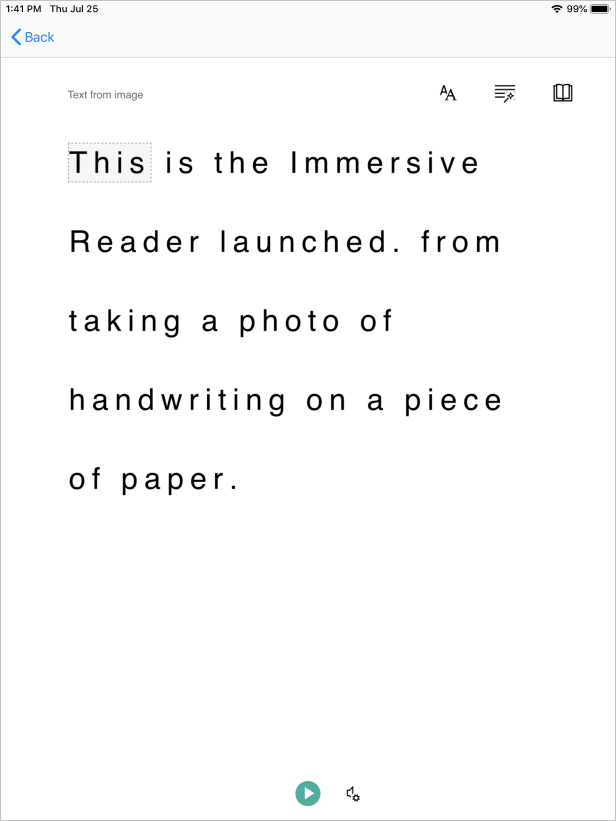
I din app bör du se:
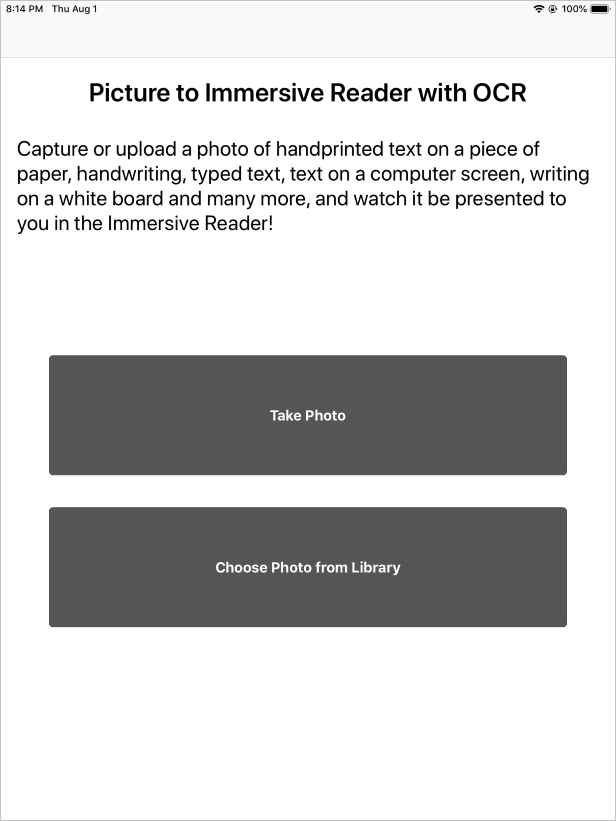
Ta eller ladda upp ett foto av text genom att trycka på knappen Ta foto eller välj foto från bibliotek . Avancerad läsare startar sedan och visar texten från fotot.