Add or edit a Delivery Plan
Azure DevOps Services | Azure DevOps Server 2022
Delivery Plans provide a highly interactive calendar view of multiple team backlogs. In this article, learn how to add and edit a plan. For the use cases, benefits, and interactions you can do, see Review team Delivery Plans.
Note
This article describes how to add or edit Delivery Plans 2.0 which is available for Azure DevOps Services and Azure DevOps Server 2022 and later versions. For information on the Delivery Plans Marketplace extension which supports Azure DevOps Server 2020 and earlier versions, see Delivery Plans 1.0.
Prerequisites
- To add or edit a Delivery Plan, you must be a member of the Contributors group for the project where you add the plan.
- To add team backlogs to a plan, you must have View permissions to those projects.
- To view a Delivery Plan, you must be a member of the Project Collection Valid Users group. Users granted Stakeholder access for a private project can view plans. Users granted Stakeholder access for a public project can add and view plans.
- To manage permissions, edit, or delete a plan, you must be the creator of the plan. Or, you must be a member of the Project Administrators, Project Collection Administrators group, or be granted explicit permission through the plan's Security dialog. For more information, see Manage Delivery Plan permissions.
- The following elements must be configured before you can create a plan:
- Teams and team backlogs.
- Team product or portfolio backlog must be enabled.
- Area paths and team area paths assignments.
- Iteration (sprint) paths and team iterations.
- Iteration Paths must be assigned Start and End Dates or they don't appear on the plan.
- Also, Iteration Paths must be selected for the team whose backlogs you select, or work items associated with those Iteration Paths don't appear on the plan.
- Each team must have product backlog items, or portfolio backlogs defined and assigned those items to either a Start Date and End Date or an Iteration Path.
Add a plan
Sign in to your organization (
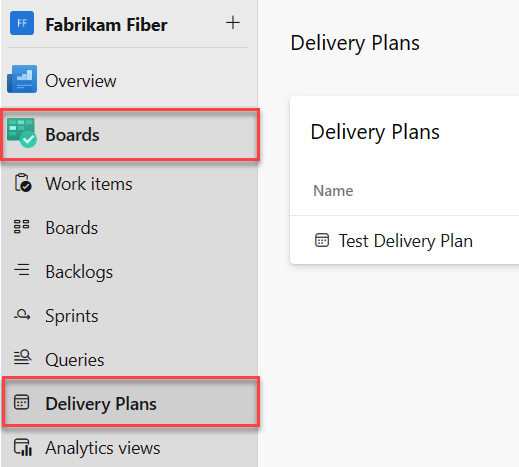
https://dev.azure.com/{yourorganization}).Select Boards > Delivery Plans.
Select New Plan.

All users have permissions to create a plan and manage the plans they create.
Enter a name and description, and specify the team backlogs that you want to appear within your plan.
When you define your plan, know the following guidelines:
- Name and description: Use the name and description fields to clearly identify your plan within the project.
- Team selection: You can choose one or more teams from any project defined in the organization or collection. There can be up to a maximum of 15 teams.
- Active backlogs: Select one or more active backlogs for a team. If you encounter issues selecting a backlog level, check the Team Backlog settings to ensure the backlog level is enabled for the team. For more information, see Select backlog navigation levels for your team.
- Reordering backlogs: You can reorder the team backlogs by dragging and dropping them into the desired sequence.
- Filtering work items: To filter for specific work items, specify the field criteria. For example, to exclude bugs from the view, add the following criteria:
Work Item Type <> Bug.

Edit a plan
Once you define a plan, you can modify or further customize it.
Select Settings from your Delivery Plan.

Choose the page you want to edit based on the customizations you want to make. In the following example, we add the Tags to the Field criteria. Only work items that contain the Build 2021 tag appear in the Delivery Plan.

Tip
If you made changes to a plan but don’t see them reflected, try refreshing your browser. Sometimes a browser refresh is necessary to trigger the updates.
Plan customization options
Once you open the Plan settings dialog, choose one of the following tabs to set your customization options.
| Page | Use to... |
|---|---|
| Overview | Edit the plan Name or Description. |
| Teams | Add or remove a team backlog. You can add up to 20 backlog levels for Azure DevOps Services or 15 backlog levels for Azure DevOps Server 2022. You can add a mix of backlog levels and teams from any project defined for the organization. |
| Field criteria | Specify field criteria to filter work item types displayed on the plan. All criteria are evaluated as an AND statement. If no fields are specified, then all work item types that appear on the teams backlog level appear on the plan. |
| Markers | Add up to 30 milestone markers to the plan. Specify a label and select a color. |
| Fields | Add or remove fields from cards to display on the plan, similar to how you customize them for your board. You can't add rich-text (HTML) fields, such as the Description field, to a card even if it appears in the list. These field types represent too many challenges to format on a card. |
| Styles | Add styling rules to change card color based on field criteria. |
| Tag colors | Add tags and specify a tag color. Optionally enable or disable a tag color. |
Choose fields to appear on cards
Display fields that are relevant for your review purposes or contain keywords that you want to use for filtering your plan. Unlike a board, you can't change the field displayed on the card directly. To make field changes, open the work item.
Tip
To add a custom field, first add it to the process used to customize the project.
Open your plan Settings.
Select Fields.
Check the boxes next to the field you want to appear on the board.
To add a field, select the
 plus icon and enter the name of a field. You can add both default and custom fields, including Boolean fields. The only fields you can't add are rich-text or HTML fields.
In the following example, we select all standard fields and add the Story Points and Priority fields to display on cards.

Tip
To show the Title of the parent work item, choose the Parent field. Choosing the Parent title from a card opens the parent work item. To change the parent work item, open the child work item and remove the link and add a different parent work item. You can filter your plan based on parent work items, whether the Parent field is added to cards or not.
To remove a field, select the
 delete icon next to the field.
When you're done, select Save.
Add milestone markers
Open your plan Settings.
Select Markers.

Specify a date.
Choose a hexadecimal color or select the color palette icon to change to a system-selected color. To add more markers, select + Add marker. You can add up to 30 markers. After 30 markers, the + Add marker button is disabled.
Select Save.
Markers appear on the plan like the following example.

Change card color
With styling rules, you can change the color of cards when their corresponding work items meet specific field criteria that you set. This functionality is similar to what you can define for a board, as described in Customize cards. In this case, we highlight the card based on its Tags assignment.

Open your plan Settings.
Select Styles.

Select +Add styling rule.
Enter a name for the style and choose a color.
Specify the field criteria. You can add multiple field values. For style purposes, they're all evaluated as a logical
AND.For example, here we choose to highlight cards with a Priority=1.

You can specify up to 10 styles.
Note
You can't directly select Title, Description, and other rich-text fields, such as Assigned To. Even if you can select a field, you might not be able to specify a value or the specific value you want. For example, you can't specify Tags that are either Empty or Not Empty.
Set color for an Iteration Path
- Open your plan Settings.
- Select Styles.
- Specify the
@CurrentIterationmacro for the desired team.
For more information, see Query by date or current iteration.
Set tag colors
Before you set tag colors, add tags to backlog items to highlight with color.
Open your plan Settings.
Select Tag colors.
Select
 Add tag color and choose the tag and color that you want on the cards.

To enable or disable a tag color, check or uncheck the Enabled checkbox.
When you're done, select Save.
Tip
If tags don't display on the cards, select Fields and make sure you checked Show Tags.
Related articles
Feedback
Coming soon: Throughout 2024 we will be phasing out GitHub Issues as the feedback mechanism for content and replacing it with a new feedback system. For more information see: https://aka.ms/ContentUserFeedback.
Submit and view feedback for