Adding My People support to an application
Important
My people is no longer supported in Windows 11 and Windows 10 versions with KB5034203 applied.
Note
As of the Windows 10 May 2019 Update (version 1903), new Windows 10 installations will no longer show ‘People in the taskbar’ by default. Customers can enable the feature by right-clicking on the taskbar and pressing “Show People on the taskbar.” Developers are discouraged from adding My People support to their applications, and should visit the Windows Developer Blog for more information about optimizing apps for Windows 10.
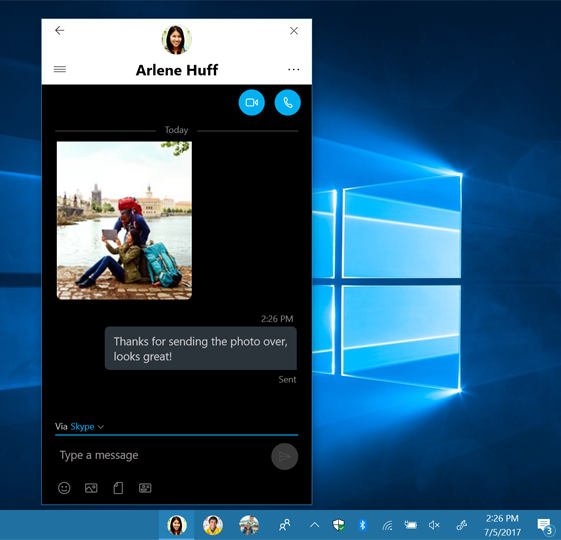
The My People feature allows users to pin contacts from an application directly to their taskbar, which creates a new contact object that they can interact with in several ways. This article shows how you can add support for this feature, allowing users to pin contacts directly from your app. When contacts are pinned, new types of user interaction become available, such as My People sharing and notifications.
Requirements
- Windows 10 and Microsoft Visual Studio 2019. For installation details, see Get set up with Visual Studio.
- Basic knowledge of C# or a similar object-oriented programming language. To get started with C#, see Create a "Hello, world" app.
Overview
There are three things you need to do to enable your application to use the My People feature:
- Declare support for the shareTarget activation contract in your application manifest.
- Annotate the contacts that the users can share to using your app.
- Support multiple instances of your application running at the same time. Users must be able to interact with a full version of your application while using it in a contact panel. They may even use it in multiple contact panels at once. To support this, your application needs to be able to run multiple views simultaneously. To learn how to do this, see the article "show multiple views for an app".
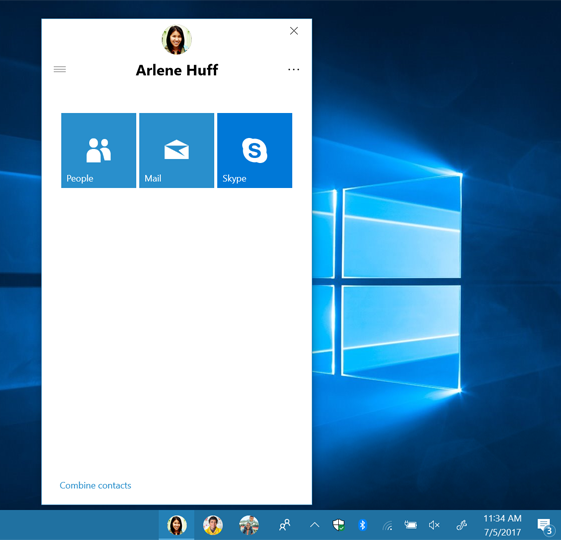
When you’ve done this, your application will appear in the contact panel for annotated contacts.
Declaring support for the contract
To declare support for the My People contract, open your application in Visual Studio. From the Solution Explorer, right click Package.appxmanifest and select Open With. From the menu, select XML (Text) Editor) and click OK. Make the following changes to the manifest:
Before
<Package
  xmlns="http://schemas.microsoft.com/appx/manifest/foundation/windows10"
  xmlns:uap="http://schemas.microsoft.com/appx/manifest/uap/windows10">

	<Applications>
	    <Application Id="MyApp"
	      Executable="$targetnametoken$.exe"
	      EntryPoint="My.App">
	    </Application>
	</Applications>
After
<Package
  xmlns="http://schemas.microsoft.com/appx/manifest/foundation/windows10"
  xmlns:uap="http://schemas.microsoft.com/appx/manifest/uap/windows10"
  xmlns:uap4="http://schemas.microsoft.com/appx/manifest/uap/windows10/4">

	<Applications>
	    <Application Id="MyApp"
	      Executable="$targetnametoken$.exe"
	      EntryPoint="My.App">
	      <Extensions>
	        <uap4:Extension Category="windows.contactPanel" />
	      </Extensions>
	    </Application>
	</Applications>
With this addition, your application can now be launched through the windows.ContactPanel contract, which allows you to interact with contact panels.
Annotating contacts
To allow contacts from your application to appear in the taskbar via the My People pane, you need to write them to the Windows contact store. To learn how to write contacts, see the Contact Card sample.
Your application must also write an annotation to each contact. Annotations are pieces of data from your application that are associated with a contact. The annotation must contain the activatable class corresponding to your desired view in its ProviderProperties member, and declare support for the ContactProfile operation.
You can annotate contacts at any point while your app is running, but generally you should annotate contacts as soon as they are added to the Windows contact store.
if (ApiInformation.IsApiContractPresent("Windows.Foundation.UniversalApiContract", 5))
{
	// Create a new contact annotation
	ContactAnnotation annotation = new ContactAnnotation();
	annotation.ContactId = myContact.Id;

	// Add appId and contact panel support to the annotation
	String appId = "MyApp_vqvv5s4y3scbg!App";
	annotation.ProviderProperties.Add("ContactPanelAppID", appId);
	annotation.SupportedOperations = ContactAnnotationOperations.ContactProfile;

	// Save annotation to contact annotation list
	// Windows.ApplicationModel.Contacts.ContactAnnotationList
	await contactAnnotationList.TrySaveAnnotationAsync(annotation));
}
The “appId” is the Package Family Name, followed by ‘!’ and the activatable class ID. To find your Package Family Name, open Package.appxmanifest using the default editor, and look in the “Packaging” tab. Here, “App” is the activatable class corresponding to the application startup view.
Allow contacts to invite new potential users
By default, your application will only appear in the contact panel for contacts that you have specifically annotated. This is to avoid confusion with contacts that can’t be interacted with through your app. If you want your application to appear for contacts that your application doesn’t know about (to invite users to add that contact to their account, for instance), you can add the following to your manifest:
Before
<Applications>
	<Application Id="MyApp"
	  Executable="$targetnametoken$.exe"
	  EntryPoint="My.App">
	  <Extensions>
    	<uap4:Extension Category="windows.contactPanel" />
	  </Extensions>
	</Application>
</Applications>
After
<Applications>
	<Application Id="MyApp"
	  Executable="$targetnametoken$.exe"
	  EntryPoint="My.App">
	  <Extensions>
		<uap4:Extension Category="windows.contactPanel">
	    	<uap4:ContactPanel SupportsUnknownContacts="true" />
		</uap4:Extension>
	  </Extensions>
	</Application>
</Applications>
With this change, your application will appear as an available option in the contact panel for all contacts that the user has pinned. When your application is activated using the contact panel contract, you should check to see if the contact is one your application knows about. If not, you should show your app’s new user experience.
Support for email apps
If you are writing an email app, you don’t need to annotate every contact manually. If you declare support for the contact pane and for the mailto: protocol, your application will automatically appear for users with an email address.
Running in the contact panel
Now that your application appears in the contact panel for some or all users, you need to handle activation with the contact panel contract.
override protected void OnActivated(IActivatedEventArgs e)
{
    if (e.Kind == ActivationKind.ContactPanel)
    {
        // Create a Frame to act as the navigation context and navigate to the first page
        var rootFrame = new Frame();

        // Place the frame in the current Window
        Window.Current.Content = rootFrame;

        // Navigate to the page that shows the Contact UI.
        rootFrame.Navigate(typeof(ContactPage), e);

        // Ensure the current window is active
        Window.Current.Activate();
    }
}
When your application is activated with this contract, it will receive a ContactPanelActivatedEventArgs object. This contains the ID of the Contact that your application is trying to interact with on launch, and a ContactPanel object. You should keep a reference to this ContactPanel object, which will allow you to interact with the panel.
The ContactPanel object has two events your application should listen for:
- The LaunchFullAppRequested event is sent when the user has invoked the UI element that requests that your full application be launched in its own window. Your application is responsible for launching itself, passing along all necessary context. You are free to do this however you’d like (for example, via protocol launch).
- The Closing event is sent when your application is about to be closed, allowing you to save any context.
The ContactPanel object also allows you to set the background color of the contact panel header (if not set, it will default to the system theme) and to programmatically close the contact panel.
Supporting notification badging
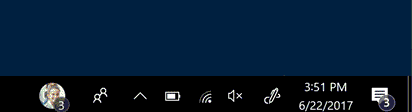
If you want contacts pinned to the taskbar to be badged when new notifications arrive from your app that are related to that person, then you must include the hint-people parameter in your toast notifications and expressive My People notifications.
To badge a contact, the top-level toast node must include the hint-people parameter to indicate the sending or related contact. This parameter can have any of the following values:
- Email address
- E.g. johndoe@mydomain.com
- Telephone number
- E.g. 888-888-8888
- Remote ID
- E.g. remoteid:1234
Here is an example of how to identify a toast notification is related to a specific person:
<toast hint-people="mailto:johndoe@mydomain.com">
    <visual lang="en-US">
        <binding template="ToastText01">
            <text>John Doe posted a comment.</text>
        </binding>
    </visual>
</toast>
Note
If your app uses the ContactStore APIs and uses the StoredContact.RemoteId property to link contacts stored on the PC with contacts stored remotely, it is essential that the value for the RemoteId property is both stable and unique. This means that the remote ID must consistently identify a single user account and should contain a unique tag to guarantee that it does not conflict with the remote IDs of other contacts on the PC, including contacts that are owned by other apps. If the remote IDs used by your app are not guaranteed to be stable and unique, you can use the RemoteIdHelper class shown later in this topic in order to add a unique tag to all of your remote IDs before you add them to the system. Or you can choose to not use the RemoteId property at all and instead you create a custom extended property in which to store remote IDs for your contacts.
The PinnedContactManager class
The PinnedContactManager is used to manage which contacts are pinned to the taskbar. This class lets you pin and unpin contacts, determine whether a contact is pinned, and determine if pinning on a particular surface is supported by the system your application is currently running on.
You can retrieve the PinnedContactManager object using the GetDefault method:
PinnedContactManager pinnedContactManager = PinnedContactManager.GetDefault();
Pinning and unpinning contacts
You can now pin and unpin contacts using the PinnedContactManager you just created. The RequestPinContactAsync and RequestUnpinContactAsync methods provide the user with confirmation dialogs, so they must be called from your Application Single-Threaded Apartment (ASTA, or UI) thread.
async void PinContact (Contact contact)
{
    await pinnedContactManager.RequestPinContactAsync(contact,
                                                      PinnedContactSurface.Taskbar);
}

async void UnpinContact (Contact contact)
{
    await pinnedContactManager.RequestUnpinContactAsync(contact,
                                                        PinnedContactSurface.Taskbar);
}
You can also pin multiple contacts at the same time:
async Task PinMultipleContacts(Contact[] contacts)
{
    await pinnedContactManager.RequestPinContactsAsync(
        contacts, PinnedContactSurface.Taskbar);
}
Note
There is currently no batch operation for unpinning contacts.
Note:
See also
Feedback
Coming soon: Throughout 2024 we will be phasing out GitHub Issues as the feedback mechanism for content and replacing it with a new feedback system. For more information see: https://aka.ms/ContentUserFeedback.
Submit and view feedback for