你当前正在访问 Microsoft Azure Global Edition 技术文档网站。 如果需要访问由世纪互联运营的 Microsoft Azure 中国技术文档网站,请访问 https://docs.azure.cn。
教程:创建一个可通过照片内容启动沉浸式阅读器的 iOS 应用程序 (Swift)
沉浸式阅读器是一款经过广泛设计的工具,它实现了可靠的技术以提高阅读理解能力。
Azure AI 视觉读取 API 使用 Microsoft 的最新识别模型来检测图像中的文本内容,并将已识别的文本转换为计算机可读的字符流。
在本教程中,你将从头开始构建一个 iOS 应用,并使用沉浸式阅读器 SDK 集成读取 API 和沉浸式阅读器。 可在 GitHub 上获取本教程的完整工作示例。
先决条件
- Azure 订阅。 可以免费创建一个帐户。
- MacOS 和 Xcode。
- 为 Microsoft Entra 身份验证配置的沉浸式阅读器资源。 按照这些说明进行设置。
- Azure AI 视觉服务订阅。 在 Azure 门户中创建 Azure AI 视觉资源。
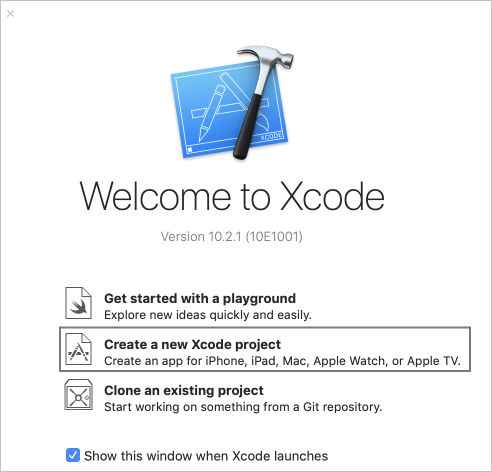
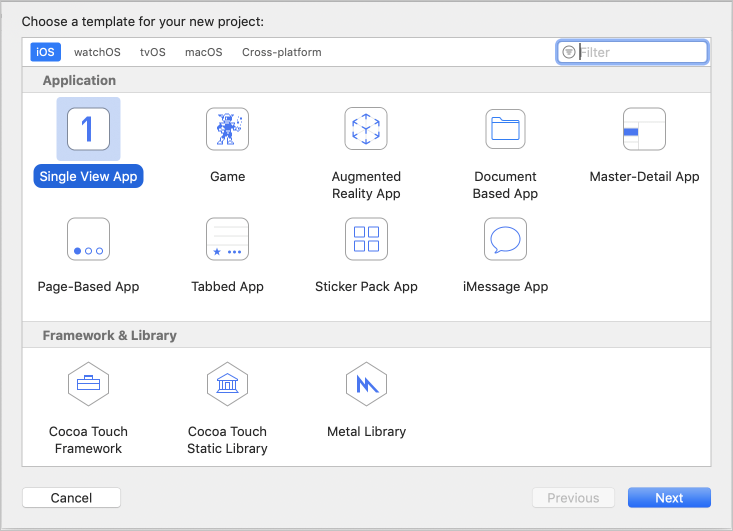
创建 Xcode 项目
在 Xcode 中创建新项目。
选择“单一视图应用”。
获取 SDK CocoaPod
若要使用沉浸式阅读器 SDK,最简单的方法是借助 CocoaPod。 若要通过 CocoaPod 进行安装,请执行以下操作:
通过在 Xcode 项目的根目录中运行
pod init,创建 Podfile。通过添加
pod 'immersive-reader-sdk', :path => 'https://github.com/microsoft/immersive-reader-sdk/tree/master/iOS/immersive-reader-sdk'将 CocoaPod 添加到 Podfile。 你的 Podfile 应该如下所示(使用你的目标的名称替换 picture-to-immersive-reader-swift):platform :ios, '9.0' target 'picture-to-immersive-reader-swift' do use_frameworks! # Pods for picture-to-immersive-reader-swift pod 'immersive-reader-sdk', :git => 'https://github.com/microsoft/immersive-reader-sdk.git' end在终端的 Xcode 项目的目录中运行
pod install命令,以便安装沉浸式阅读器 SDK Pod。将
import immersive_reader_sdk添加到所有需要引用此 SDK 的文件中。若要打开项目,请确保打开
.xcworkspace文件而不是.xcodeproj文件。
获取 Microsoft Entra 身份验证令牌
在先决条件部分中,需要使用 Microsoft Entra 身份验证配置步骤中的一些值。 请返回以参阅从该会话保存的文本文件。
TenantId     => Azure subscription TenantId
ClientId     => Microsoft Entra ApplicationId
ClientSecret => Microsoft Entra Application Service Principal password
Subdomain    => Immersive Reader resource subdomain (resource 'Name' if the resource was created in the Azure portal, or 'CustomSubDomain' option if the resource was created with Azure CLI PowerShell. Check the Azure portal for the subdomain on the Endpoint in the resource Overview page, for example, 'https://[SUBDOMAIN].cognitiveservices.azure.com/')
在包含 ViewController.swift 文件的主项目文件夹中,创建名为 Constants.swift 的 Swift 类文件。 将该类替换为以下代码,根据情况添加你的值。 将此文件保留为仅存在于你的计算机上的本地文件,并确保不要将此文件提交到源代码管理中,因为它包含不应公开的机密。 建议不要在应用中保存机密。 相反,应使用后端服务来获取令牌,这样可以将机密保留在应用和设备以外。 后端 API 终结点应该以某种形式的身份验证(例如,OAuth)进行保护,防止未经授权的用户获取令牌并将其用于你的沉浸式阅读器服务和计费;该内容超出了本教程的范围。
将应用设置为在没有情节提要的情况下运行
打开 AppDelegate.swift,将此文件替换为以下代码。
import UIKit

@UIApplicationMain
class AppDelegate: UIResponder, UIApplicationDelegate {

    var window: UIWindow?

    var navigationController: UINavigationController?

    func application(_ application: UIApplication, didFinishLaunchingWithOptions launchOptions: [UIApplication.LaunchOptionsKey: Any]?) -> Bool {
        // Override point for customization after application launch.

        window = UIWindow(frame: UIScreen.main.bounds)

        // Allow the app run without a storyboard
        if let window = window {
            let mainViewController = PictureLaunchViewController()
            navigationController = UINavigationController(rootViewController: mainViewController)
            window.rootViewController = navigationController
            window.makeKeyAndVisible()
        }
        return true
    }

    func applicationWillResignActive(_ application: UIApplication) {
        // Sent when the application is about to move from active to inactive state. This can occur for certain types of temporary interruptions (such as an incoming phone call or SMS message) or when the user quits the application and it begins the transition to the background state.
        // Use this method to pause ongoing tasks, disable timers, and invalidate graphics rendering callbacks. Games should use this method to pause the game.
    }

    func applicationDidEnterBackground(_ application: UIApplication) {
        // Use this method to release shared resources, save user data, invalidate timers, and store enough application state information to restore your application to its current state in case it is terminated later.
        // If your application supports background execution, this method is called instead of applicationWillTerminate: when the user quits.
    }

    func applicationWillEnterForeground(_ application: UIApplication) {
        // Called as part of the transition from the background to the active state; here you can undo many of the changes made on entering the background.
    }

    func applicationDidBecomeActive(_ application: UIApplication) {
        // Restart any tasks that were paused (or not yet started) while the application was inactive. If the application was previously in the background, optionally refresh the user interface.
    }

    func applicationWillTerminate(_ application: UIApplication) {
        // Called when the application is about to terminate. Save data if appropriate. See also applicationDidEnterBackground:.
    }

}
添加拍摄和上传照片的功能
将 ViewController.swift 重命名为 PictureLaunchViewController.swift,并将该文件替换为以下代码。
import UIKit
import immersive_reader_sdk

class PictureLaunchViewController: UIViewController, UINavigationControllerDelegate, UIImagePickerControllerDelegate {

    private var photoButton: UIButton!
    private var cameraButton: UIButton!
    private var titleText: UILabel!
    private var bodyText: UILabel!
    private var sampleContent: Content!
    private var sampleChunk: Chunk!
    private var sampleOptions: Options!
    private var imagePicker: UIImagePickerController!
    private var spinner: UIActivityIndicatorView!
    private var activityIndicatorBackground: UIView!
    private var textURL = "vision/v2.0/read/core/asyncBatchAnalyze";

    override func viewDidLoad() {
        super.viewDidLoad()

        view.backgroundColor = .white

        titleText = UILabel()
        titleText.text = "Picture to Immersive Reader with OCR"
        titleText.font = UIFont.boldSystemFont(ofSize: 32)
        titleText.textAlignment = .center
        titleText.lineBreakMode = .byWordWrapping
        titleText.numberOfLines = 0
        view.addSubview(titleText)

        bodyText = UILabel()
        bodyText.text = "Capture or upload a photo of handprinted text on a piece of paper, handwriting, typed text, text on a computer screen, writing on a white board and many more, and watch it be presented to you in the Immersive Reader!"
        bodyText.font = UIFont.systemFont(ofSize: 18)
        bodyText.lineBreakMode = .byWordWrapping
        bodyText.numberOfLines = 0
        let screenSize = self.view.frame.height
        if screenSize <= 667 {
            // Font size for smaller iPhones.
            bodyText.font = bodyText.font.withSize(16)

        } else if screenSize <= 812.0 {
            // Font size for medium iPhones.
            bodyText.font = bodyText.font.withSize(18)

        } else if screenSize <= 896  {
            // Font size for larger iPhones.
            bodyText.font = bodyText.font.withSize(20)

        } else {
            // Font size for iPads.
            bodyText.font = bodyText.font.withSize(26)
        }
        view.addSubview(bodyText)

        photoButton = UIButton()
        photoButton.backgroundColor = .darkGray
        photoButton.contentEdgeInsets = UIEdgeInsets(top: 10, left: 5, bottom: 10, right: 5)
        photoButton.layer.cornerRadius = 5
        photoButton.setTitleColor(.white, for: .normal)
        photoButton.setTitle("Choose Photo from Library", for: .normal)
        photoButton.titleLabel?.font = UIFont.systemFont(ofSize: 18, weight: .bold)
        photoButton.addTarget(self, action: #selector(selectPhotoButton(sender:)), for: .touchUpInside)
        view.addSubview(photoButton)

        cameraButton = UIButton()
        cameraButton.backgroundColor = .darkGray
        cameraButton.contentEdgeInsets = UIEdgeInsets(top: 10, left: 5, bottom: 10, right: 5)
        cameraButton.layer.cornerRadius = 5
        cameraButton.setTitleColor(.white, for: .normal)
        cameraButton.setTitle("Take Photo", for: .normal)
        cameraButton.titleLabel?.font = UIFont.systemFont(ofSize: 18, weight: .bold)
        cameraButton.addTarget(self, action: #selector(takePhotoButton(sender:)), for: .touchUpInside)
        view.addSubview(cameraButton)

        activityIndicatorBackground = UIView()
        activityIndicatorBackground.backgroundColor = UIColor.black
        activityIndicatorBackground.alpha = 0
        view.addSubview(activityIndicatorBackground)
        view.bringSubviewToFront(_: activityIndicatorBackground)

        spinner = UIActivityIndicatorView(style: .whiteLarge)
        view.addSubview(spinner)

        let layoutGuide = view.safeAreaLayoutGuide

        titleText.translatesAutoresizingMaskIntoConstraints = false
        titleText.topAnchor.constraint(equalTo: layoutGuide.topAnchor, constant: 25).isActive = true
        titleText.leadingAnchor.constraint(equalTo: layoutGuide.leadingAnchor, constant: 20).isActive = true
        titleText.trailingAnchor.constraint(equalTo: layoutGuide.trailingAnchor, constant: -20).isActive = true

        bodyText.translatesAutoresizingMaskIntoConstraints = false
        bodyText.topAnchor.constraint(equalTo: titleText.bottomAnchor, constant: 35).isActive = true
        bodyText.leadingAnchor.constraint(equalTo: layoutGuide.leadingAnchor, constant: 20).isActive = true
        bodyText.trailingAnchor.constraint(equalTo: layoutGuide.trailingAnchor, constant: -20).isActive = true

        cameraButton.translatesAutoresizingMaskIntoConstraints = false
        if screenSize > 896  {
            // Constraints for iPads.
            cameraButton.heightAnchor.constraint(equalToConstant: 150).isActive = true
            cameraButton.leadingAnchor.constraint(equalTo: layoutGuide.leadingAnchor, constant: 60).isActive = true
            cameraButton.trailingAnchor.constraint(equalTo: layoutGuide.trailingAnchor, constant: -60).isActive = true
            cameraButton.topAnchor.constraint(equalTo: bodyText.bottomAnchor, constant: 150).isActive = true
        } else {
            // Constraints for iPhones.
            cameraButton.heightAnchor.constraint(equalToConstant: 100).isActive = true
            cameraButton.leadingAnchor.constraint(equalTo: layoutGuide.leadingAnchor, constant: 30).isActive = true
            cameraButton.trailingAnchor.constraint(equalTo: layoutGuide.trailingAnchor, constant: -30).isActive = true
            cameraButton.topAnchor.constraint(equalTo: bodyText.bottomAnchor, constant: 100).isActive = true
        }
        cameraButton.bottomAnchor.constraint(equalTo: photoButton.topAnchor, constant: -40).isActive = true

        photoButton.translatesAutoresizingMaskIntoConstraints = false
        if screenSize > 896  {
            // Constraints for iPads.
            photoButton.heightAnchor.constraint(equalToConstant: 150).isActive = true
            photoButton.leadingAnchor.constraint(equalTo: layoutGuide.leadingAnchor, constant: 60).isActive = true
            photoButton.trailingAnchor.constraint(equalTo: layoutGuide.trailingAnchor, constant: -60).isActive = true
        } else {
            // Constraints for iPhones.
            photoButton.heightAnchor.constraint(equalToConstant: 100).isActive = true
            photoButton.leadingAnchor.constraint(equalTo: layoutGuide.leadingAnchor, constant: 30).isActive = true
            photoButton.trailingAnchor.constraint(equalTo: layoutGuide.trailingAnchor, constant: -30).isActive = true
        }

        spinner.translatesAutoresizingMaskIntoConstraints = false
        spinner.centerXAnchor.constraint(equalTo: view.centerXAnchor).isActive = true
        spinner.centerYAnchor.constraint(equalTo: view.centerYAnchor).isActive = true

        activityIndicatorBackground.translatesAutoresizingMaskIntoConstraints = false
        activityIndicatorBackground.topAnchor.constraint(equalTo: layoutGuide.topAnchor).isActive = true
        activityIndicatorBackground.bottomAnchor.constraint(equalTo: layoutGuide.bottomAnchor).isActive = true
        activityIndicatorBackground.leadingAnchor.constraint(equalTo: layoutGuide.leadingAnchor).isActive = true
        activityIndicatorBackground.trailingAnchor.constraint(equalTo: layoutGuide.trailingAnchor).isActive = true

        // Create content and options.
        sampleChunk = Chunk(content: bodyText.text!, lang: nil, mimeType: nil)
        sampleContent = Content(title: titleText.text!, chunks: [sampleChunk])
        sampleOptions = Options(uiLang: nil, timeout: nil, uiZIndex: nil)
    }

    @IBAction func selectPhotoButton(sender: AnyObject) {
            // Launch the photo picker.
            imagePicker =  UIImagePickerController()
            imagePicker.delegate = self
            self.imagePicker.sourceType = .photoLibrary
            self.imagePicker.allowsEditing = true
            self.present(self.imagePicker, animated: true, completion: nil)
            self.photoButton.isEnabled = true
    }

    @IBAction func takePhotoButton(sender: AnyObject) {
        if !UIImagePickerController.isSourceTypeAvailable(.camera) {
            // If there is no camera on the device, disable the button
            self.cameraButton.backgroundColor = .gray
            self.cameraButton.isEnabled = true

        } else {
            // Launch the camera.
            imagePicker =  UIImagePickerController()
            imagePicker.delegate = self
            self.imagePicker.sourceType = .camera
            self.present(self.imagePicker, animated: true, completion: nil)
            self.cameraButton.isEnabled = true
        }
    }

    func imagePickerController(_ picker: UIImagePickerController, didFinishPickingMediaWithInfo info: [UIImagePickerController.InfoKey : Any]) {
        imagePicker.dismiss(animated: true, completion: nil)
        photoButton.isEnabled = false
        cameraButton.isEnabled = false
        self.spinner.startAnimating()
        activityIndicatorBackground.alpha = 0.6

        // Retrieve the image.
        let image = (info[.originalImage] as? UIImage)!

        // Retrieve the byte array from image.
        let imageByteArray = image.jpegData(compressionQuality: 1.0)

        // Call the getTextFromImage function passing in the image the user takes or chooses.
        getTextFromImage(subscriptionKey: Constants.computerVisionSubscriptionKey, getTextUrl: Constants.computerVisionEndPoint + textURL, pngImage: imageByteArray!, onSuccess: { cognitiveText in
            print("cognitive text is: \(cognitiveText)")
            DispatchQueue.main.async {
                self.photoButton.isEnabled = true
                self.cameraButton.isEnabled = true
            }

            // Create content and options with the text from the image.
            let sampleImageChunk = Chunk(content: cognitiveText, lang: nil, mimeType: nil)
            let sampleImageContent = Content(title: "Text from image", chunks: [sampleImageChunk])
            let sampleImageOptions = Options(uiLang: nil, timeout: nil, uiZIndex: nil)

            // Callback to get token for Immersive Reader.
            self.getToken(onSuccess: {cognitiveToken in

                DispatchQueue.main.async {

                    launchImmersiveReader(navController: self.navigationController!, token: cognitiveToken, subdomain: Constants.subdomain, content: sampleImageContent, options: sampleImageOptions, onSuccess: {
                        self.spinner.stopAnimating()
                        self.activityIndicatorBackground.alpha = 0
                        self.photoButton.isEnabled = true
                        self.cameraButton.isEnabled = true

                    }, onFailure: { error in
                        print("An error occurred launching the Immersive Reader: \(error)")
                        self.spinner.stopAnimating()
                        self.activityIndicatorBackground.alpha = 0
                        self.photoButton.isEnabled = true
                        self.cameraButton.isEnabled = true

                    })
                }

            }, onFailure: { error in
                DispatchQueue.main.async {
                    self.photoButton.isEnabled = true
                    self.cameraButton.isEnabled = true

                }
                print("An error occurred retrieving the token: \(error)")
            })

        }, onFailure: { error in
            DispatchQueue.main.async {
                self.photoButton.isEnabled = true
                self.cameraButton.isEnabled = true
            }

        })
    }

    /// Retrieves the token for the Immersive Reader using Microsoft Entra authentication
    ///
    /// - Parameters:
    ///     -onSuccess: A closure that gets called when the token is successfully received using Microsoft Entra authentication.
    ///     -theToken: The token for the Immersive Reader received using Microsoft Entra authentication.
    ///     -onFailure: A closure that gets called when the token fails to be obtained from the Microsoft Entra authentication.
    ///     -theError: The error that occurred when the token fails to be obtained from the Microsoft Entra authentication.
    func getToken(onSuccess: @escaping (_ theToken: String) -> Void, onFailure: @escaping ( _ theError: String) -> Void) {

        let tokenForm = "grant_type=client_credentials&resource=https://cognitiveservices.azure.com/&client_id=" + Constants.clientId + "&client_secret=" + Constants.clientSecret
        let tokenUrl = "https://login.windows.net/" + Constants.tenantId + "/oauth2/token"

        var responseTokenString: String = "0"

        let url = URL(string: tokenUrl)!
        var request = URLRequest(url: url)
        request.httpBody = tokenForm.data(using: .utf8)
        request.httpMethod = "POST"

        let task = URLSession.shared.dataTask(with: request) { data, response, error in
            guard let data = data,
                let response = response as? HTTPURLResponse,
                // Check for networking errors.
                error == nil else {
                    print("error", error ?? "Unknown error")
                    onFailure("Error")
                    return
            }

            // Check for http errors.
            guard (200 ... 299) ~= response.statusCode else {
                print("statusCode should be 2xx, but is \(response.statusCode)")
                print("response = \(response)")
                onFailure(String(response.statusCode))
                return
            }

            let responseString = String(data: data, encoding: .utf8)
            print("responseString = \(String(describing: responseString!))")

            let jsonResponse = try? JSONSerialization.jsonObject(with: data, options: [])
            guard let jsonDictonary = jsonResponse as? [String: Any] else {
                onFailure("Error parsing JSON response.")
                return
            }
            guard let responseToken = jsonDictonary["access_token"] as? String else {
                onFailure("Error retrieving token from JSON response.")
                return
            }
            responseTokenString = responseToken
            onSuccess(responseTokenString)
        }

        task.resume()
    }

    /// Returns the text string after it has been extracted from an Image input.
    ///
    /// - Parameters:
    ///     -subscriptionKey: The Azure subscription key.
    ///     -pngImage: Image data in PNG format.
    /// - Returns: a string of text representing the
    func getTextFromImage(subscriptionKey: String, getTextUrl: String, pngImage: Data, onSuccess: @escaping (_ theToken: String) -> Void, onFailure: @escaping ( _ theError: String) -> Void) {

        let url = URL(string: getTextUrl)!
        var request = URLRequest(url: url)
        request.setValue(subscriptionKey, forHTTPHeaderField: "Ocp-Apim-Subscription-Key")
        request.setValue("application/octet-stream", forHTTPHeaderField: "Content-Type")

        // Two REST API calls are required to extract text. The first call is to submit the image for processing, and the next call is to retrieve the text found in the image.

        // Set the body to the image in byte array format.
        request.httpBody = pngImage

        request.httpMethod = "POST"

        let task = URLSession.shared.dataTask(with: request) { data, response, error in
            guard let data = data,
                let response = response as? HTTPURLResponse,
                // Check for networking errors.
                error == nil else {
                    print("error", error ?? "Unknown error")
                    onFailure("Error")
                    return
            }

            // Check for http errors.
            guard (200 ... 299) ~= response.statusCode else {
                print("statusCode should be 2xx, but is \(response.statusCode)")
                print("response = \(response)")
                onFailure(String(response.statusCode))
                return
            }

            let responseString = String(data: data, encoding: .utf8)
            print("responseString = \(String(describing: responseString!))")

            // Send the second call to the API. The first API call returns operationLocation which stores the URI for the second REST API call.
            let operationLocation = response.allHeaderFields["Operation-Location"] as? String

            if (operationLocation == nil) {
                print("Error retrieving operation location")
                return
            }

            // Wait 10 seconds for text recognition to be available as suggested by the Text API documentation.
            print("Text submitted. Waiting 10 seconds to retrieve the recognized text.")
            sleep(10)

            // HTTP GET request with the operationLocation url to retrieve the text.
            let getTextUrl = URL(string: operationLocation!)!
            var getTextRequest = URLRequest(url: getTextUrl)
            getTextRequest.setValue(subscriptionKey, forHTTPHeaderField: "Ocp-Apim-Subscription-Key")
            getTextRequest.httpMethod = "GET"

            // Send the GET request to retrieve the text.
            let taskGetText = URLSession.shared.dataTask(with: getTextRequest) { data, response, error in
                guard let data = data,
                    let response = response as? HTTPURLResponse,
                    // Check for networking errors.
                    error == nil else {
                        print("error", error ?? "Unknown error")
                        onFailure("Error")
                        return
                }

                // Check for http errors.
                guard (200 ... 299) ~= response.statusCode else {
                    print("statusCode should be 2xx, but is \(response.statusCode)")
                    print("response = \(response)")
                    onFailure(String(response.statusCode))
                    return
                }

                // Decode the JSON data into an object.
                let customDecoding = try! JSONDecoder().decode(TextApiResponse.self, from: data)

                // Loop through the lines to get all lines of text and concatenate them together.
                var textFromImage = ""
                for textLine in customDecoding.recognitionResults[0].lines {
                    textFromImage = textFromImage + textLine.text + " "
                }

                onSuccess(textFromImage)
            }
            taskGetText.resume()

        }

        task.resume()
    }

    // Structs used for decoding the Text API JSON response.
    struct TextApiResponse: Codable {
        let status: String
        let recognitionResults: [RecognitionResult]
    }

    struct RecognitionResult: Codable {
        let page: Int
        let clockwiseOrientation: Double
        let width, height: Int
        let unit: String
        let lines: [Line]
    }

    struct Line: Codable {
        let boundingBox: [Int]
        let text: String
        let words: [Word]
    }

    struct Word: Codable {
        let boundingBox: [Int]
        let text: String
        let confidence: String?
    }

}
生成并运行应用
通过选择模拟器或设备目标,在 Xcode 中设置存档方案。

在 Xcode 中,选择 Ctrl+R 或单击“播放”按钮以运行项目。 应用应在指定的模拟器或设备上启动。
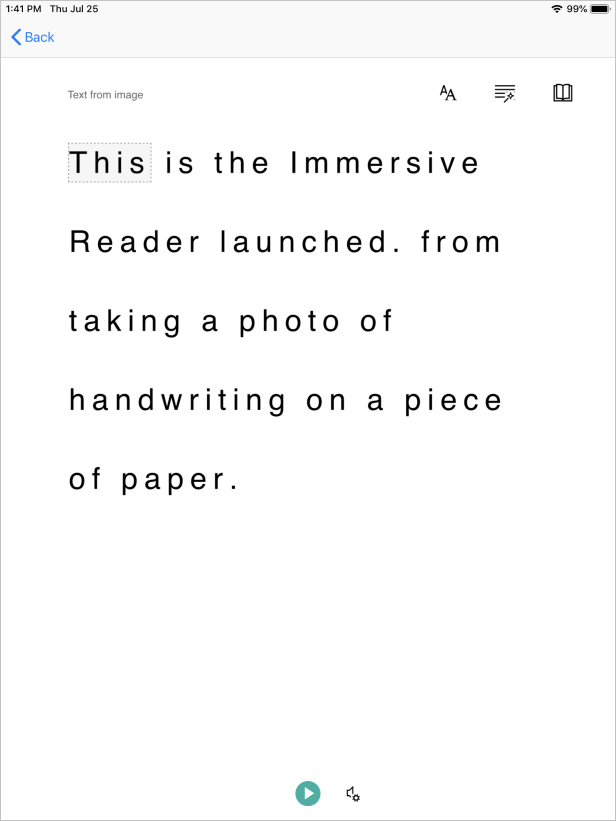
在应用中会看到:
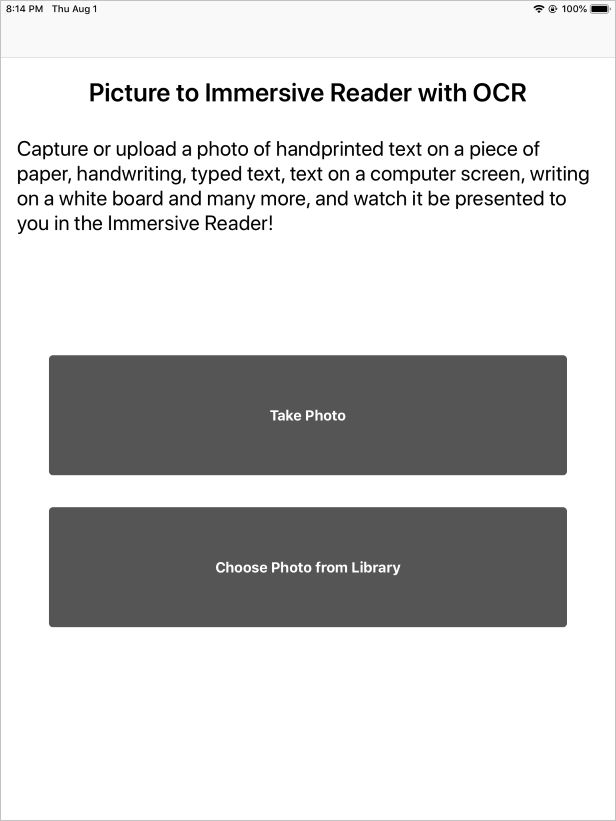
通过按“拍摄照片”按钮或“从库 中选择照片”按钮来拍摄或上传文本照片。 然后,沉浸式阅读器将会启动并显示照片中的文本。