你当前正在访问 Microsoft Azure Global Edition 技术文档网站。 如果需要访问由世纪互联运营的 Microsoft Azure 中国技术文档网站,请访问 https://docs.azure.cn。
Web Chat 自定义
适用于:SDK v4
本文将详细介绍如何自定义 Web Chat 示例使其适应机器人。
将 Web Chat 集成到网站
Web 聊天概述介绍了如何将 Web 聊天控件集成到网站中。
自定义样式
Web 聊天控件的提供了丰富的自定义选项:可以更改颜色、大小、元素的位置,添加自定义元素并与托管网页进行交互。 下面是几个关于如何自定义 Web 聊天 UI 的示例。
可以在 StyleOptions.ts 文件上找到可以在 Web 聊天中轻松修改的所有设置的完整列表。 可以在 defaultStyleOptions.ts 文件中找到Web 聊天的默认值
这些设置会生成一个样式集 ,这是一套使用 glamor 进行增强的 CSS 规则。 可以在 createStyleSet.ts 文件上找到在样式集中生成的 CSS 样式的完整列表。
设置 Web Chat 容器的大小
若要调整 Web 聊天容器的大小,请使用样式集的rootHeight和rootWidth属性。 以下示例还设置容器的背景色以显示控制器的大小。
<!DOCTYPE html>
<head>
    <script src="https://cdn.botframework.com/botframework-webchat/latest/webchat.js"></script>
</head>
<body>
  <div style="height: 60%; width: 40%; margin-top:5%; margin-left:10%" id="webchat" role="main"></div>
  <script>
     // Set  the CSS rules.
     const styleSet = window.WebChat.createStyleSet({
         rootHeight: '100%',
         rootWidth: '50%',
         backgroundColor: 'paleturquoise'
      });

    window.WebChat.renderWebChat({
      directLine: window.WebChat.createDirectLine({
          token: '<Your Direct Line token>'}),
      styleSet
    }, document.getElementById('webchat'));

  </script>
</body>

警告
在托管网页中,请勿使用Direct Line密钥。 按照如何将机器人连接到 Web 聊天的生产嵌入选项部分的说明使用令牌。
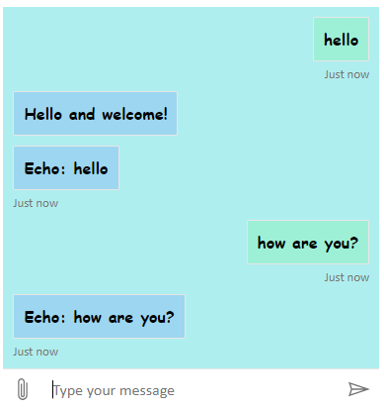
更改聊天气泡字体和颜色
可以自定义聊天气泡中使用的背景色和字体,以匹配托管 Web 聊天控件的网页样式。 下面的代码片段演示了如何执行此操作。
<!DOCTYPE html>
<head>
    <script src="https://cdn.botframework.com/botframework-webchat/latest/webchat.js"></script>
</head>
<body>
  <div style="height: 60%; width: 40%; margin-top:5%; margin-left:10%" id="webchat" role="main"></div>
  <script>

     // Set  the CSS rules.
     const styleSet = window.WebChat.createStyleSet({
         bubbleBackground: 'rgba(0, 0, 255, .1)',
         bubbleFromUserBackground: 'rgba(0, 255, 0, .1)',
         rootHeight: '100%',
         rootWidth: '50%',
         backgroundColor: 'paleturquoise'
      });

      // After generated, you can modify the CSS rules.
      // Change font family and weight.
      styleSet.textContent = {
         ...styleSet.textContent,
         fontFamily: "'Comic Sans MS', 'Arial', sans-serif",
         fontWeight: 'bold'
      };
    window.WebChat.renderWebChat({
      directLine: window.WebChat.createDirectLine({
          token: '<Your Direct Line token>'}),
      styleSet
    }, document.getElementById('webchat'));

  </script>
</body>
更改机器人和用户头像
Web 聊天支持头像(可以通过在 styleOptions 属性中设置 botAvatarInitials 和 userAvatarInitials 进行自定义)。
![]()
<!DOCTYPE html>
<head>
    <script src="https://cdn.botframework.com/botframework-webchat/latest/webchat.js"></script>
</head>
<body>
  <div style="height: 60%; width: 40%; margin-top:5%; margin-left:10%" id="webchat" role="main"></div>
  <script>

     // Set  the CSS rules.
     const styleSet = window.WebChat.createStyleSet({
         bubbleBackground: 'rgba(0, 0, 255, .1)',
         bubbleFromUserBackground: 'rgba(0, 255, 0, .1)',
         rootHeight: '100%',
         rootWidth: '50%',
         backgroundColor: 'paleturquoise'
      });

      // After generated, you can modify the CSS rules.
      // Change font family and weight.
      styleSet.textContent = {
         ...styleSet.textContent,
         fontFamily: "'Comic Sans MS', 'Arial', sans-serif",
         fontWeight: 'bold'
      };

    // Set the avatar options.
     const avatarOptions = {
         botAvatarInitials: 'BF',
         userAvatarInitials: 'WC'
         };

    window.WebChat.renderWebChat({
      directLine: window.WebChat.createDirectLine({
          token: '<Your Direct Line token>'}),
      styleSet,
      styleOptions: avatarOptions
    }, document.getElementById('webchat'));

  </script>
</body>
使用 botAvatarInitials 属性设置机器人的头像首字母缩写,该缩写显示在控件的左侧。
使用 userAvatarInitials 属性为用户设置头像首字母缩写,该缩写显示在右侧。
使用 botAvatarImage 和 userAvatarImage 属性为机器人和用户头像提供图像 URL。 控件将显示这些来代替首字母,如下所示。
const avatarOptions = {
   botAvatarImage: '<URL to your bot avatar image>',
   botAvatarInitials: 'BF',
   userAvatarImage: '<URL to your user avatar image>',
   userAvatarInitials: 'WC'
};
![]()
自定义呈现活动或附件
使用最新版本的 Web 聊天,还可以呈现Web 聊天不支持现成的活动或附件。 以 Redux 中间件为模型的自定义管道发送活动和附件呈现。 管道非常灵活,可使你轻松地执行以下任务:
- 修饰现有活动/附件
- 添加新的活动/附件
- 替换现有活动/附件(或将其删除)
- 用菊花链将中间件组合在一起
将 GitHub 存储库显示为附件
例如,如果想要显示一套 GitHub 存储库卡,可以为 GitHub 存储库创建新的 React 组件,并将其添加为中间件。 下面的图片和代码片段来自示例 customization-card-components 示例。
输入默认消息时,输出如下:sample:github-repository。

如果输入帮助,可以选择所有卡。 这是许多示例之一:

import ReactWebChat from 'botframework-webchat';
import ReactDOM from 'react-dom';

// Create a new React component that accept render a GitHub repository attachment
const GitHubRepositoryAttachment = props => (
   <div
      style={{
         fontFamily: "'Calibri', 'Helvetica Neue', Arial, sans-serif",
         margin: 20,
         textAlign: 'center'
      }}
   >
      <svg
         height="64"
         viewBox="0 0 16 16"
         version="1.1"
         width="64"
         aria-hidden="true"
      >
         <path
            fillRule="evenodd"
            d="M8 0C3.58 0 0 3.58 0 8c0 3.54 2.29 6.53 5.47 7.59.4.07.55-.17.55-.38 0-.19-.01-.82-.01-1.49-2.01.37-2.53-.49-2.69-.94-.09-.23-.48-.94-.82-1.13-.28-.15-.68-.52-.01-.53.63-.01 1.08.58 1.23.82.72 1.21 1.87.87 2.33.66.07-.52.28-.87.51-1.07-1.78-.2-3.64-.89-3.64-3.95 0-.87.31-1.59.82-2.15-.08-.2-.36-1.02.08-2.12 0 0 .67-.21 2.2.82.64-.18 1.32-.27 2-.27.68 0 1.36.09 2 .27 1.53-1.04 2.2-.82 2.2-.82.44 1.1.16 1.92.08 2.12.51.56.82 1.27.82 2.15 0 3.07-1.87 3.75-3.65 3.95.29.25.54.73.54 1.48 0 1.07-.01 1.93-.01 2.2 0 .21.15.46.55.38A8.013 8.013 0 0 0 16 8c0-4.42-3.58-8-8-8z"
         />
      </svg>
      <p>
         <a
            href={`https://github.com/${encodeURI(props.owner)}/${encodeURI(
               props.repo
            )}`}
            target="_blank"
         >
            {props.owner}/<br />
            {props.repo}
         </a>
      </p>
   </div>
);

// Creating a new middleware pipeline that will render <GitHubRepositoryAttachment> for specific type of attachment
const attachmentMiddleware = () => next => card => {
   switch (card.attachment.contentType) {
      case 'application/vnd.microsoft.botframework.samples.github-repository':
         return (
            <GitHubRepositoryAttachment
               owner={card.attachment.content.owner}
               repo={card.attachment.content.repo}
            />
         );

      default:
         return next(card);
   }
};

ReactDOM.render(
   <ReactWebChat
      // Prepending the new middleware pipeline
      attachmentMiddleware={attachmentMiddleware}
      directLine={window.WebChat.createDirectLine({ token })}
   />,
   document.getElementById('webchat')
);
在此示例中,我们将添加名为 GitHubRepositoryAttachment 的新 React 组件:
const GitHubRepositoryAttachment = props => (
   <div
      style={{
         fontFamily: "'Calibri', 'Helvetica Neue', Arial, sans-serif",
         margin: 20,
         textAlign: 'center'
      }}
   >
      <svg
         height="64"
         viewBox="0 0 16 16"
         version="1.1"
         width="64"
         aria-hidden="true"
      >
         <path
            fillRule="evenodd"
            d="M8 0C3.58 0 0 3.58 0 8c0 3.54 2.29 6.53 5.47 7.59.4.07.55-.17.55-.38 0-.19-.01-.82-.01-1.49-2.01.37-2.53-.49-2.69-.94-.09-.23-.48-.94-.82-1.13-.28-.15-.68-.52-.01-.53.63-.01 1.08.58 1.23.82.72 1.21 1.87.87 2.33.66.07-.52.28-.87.51-1.07-1.78-.2-3.64-.89-3.64-3.95 0-.87.31-1.59.82-2.15-.08-.2-.36-1.02.08-2.12 0 0 .67-.21 2.2.82.64-.18 1.32-.27 2-.27.68 0 1.36.09 2 .27 1.53-1.04 2.2-.82 2.2-.82.44 1.1.16 1.92.08 2.12.51.56.82 1.27.82 2.15 0 3.07-1.87 3.75-3.65 3.95.29.25.54.73.54 1.48 0 1.07-.01 1.93-.01 2.2 0 .21.15.46.55.38A8.013 8.013 0 0 0 16 8c0-4.42-3.58-8-8-8z"
         />
      </svg>
      <p>
         <a
            href={`https://github.com/${encodeURI(props.owner)}/${encodeURI(
               props.repo
            )}`}
            target="_blank"
         >
            {props.owner}/<br />
            {props.repo}
         </a>
      </p>
   </div>
);
然后,在机器人发送内容类型附件 application/vnd.microsoft.botframework.samples.github-repository 时,创建可呈现新 React 组件的中间件。 否则,它将通过调用 next(card) 继续存在于中间件上。
const attachmentMiddleware = () => next => card => {
   switch (card.attachment.contentType) {
      case 'application/vnd.microsoft.botframework.samples.github-repository':
         return (
            <GitHubRepositoryAttachment
               owner={card.attachment.content.owner}
               repo={card.attachment.content.repo}
            />
         );

      default:
         return next(card);
   }
};
发送自机器人的活动如下所示:
{
   "type": "message",
   "from": {
      "role": "bot"
   },
   "attachmentLayout": "carousel",
   "attachments": [
      {
         "contentType": "application/vnd.microsoft.botframework.samples.github-repository",
         "content": {
            "owner": "Microsoft",
            "repo": "BotFramework-WebChat"
         }
      },
      {
         "contentType": "application/vnd.microsoft.botframework.samples.github-repository",
         "content": {
            "owner": "Microsoft",
            "repo": "BotFramework-Emulator"
         }
      },
      {
         "contentType": "application/vnd.microsoft.botframework.samples.github-repository",
         "content": {
            "owner": "Microsoft",
            "repo": "BotFramework-DirectLineJS"
         }
      }
   ]
}