你当前正在访问 Microsoft Azure Global Edition 技术文档网站。 如果需要访问由世纪互联运营的 Microsoft Azure 中国技术文档网站,请访问 https://docs.azure.cn。
使用 Azure DevOps 持续部署
重要
自定义命令将于 2026 年 4 月 30 日停用。 自 2023 年 10 月 30 日起,无法在 Speech Studio 中创建新的自定义命令应用程序。 与此更改相关的是,LUIS 将于 2025 年 10 月 1 日停用。 自 2023 年 4 月 1 日起,无法创建新的 LUIS 资源。
本文介绍如何为自定义命令应用程序设置持续部署。 将向你提供支持 CI/CD 工作流的脚本。
先决条件
- 用于开发的自定义命令应用程序 (DEV)
- 用于生产的自定义命令应用程序 (PROD)
- 注册 Azure Pipelines
导出/导入/发布
脚本托管在语音助理 - 自定义命令。 将 bash 目录中的脚本克隆到存储库中。 确保保持同一路径。
设置管道
转到“Azure DevOps - Pipelines”,然后选择“新建管道”
在“Connect”部分中,选择这些脚本所在的存储库的位置
在“Select”部分中,选择你的存储库
在“Configure”部分中,选择“Starter pipeline”
接下来,你将获得一个带有 YAML 文件的编辑器,请用此脚本替换“步骤”部分。
steps:
- task: Bash@3
  displayName: 'Export source app'
  inputs:
    targetType: filePath
    filePath: ./bash/export.sh
    arguments: '-r westus2 -s $(SubscriptionKey) -c $(Culture) -a $(SourceAppId) -f ExportedDialogModel.json'
    workingDirectory: bash
    failOnStderr: true

- task: Bash@3
  displayName: 'Import to target app'
  inputs:
    targetType: filePath
    filePath: ./bash/import.sh
    arguments: '-r westus2 -s $(SubscriptionKey) -c $(Culture) -a $(TargetAppId) -f ExportedDialogModel.json'
    workingDirectory: bash
    failOnStderr: true

- task: Bash@3
  displayName: 'Train and Publish target app'
  inputs:
    targetType: filePath
    filePath: './bash/train-and-publish.sh'
    arguments: '-r westus2 -s $(SubscriptionKey) -c $(Culture) -a $(TargetAppId)'
    workingDirectory: bash
    failOnStderr: true
这些脚本假定你使用的是区域
westus2,如果不是这样,请相应地更新任务的参数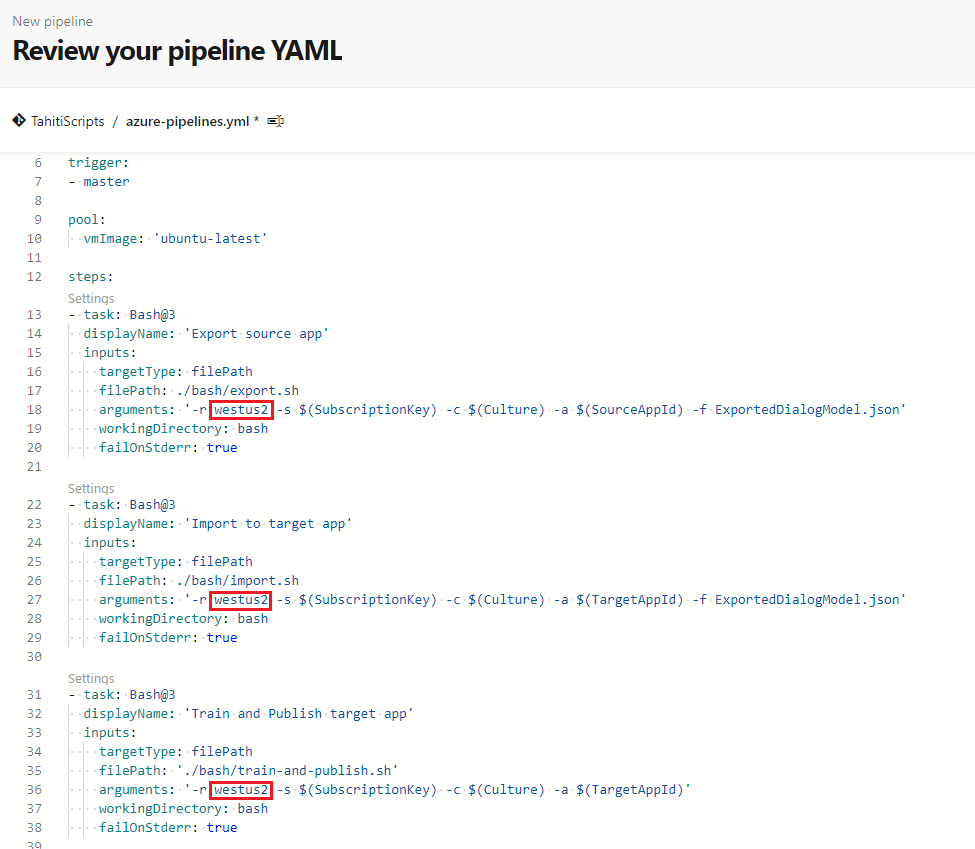
在“保存并运行”按钮中,打开下拉菜单,然后选择“保存”
将管道挂接到应用程序
导航到管道的主页。
在右上角下拉列表中,选择“Edit pipeline”。 将显示 YAML 编辑器。
在“Run”按钮旁的右上角,选择“Variables”。 选择“New variable”。
添加这些变量:
变量 说明 SourceAppId 开发应用程序的 ID TargetAppId PROD 应用程序的 ID SubscriptionKey 用于这两个应用程序的密钥 环境 应用程序环境 (en-us) 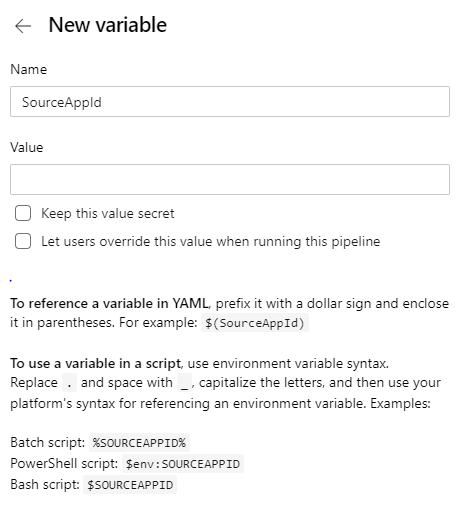
选择“运行”,然后选择正在运行的“作业”。
应会看到正在运行的任务列表,包括:“Export source app”、“Import to target app”和“Train and Publish target app”
从源代码进行部署
如果要将应用程序的定义保留在存储库中,我们会提供源代码中用于部署的脚本。 由于脚本在 bash 中,因此,如果你使用的是 Windows,则需要安装 Linux 子系统。
脚本托管在语音助理 - 自定义命令。 将 bash 目录中的脚本克隆到存储库中。 确保保持同一路径。
准备存储库
为应用程序创建一个目录,本示例将创建一个名为“apps”的目录。
更新以下 bash 脚本的参数,并运行。 它会将应用程序的对话框模型导入文件 myapp.json
bash/export.sh -r <region> -s <subscriptionkey> -c en-us -a <appid> -f apps/myapp.json参数 说明 region 你的语音资源区域。 例如: westus2subscriptionkey 语音资源密钥。 appid 要导出的自定义命令的应用程序 ID。 将这些更改推送到存储库。
设置管道
转到“Azure DevOps - Pipelines”,然后选择“新建管道”
在“Connect”部分中,选择这些脚本所在的存储库的位置
在“Select”部分中,选择你的存储库
在“Configure”部分中,选择“Starter pipeline”
接下来,你将获得一个带有 YAML 文件的编辑器,请用此脚本替换“步骤”部分。
steps:
- task: Bash@3
  displayName: 'Import app'
  inputs:
    targetType: filePath
    filePath: ./bash/import.sh
    arguments: '-r westus2 -s $(SubscriptionKey) -c $(Culture) -a $(TargetAppId) -f ../apps/myapp.json'
    workingDirectory: bash
    failOnStderr: true

- task: Bash@3
  displayName: 'Train and Publish app'
  inputs:
    targetType: filePath
    filePath: './bash/train-and-publish.sh'
    arguments: '-r westus2 -s $(SubscriptionKey) -c $(Culture) -a $(TargetAppId)'
    workingDirectory: bash
    failOnStderr: true
注意
这些脚本假定你使用的是区域 westus2,如果不是这样,请相应地更新任务的参数
在“保存并运行”按钮中,打开下拉菜单,然后选择“保存”
将管道挂接到目标应用程序
导航到管道的主页。
在右上角下拉列表中,选择“Edit pipeline”。 将显示 YAML 编辑器。
在“Run”按钮旁的右上角,选择“Variables”。 选择“New variable”。
添加这些变量:
变量 说明 TargetAppId PROD 应用程序的 ID SubscriptionKey 用于这两个应用程序的密钥 环境 应用程序环境 (en-us) 选择“运行”,然后选择正在运行的“作业”。 应会看到正在运行的任务列表,包括:“Import app”和“Train and Publish app”