使用 GitHub Actions 和 Azure 生成自定义虚拟机映像
通过创建用于生成虚拟机映像的工作流来开始使用 GitHub Actions。
在 GitHub Actions 中,可以通过使用工作流中的项目创建自定义虚拟机映像,从而加快 CI/CD 进程。 可以生成映像并将其分发到共享映像库。
生成虚拟机映像将用到 Azure 映像生成器服务。
先决条件
- 具有活动订阅的 Azure 帐户。 免费创建帐户。
- 活动存储库的 GitHub 帐户。 如果没有该帐户,请注册免费版。
- 此示例使用 Java Spring PetClinic 示例应用程序。
- 包含映像的 Azure 计算库。
工作流文件概述
工作流通过存储库的 /.github/workflows/ 路径中的 YAML (.yml) 文件定义。 此定义包含组成工作流的各种步骤和参数。
此文件包含三个部分:
| 部分 | 任务 |
|---|---|
| 身份验证 | 1. 添加用户管理的标识。 2.设置服务主体或打开 ID 连接。 3. 创建 GitHub 机密。 |
| 生成 | 1.设置环境。 2. 生成应用。 |
| 图像 | 1. 创建 VM 映像。 2. 创建虚拟机。 |
创建用户管理的标识
需要对 Azure 映像生成器 (AIB) 使用用户管理的标识来分发映像。 将在映像生成过程中使用 Azure 用户分配的托管标识来读取映像并将其写入共享映像库。
自定义此 JSON 代码。 请将
{subscriptionID}和{rgName}的占位符替换为你的订阅 ID 和资源组名称。{ "properties": { "roleName": "Image Creation Role", "IsCustom": true, "description": "Azure Image Builder access to create resources for the image build", "assignableScopes": [ "/subscriptions/{subscriptionID}/resourceGroups/{rgName}" ], "permissions": [ { "actions": [ "Microsoft.Compute/galleries/read", "Microsoft.Compute/galleries/images/read", "Microsoft.Compute/galleries/images/versions/read", "Microsoft.Compute/galleries/images/versions/write", "Microsoft.Compute/images/write", "Microsoft.Compute/images/read", "Microsoft.Compute/images/delete" ], "notActions": [], "dataActions": [], "notDataActions": [] } ] } }使用此 JSON 代码通过 JSON 创建新的 自定义角色 。
在Azure 门户中,打开 Azure 计算库并转到访问控制(IAM)。
选择“ 添加角色分配 ”,并将映像创建角色分配给用户托管标识。
生成部署凭据
在 Azure CLI 中使用 az ad sp create-for-rbac 命令创建服务主体。 请使用 Azure 门户中的 Azure Cloud Shell 或选择“试用”按钮运行此命令。
az ad sp create-for-rbac --name "myML" --role contributor \
                            --scopes /subscriptions/<subscription-id>/resourceGroups/<group-name> \
                            --json-auth
参数 --json-auth 在 Azure CLI 版本 >= 2.51.0 中可用。 此版本之前的版本使用 --sdk-auth,带有弃用警告。
在上面的示例中,请将占位符替换为你的订阅 ID、资源组名称和应用名称。 输出是一个 JSON 对象,包含的角色分配凭据可提供对应用服务应用的访问权限,如下所示。 复制此 JSON 对象供以后使用。
  {
    "clientId": "<GUID>",
    "clientSecret": "<GUID>",
    "subscriptionId": "<GUID>",
    "tenantId": "<GUID>",
    (...)
  }
创建 GitHub 机密
在 GitHub 中,转到存储库。
转到导航菜单中的“设置”。
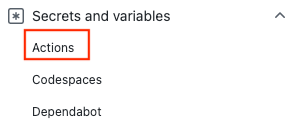
选择“安全性”>“机密和变量”>“操作”。
选择“新建存储库机密”。
将 Azure CLI 命令的整个 JSON 输出粘贴到机密的值字段中。 为机密指定名称
AZURE_CREDENTIALS。选择“添加机密”。
使用 Azure 登录操作
通过 Azure 登录操作使用 GitHub 机密向 Azure 进行身份验证。
在此工作流中,将结合使用 Azure 登录操作和存储在 secrets.AZURE_CREDENTIALS 中的服务主体详细信息进行身份验证。 然后,运行 Azure CLI 操作。 有关如何在工作流文件中引用 GitHub 机密的详细信息,请参阅 GitHub 文档中的在工作流中使用加密的机密。
on: [push]

name: Create Custom VM Image

jobs:
  build-image:
    runs-on: ubuntu-latest
    steps:
      - name: Log in with Azure
        uses: azure/login@v1
        with:
          creds: '${{ secrets.AZURE_CREDENTIALS }}'
配置 Java
通过 Java 设置 SDK 操作来设置 Java 环境。 在此示例中,你将设置环境,使用 Maven 进行生成,然后输出项目。
GitHub 项目提供一种方法以在作业之间共享工作流中的文件。 将创建项目来保存 JAR 文件,然后将其添加到虚拟机映像。
on: [push]

name: Create Custom VM Image

jobs:
  build-image:
    runs-on: ubuntu-latest
    strategy:
      matrix:
        java: [ '17' ]

    steps:
    - name: Checkout
      uses: actions/checkout@v3

    - name: Login via Az module
      uses: azure/login@v1
      with:
        creds: ${{secrets.AZURE_CREDENTIALS}}

    - name: Set up JDK ${{matrix.java}}
      uses: actions/setup-java@v2
      with:
        java-version: ${{matrix.java}}
        distribution: 'adopt'
        cache: maven
    - name: Build with Maven Wrapper
      run: ./mvnw -B package

    - name: Build Java
      run: mvn --batch-mode --update-snapshots verify

    - run: mkdir staging && cp target/*.jar staging
    - uses: actions/upload-artifact@v2
      with:
        name: Package
        path: staging
生成映像
使用生成 Azure 虚拟机映像操作来创建自定义虚拟机映像。
将 {subscriptionID}{rgName} 和 {Identity} 的占位符替换为订阅 ID、资源组名称和托管标识名称。 将 {galleryName} 和 {imageName} 的值替换为映像库名称和映像名称。
注意
如果“创建应用烘焙映像”操作失败并出现权限错误,请验证是否已将映像创建角色分配给用户托管标识。
    - name: Create App Baked Image
      id: imageBuilder
      uses: azure/build-vm-image@v0
      with:
        location: 'eastus2'
        resource-group-name: '{rgName}'
        managed-identity: '{Identity}' # Managed identity
        source-os-type: 'windows'
        source-image-type: 'platformImage'
        source-image: MicrosoftWindowsServer:WindowsServer:2019-Datacenter:latest #unique identifier of source image
        dist-type: 'SharedImageGallery'
        dist-resource-id: '/subscriptions/{subscriptionID}/resourceGroups/{rgName}/providers/Microsoft.Compute/galleries/{galleryName}/images/{imageName}/versions/0.1.${{ GITHUB.RUN_ID }}' #Replace with the resource id of your shared image  gallery's image definition
        dist-location: 'eastus2'
虚拟机操作参数
| 输入 | 必须 | 说明 |
|---|---|---|
resource-group-name |
是 | 用于在生成过程中存储和保存项目的资源组。 |
image-builder-template-name |
否 | 使用的映像生成器模板资源的名称。 |
location |
是 | Azure 映像生成器将运行的位置。 请参阅支持的位置。 |
build-timeout-in-minutes |
否 | 在此之后取消生成的时间。 默认为 240。 |
vm-size |
可选 | 默认情况下,将使用 Standard_D1_v2。 请参阅虚拟机大小。 |
managed-identity |
是 | 之前创建的用户管理的标识。 如果标识位于不同的资源组,请使用完整的标识符。 如果它位于相同的资源组,请使用该名称。 |
source-os |
是 | 基础映像的 OS 类型(Linux 或 Windows) |
source-image-type |
是 | 将用于创建自定义映像的基础映像类型。 |
source-image |
是 | 基础映像的资源标识符。 源映像应出现在 location 输入值中所设置的同一 Azure 区域中。 |
customizer-source |
否 | 可以在其中保留所有需要添加到基础映像以进行自定义的项目的目录。 默认情况下该值为 ${{ GITHUB.WORKSPACE }}/workflow-artifacts. |
customizer-destination |
否 | 这是自定义映像中项目所复制到的目录。 |
customizer-windows-update |
否 | 仅限 Windows。 布尔值。 如果为 true,则映像生成器在自定义结束时将运行 Windows 更新。 |
dist-location |
否 | 对于 SharedImageGallery,这是 dist-type。 |
dist-image-tags |
否 | 这些是用户定义的标记,它们将添加到创建的自定义映像(示例:version:beta)。 |
创建虚拟机
最后一步是从映像创建虚拟机。
将
{rgName}的占位符替换为资源组名称。使用虚拟机密码 (
VM_PWD) 添加 GitHub 机密。 请确保记下该密码,因为将无法再次查看它。 用户名为myuser。
    - name: CREATE VM
      uses: azure/CLI@v1
      with:
        azcliversion: 2.0.72
        inlineScript: |
        az vm create --resource-group ghactions-vMimage  --name "app-vm-${{ GITHUB.RUN_NUMBER }}"  --admin-username myuser --admin-password "${{ secrets.VM_PWD }}" --location  eastus2 \
            --image "${{ steps.imageBuilder.outputs.custom-image-uri }}"
完成 YAML
  on: [push]

  name: Create Custom VM Image

  jobs:
    build-image:
      runs-on: ubuntu-latest
      steps:
      - name: Checkout
        uses: actions/checkout@v2

      - name: Login via Az module
        uses: azure/login@v1
        with:
          creds: ${{secrets.AZURE_CREDENTIALS}}

      - name: Setup Java 1.8.x
        uses: actions/setup-java@v1
        with:
          java-version: '1.8.x'

      - name: Build Java
        run: mvn --batch-mode --update-snapshots verify

      - run: mkdir staging && cp target/*.jar staging
      - uses: actions/upload-artifact@v2
        with:
          name: Package
          path: staging

      - name: Create App Baked Image
        id: imageBuilder
        uses: azure/build-vm-image@v0
        with:
          location: 'eastus2'
          resource-group-name: '{rgName}'
          managed-identity: '{Identity}' # Managed identity
          source-os-type: 'windows'
          source-image-type: 'platformImage'
          source-image: MicrosoftWindowsServer:WindowsServer:2019-Datacenter:latest #unique identifier of source image
          dist-type: 'SharedImageGallery'
          dist-resource-id: '/subscriptions/{subscriptionID}/resourceGroups/{rgName}/providers/Microsoft.Compute/galleries/{galleryName}/images/{imageName}/versions/0.1.${{ GITHUB.RUN_ID }}' #Replace with the resource id of your shared image  gallery's image definition
          dist-location: 'eastus2'

      - name: CREATE VM
        uses: azure/CLI@v1
        with:
          azcliversion: 2.0.72
          inlineScript: |
          az vm create --resource-group ghactions-vMimage  --name "app-vm-${{ GITHUB.RUN_NUMBER }}"  --admin-username myuser --admin-password "${{ secrets.VM_PWD }}" --location  eastus2 \
              --image "${{ steps.imageBuilder.outputs.custom-image-uri }}"
后续步骤
- 了解如何部署到 Azure。
反馈
即将发布:在整个 2024 年,我们将逐步淘汰作为内容反馈机制的“GitHub 问题”,并将其取代为新的反馈系统。 有关详细信息,请参阅:https://aka.ms/ContentUserFeedback。
提交和查看相关反馈