Turnover balance statement reports
Turnover balance sheets for the customer, vendor, and advance holder let you show information in the context of customers, vendors, and advance holders.
Customer turnover register
Go to General ledger > Inquiries and reports > Turnover balance statement > Customer turnover register.
On the General tab, in the Date interval code field, select the date interval code from the date interval directory.
In the From date and To date fields, select the start and end of the report generation period.
Note
If you don't manually set these fields, values are entered based on the selected date interval code.
In the Currency type field, select the currency type for the report: Accounting currency, Reporting currency, or Indicated currency.
In the Currency field, select the transaction currency.
Note
This field is available only if you select Indicated currency in the Currency type field.
In the Main account field, select the account to generate the report for.
Select Expand all to view additional settlement information.
In the Detail and sorting parameters section, specify the fields that are used for grouping by moving them from the Available fields list to the Selected fields list. You can also change the grouping order as you require.
In the Financial dimensions section, in the Agreement, ExpenseAndIncomeCode, and Worker fields, specify the dimension codes if you want to select transactions that have specific codes for the report.
Note
If you leave these fields blank, the system will select transactions that have any dimension code for the report.
Set the Print ranges option to Yes to view the query terms when you print the report.
Set the Delete zero line option to Yes if you don't want to print lines or columns that have 0 (zero) values.
Set the Total accounts option to Yes to total the accounts.
Set the Show transactions option to Yes to show the contractor transactions.
Set the Itemize balance option to Yes to show a detailed view of the balance columns.
Set the Calculate balance option to Yes to calculate and show the balance on the report.
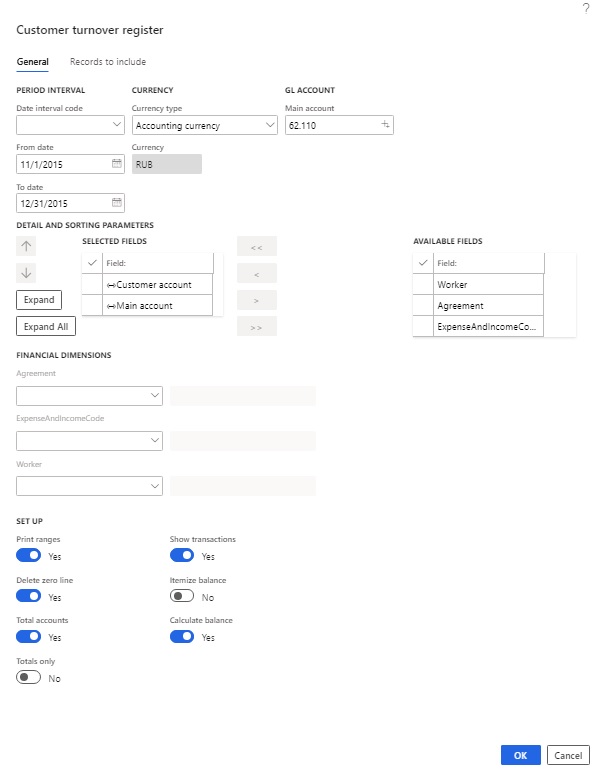
Select ОК to generate the report.

[!NOTE]
- Select Voucher to view the ledger transactions that generated the activity.
- Select Select to change the report generation parameters.
- Select Print to print the report in Microsoft SQL Server Reporting Services (SSRS).
- Select Totals only to show lines only for the first selected dimension.
Vendor turnover register
Go to General ledger > Inquiries and reports > Turnover balance statement > Vendor turnover register.
On the General tab, in the Date interval code field, select the date interval code from the date interval directory.
In the From date and To date fields, select the start and end of the report generation period.
Note
If you don't manually set these fields, values are entered based on the selected date interval code.
In the Currency type field, select the currency type for the report: Accounting currency, Reporting currency, and Indicated currency.
In the Currency field, select the transaction currency.
Note
This field is activated available only if you select Indicated currency in the Currency type field.
In the Main account field, select the account to generate the report for.
Select Expand all to view additional settlement information.
In the Detail and sorting parameters section, specify the fields that are used for grouping by moving them from the Available fields list to the Selected fields list. You can also change the grouping order as you require.
In the Financial dimensions section, in the Agreement, ExpenseAndIncomeCode, and Worker fields, specify the dimension codes if you want to select transactions that have specific codes for the report.
Note
If you leave these fields blank, the system will select transactions that have any dimension code for the report.
Set the Print ranges option to Yes to view the query terms when you print the report.
Set the Delete zero line option to Yes if you don't want to print lines or columns that have 0 (zero) values.
Set the Total accounts option to Yes to total the accounts.
Set the Show transactions option to Yes to show the contractor transactions.
Set the Itemize balance option to Yes to show a detailed view of the balance columns.
Set the Calculate balance option to Yes to calculate and show the balance on the report.
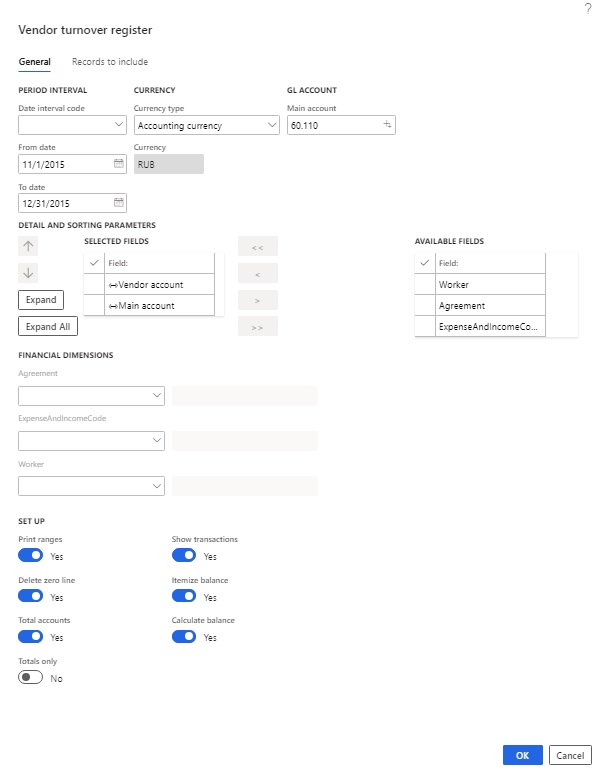
Select ОК to generate the report.

[!NOTE]
- Select Voucher to view the ledger transactions that generated the activity.
- Select Select to change the report generation parameters.
- Select Print to print the report in SSRS.
- Select Totals only to show lines only for the first selected dimension.
Advance holder turnover register
Go to General ledger > Inquiries and reports > Turnover balance statement > Advance holder turnover register.
On the General tab, in the Date interval code field, select the date interval code from the date interval directory.
In the From date and To date fields, select the start and end of the report generation period.
Note
If you don't manually set these fields, values are entered based on the selected date interval code.
In the Currency type field, select the currency type for the report: Accounting currency, Reporting currency, or Indicated currency.
In the Currency field, select the transaction currency.
Note
This field is available only if you select Indicated currency in the Currency type field.
In the Main account field, select the account to generate the report for.
Select Expand all to view additional settlement information.
In the Detail and sorting parameters section, specify the fields that are used for grouping by moving them from the Available fields list to the Selected fields list. You can also change the grouping order as you require.
In the Financial dimensions section, in the Agreement, ExpenseAndIncomeCode, and Worker fields, specify dimension codes if you want to select transactions that have specific codes for the report.
Note
If you leave these fields blank, the system will select transactions that have any dimension code for the report.
Set the Print ranges option to Yes to view the query terms when you print the report.
Set the Delete zero line option to Yes if you don't want to print lines or columns that have 0 (zero) values.
Set the Total accounts option to Yes to total the accounts.
Set the Show transactions option to Yes to show the contractor transactions.
Set the Itemize balance option to Yes to show a detailed view of the balance columns.
Set the Calculate balance option to Yes to calculate and show the balance on the report.
Select ОК to generate the report.
Note
- Select Voucher to view the ledger transactions that generated the activity.
- Select Select to change the report generation parameters.
- Select Print to print the report.
- Select Totals only to show lines only for the first selected dimension.
General ledger report
The General ledger report is designed to generate turnover on a specified account that is in correspondence with other accounts.
Go to General ledger > Inquiries and reports > Turnover balance statement > General ledger.
On the General tab, in the Date interval code field, select the date interval code from the date interval directory.
In the From date and To date fields, select the start and end of the report generation period.
Note
If you don't manually set these fields, values are entered based on the selected date interval code.
In the Currency type field, select the currency type for the report: Accounting currency, Reporting currency, or Indicated currency.
In the Currency field, select the transaction currency.
Note
This field is available only if you select Indicated currency in the Currency type field.
In the Main account field, select the account to generate the report for.
In the Corr. account field, select the corresponding account to generate the report for.
Select Expand all to view additional settlement information.
In the Detail and sorting parameters section, you can specify the fields that are used for grouping by moving them from the Available fields list to the Selected fields list. You can also change the grouping order as you require.
In the Financial dimensions section, in the Agreement, ExpenseAndIncomeCode, and Worker fields, specify dimension codes if you want to select transactions that have specific codes for the report.
Note
If you leave these fields blank, the system will select transactions that have any dimension code for the report.
Set the Print ranges option to Yes to view the query terms when you print the report.
Set the Delete zero line option to Yes if you don't want to print lines or columns that have zero (0) values.
Set the Total accounts option to Yes to total the accounts.
Set the Show transactions option to Yes to show the accountable person transactions.
Set the Calculate balance option to Yes to calculate and show the balance on the report.
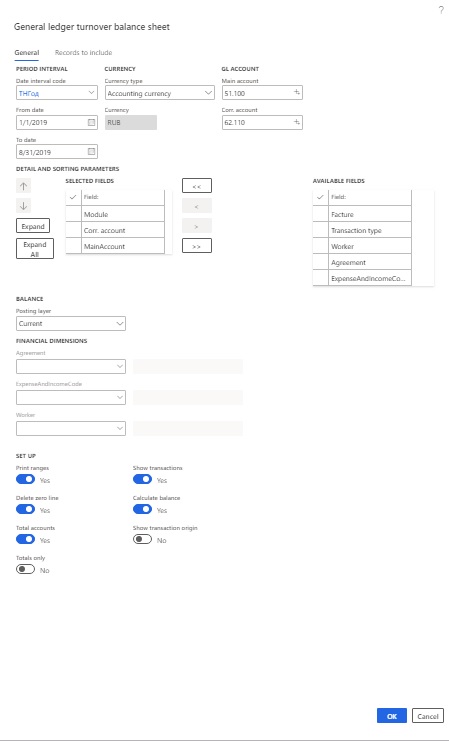
Select ОК to generate the report.
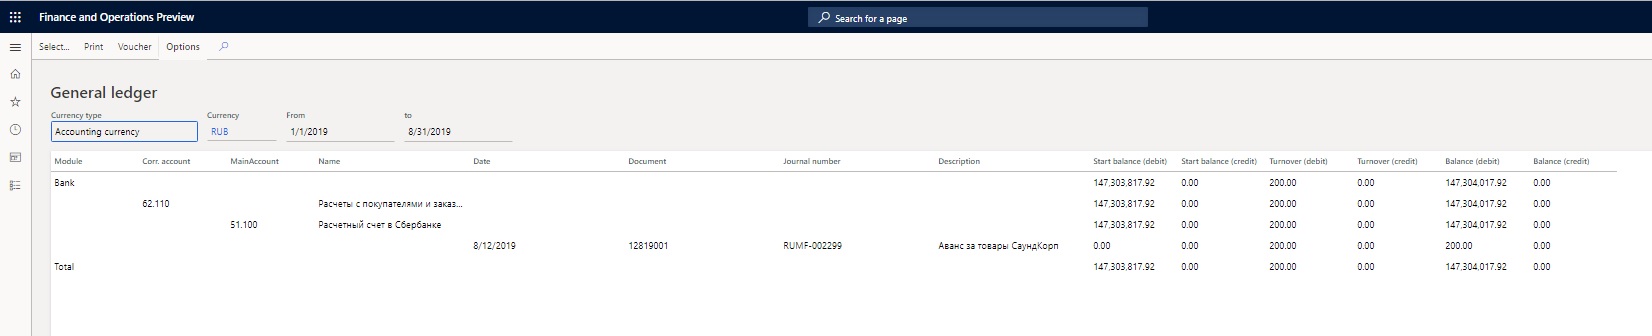
Note
- Select Voucher to view the ledger transactions that generated the activity.
- Select Select to change the report generation parameters.
- Select Print to print the report in SSRS.
- Select Totals only to show lines only for the first selected dimension.
Turnover balance statement report archive
On the Report archive page, you can view reports and download them in Excel format.
Go to General ledger > Inquiries and reports > Turnover balance statement > Report archive.
On the Turnover and balance statement report archive page, in the Report type field, specify the type of report.
Select the report.
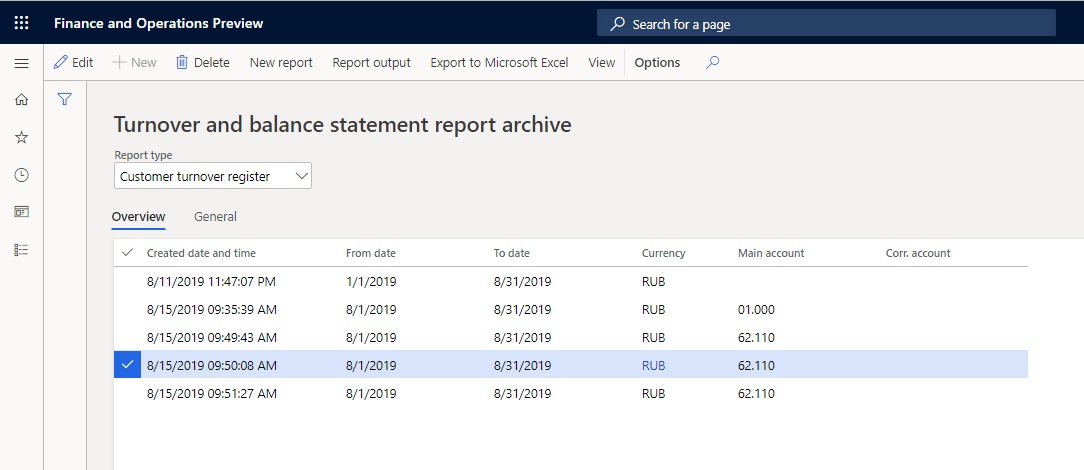
Select New report to generate a new report that has the same parameters as the selected report.
Select Report output to print the report.
Select Export to Microsoft Excel to open the Export to Excel page, and then select Download to download the report in Excel format.
Select View to view the report.
Pre-calculate transactional data
By pre-calculating transactional data, you can help improve performance.
Go to General ledger > Ledger setup > General ledger parameters.
On the Ledger tab, in the Turnover balance statement section, set the Use pre-calculated data option to Yes.
Go to General ledger > Periodic tasks > Pre-calculate transactional data.
In the Pre-calculate transactional data dialog box, on the Parameters FastTab, in the Report type field, select the type of the report:
- Customer turnover register
- Vendor turnover register
- General ledger
- Advance holder turnover register
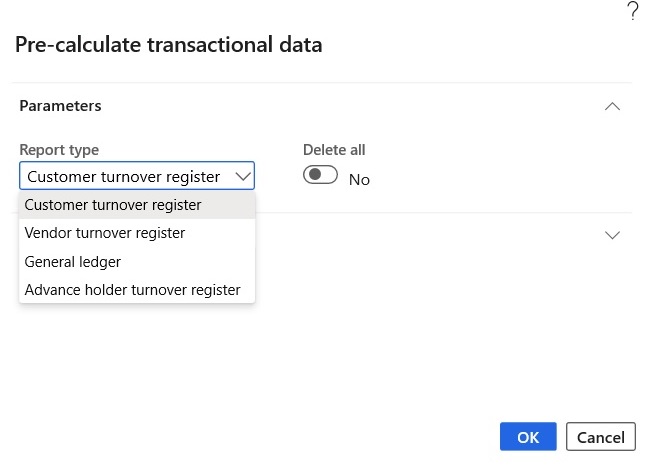
Select OK to pre-calculate transactional data.
反馈
即将发布:在整个 2024 年,我们将逐步淘汰作为内容反馈机制的“GitHub 问题”,并将其取代为新的反馈系统。 有关详细信息,请参阅:https://aka.ms/ContentUserFeedback。
提交和查看相关反馈