通过 Azure AD 仅限应用令牌授予访问权限
使用 SharePoint Online 时,可以在 Azure ID 中定义应用程序,并能向这些应用程序授予对 SharePoint 的访问权限,还可以向应用程序授予对 Office 365 中其他所有服务的访问权限。 如果使用的是 SharePoint Online,则此模型是首选模型,如果在本地使用 SharePoint,则必须通过基于的 Azure ACS 使用 SharePoint Only 模型,如此 处所述。
重要
自 2023 年 11 月 27 日起,已停用 Azure ACS (访问控制 Services for SharePoint Online) ,请查看完整的停用公告以了解详细信息。 在 SharePoint 上下文之外使用 Azure ACS 已于 2018 年 11 月 7 日停用,现已停用。
停用意味着该功能不会获得任何新投资,但仍受支持。 生命周期结束意味着该功能将停用,不再可供使用。
为 Azure AD 应用设置仅限应用访问
在 Azure AD 中执行仅限应用访问时,通常都是使用证书来请求获取访问权限:只要拥有证书及其私钥,就可以使用应用,并拥有向应用授予的权限。 下面逐步介绍了如何设置此模型。
现在可以将 Azure AD 应用配置为,使用仅限应用访问令牌调用 SharePoint Online。 为此,必须创建和配置自签名 X.509 证书,用于对应用进行 Azure AD 身份验证,同时请求获取仅限应用访问令牌。 首先,必须创建自签名的 X.509 证书,可以使用 Windows SDK 中提供的 makecert.exe 工具,通过提供的 PowerShell 脚本创建,该脚本没有生成证书的依赖项,或者使用 PnP PowerShell 命令。 使用 PowerShell 脚本是首选方法,本章节对此进行了介绍。
重要
请务必使用管理员权限运行以下脚本。
使用此脚本创建自签名证书的具体步骤:
.\Create-SelfSignedCertificate.ps1 -CommonName "MyCompanyName" -StartDate 2017-10-01 -EndDate 2019-10-01
注意
日期采用 ISO 日期格式:YYYY-MM-dd
证书密钥 algoritm 必须是 RSA,这是目前唯一受支持的算法
可以复制下面的实际脚本:
#Requires -RunAsAdministrator
<#
.SYNOPSIS
Creates a Self Signed Certificate for use in server to server authentication
.DESCRIPTION
.EXAMPLE
PS C:\> .\Create-SelfSignedCertificate.ps1 -CommonName "MyCert" -StartDate 2015-11-21 -EndDate 2017-11-21
This will create a new self signed certificate with the common name "CN=MyCert". During creation you will be asked to provide a password to protect the private key.
.EXAMPLE
PS C:\> .\Create-SelfSignedCertificate.ps1 -CommonName "MyCert" -StartDate 2015-11-21 -EndDate 2017-11-21 -Password (ConvertTo-SecureString -String "MyPassword" -AsPlainText -Force)
This will create a new self signed certificate with the common name "CN=MyCert". The password as specified in the Password parameter will be used to protect the private key
.EXAMPLE
PS C:\> .\Create-SelfSignedCertificate.ps1 -CommonName "MyCert" -StartDate 2015-11-21 -EndDate 2017-11-21 -Force
This will create a new self signed certificate with the common name "CN=MyCert". During creation you will be asked to provide a password to protect the private key. If there is already a certificate with the common name you specified, it will be removed first.
#>
Param(

   [Parameter(Mandatory=$true)]
   [string]$CommonName,

   [Parameter(Mandatory=$true)]
   [DateTime]$StartDate,

   [Parameter(Mandatory=$true)]
   [DateTime]$EndDate,

   [Parameter(Mandatory=$false, HelpMessage="Will overwrite existing certificates")]
   [Switch]$Force,

   [Parameter(Mandatory=$false)]
   [SecureString]$Password
)

# DO NOT MODIFY BELOW

function CreateSelfSignedCertificate(){

    #Remove and existing certificates with the same common name from personal and root stores
    #Need to be very wary of this as could break something
    if($CommonName.ToLower().StartsWith("cn="))
    {
        # Remove CN from common name
        $CommonName = $CommonName.Substring(3)
    }
    $certs = Get-ChildItem -Path Cert:\LocalMachine\my | Where-Object{$_.Subject -eq "CN=$CommonName"}
    if($certs -ne $null -and $certs.Length -gt 0)
    {
        if($Force)
        {

            foreach($c in $certs)
            {
                remove-item $c.PSPath
            }
        } else {
            Write-Host -ForegroundColor Red "One or more certificates with the same common name (CN=$CommonName) are already located in the local certificate store. Use -Force to remove them";
            return $false
        }
    }

    $name = new-object -com "X509Enrollment.CX500DistinguishedName.1"
    $name.Encode("CN=$CommonName", 0)

    $key = new-object -com "X509Enrollment.CX509PrivateKey.1"
    $key.ProviderName = "Microsoft RSA SChannel Cryptographic Provider"
    $key.KeySpec = 1
    $key.Length = 2048
    $key.SecurityDescriptor = "D:PAI(A;;0xd01f01ff;;;SY)(A;;0xd01f01ff;;;BA)(A;;0x80120089;;;NS)"
    $key.MachineContext = 1
    $key.ExportPolicy = 1 # This is required to allow the private key to be exported
    $key.Create()

    $serverauthoid = new-object -com "X509Enrollment.CObjectId.1"
    $serverauthoid.InitializeFromValue("1.3.6.1.5.5.7.3.1") # Server Authentication
    $ekuoids = new-object -com "X509Enrollment.CObjectIds.1"
    $ekuoids.add($serverauthoid)
    $ekuext = new-object -com "X509Enrollment.CX509ExtensionEnhancedKeyUsage.1"
    $ekuext.InitializeEncode($ekuoids)

    $cert = new-object -com "X509Enrollment.CX509CertificateRequestCertificate.1"
    $cert.InitializeFromPrivateKey(2, $key, "")
    $cert.Subject = $name
    $cert.Issuer = $cert.Subject
    $cert.NotBefore = $StartDate
    $cert.NotAfter = $EndDate
    $cert.X509Extensions.Add($ekuext)
    $cert.Encode()

    $enrollment = new-object -com "X509Enrollment.CX509Enrollment.1"
    $enrollment.InitializeFromRequest($cert)
    $certdata = $enrollment.CreateRequest(0)
    $enrollment.InstallResponse(2, $certdata, 0, "")
    return $true
}

function ExportPFXFile()
{
    if($CommonName.ToLower().StartsWith("cn="))
    {
        # Remove CN from common name
        $CommonName = $CommonName.Substring(3)
    }
    if($Password -eq $null)
    {
        $Password = Read-Host -Prompt "Enter Password to protect private key" -AsSecureString
    }
    $cert = Get-ChildItem -Path Cert:\LocalMachine\my | where-object{$_.Subject -eq "CN=$CommonName"}

    Export-PfxCertificate -Cert $cert -Password $Password -FilePath "$($CommonName).pfx"
    Export-Certificate -Cert $cert -Type CERT -FilePath "$CommonName.cer"
}

function RemoveCertsFromStore()
{
    # Once the certificates have been been exported we can safely remove them from the store
    if($CommonName.ToLower().StartsWith("cn="))
    {
        # Remove CN from common name
        $CommonName = $CommonName.Substring(3)
    }
    $certs = Get-ChildItem -Path Cert:\LocalMachine\my | Where-Object{$_.Subject -eq "CN=$CommonName"}
    foreach($c in $certs)
    {
        remove-item $c.PSPath
    }
}

if(CreateSelfSignedCertificate)
{
    ExportPFXFile
    RemoveCertsFromStore
}
系统会提示提供用于加密私钥的密码,.PFX 文件和 .CER 文件都会导出到当前文件夹。
注意
还可以通过 New-PnPAzureCertificate 命令生成自签名证书。
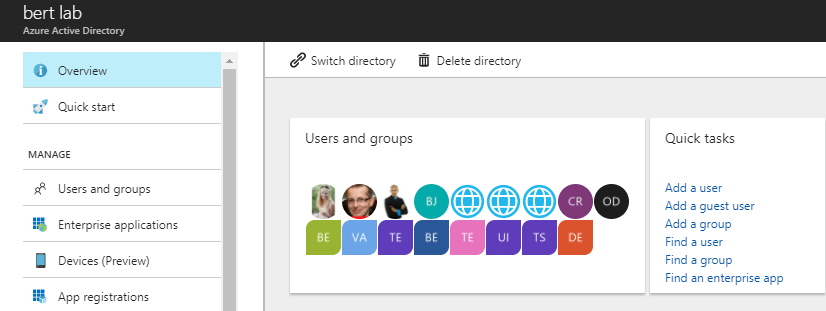
下一步是在与 Office 365 租户关联的 Azure Active Directory 租户中注册 Azure AD 应用。 为此,请使用租户全局管理员组的用户成员的帐户打开Office 365 Admin中心 https://admin.microsoft.com () 。 在 Office 365 管理中心的左侧树视图中,单击“管理中心”组下的“Azure Active Directory”链接。 随即打开的新浏览器选项卡中将显示 Microsoft Azure 门户。 如果这是首次使用帐户访问 Azure 门户,必须注册新 Azure 订阅,同时提供一些信息以及付款时所需的信用卡。 不过,别担心,使用 Azure AD 和注册 Office 365 应用程序无需支付任何费用。 实际上,这些都是免费功能。 有权访问 Azure 门户后,依次选择“Azure Active Directory”部分和“应用注册”选项。 有关详细信息,请参阅下图。
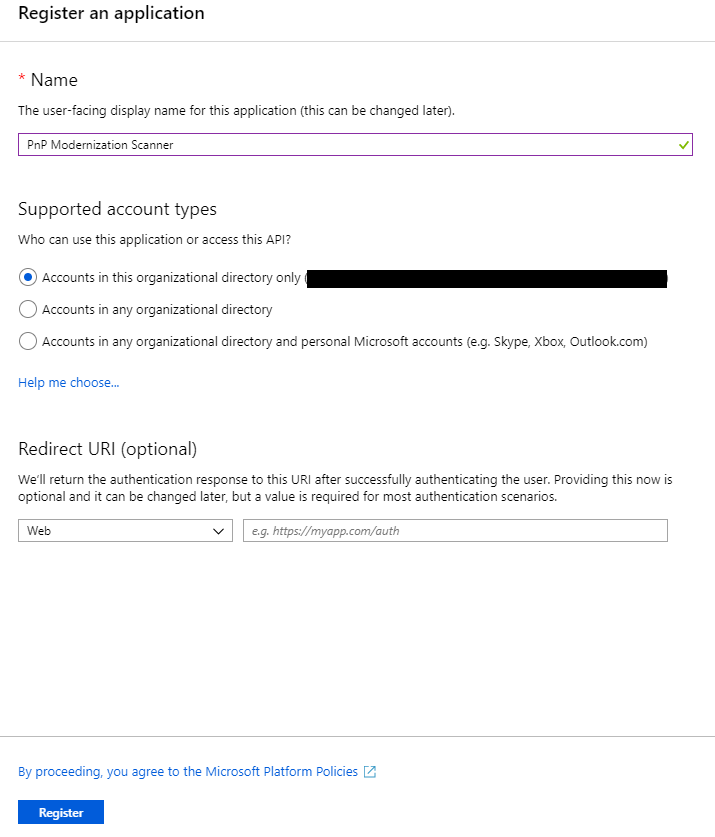
“应用注册”选项卡中列出了在租户中注册的 Azure AD 应用。 单击边栏选项卡左上角的“新注册”按钮。 接下来,命名应用,并单击边栏选项卡底部的“注册”。
重要
创建应用程序后,请复制“应用程序 (客户端) ID”,因为稍后将需要它。
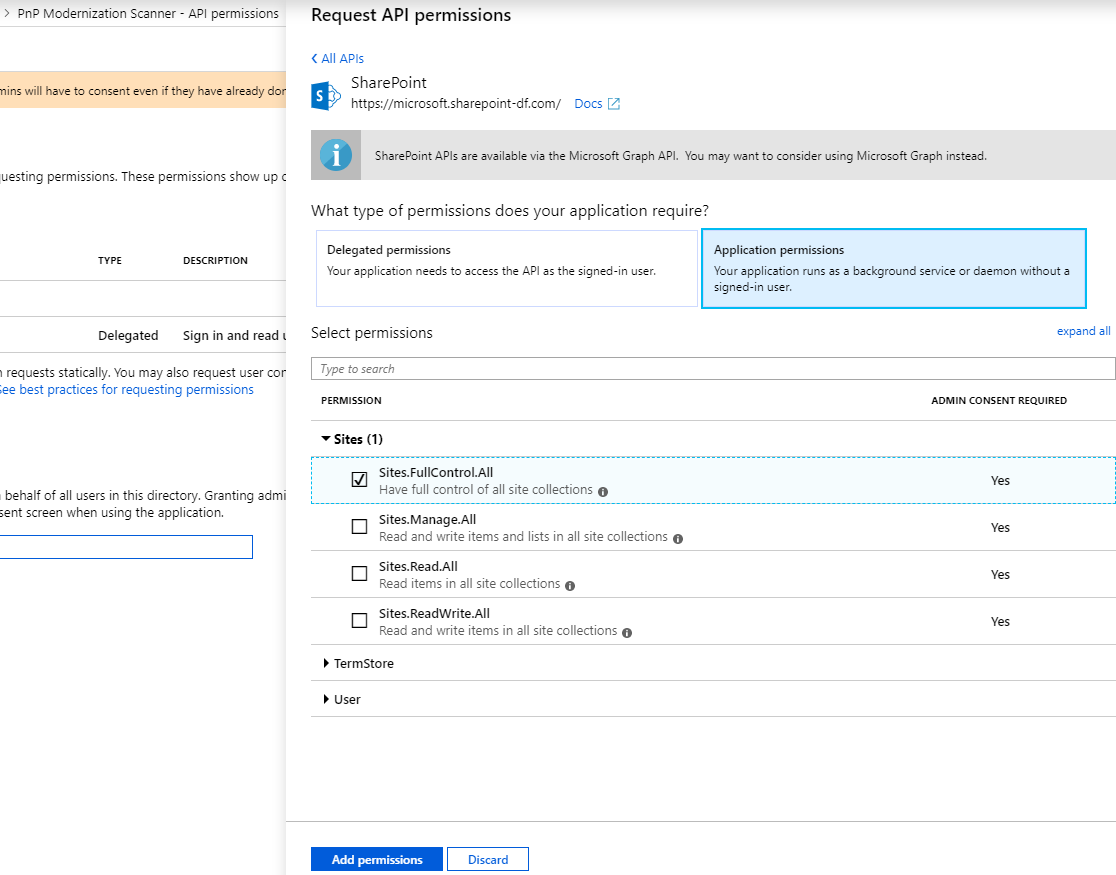
现在,依次单击左侧菜单栏中的“API 权限”和“添加权限”按钮。 此时,新边栏选项卡显示。 在其中,可以选择将向此应用授予的权限。 即选择:
- SharePoint
- 应用权限
- 网站
- Sites.FullControl.All
- 网站
- 应用权限
单击底部的蓝色“添加权限”按钮,以向应用添加权限。 “应用权限”是向作为“仅应用”运行的应用授予的权限。
最后一步是将之前创建的证书“连接到”应用程序。 单击左侧菜单栏中的“证书和机密”。 单击“上传证书”按钮,选择之前生成的 .CER 文件,并单击“添加”来上传它。
若要确认证书是否已成功注册,请单击左侧菜单栏中的“清单”。 搜索“keyCredentials”属性。 它应如下所示:
  "keyCredentials": [
    {
      "customKeyIdentifier": "<$base64CertHash>",
      "endDate": "2021-05-01T00:00:00Z",
      "keyId": "<$guid>",
      "startDate": "2019-05-01T00:00:00Z",
      "type": "AsymmetricX509Cert",
      "usage": "Verify",
      "value": "<$base64Cert>",
      "displayName": "CN=<$name of your cert>"
     }
  ],
如果看到类似这样的部分,表明证书已成功添加。
在此示例中,必须在租户中获得管理员同意,才能使用 Sites.FullControl.All 应用权限。 为此,请再次单击左侧菜单中的“API 权限”。 在底部,你会看到“授予同意”部分。 单击“授予 {{organization name}} 管理员同意”按钮,然后单击顶部显示的“是”按钮确认操作。

通过 PnP PowerShell 使用此主体
若要通过 PnP PowerShell 使用此 AAD“仅应用”主体,可以在安装 PnP PowerShell 模块后,使用下面的代码连接到 SharePoint Online 环境:
Connect-PnPOnline -ClientId <$application client id as copied over from the AAD app registration above> -CertificatePath '<$path to the PFX file generated by the PowerShell script above>' -CertificatePassword (ConvertTo-SecureString -AsPlainText "<$password assigned to the generated certificate pair above>" -Force) -Url https://<$yourtenant>.sharepoint.com -Tenant "<$tenantname>.onmicrosoft.com"
现在可以通过 PnP PowerShell 使用此证书“仅应用”信任,对 SharePoint Online 环境执行操作。
注意
PnP PowerShell 是一种开放源代码解决方案,其中包含为其提供支持的活动社区。 没有用于 Microsoft 开放源代码工具支持的 SLA。
使用 SharePoint PnP 框架库在应用程序中使用此主体
在第一步中,添加 PnP 框架库 NuGet 包: https://www.nuget.org/packages/PnP.Framework。
完成此操作后,可以使用以下代码构造:
using PnP.Framework;
using System;

namespace AzureADCertAuth
{
    class Program
    {
        static void Main(string[] args)
        {
            var authManager = new AuthenticationManager("<application id>", "c:\\temp\\mycert.pfx", "<password>", "contoso.onmicrosoft.com");
            using (var cc = authManager.GetContext("https://contoso.sharepoint.com/sites/demo"))
            {
                cc.Load(cc.Web, p => p.Title);
                cc.ExecuteQuery();
                Console.WriteLine(cc.Web.Title);
            };
        }
    }
}
注意
PnP Framework 是一个开放源代码解决方案,其活动社区为其提供支持。 没有用于 Microsoft 开放源代码工具支持的 SLA。
使用 PnP 框架库在 Powershell 脚本中使用此主体
使用 Azure 自动化 Runbook 时,首先使用“证书”选项(在“共享资源”下)添加证书 (.pfx),然后使用 Get-AutomationCertificate cmdlet 检索要在脚本中使用的证书。
注意
需要先将 PnP.Framework 模块添加到自动化帐户。 此模块包含进行身份验证调用所需的一切内容。
# path to installed modules
$path = "C:\Modules\User\SharePointPnPPowerShellOnline"

# reference to needed assemblies
Add-Type -Path "$path\Microsoft.SharePoint.Client.dll"
Add-Type -Path "$path\Microsoft.SharePoint.Client.Runtime.dll"
Add-Type -Path "$path\PnP.Framework.dll"
Add-Type -Path "$path\PnP.Core.dll"
Add-Type -Path "$path\Microsoft.Identity.Client.dll"

# reference to the certificate
$cert = Get-AutomationCertificate -Name 'NameOfCertificate'

# set the variables
$siteUrl = "https://<tenant>.sharepoint.com"
$appId = "<guid of the App>"
$domain = "<tenant>.onmicrosoft.com"
$azureEnv = [PnP.Framework.AzureEnvironment]::Production

try {
    # instantiate the object
    $clientContext = $null
    $authManager = new-object PnP.Framework.AuthenticationManager($appId, $cert, $domain, $null, $azureEnv)

    # configure the object
    $clientContext = $authManager.GetContext($siteUrl)

    # do some stuff
    $clientContext.Load($clientContext.Web)
    $clientContext.ExecuteQuery()
    $clientContext.Web.Title
}
catch {
    # catch error if needed
}
finally {
    $clientContext.Dispose()
}
在应用程序中使用此主体,并使用 Azure KeyVault 来存储证书并使用 Azure 函数进行检索
将托管标识添加到 Azure 函数并为此标识提供对 KeyVault 的访问权限(针对机密的 GET 权限)。
下面对同一 AuthenticationManager 方法的调用略有不同,其中我们传递的是实际证书,而不是证书的路径。 添加了一个额外的函数,以使用 Azure 函数的托管标识从 KeyVault 检索证书,此检索是无缝和透明的,因为“magic”发生在 DefaultAzureCredential 中。
此示例使用两个库来访问密钥保管库:
- 用于向密钥保管库进行身份验证的 Azure.Identity
- 用于获取证书的 Azure.Security.KeyVault.Secrets
using Azure.Identity;
using Azure.Security.KeyVault.Secrets;
using Microsoft.SharePoint.Client;
using System.Security.Cryptography.X509Certificates;

using (var cc = new PnP.Framework.AuthenticationManager(
    "<application id>",
    GetKeyVaultCertificate("kv-spo", "AzureAutomationSPOAccess"),
    "contoso.onmicrosoft.com").GetContext("https://contoso.sharepoint.com/sites/demo"))
{
    cc.Load(cc.Web, p => p.Title);
    cc.ExecuteQuery();
    log.Info("Via PnP, we have site: " + cc.Web.Title);
};

static X509Certificate2 GetKeyVaultCertificate(string keyvaultName, string name)
{
    // Some steps need to be taken to make this work
    // 1. Create a KeyVault and upload the certificate
    // 2. Give the Function App the permission to GET certificates via Access Policies in the KeyVault
    // 3. Call an explicit access token request to the management resource to https://vault.azure.net and use the URL of our Keyvault in the GetSecret method
    Uri keyVaultUri = new Uri($"https://{keyvaultName}.vault.azure.net/");

    var client = new SecretClient(keyVaultUri, new DefaultAzureCredential());
    KeyVaultSecret secret = client.GetSecret(name);

    return new X509Certificate2(Convert.FromBase64String(secret.Value), string.Empty, X509KeyStorageFlags.MachineKeySet);
}
通过 Pnp 现代化扫描仪使用此主体
现在已创建 Azure Active Directory 应用注册,继续按照此处的步骤操作来通过工具使用此主体。
常见问题
除了使用证书以外,还能使用其他方法对我的 Azure AD 应用实现仅限应用访问吗?
不能,其他所有选项都已被 SharePoint Online 屏蔽,并会导致生成“访问遭拒”消息。