教程:Visual Studio 中的 C# 和 ASP.NET Core 入门
本教程介绍借助 ASP.NET Core 进行 C# 开发,在 Visual Studio 中创建一个 C# ASP.NET Core Web 应用。
本教程演示如何:
- 创建 Visual Studio 项目
- 创建 C# ASP.NET Core Web 应用
- 对 Web 应用进行更改
- 探索 IDE 功能
- 运行 Web 应用
先决条件
若要完成本教程,必须具有 Visual Studio。 请访问 Visual Studio 下载页获取免费版本。
有关升级到最新 Visual Studio 版本的详细信息,请参阅 Visual Studio更新。
若要自定义 Visual Studio 体验,请参阅个性化 Visual Studio IDE 和编辑器。
创建项目
首先,创建一个 ASP.NET Core 项目。 项目类型随附了构建功能完备的网站所需的全部模板文件。
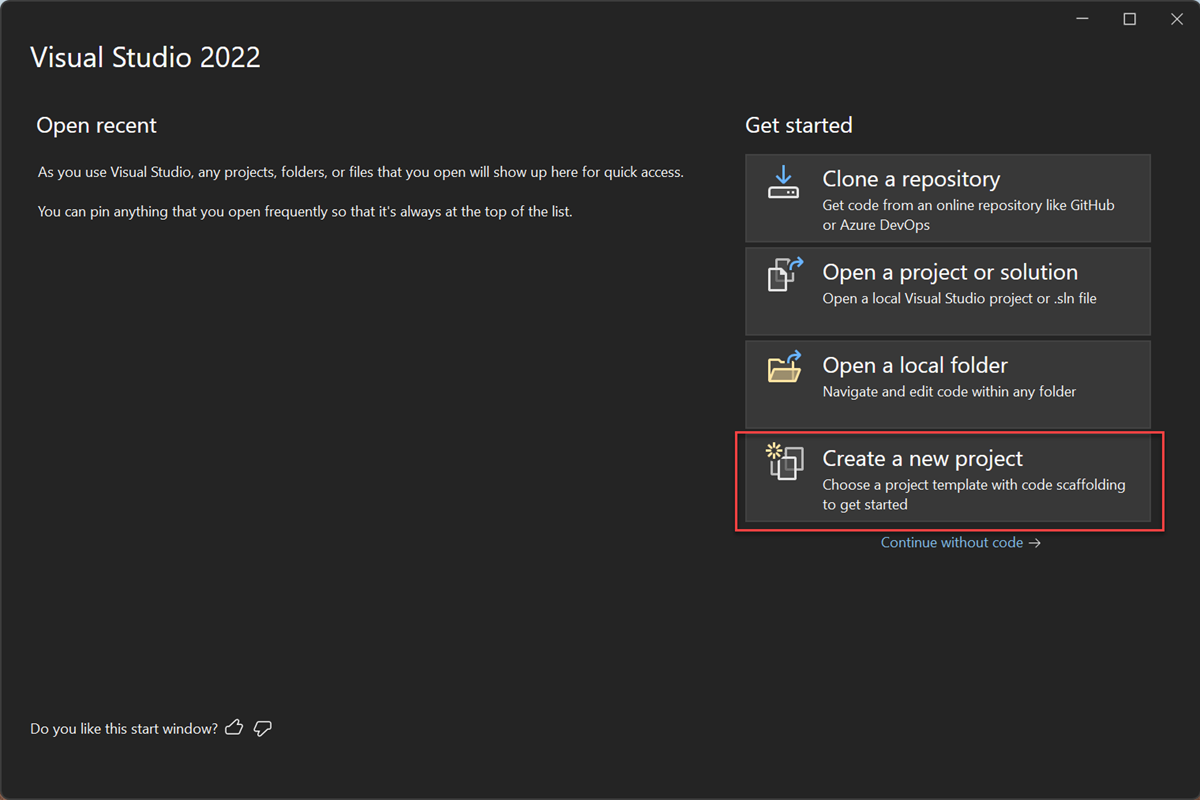
在“开始”窗口中,选择“创建新项目”。

在“创建新项目”窗口中,从“语言”列表中选择“C#”。 接下来,从“平台”列表中选择“Windows”,然后从“项目类型”列表中选择“Web”。
应用语言、平台和项目类型筛选器之后,选择“ASP.NET Core Web 应用”模板,然后选择“下一步”。

注意
如果未看到“ASP.NET Core Web 应用”模板,则可以从“创建新项目”窗口安装该模板。
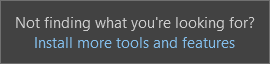
在模板列表底部的“未找到你要查找的内容?”消息中,选择“安装更多工具和功能”链接。

在 Visual Studio 安装程序中,选择“ASP.NET 和 Web 开发”。
在 Visual Studio 安装程序中,选择“修改”。 系统可能会提示你保存工作内容。 选择“继续”以安装该工作负载。
返回到“创建项目”过程中的步骤 2。
在“配置新项目”窗口中,在“项目名称”字段中输入“MyCoreApp”。 然后选择下一步。

在“其他信息”窗口中,验证“目标框架”字段中是否显示了“.NET Core 3.1”。
在此窗口中,可以启用 Docker 支持并添加身份验证支持。 “身份验证类型”的下拉菜单具有以下四个选项:
- 无:不进行身份验证。
- 个人帐户:这些身份验证存储在本地或基于 Azure 的数据库中。
- Microsoft 标识平台:此选项使用 Microsoft Entra ID 或 Microsoft 365 进行身份验证。
- Windows:适用于 Intranet 应用程序。
保持“启用 Docker”框处于未选中状态,并选择“无”作为身份验证类型。

选择创建。


此时,Visual Studio 将打开新项目。
在“开始”窗口中,选择“创建新项目”。
在“创建新项目”窗口中,从“语言”列表中选择“C#”。 接下来,从“平台”列表中选择“Windows”,然后从“项目类型”列表中选择“Web”。
应用语言、平台和项目类型筛选器之后,选择“ASP.NET Core Web 应用”模板,然后选择“下一步”。

注意
如果未看到“ASP.NET Core Web 应用”模板,则可以从“创建新项目”窗口安装该模板。
在模板列表底部的“未找到你要查找的内容?”消息中,选择“安装更多工具和功能”链接。
在 Visual Studio 安装程序中,选择“ASP.NET 和 Web 开发”工作负载。
在 Visual Studio 安装程序中,选择“修改”。 系统可能会提示你保存工作内容。 选择“继续”以安装该工作负载。
返回到“创建项目”过程中的步骤 2。
在“配置新项目”窗口中,在“项目名称”字段中输入“MyCoreApp”。 然后,选择“下一步” 。

在“其他信息”窗口中,验证“目标框架”字段中是否显示了“.NET 8.0”。
在此窗口中,可以启用 Docker 支持并添加身份验证支持。 “身份验证类型”的下拉菜单具有以下四个选项:
- 无:不进行身份验证。
- 个人帐户:这些身份验证存储在本地或基于 Azure 的数据库中。
- Microsoft 标识平台:此选项使用 Microsoft Entra ID 或 Microsoft 365 进行身份验证。
- Windows:适用于 Intranet 应用程序。
保持“启用 Docker”框处于未选中状态,并选择“无”作为身份验证类型。

选择创建。


此时,Visual Studio 将打开新项目。
关于解决方案
此解决方案遵循 Razor 页面 设计模式。 它与 Model-View-Controller (MVC) 设计模式的不同之处在于,它进行了优化,以包含 Razor Page 本身的模型和控制器代码。
浏览解决方案
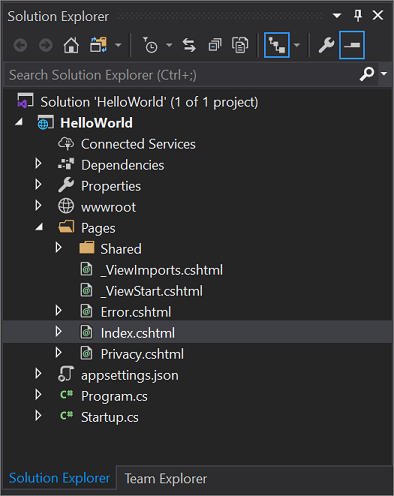
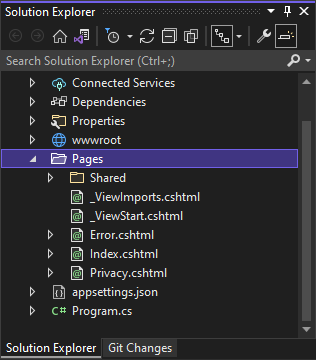
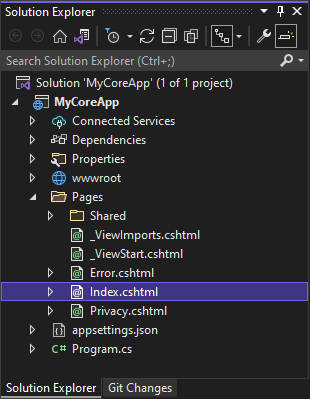
项目模板会创建一个解决方案,其中包含一个名为 MyCoreApp 的 ASP.NET Core 项目。 选择“解决方案资源管理器”选项卡以查看其内容。

展开“页面”文件夹 。
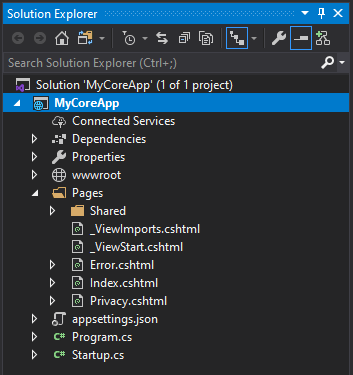
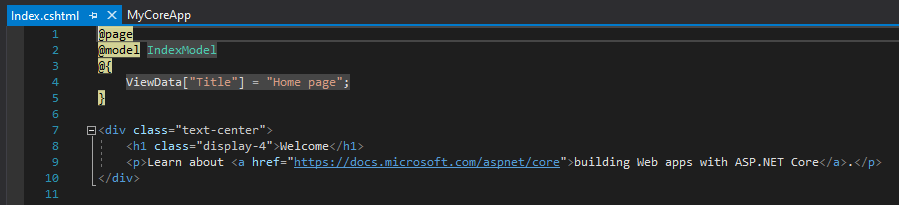
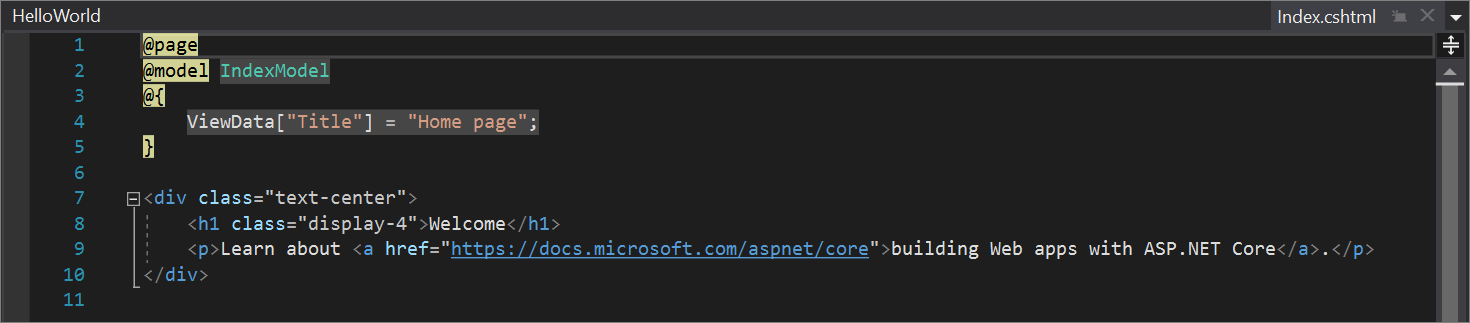
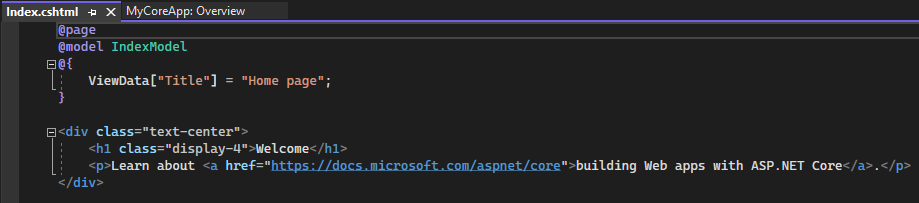
选择 Index.cshtml 文件,并在代码编辑器中查看。
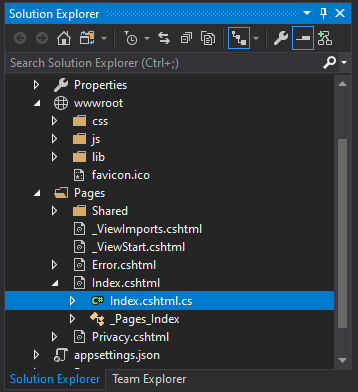
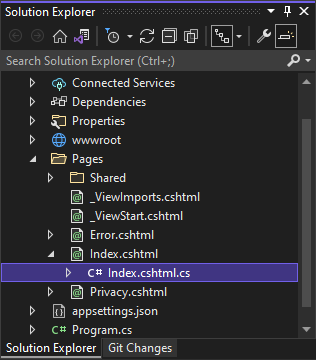
每个 .cshtml 文件都具有关联的代码文件。 若要在编辑器中打开代码文件,请在“解决方案资源管理器”中展开“Index.cshtml”节点,并选择“Index.cshtml.cs”文件。
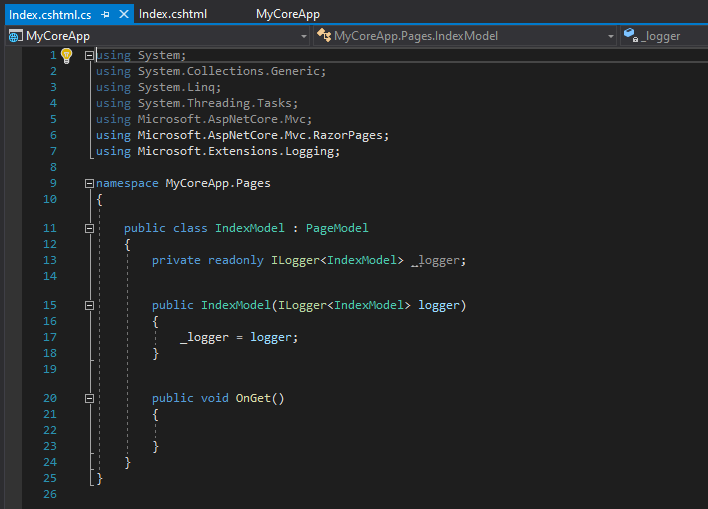
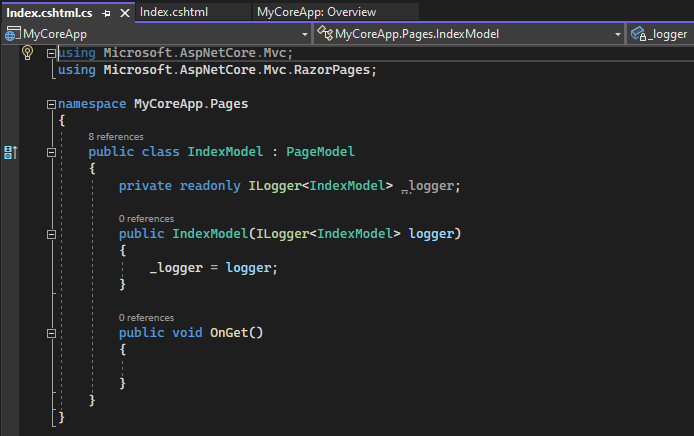
查看代码编辑器中的“Index.cshtml.cs”文件 。
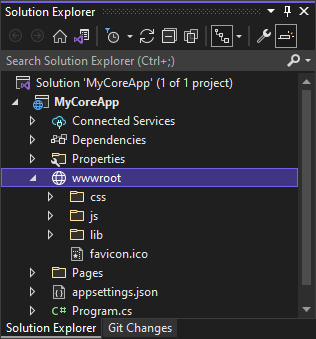
该项目包含一个 wwwroot 文件夹,它是网站的根。 展开文件夹以查看其内容。
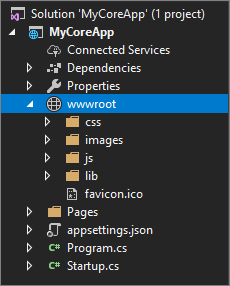
可将静态站点内容(例如 CSS、图像和 JavaScript 库)直接放置在所需的路径中。
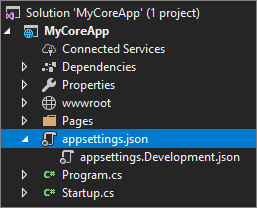
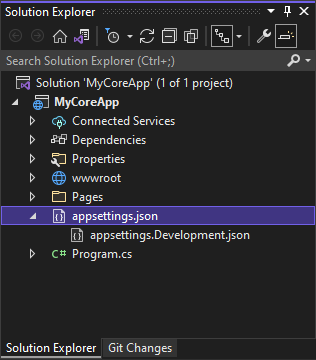
该项目还包含在运行时管理 Web 应用的配置文件。 默认应用程序配置存储在 appsettings.json 中。 但是,可使用 appsettings.Development.json 替代这些设置 。
展开 appsettings.json 文件以查看 appsettings.Development.json 文件 。
运行、调试和更改
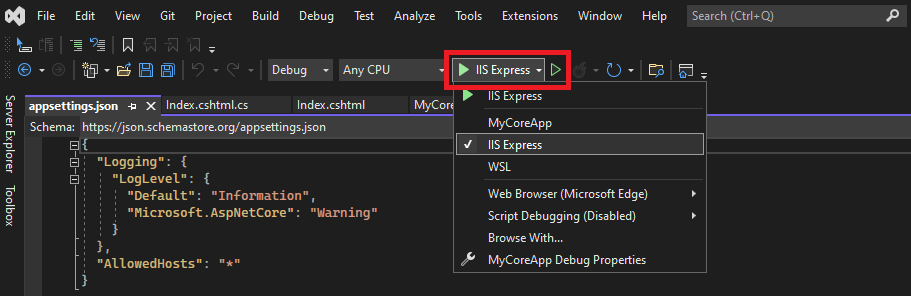
在工具栏中选择“IIS Express”按钮,在调试模式下生成并运行应用。 或者,按 F5 或从菜单栏转到“调试”>“启动调试”。

注意
如果收到错误消息“无法连接到 Web 服务器 'IIS Express'”,请关闭 Visual Studio,然后以管理员身份重新启动程序。 要执行此任务,可右键单击“开始”菜单中的 Visual Studio 图标,然后从上下文菜单中选择“以管理员身份运行”选项。
系统可能会向你发送一条消息,询问你是否接受 IIS SSL Express 证书。 要在 Web 浏览器中查看代码,请选择“是”,如果收到后续安全警告消息,也请选择“是”。
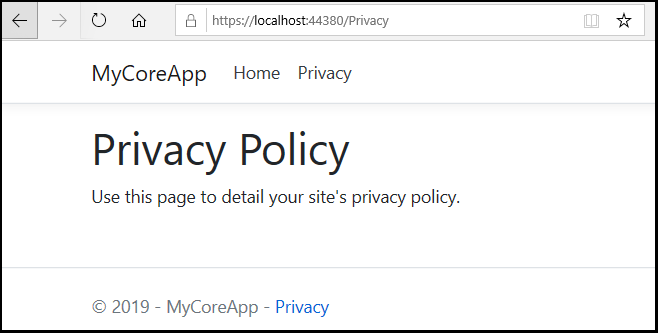
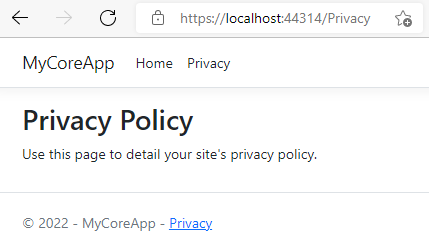
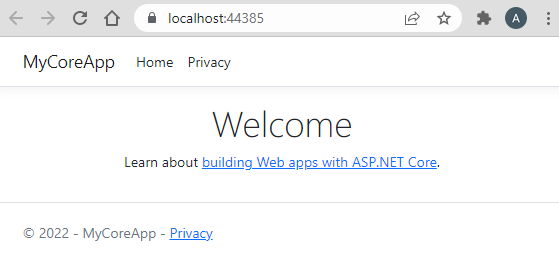
Visual Studio 启动浏览器窗口。 然后,应在菜单栏中看到“主页”和“隐私”页面。
从菜单栏中选择“隐私”。 浏览器中的“隐私”页呈现在 Privacy.cshtml 文件中设置的文本。
返回到 Visual Studio,然后按 Shift+F5 停止调试。 此操作会关闭浏览器窗口中的项目。
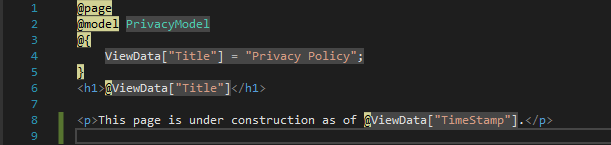
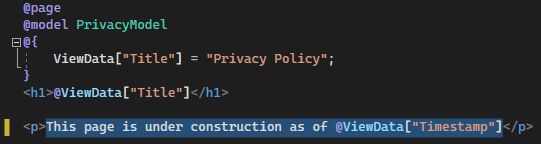
在 Visual Studio 中,打开要编辑的“Privacy.cshtml” 。 接下来,删除“使用此页面详细说明网站的隐私策略”语句,并将其替换为“此页面自 @ViewData["TimeStamp"] 起构建”。
现在,让我们对代码进行更改。 选择“Privacy.cshtml.cs”。 接下来,使用以下快捷方式清理文件顶部的
using指令:鼠标悬停或选择灰显的
using指令。 快速操作灯泡将出现在插入点下方或左边距中。 选择此灯泡,然后选择“删除不必要的 using”。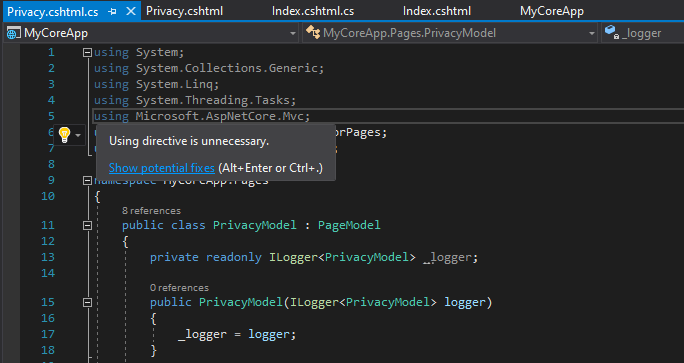
现在,选择“预览更改”来查看所更改的内容。

选择“应用”。 Visual Studio 从文件中删除不必要的
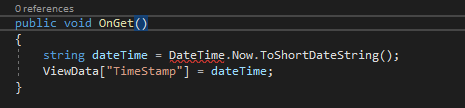
using指令。接下来,在
OnGet()方法中,将主体更改为以下代码:public void OnGet() { string dateTime = DateTime.Now.ToShortDateString(); ViewData["TimeStamp"] = dateTime; }请注意,波浪下划线显示在“日期/时间”下。 显示波浪下划线是因为此类型不在范围内。
打开“错误列表”工具栏,查看此处列出的相同错误 。 如果没有看到“错误列表”工具栏,请转到顶部菜单栏中的“视图”>“错误列表”。

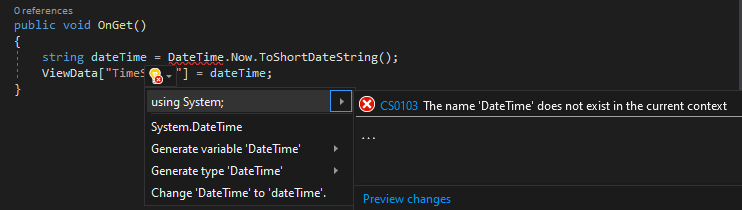
让我们来修复此错误。 在代码编辑器中,将光标放在包含错误的行上,然后选择左边距中的“快速操作”灯泡。 然后,从下拉菜单中,选择“using System;”将此指令添加到文件顶部并解析错误。
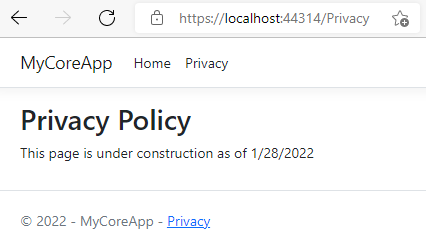
按 F5,即可在 Web 浏览器中打开项目 。
在网站顶部,选择“隐私”查看你的更改。

关闭 Web 浏览器,按 Shift+F5 停止调试。
更改你的主页
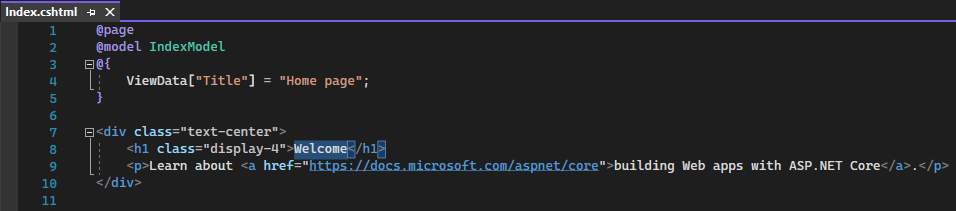
在“解决方案资源管理器”中,展开“Pages”文件夹,然后选择“Index.cshtml”。
“Index.cshtml”文件对应于在 Web 浏览器中运行的 Web 应用中的“主页”。

在代码编辑器,可以看到主页上显示的文本的 HTML 代码。
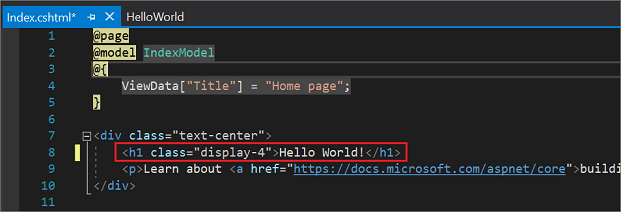
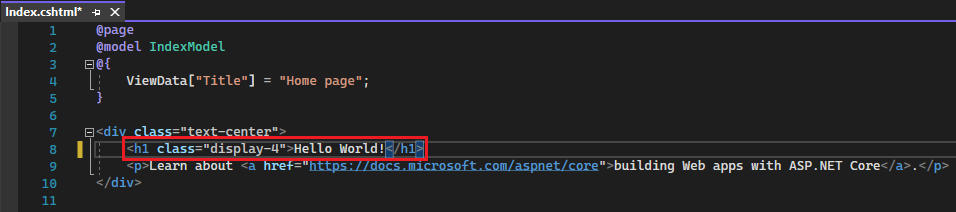
将“欢迎”文本替换为“Hello World!”
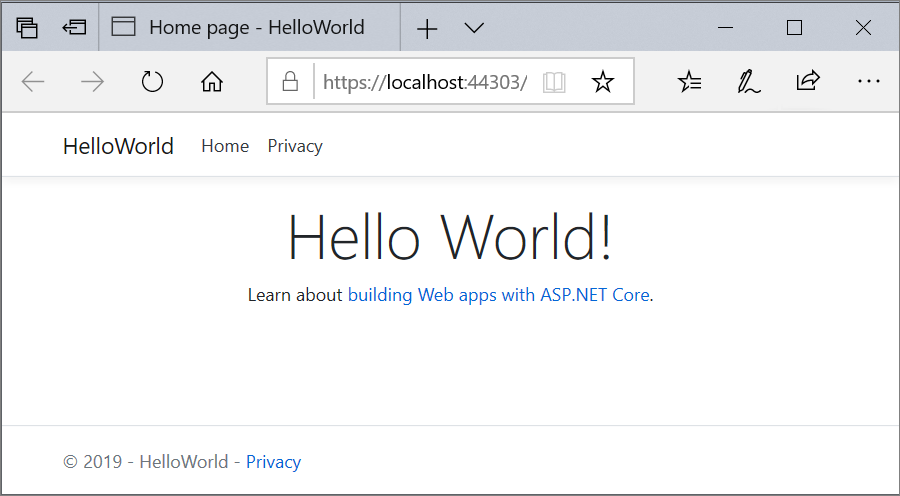
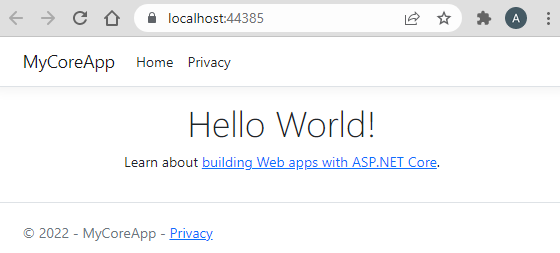
选择“IIS Express”或按 Ctrl+F5 运行此应用,并在 Web 浏览器中打开它 。

在 Web 浏览器中,可以在主页上看到新更改。
关闭 Web 浏览器,按 Shift+F5 停止调试,并保存项目。 现在可以关闭 Visual Studio。
浏览解决方案
项目模板会创建一个解决方案,其中包含一个名为 MyCoreApp 的 ASP.NET Core 项目。 选择“解决方案资源管理器”选项卡以查看其内容。
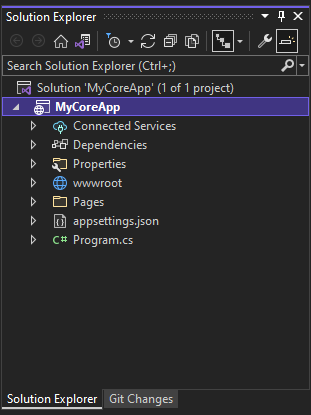
展开“页面”文件夹 。
选择“Index.cshtml”文件,并在代码编辑器中查看。
每个 .cshtml 文件都具有关联的代码文件。 若要在编辑器中打开代码文件,请在“解决方案资源管理器”中展开“Index.cshtml”节点,并选择“Index.cshtml.cs”文件。
查看代码编辑器中的“Index.cshtml.cs”文件 。
该项目包含一个 wwwroot 文件夹,它是网站的根。 展开文件夹以查看其内容。
可将静态站点内容(例如 CSS、图像和 JavaScript 库)直接放置在所需的路径中。
该项目还包含在运行时管理 Web 应用的配置文件。 默认应用程序配置存储在 appsettings.json 中。 但是,可使用 appsettings.Development.json 替代这些设置 。 展开 appsettings.json 文件以查看 appsettings.Development.json 文件 。
运行、调试和更改
在工具栏中选择“IIS Express”按钮,在调试模式下生成并运行应用。 或者,按 F5 或从菜单栏转到“调试”>“启动调试”。
注意
如果收到错误消息“无法连接到 Web 服务器 'IIS Express'”,请关闭 Visual Studio,然后以管理员身份重新启动程序。 要执行此任务,可右键单击“开始”菜单中的 Visual Studio 图标,然后从上下文菜单中选择“以管理员身份运行”选项。
系统可能会向你发送一条消息,询问你是否接受 IIS SSL Express 证书。 要在 Web 浏览器中查看代码,请选择“是”,如果收到后续安全警告消息,也请选择“是”。
Visual Studio 启动浏览器窗口。 然后,应在菜单栏中看到“主页”和“隐私”页面。
从菜单栏中选择“隐私”。 浏览器中的“隐私”页呈现在 Privacy.cshtml 文件中设置的文本。
返回到 Visual Studio,然后按 Shift+F5 停止调试。 此操作会关闭浏览器窗口中的项目。
在 Visual Studio 中,打开要编辑的“Privacy.cshtml” 。 接下来,删除“使用此页面详细说明网站的隐私策略”语句,并将其替换为“此页面自 @ViewData["TimeStamp"] 起构建”。
现在,让我们对代码进行更改。 选择“Privacy.cshtml.cs”。 然后,选择以下快捷方式清理文件顶部的
using指令:鼠标悬停或选择灰显的
using指令。 快速操作灯泡将出现在插入点下方或左边距中。 选择灯泡,然后选择“移除不必要的使用”旁边的“展开”箭头。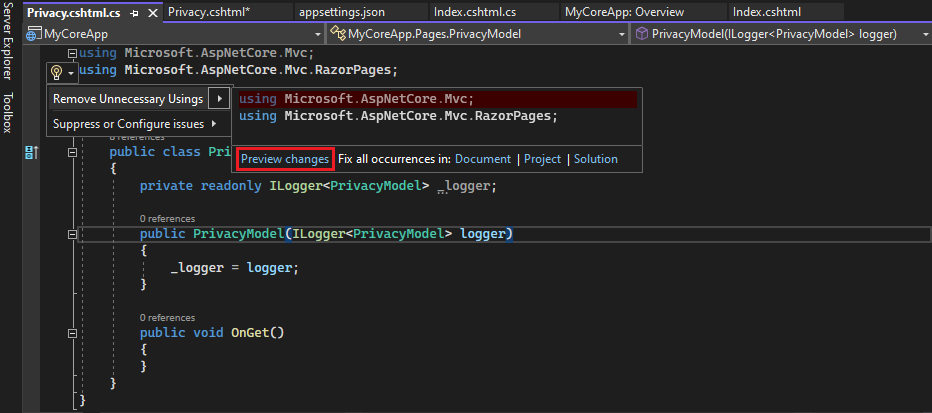
现在,选择“预览更改”来查看所更改的内容。

选择“应用”。 Visual Studio 从文件中删除不必要的
using指令。接下来,使用 DateTime.ToString 方法为针对区域性或区域设置格式的当前日期创建字符串。
- 该方法的第一个参数指定如何显示日期。 此示例使用格式说明符 (
d) 指示短日期格式。 - 第二个参数是 CultureInfo 对象,该对象指定日期的区域性或区域。 第二个参数确定日期中任意单词的语言以及所使用的分隔符类型等。
将
OnGet()方法的主体更改为以下代码:public void OnGet() { string dateTime = DateTime.Now.ToString("d", new CultureInfo("en-US")); ViewData["TimeStamp"] = dateTime; }- 该方法的第一个参数指定如何显示日期。 此示例使用格式说明符 (
请注意,以下
using指令会自动添加到文件顶部:using System.Globalization;System.Globalization包含 CultureInfo 类。按 F5,即可在 Web 浏览器中打开项目 。
在网站顶部,选择“隐私”查看你的更改。
关闭 Web 浏览器,按 Shift+F5 停止调试。
更改你的主页
在“解决方案资源管理器”中,展开“Pages”文件夹,然后选择“Index.cshtml”。
“Index.cshtml”文件对应于在 Web 浏览器中运行的 Web 应用中的“主页”。
在代码编辑器,可以看到主页上显示的文本的 HTML 代码。
将“欢迎”文本替换为“Hello World!”
选择“IIS Express”或按 Ctrl+F5 运行此应用,并在 Web 浏览器中打开它 。

在 Web 浏览器中,可以在主页上看到新更改。
关闭 Web 浏览器,按 Shift+F5 停止调试,并保存项目。 现在可以关闭 Visual Studio。
后续步骤
恭喜你完成本教程! 希望你在学习 C#、ASP.NET Core 和 Visual Studio IDE 时乐享其中。 要详细了解如何使用 C# 和 ASP.NET 创建 Web 应用或网站,请继续学习以下教程:
或者,了解如何使用 Docker 容器化 Web 应用:
另请参阅
反馈
即将发布:在整个 2024 年,我们将逐步淘汰作为内容反馈机制的“GitHub 问题”,并将其取代为新的反馈系统。 有关详细信息,请参阅:https://aka.ms/ContentUserFeedback。
提交和查看相关反馈