教程:打开存储库中的项目
在本教程中,你将使用 Visual Studio 首次连接到存储库,进行克隆,然后打开其中的一个项目。
如果尚未安装 Visual Studio,请转到 Visual Studio 下载页免费安装。
打开 GitHub 存储库中的项目
可以使用 Visual Studio 轻松打开存储库中的项目。 可以在启动 Visual Studio 时执行此操作,也可以直接从 Visual Studio IDE 中执行此操作。
操作方法如下。
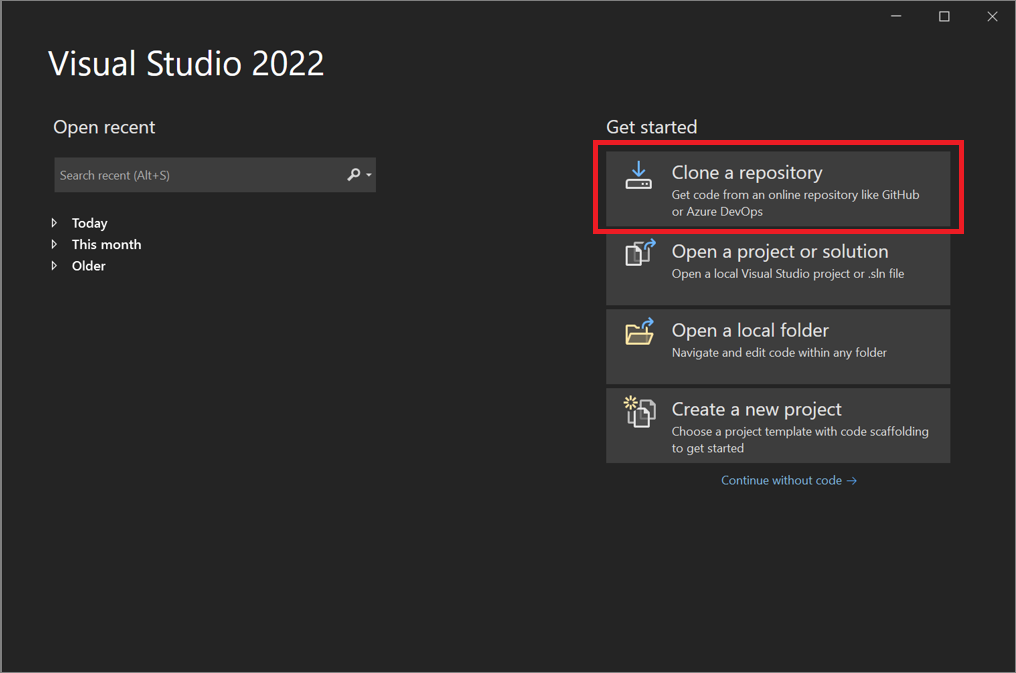
使用“开始”窗口
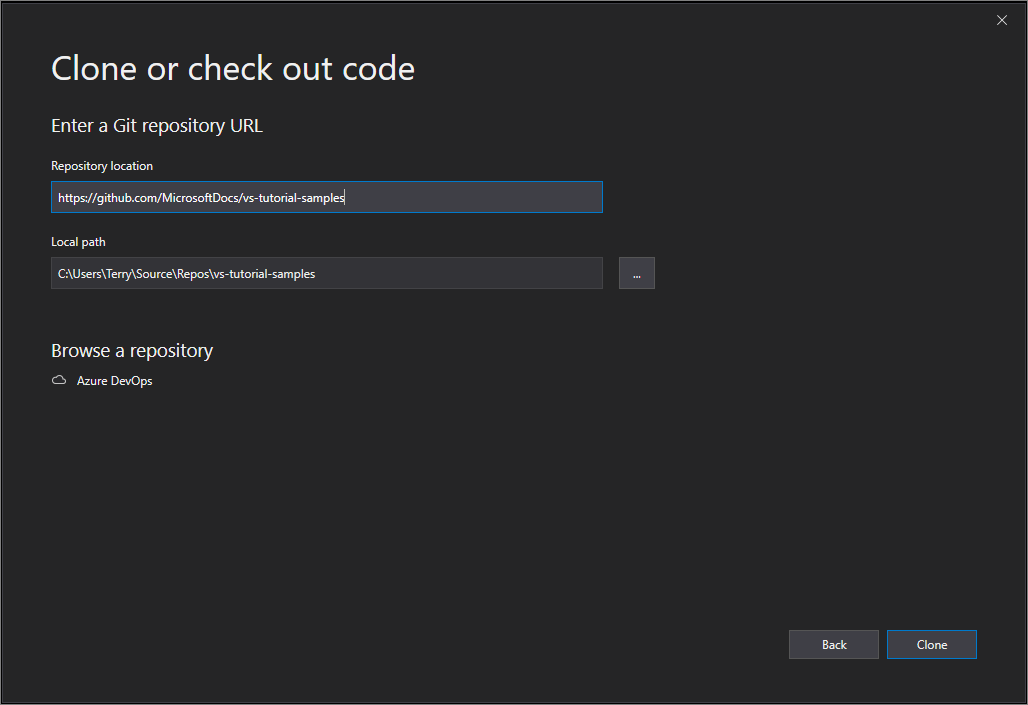
打开 Visual Studio。
在起始窗口中,选择“克隆存储库”。
输入或键入存储库位置,然后选择“克隆”按钮。

如果尚未登录,系统可能会提示你登录到 Visual Studio 或 GitHub 帐户。
提示
有关登录 Visual Studio 的详细信息,请参阅登录 Visual Studio 页。 有关如何使用 GitHub 帐户进行登录的具体信息,请参阅在 Visual Studio 中使用 GitHub 帐户页。 如果你收到信任通知,想要了解有关它的详细信息,请参阅配置文件和文件夹的信任设置页。
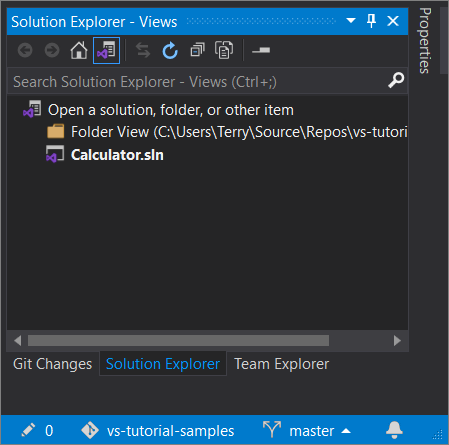
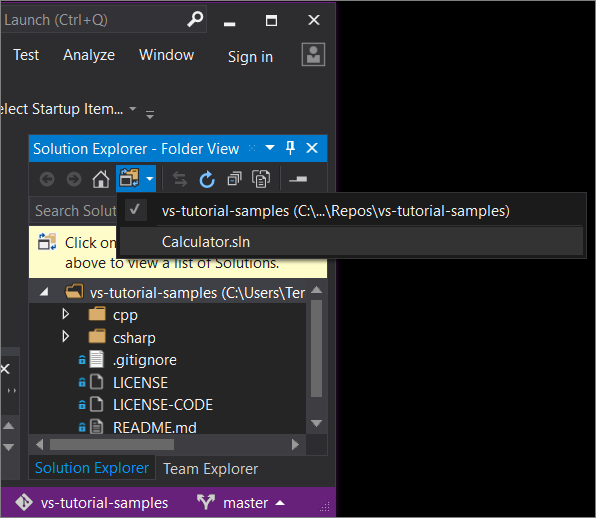
解决方案资源管理器中的的视图文件
接下来,Visual Studio 会通过使用解决方案资源管理器中的“文件夹视图”,从存储库加载解决方案。

可以在“解决方案视图”中查看某个解决方案,方法是双击其 .sln 文件。
也可以选择“切换视图”按钮,然后选择“Program.cs”来查看解决方案的代码。

提示
可以通过 Git 菜单将默认“文件夹视图”更改为“解决方案视图”。 选择“设置”>“源代码管理”>“Git 全局设置”>“打开 Git 存储库时自动加载解决方案”,以执行该操作。
在本地打开之前克隆的 GitHub 存储库中的项目
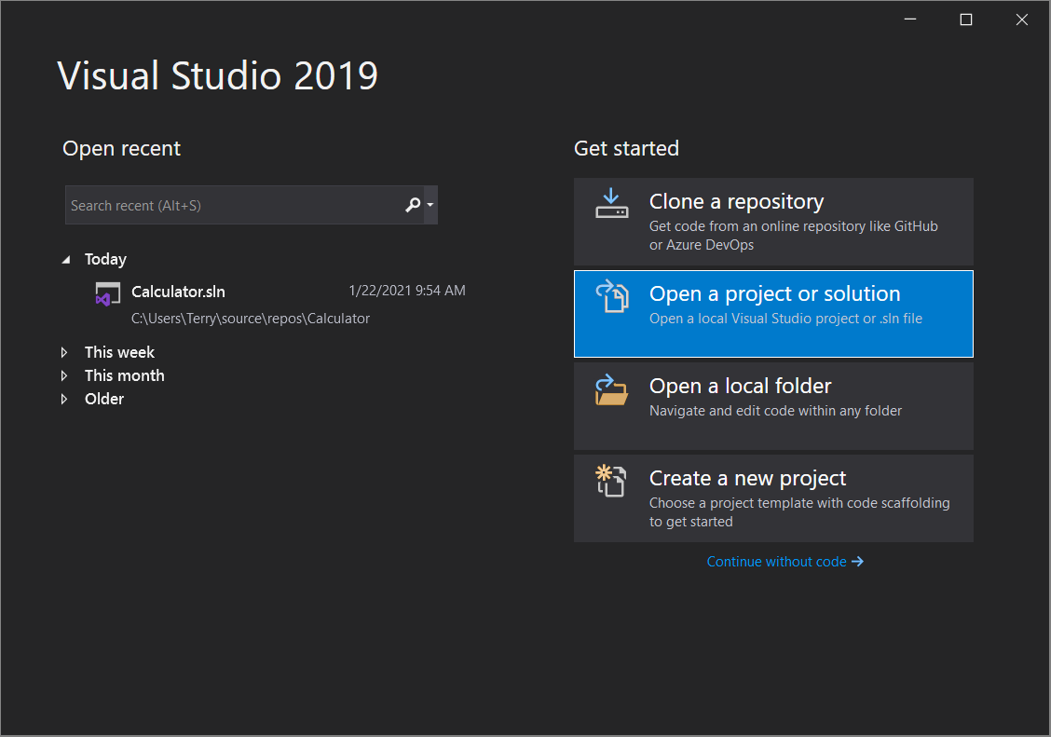
打开 Visual Studio。
在起始窗口中,选择“打开项目或解决方案”。
Visual Studio 将打开文件资源管理器的一个实例,你可以在其中浏览到你的解决方案或项目,然后选择它以将其打开。

提示
如果最近打开过该项目或解决方案,可从“打开最近使用的文件”部分中将其选中,快速地再次将其打开。
开始编码!
使用 IDE
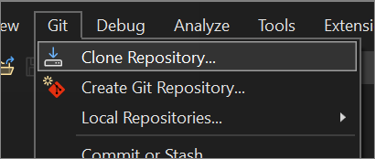
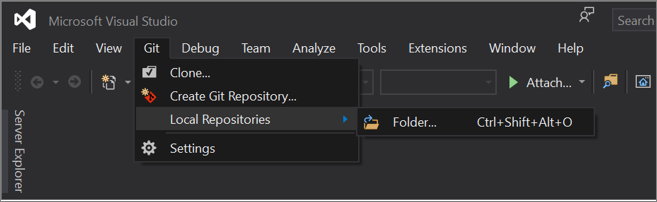
还可以在 Visual Studio IDE 中使用“Git”菜单或“选择存储库”控件,与存储库的文件夹和文件进行交互。
操作方法如下。
克隆存储库并打开项目
在 Visual Studio IDE 中选择“Git”菜单,然后选择“克隆存储库”。
按照提示连接到包含要查找的文件的 Git 存储库。
打开本地文件夹和文件
在 Visual Studio IDE 中依次选择“Git”菜单、“本地存储库”、“打开本地存储库” 。

按照提示连接到包含要查找的文件的 Git 存储库。
浏览到 Azure DevOps 存储库
下面介绍如何使用 Visual Studio 浏览到并克隆 Azure DevOps 存储库。
打开 Visual Studio。
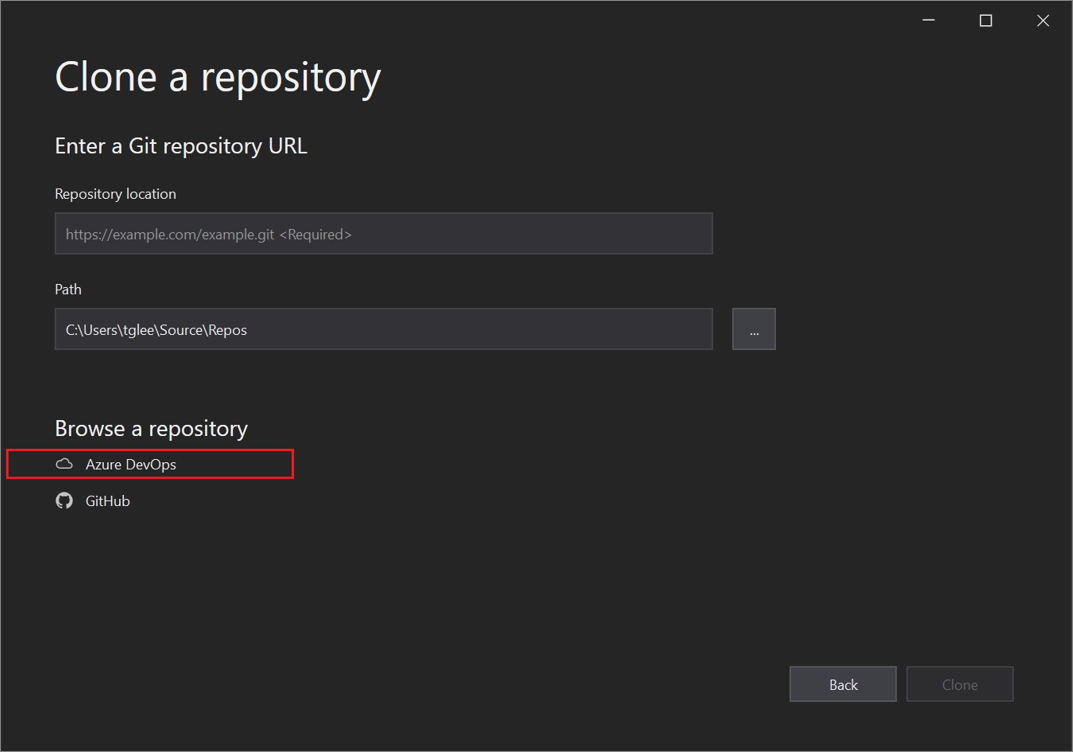
在起始窗口中,选择“克隆存储库”。
在“浏览存储库”部分中,选择“Azure DevOps” 。
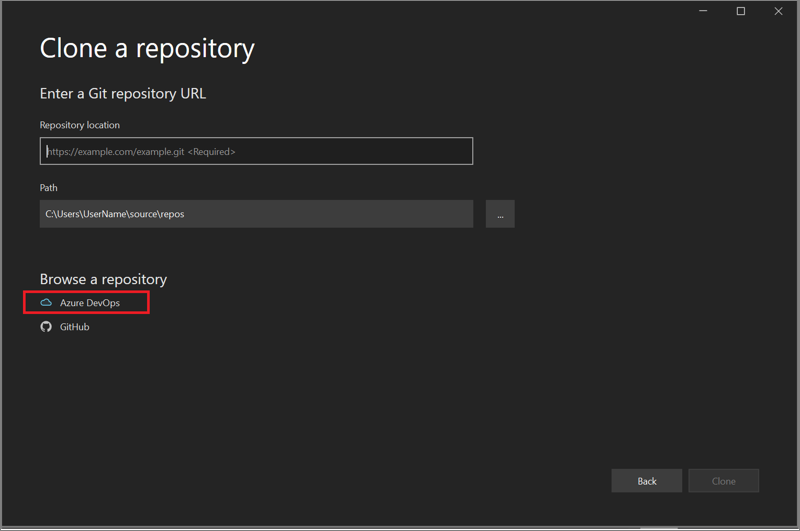
按照提示克隆要查找的文件所在的 Azure DevOps 存储库,然后打开你的项目。
使用 Visual Studio 2019 打开 GitHub 存储库中的项目
使用 Visual Studio 打开 GitHub 存储库中的项目的方式取决于你的版本。 具体来说,如果你已安装 Visual Studio 2019 版本 16.8 或更高版本,则可使用 Visual Studio 中提供的一个更全面集成的全新 Git 体验。
但无论安装的是哪个版本,你始终可以使用 Visual Studio 打开 GitHub 存储库中的项目。
Visual Studio 2019 版本 16.8 及更高版本
下面介绍了如何使用 Visual Studio 2019 版本 16.8 或更高版本中的 Git。
克隆一个 GitHub 存储库,然后打开一个项目
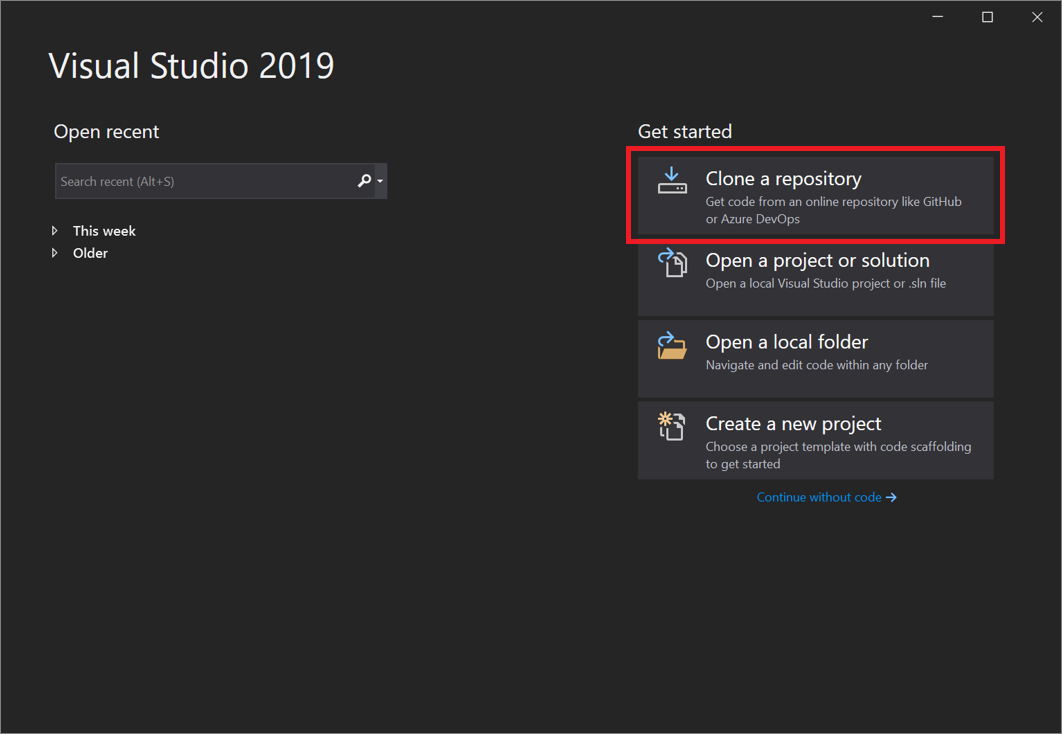
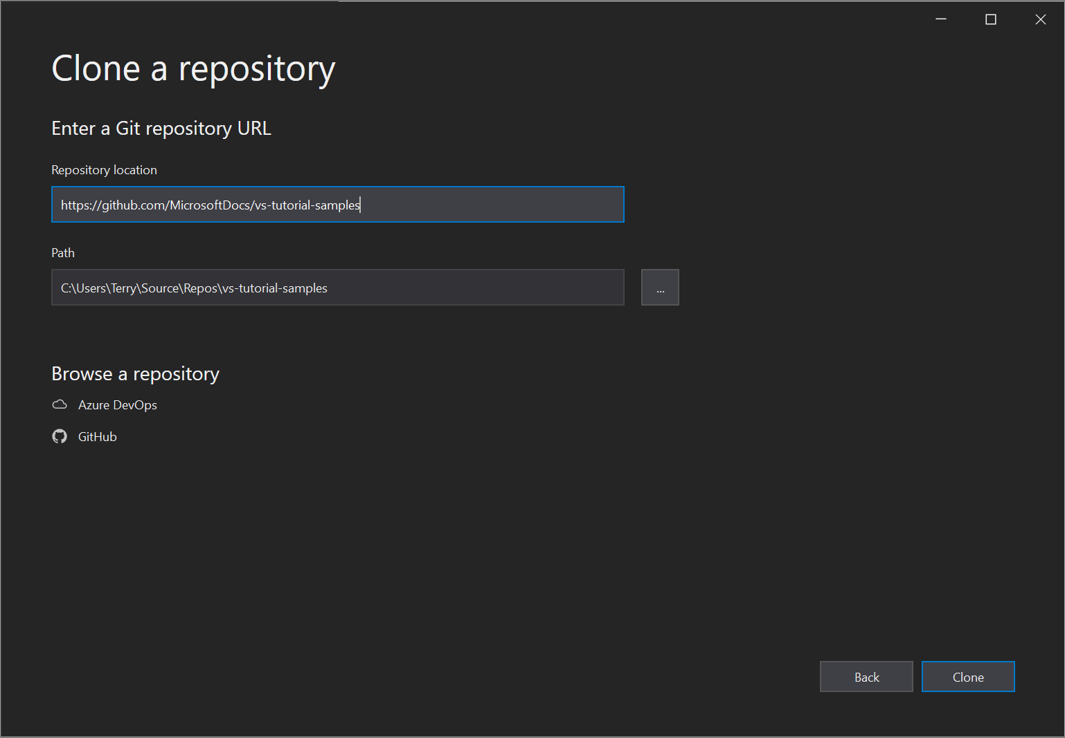
打开 Visual Studio 2019。
在起始窗口中,选择“克隆存储库”。
输入或键入存储库位置,然后选择“克隆”。
系统可能会要求你在“Git 用户信息”对话框中提供用户登录信息。 可添加你的信息或编辑所提供的默认信息。
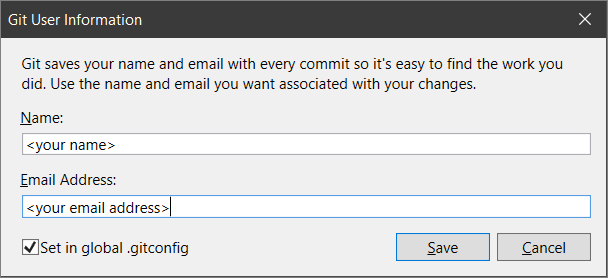
选择“保存”,将信息添加到全局 .gitconfig 文件。 (或者,如果要稍后保存信息,可以选择“取消”。)
提示
有关登录 Visual Studio 的详细信息,请参阅登录 Visual Studio 页面。 有关如何使用 GitHub 帐户登录的特定信息,请参阅在 Visual Studio 中使用 GitHub 帐户页面。
接下来,Visual Studio 自动从存储库中加载并打开解决方案。
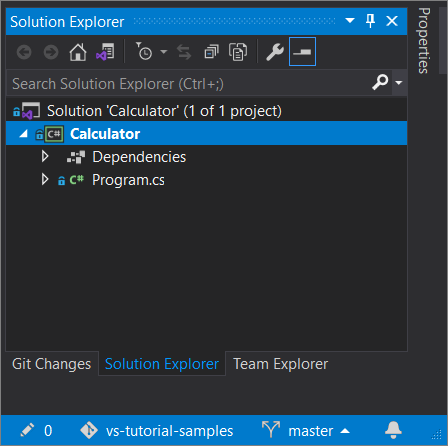
如果存储库包含多个解决方案,解决方案资源管理器将显示它们。 对于解决方案的列表视图,请选择解决方案资源管理器中的“切换视图”按钮。
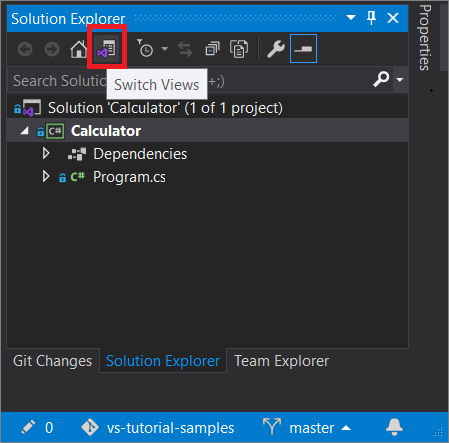
然后,解决方案资源管理器为你提供了选择 - 在“文件夹视图”中打开根文件夹,还是选择一个要打开的解决方案文件。
若要切换视图,请再次选择“切换视图”按钮。
提示
你还可以使用 Visual Studio IDE 中的“Git”菜单来克隆存储库并打开项目。

在本地打开之前克隆的 GitHub 存储库中的项目
打开 Visual Studio 2019 版本 16.8 或更高版本。
在起始窗口中,选择“打开项目或解决方案”。
Visual Studio 将打开文件资源管理器的一个实例,你可以在其中浏览到你的解决方案或项目,然后选择它以将其打开。
如果最近打开过该项目或解决方案,可从“打开最近使用的文件”部分中将其选中,快速地再次将其打开。
提示
你还可以使用 Visual Studio IDE 中的“Git”菜单,打开之前已克隆的存储库中的本地文件夹和文件。
开始编码!
Visual Studio 2019 版本 16.7 及更早版本
下面介绍如何使用 Visual Studio 2019 版本 16.7 或更低版本中的 Git。
克隆一个 GitHub 存储库,然后打开一个项目
打开 Visual Studio 2019 版本 16.7 或更低版本。
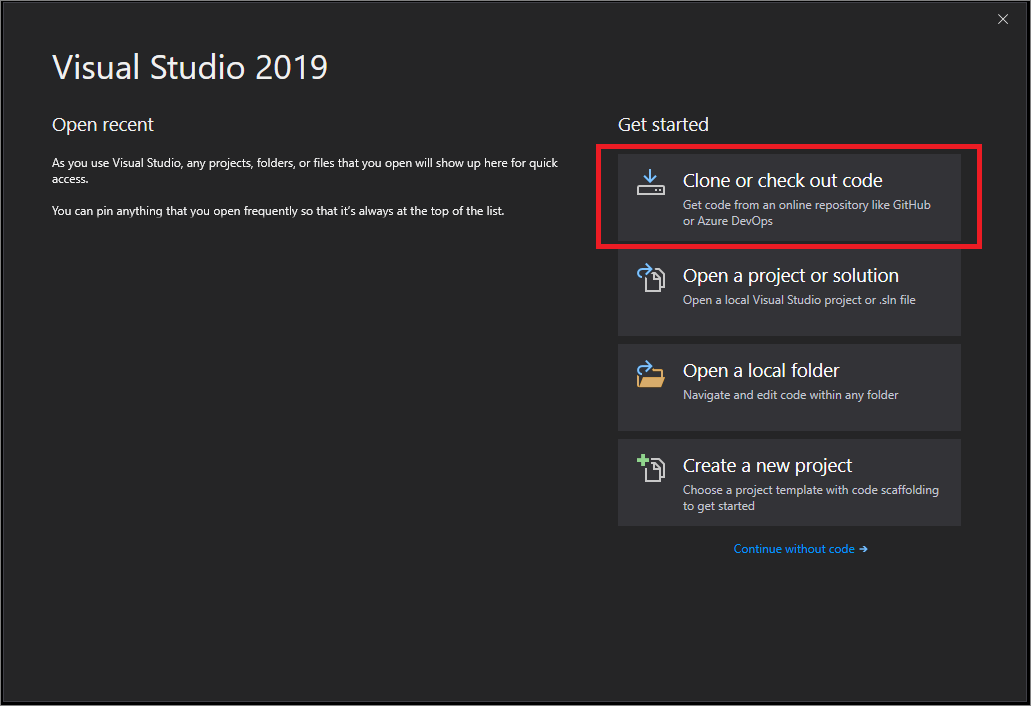
在起始窗口上,选择“克隆或签出代码”。
输入或键入存储库位置,然后选择“克隆”。
Visual Studio 从存储库打开项目。
如果有可用的解决方案文件,它会显示在“解决方案和文件夹”弹出菜单中。 选择它后,Visual Studio 将打开你的解决方案。
如果存储库中没有解决方案文件(特别是 .sln 文件),则弹出菜单会显示“未找到解决方案”。但是,可以双击文件夹菜单中的任何文件以在 Visual Studio 代码编辑器中打开它。
开始编码!
使用 Visual Studio 2019 浏览到 Azure DevOps 存储库
使用 Visual Studio 2019 浏览到并克隆 Azure DevOps 存储库时看到的内容取决于你的版本。 具体来说,如果你已安装 16.8 版本或更高版本,我们已更改了 UI,以适应 Visual Studio 中更全面集成的全新 Git 体验。
但无论安装的是哪个版本,你始终可以使用 Visual Studio 浏览到并克隆 Azure DevOps 存储库。
Visual Studio 2019 版本 16.8 及更高版本
打开 Visual Studio 2019 版本 16.8 或更高版本。
在起始窗口中,选择“克隆存储库”。
在“浏览存储库”部分中,选择“Azure DevOps” 。
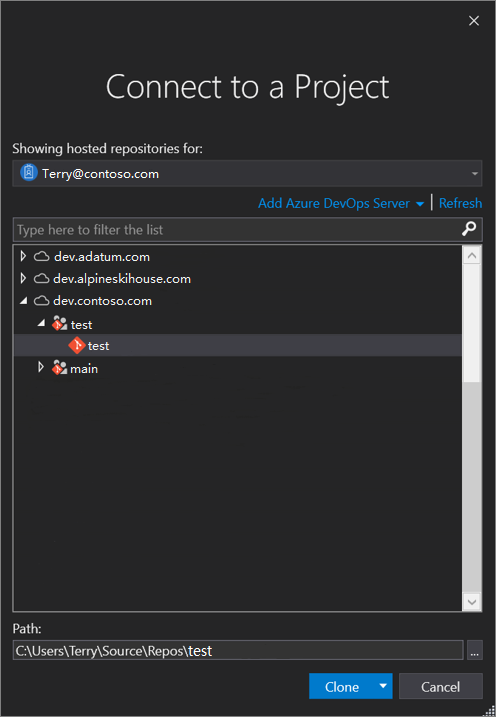
如果看到登录窗口,请登录帐户。
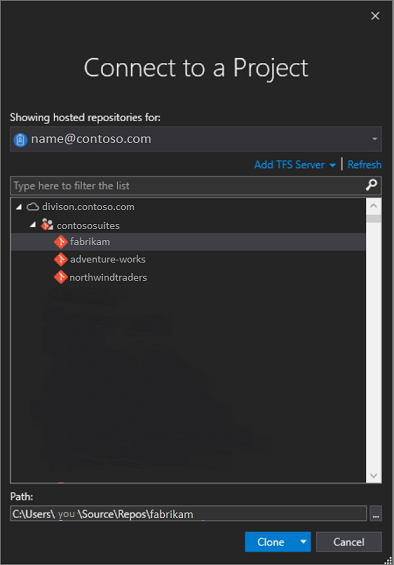
在“连接到项目”对话框中,选择要连接的存储库,然后选择“克隆” 。
提示
如果未看到要连接的存储库的预填充列表,选择“添加 Azure DevOps Server”,输入一个服务器 URL。 (或者,你可能会看到“找不到任何服务器”提示,其中包含用于添加现有 Azure DevOps Server 或创建 Azure DevOps 帐户的链接。)
接下来,Visual Studio 将打开解决方案资源管理器,其中显示了这些文件夹和文件。
选择“团队资源管理器”选项卡以查看 Azure DevOps 操作。
Visual Studio 2019 版本 16.7 及更早版本
打开 Visual Studio 2019 版本 16.7 或更低版本。
在起始窗口上,选择“克隆或签出代码”。
在“浏览存储库”部分中,选择“Azure DevOps” 。
如果看到登录窗口,请登录帐户。
在“连接到项目”对话框中,选择要连接的存储库,然后选择“克隆” 。
注意
列表框中显示的内容取决于你有权访问的 Azure DevOps 存储库。
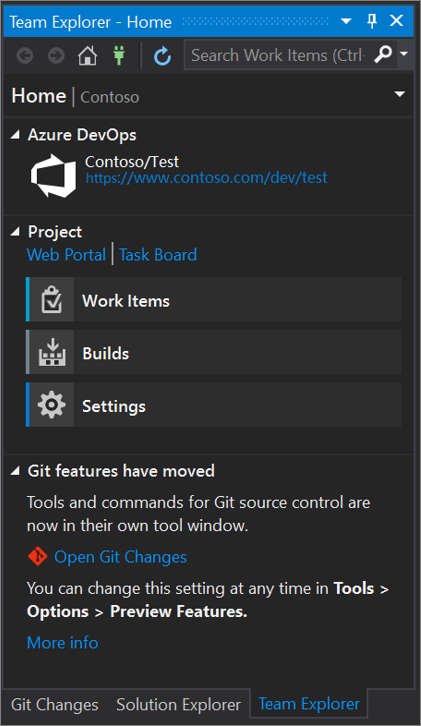
克隆完成后,Visual Studio 会打开“团队资源管理器”并显示通知。
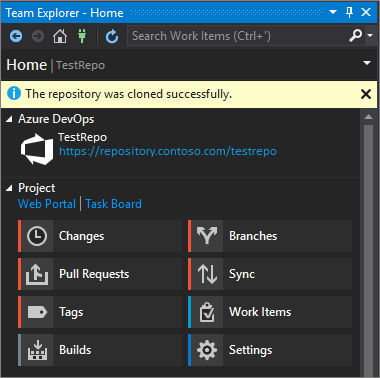
若要查看文件夹和文件,请选择“显示文件夹视图”链接。
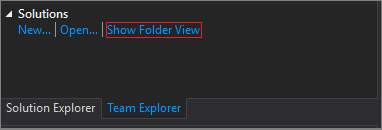
Visual Studio 随即打开“解决方案资源管理器”。
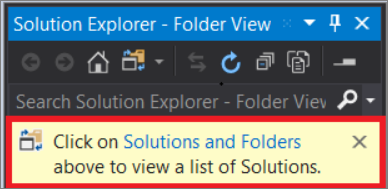
选择“解决方案和文件夹”链接,搜索要打开的解决方案文件(特别是 .sln 文件)。
如果存储库中没有解决方案文件,则会显示消息“找不到解决方案”。 但是,可以双击文件夹菜单中的任意文件,以便在 Visual Studio 代码编辑器中将其打开。
后续步骤
如果需要,可以深入了解以下特定于语言的任何教程:
- Visual Studio 教程 | C#
- Visual Studio 教程 | Visual Basic
- Visual Studio 教程 | C++
- Visual Studio 教程 | Python
- Visual Studio 教程 | JavaScript、TypeScript 和 Node.js
另请参阅
反馈
即将发布:在整个 2024 年,我们将逐步淘汰作为内容反馈机制的“GitHub 问题”,并将其取代为新的反馈系统。 有关详细信息,请参阅:https://aka.ms/ContentUserFeedback。
提交和查看相关反馈