Create a new project in Visual Studio
Applies to: ![]() Visual Studio
Visual Studio ![]() Visual Studio for Mac
Visual Studio for Mac
Note
This article applies to Visual Studio 2017. If you're looking for the latest Visual Studio documentation, see Visual Studio documentation. We recommend upgrading to the latest version of Visual Studio. Download it here
In this article, we'll show you how to quickly create a new project in Visual Studio from a template.
Open the New Project page in Visual Studio 2017
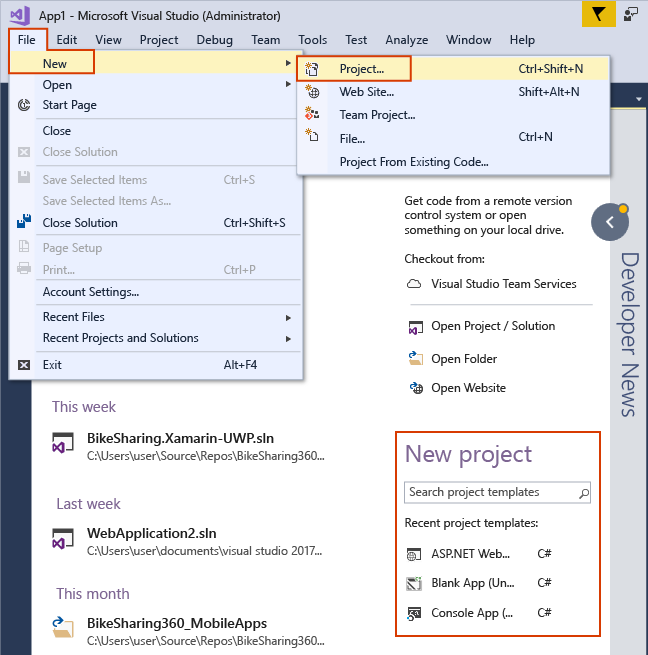
There are multiple ways to create a new project in Visual Studio 2017. On the Start page, you can type in the name of a project template in the Search project templates box or select the Create new project link to open the New Project dialog box. Aside from the Start page, you can also select File > New > Project on the menu bar or select the New Project button on the toolbar.
Select a template type in Visual Studio 2017
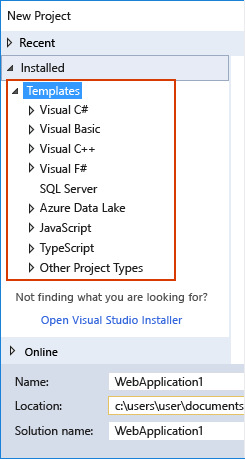
In the New Project dialog box, available project templates appear in a list under the Templates category. Templates are organized by programming language and project type, such as Visual C#, JavaScript, and Azure Data Lake.
Note
The list of available languages and project templates that appears depends on the version of Visual Studio you are running and the workloads that are installed. To learn about how to install additional workloads, see Modify Visual Studio by adding or removing workloads and components.
Show the list of templates for the programming language you want to use by selecting the triangle next to the language name and then choosing a project category (such as Windows Desktop).
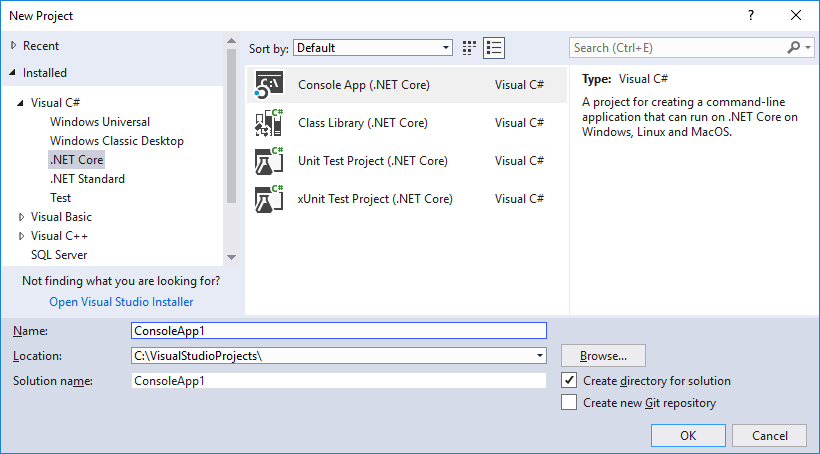
The following image shows the project templates available for Visual C# .NET Core projects:
Configure your project in Visual Studio 2017
Enter a name for the new project in the Name box. You can save the project in the default location on your computer or select the Browse button to find another location. You can also select a solution name or add the new project to a Git repository (by selecting Add to Source Control).
Select OK to create the solution and project.
Add additional projects to a solution
If you want to add an additional project to a solution, right-click the solution node in Solution Explorer and then select Add > New Project.
Tip
For an example of a project and solution created from scratch, complete with step-by-step instructions and sample code, see Introduction to projects and solutions.