Hello,iOS 多屏显示 – 快速入门
警告
iOS Designer 在 Visual Studio 2019 版本 16.8 和 Visual Studio 2019 for Mac 版本 8.8 中已经弃用,并且已从 Visual Studio 2019 版本 16.9 和 Visual Studio for Mac 版本 8.9 中移除。 要生成 iOS 用户界面,建议直接在运行 Xcode 的 Interface Builder 的 Mac 上操作。 有关详细信息,请参阅用 Xcode 设计用户界面。
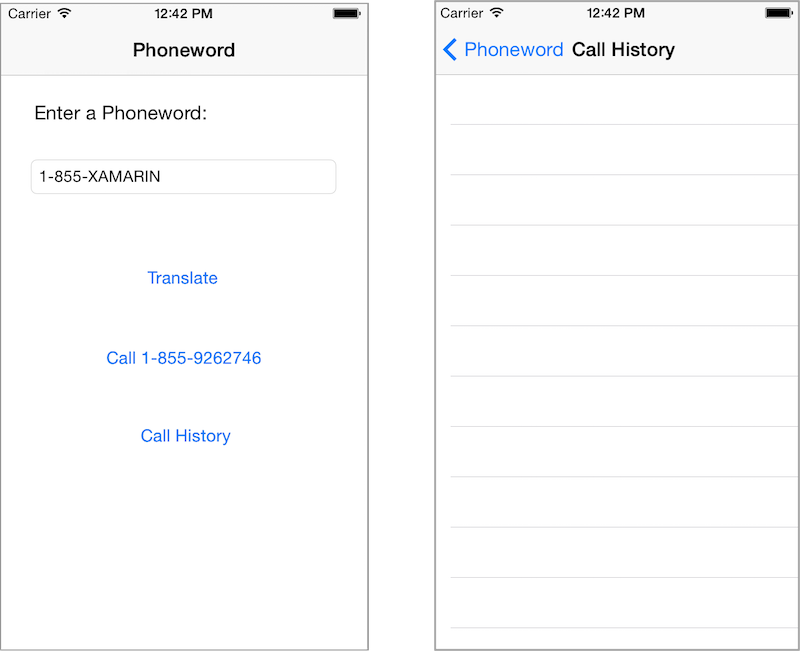
本部分演练将向 Phoneword 应用程序添加第二个屏幕,将显示使用该应用进行呼叫的电话号码历史记录。 最终的应用程序将拥有第二个屏幕,可显示呼叫历史记录,如下面的屏幕截图所示:

随附的深度分析将回顾已生成的程序,并讨论体系结构、导航和此过程中遇到的其他新的 iOS 概念。
要求
本指南将从《了解 iOS》文档中断的位置继续,并要求完成了解 iOS 快速入门。 可从 iOS 示例入门下载 Phoneword 应用的已完成版本。
macOS 上的演练
本演练将向 Phoneword 应用程序添加一个“呼叫历史记录”屏幕。
在 Visual Studio for Mac 中打开 Phoneword 应用程序。 如有必要,可从此处下载 了解 iOS 演练指南中涉及的完整 Phoneword 应用程序。
从 Solution Pad 打开 Main.storyboard 文件:

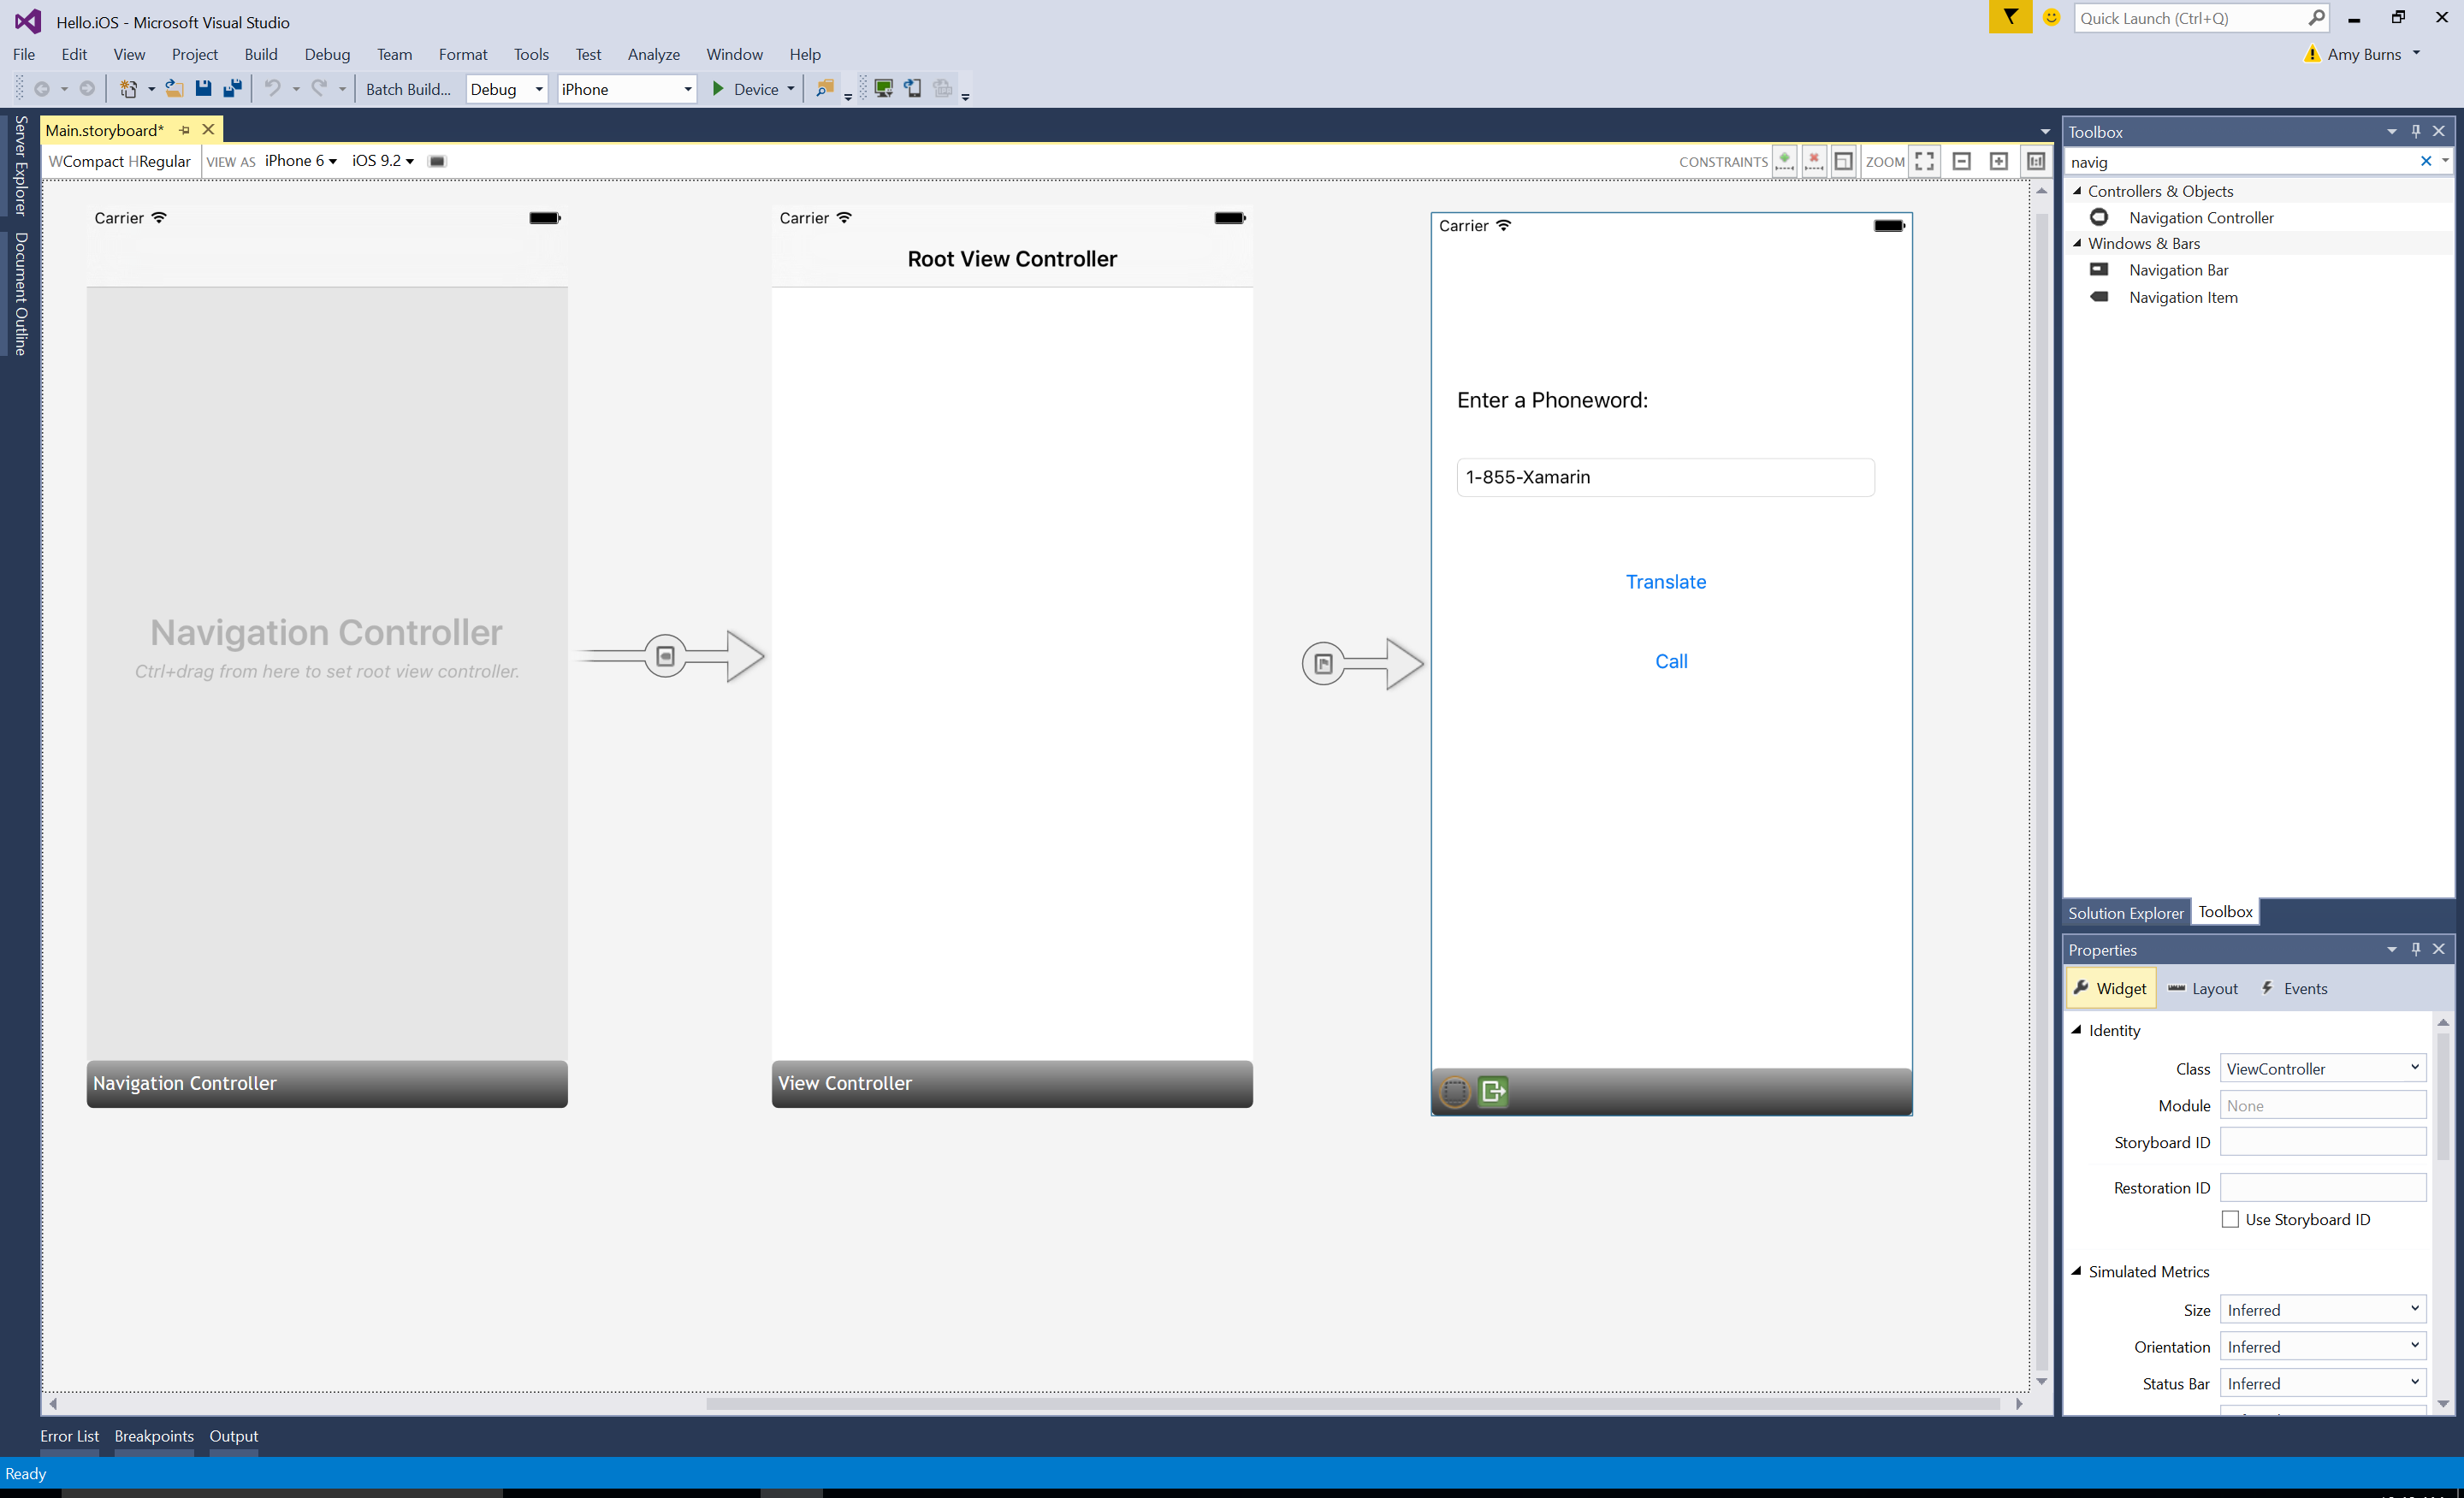
将“工具箱”中的“导航控制器”拖动到设计图面(可能需将其缩小以适应设计图面的所有大小!):

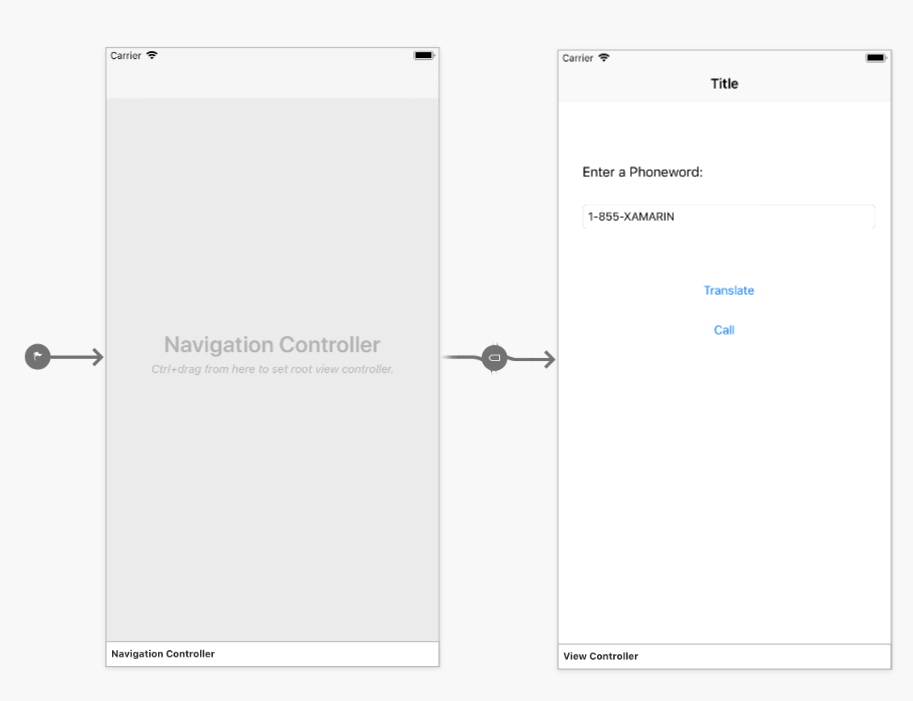
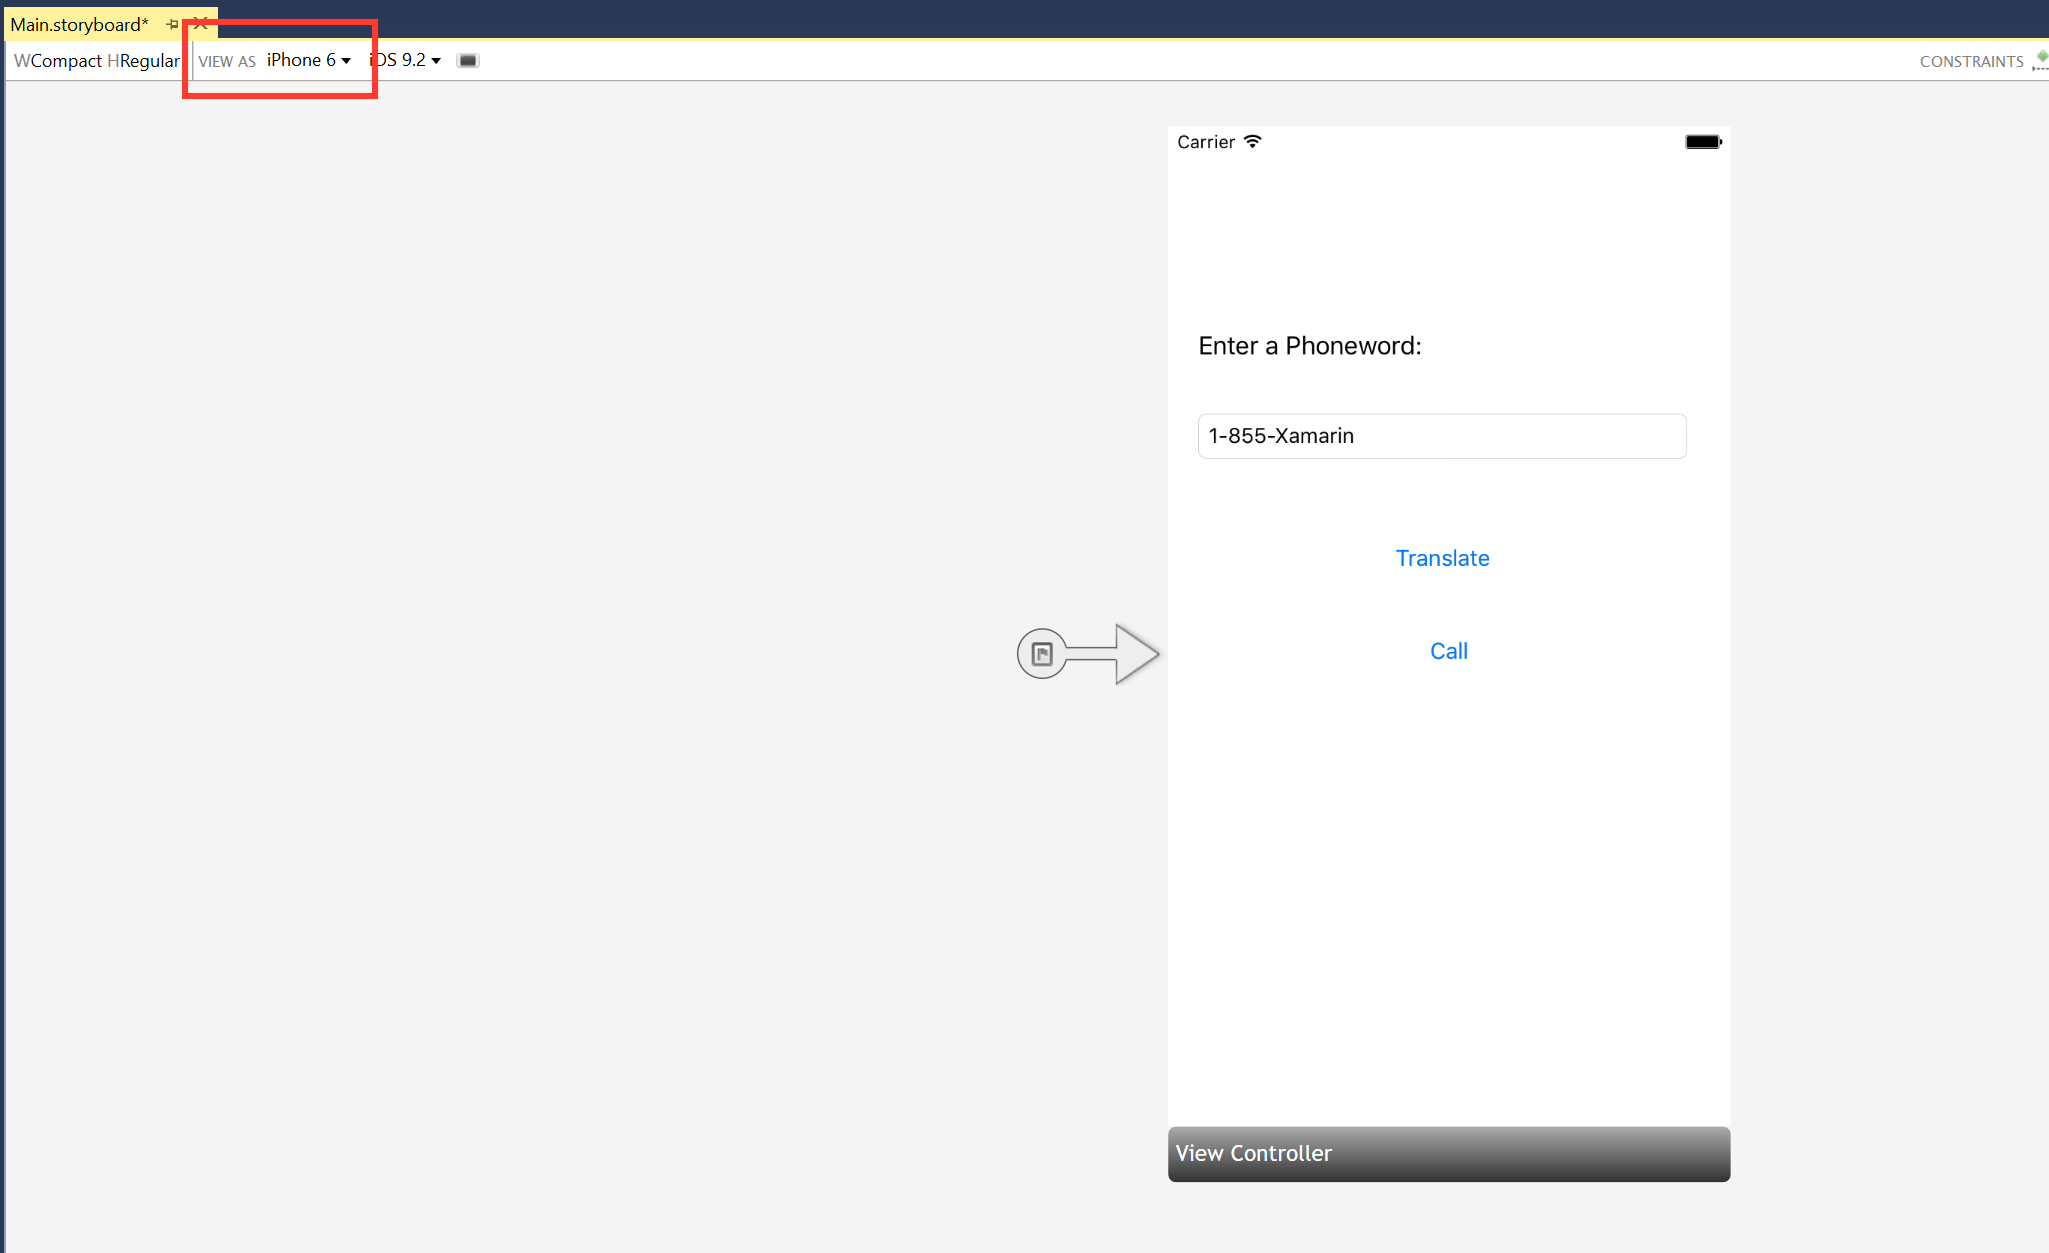
将 sourceless segue(即单个视图控制器左侧的灰色箭头)拖动到“导航控制器”,以更改应用程序的起点:
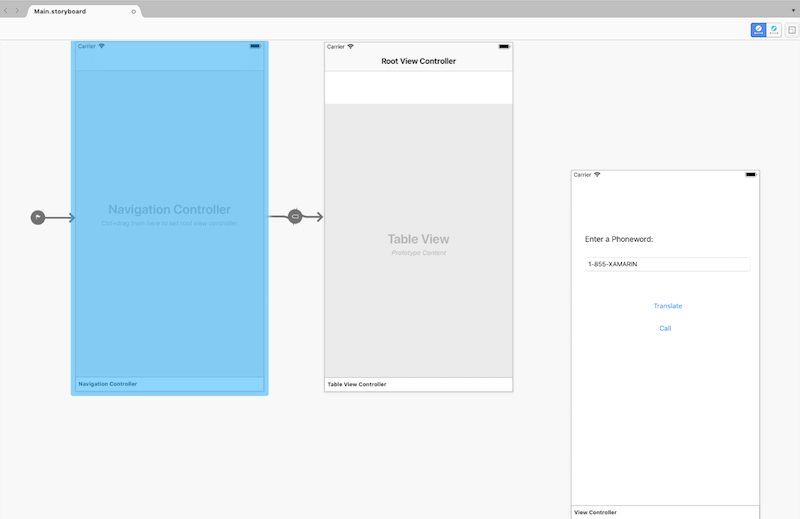
单击底部栏选择现有的“根视图控制器”,按“删除”将其从设计图面删除。 然后,将 Phoneword 场景移动到“导航控制器”旁:
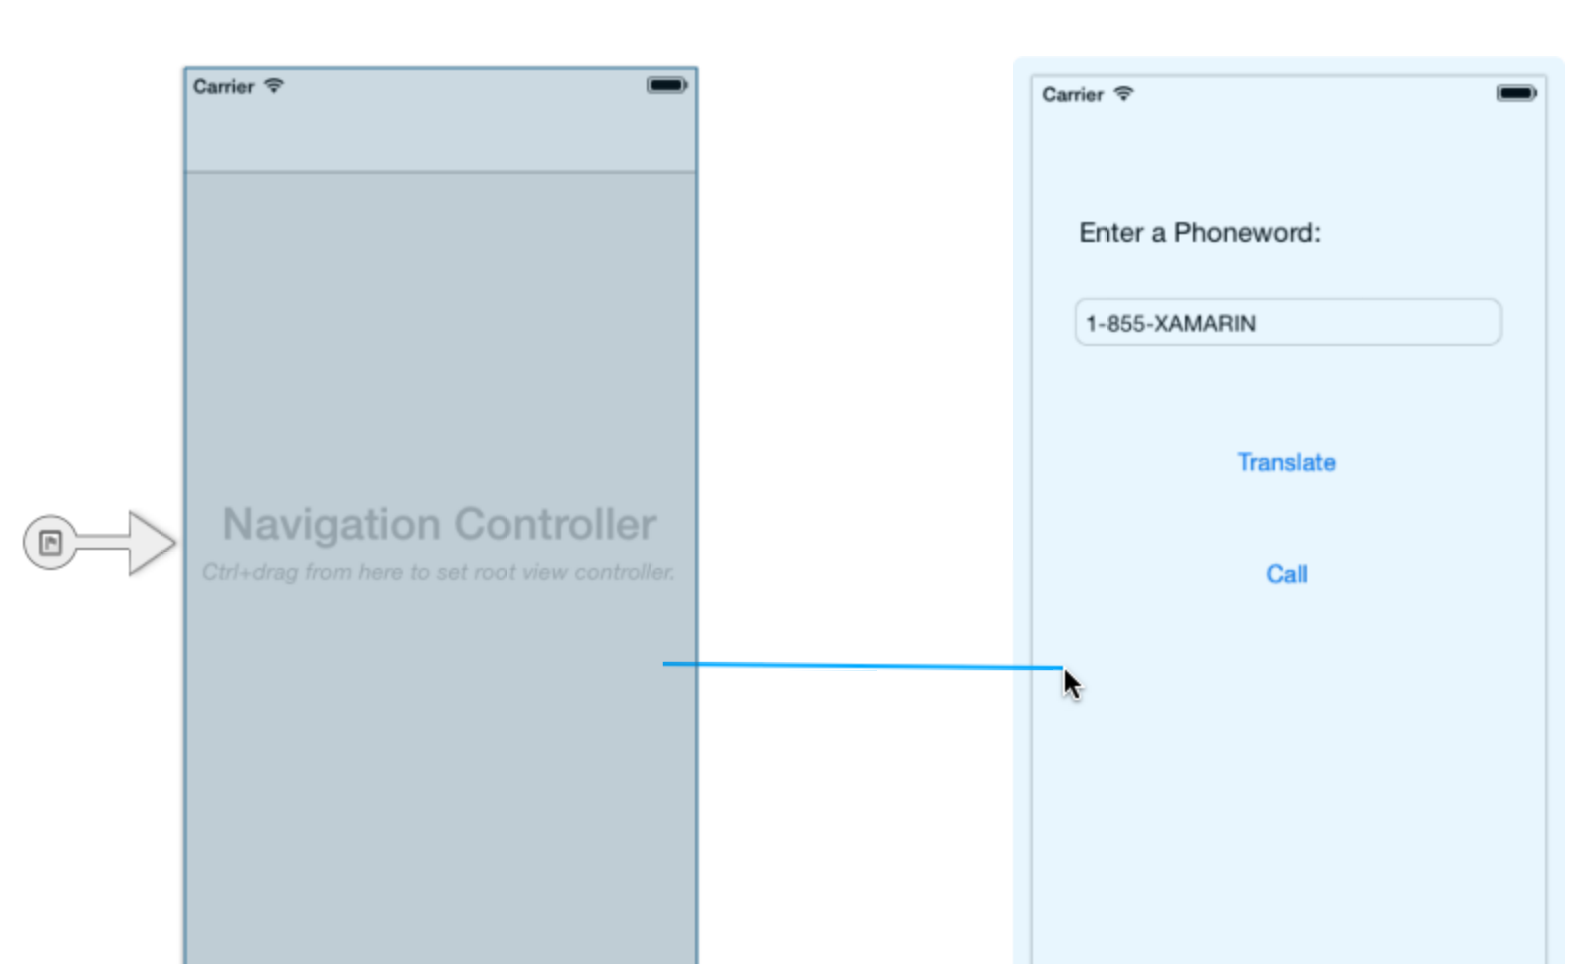
将“ViewController”设为“导航控制器”的“根视图控制器”。 按下 Ctrl 键,并在“导航控制器”内单击。 此时应出现一条蓝色线条。 然后,仍然按住“Ctrl”不放,从“导航控制器”拖动到“Phoneword”场景,然后松开。 这称为“按住 Ctrl 键拖动”:
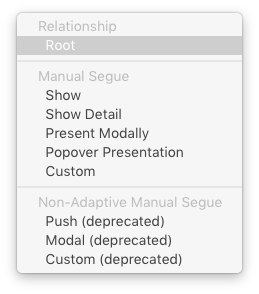
在弹出窗口中,将关系设置为根:
ViewController 现在是导航控制器的根视图控制器:
双击 Phoneword 屏幕的“标题”栏,然后将标题更改为 Phoneword:

从“工具箱”拖动某个按钮,将其置于“呼叫按钮”下。 拖动图柄,使新的按钮与“呼叫按钮”宽度相同:
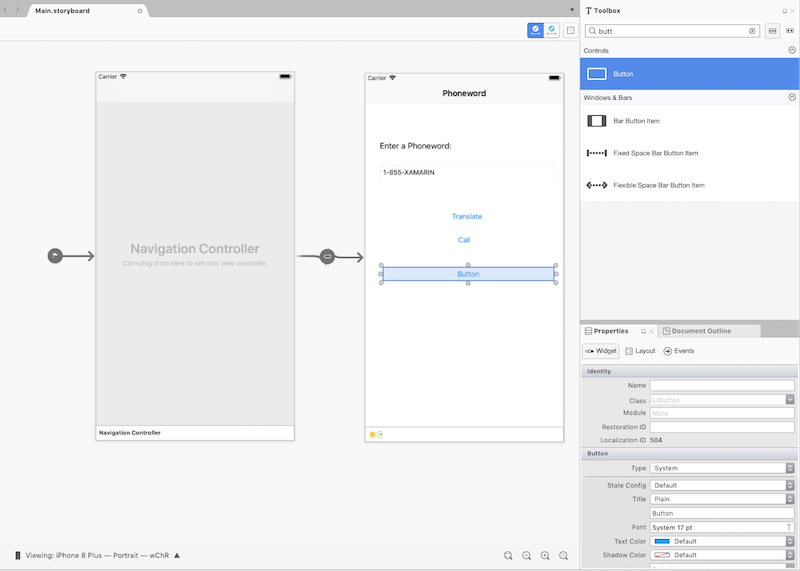
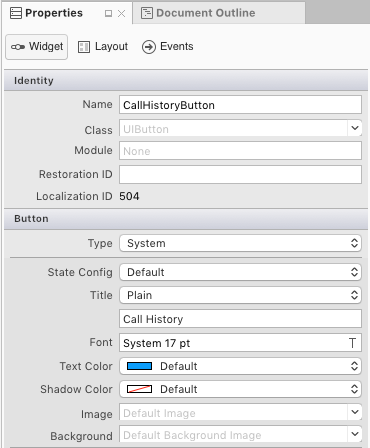
在 Properties Pad 中,将按钮“名称”更改为“CallHistoryButton”,并将“标题”更改为“呼叫历史记录”:
创建“呼叫历史记录”屏幕。 在“工具箱”中,将表格视图控制器拖到设计图面上:
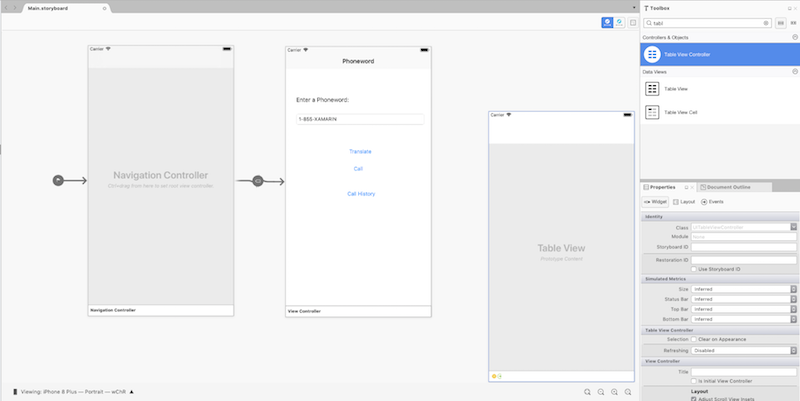
接下来,单击“场景”底部的黑色栏选择“表格视图控制器”。 在 Properties Pad 中,将表格视图控制器的类更改为
CallHistoryController,并按“Enter”: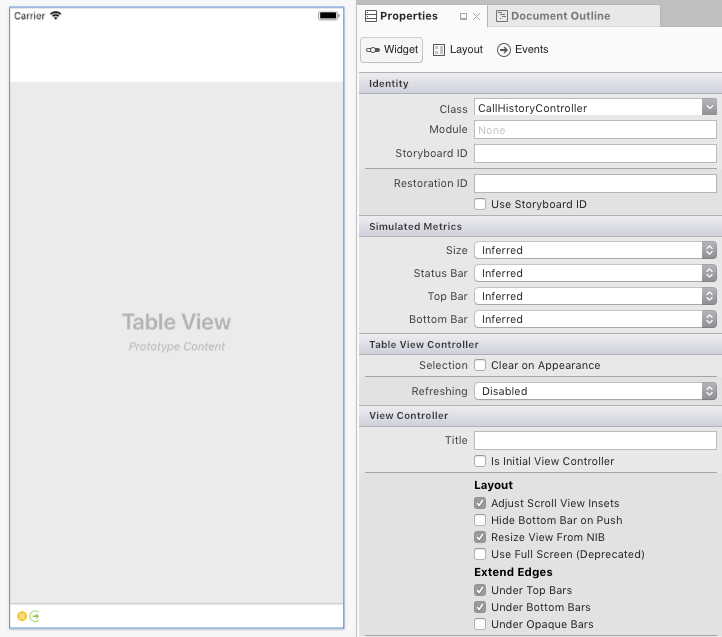
iOS 设计器将生成一个名为
CallHistoryController的自定义后备类,以管理屏幕的“内容视图层次结构”。 CallHistoryController.cs 文件将在 Solution Pad 中出现: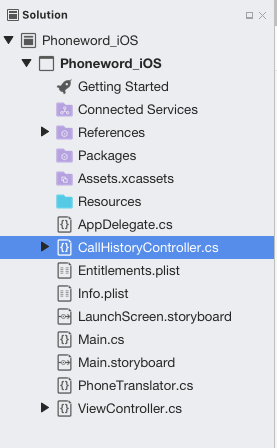
双击 CallHistoryController.cs 文件即可将其打开,并将内容替换为以下代码:
using System;
using Foundation;
using UIKit;
using System.Collections.Generic;

namespace Phoneword_iOS
{
    public partial class CallHistoryController : UITableViewController
    {
        public List<string> PhoneNumbers { get; set; }

        static NSString callHistoryCellId = new NSString ("CallHistoryCell");

        public CallHistoryController (IntPtr handle) : base (handle)
        {
            TableView.RegisterClassForCellReuse (typeof(UITableViewCell), callHistoryCellId);
            TableView.Source = new CallHistoryDataSource (this);
            PhoneNumbers = new List<string> ();
        }

        class CallHistoryDataSource : UITableViewSource
        {
            CallHistoryController controller;

            public CallHistoryDataSource (CallHistoryController controller)
            {
                this.controller = controller;
            }

            public override nint RowsInSection (UITableView tableView, nint section)
            {
                return controller.PhoneNumbers.Count;
            }

            public override UITableViewCell GetCell (UITableView tableView, NSIndexPath indexPath)
            {
                var cell = tableView.DequeueReusableCell (CallHistoryController.callHistoryCellId);

                int row = indexPath.Row;
                cell.TextLabel.Text = controller.PhoneNumbers [row];
                return cell;
            }
        }
    }
}
保存应用程序 (⌘ + s) 并进行生成 (⌘ + b),以确保没有错误。
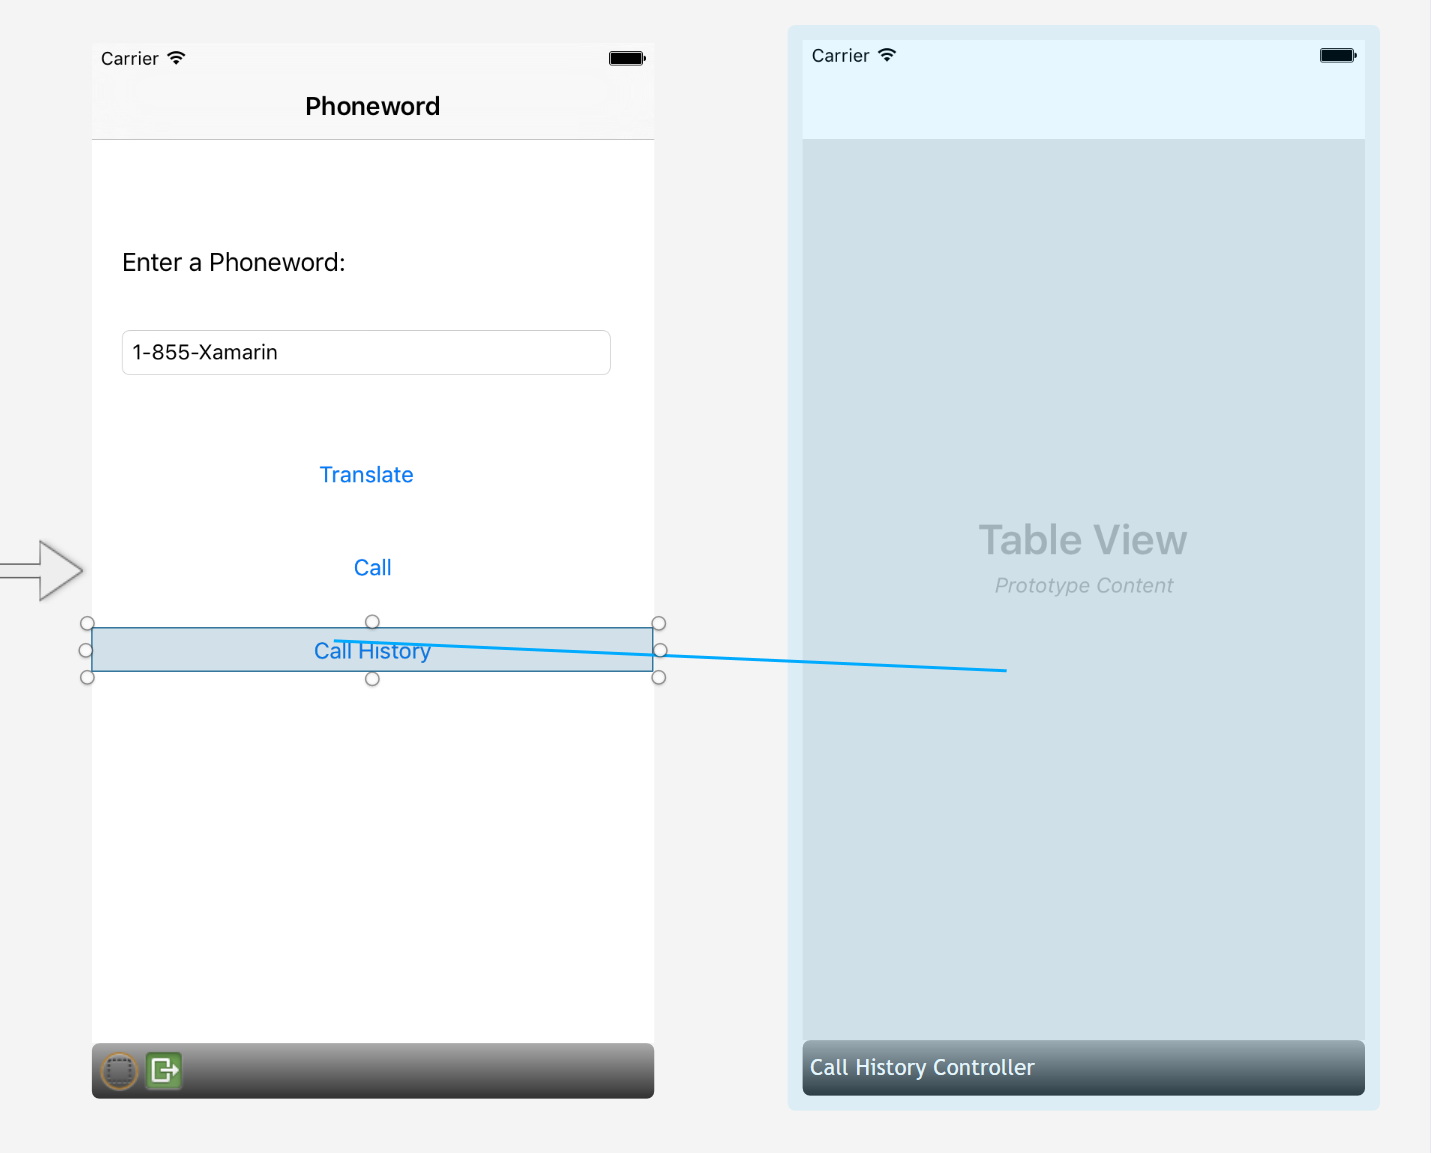
创建 Phoneword 场景和呼叫历史记录场景之间的 Segue(转换)。 在“Phoneword 场景”中,选择“呼叫历史记录按钮”,然后按住 Ctrl 拖动,从“按钮”拖动到“呼叫历史记录”场景:
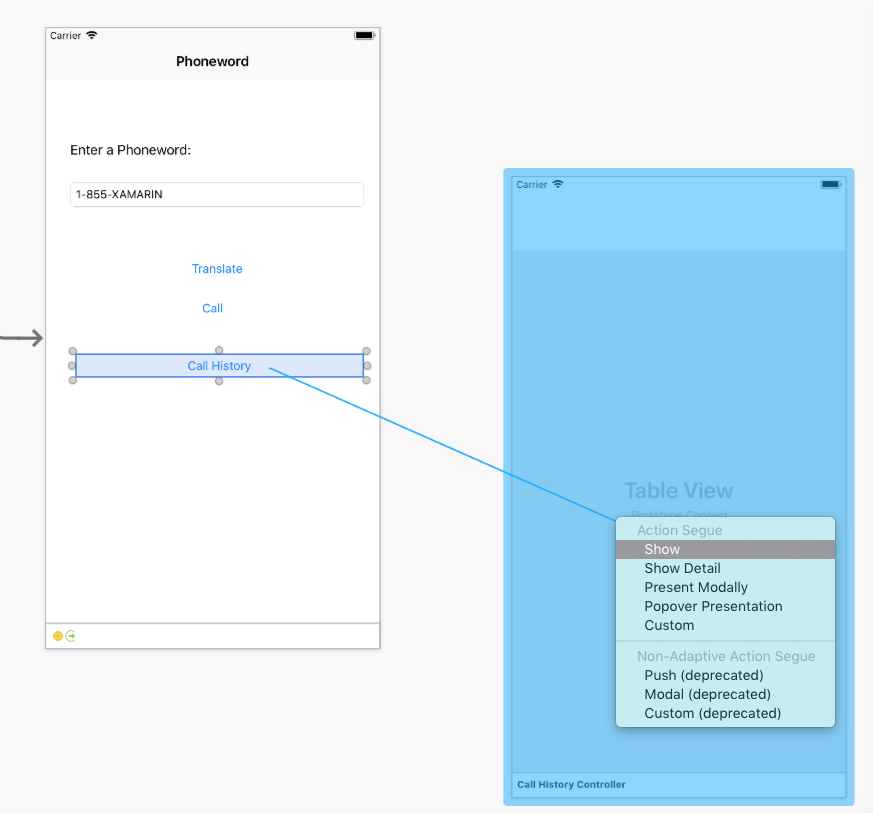
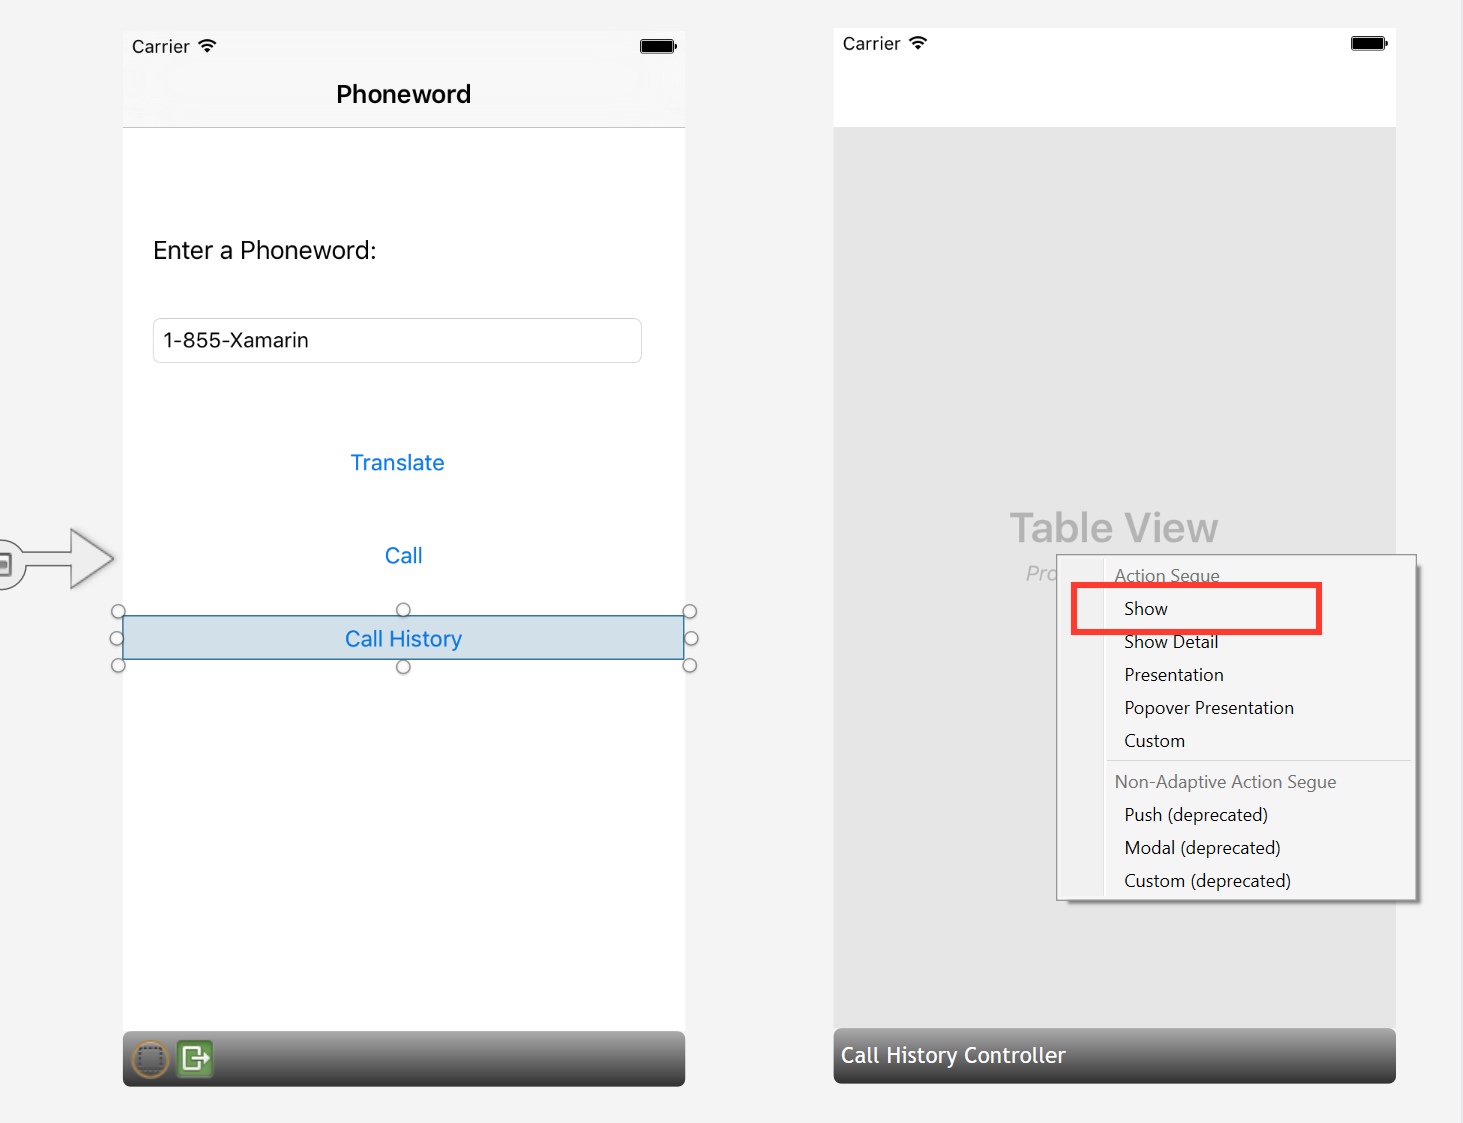
从“操作 Segue”弹出框,选择“显示”
iOS 设计器将在两个场景之间添加 Segue:
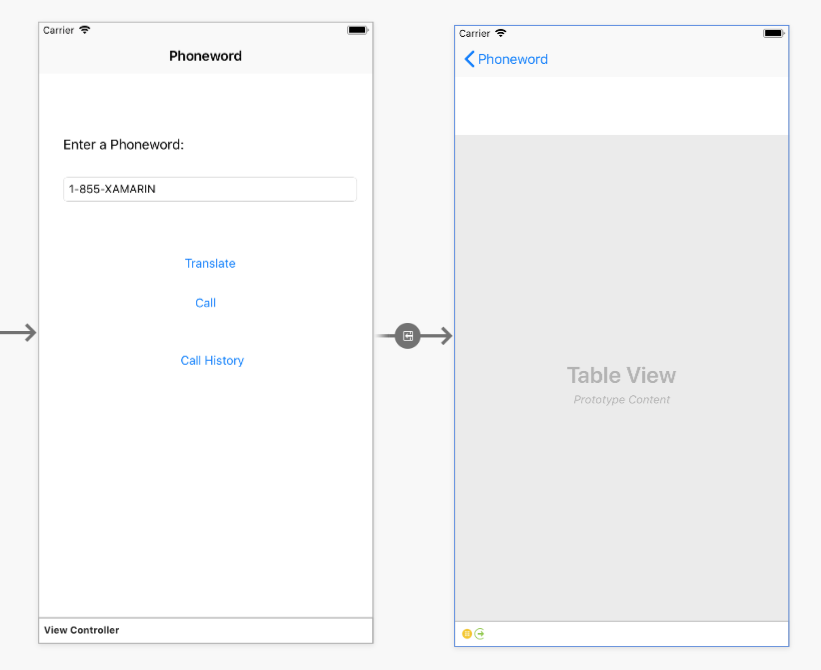
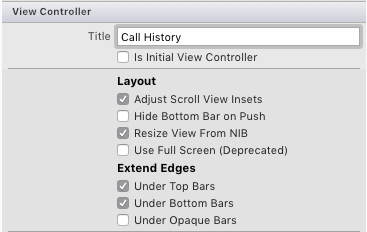
在 Properties Pad 中,选择“场景”底部的黑色栏并将“视图控制器标题”更改为“呼叫历史记录”,向“表格视图控制器”添加“标题”:
应用程序运行时,“呼叫历史记录按钮”将打开“呼叫历史记录”屏幕,但表格视图将为空,因为没有代码来记录并显示电话号码。
此应用会将电话号码以字符串列表的形式进行存储。
using在 ViewController 顶部添加指令System.Collections.Generic:using System.Collections.Generic;使用以下代码修改
ViewController类:using System; using System.Collections.Generic; using Foundation; using UIKit; namespace Phoneword_iOS { public partial class ViewController : UIViewController { string translatedNumber = ""; public List<string> PhoneNumbers { get; set; } protected ViewController(IntPtr handle) : base(handle) { //initialize list of phone numbers called for Call History screen PhoneNumbers = new List<string>(); } public override void ViewDidLoad() { base.ViewDidLoad(); // Perform any additional setup after loading the view, typically from a nib. TranslateButton.TouchUpInside += (object sender, EventArgs e) => { // Convert the phone number with text to a number // using PhoneTranslator.cs translatedNumber = PhoneTranslator.ToNumber( PhoneNumberText.Text); // Dismiss the keyboard if text field was tapped PhoneNumberText.ResignFirstResponder(); if (translatedNumber == "") { CallButton.SetTitle("Call ", UIControlState.Normal); CallButton.Enabled = false; } else { CallButton.SetTitle("Call " + translatedNumber, UIControlState.Normal); CallButton.Enabled = true; } }; CallButton.TouchUpInside += (object sender, EventArgs e) => { //Store the phone number that we're dialing in PhoneNumbers PhoneNumbers.Add(translatedNumber); // Use URL handler with tel: prefix to invoke Apple's Phone app... var url = new NSUrl("tel:" + translatedNumber); // otherwise show an alert dialog if (!UIApplication.SharedApplication.OpenUrl(url)) { var alert = UIAlertController.Create("Not supported", "Scheme 'tel:' is not supported on this device", UIAlertControllerStyle.Alert); alert.AddAction(UIAlertAction.Create("Ok", UIAlertActionStyle.Default, null)); PresentViewController(alert, true, null); } }; } public override void PrepareForSegue(UIStoryboardSegue segue, NSObject sender) { base.PrepareForSegue(segue, sender); // set the view controller that’s powering the screen we’re // transitioning to var callHistoryController = segue.DestinationViewController as CallHistoryController; //set the table view controller’s list of phone numbers to the // list of dialed phone numbers if (callHistoryController != null) { callHistoryController.PhoneNumbers = PhoneNumbers; } } } }此处有几个需要注意的要点:
- 变量
translatedNumber已从ViewDidLoad方法移到类级变量。 - 修改了 CallButton 代码,以通过调用
PhoneNumbers.Add(translatedNumber)将已拨号码添加到电话号码列表。 - 已添加
PrepareForSegue方法。
保存并生成应用程序,确保没有错误。
- 变量
在 iOS 模拟器内按“启动”按钮,启动该应用程序:
恭喜,你已完成第一个多屏 Xamarin.iOS 应用程序!
Windows 上的演练
本演练将向 Phoneword 应用程序添加一个“呼叫历史记录”屏幕。
在 Visual Studio 中打开 Phoneword 应用程序。 如有必要,可从了解 iOS 演练指南下载完整的 Phoneword 应用程序。 注意,必须连接 Mac 才可使用 iOS 设计器和 iOS 模拟器。
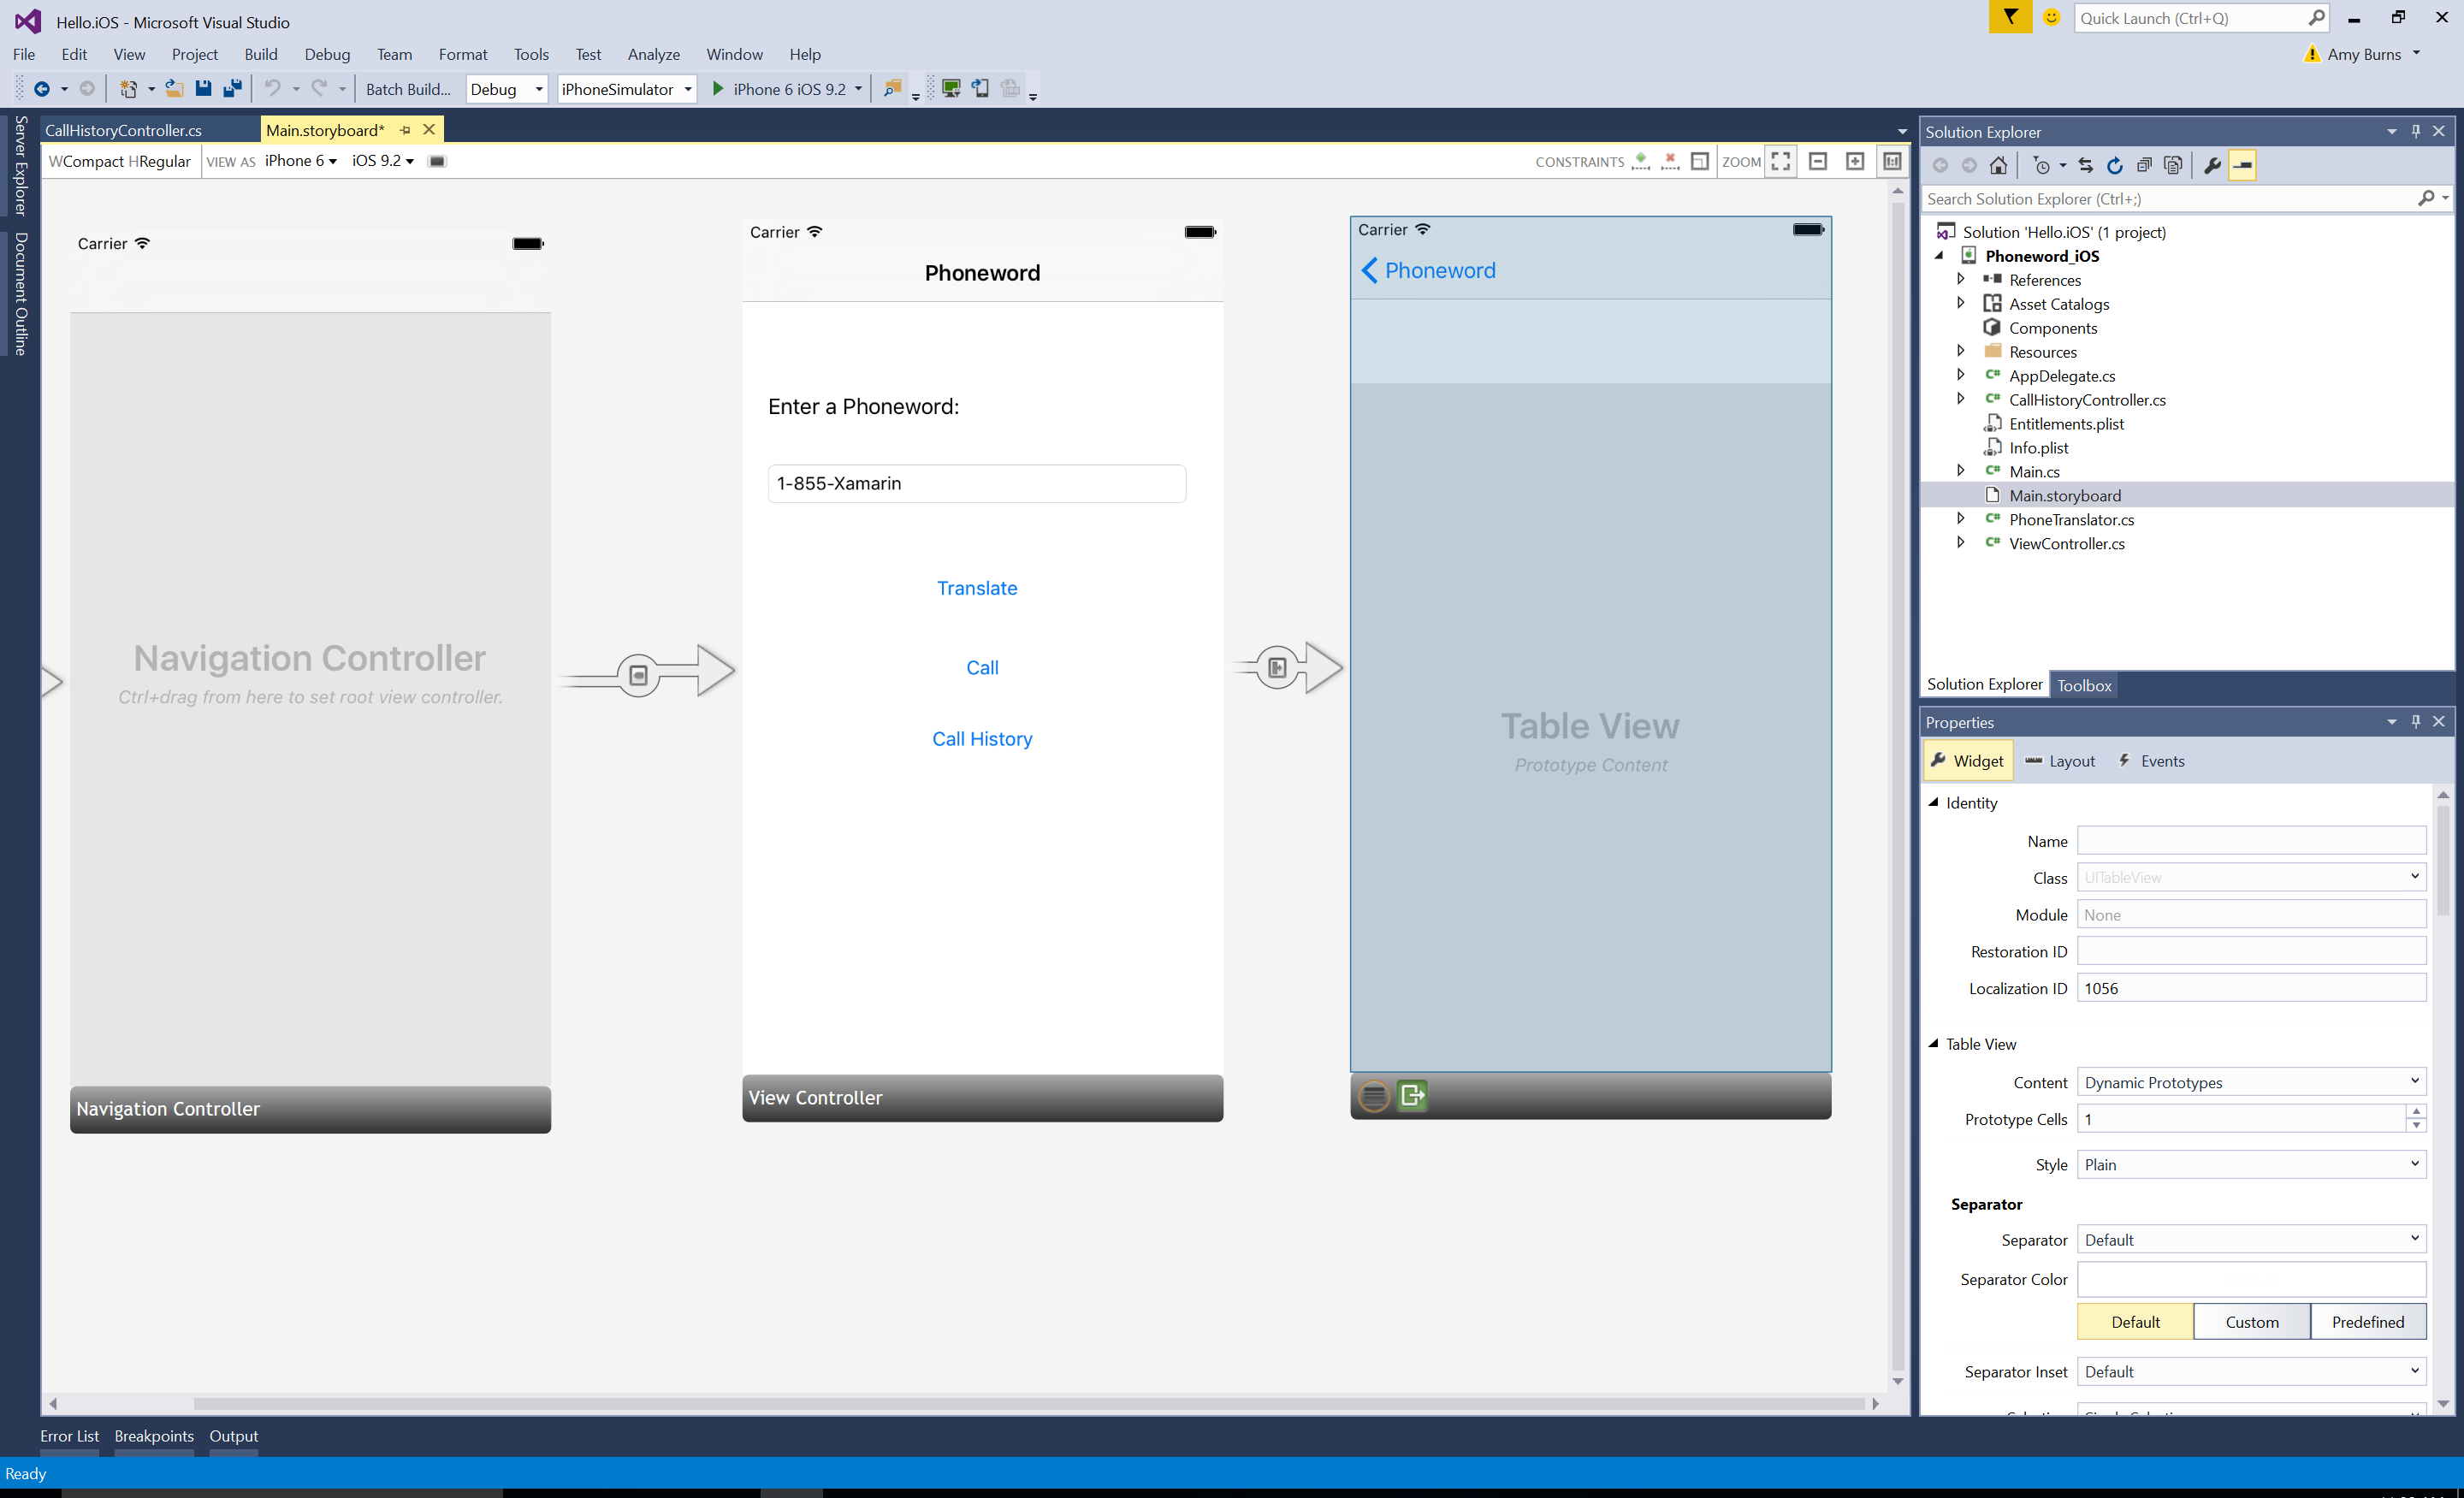
从编辑用户界面开始。 从“解决方案资源管理器”打开 Main.storyboard 文件,确保“查看方式”已设为 iPhone 6:
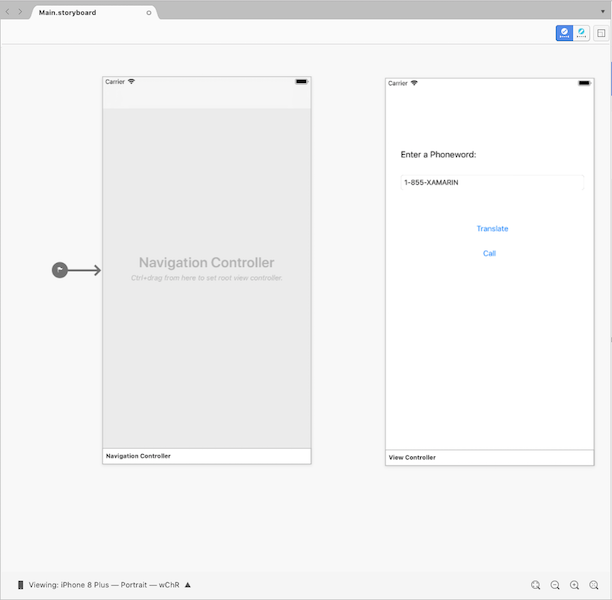
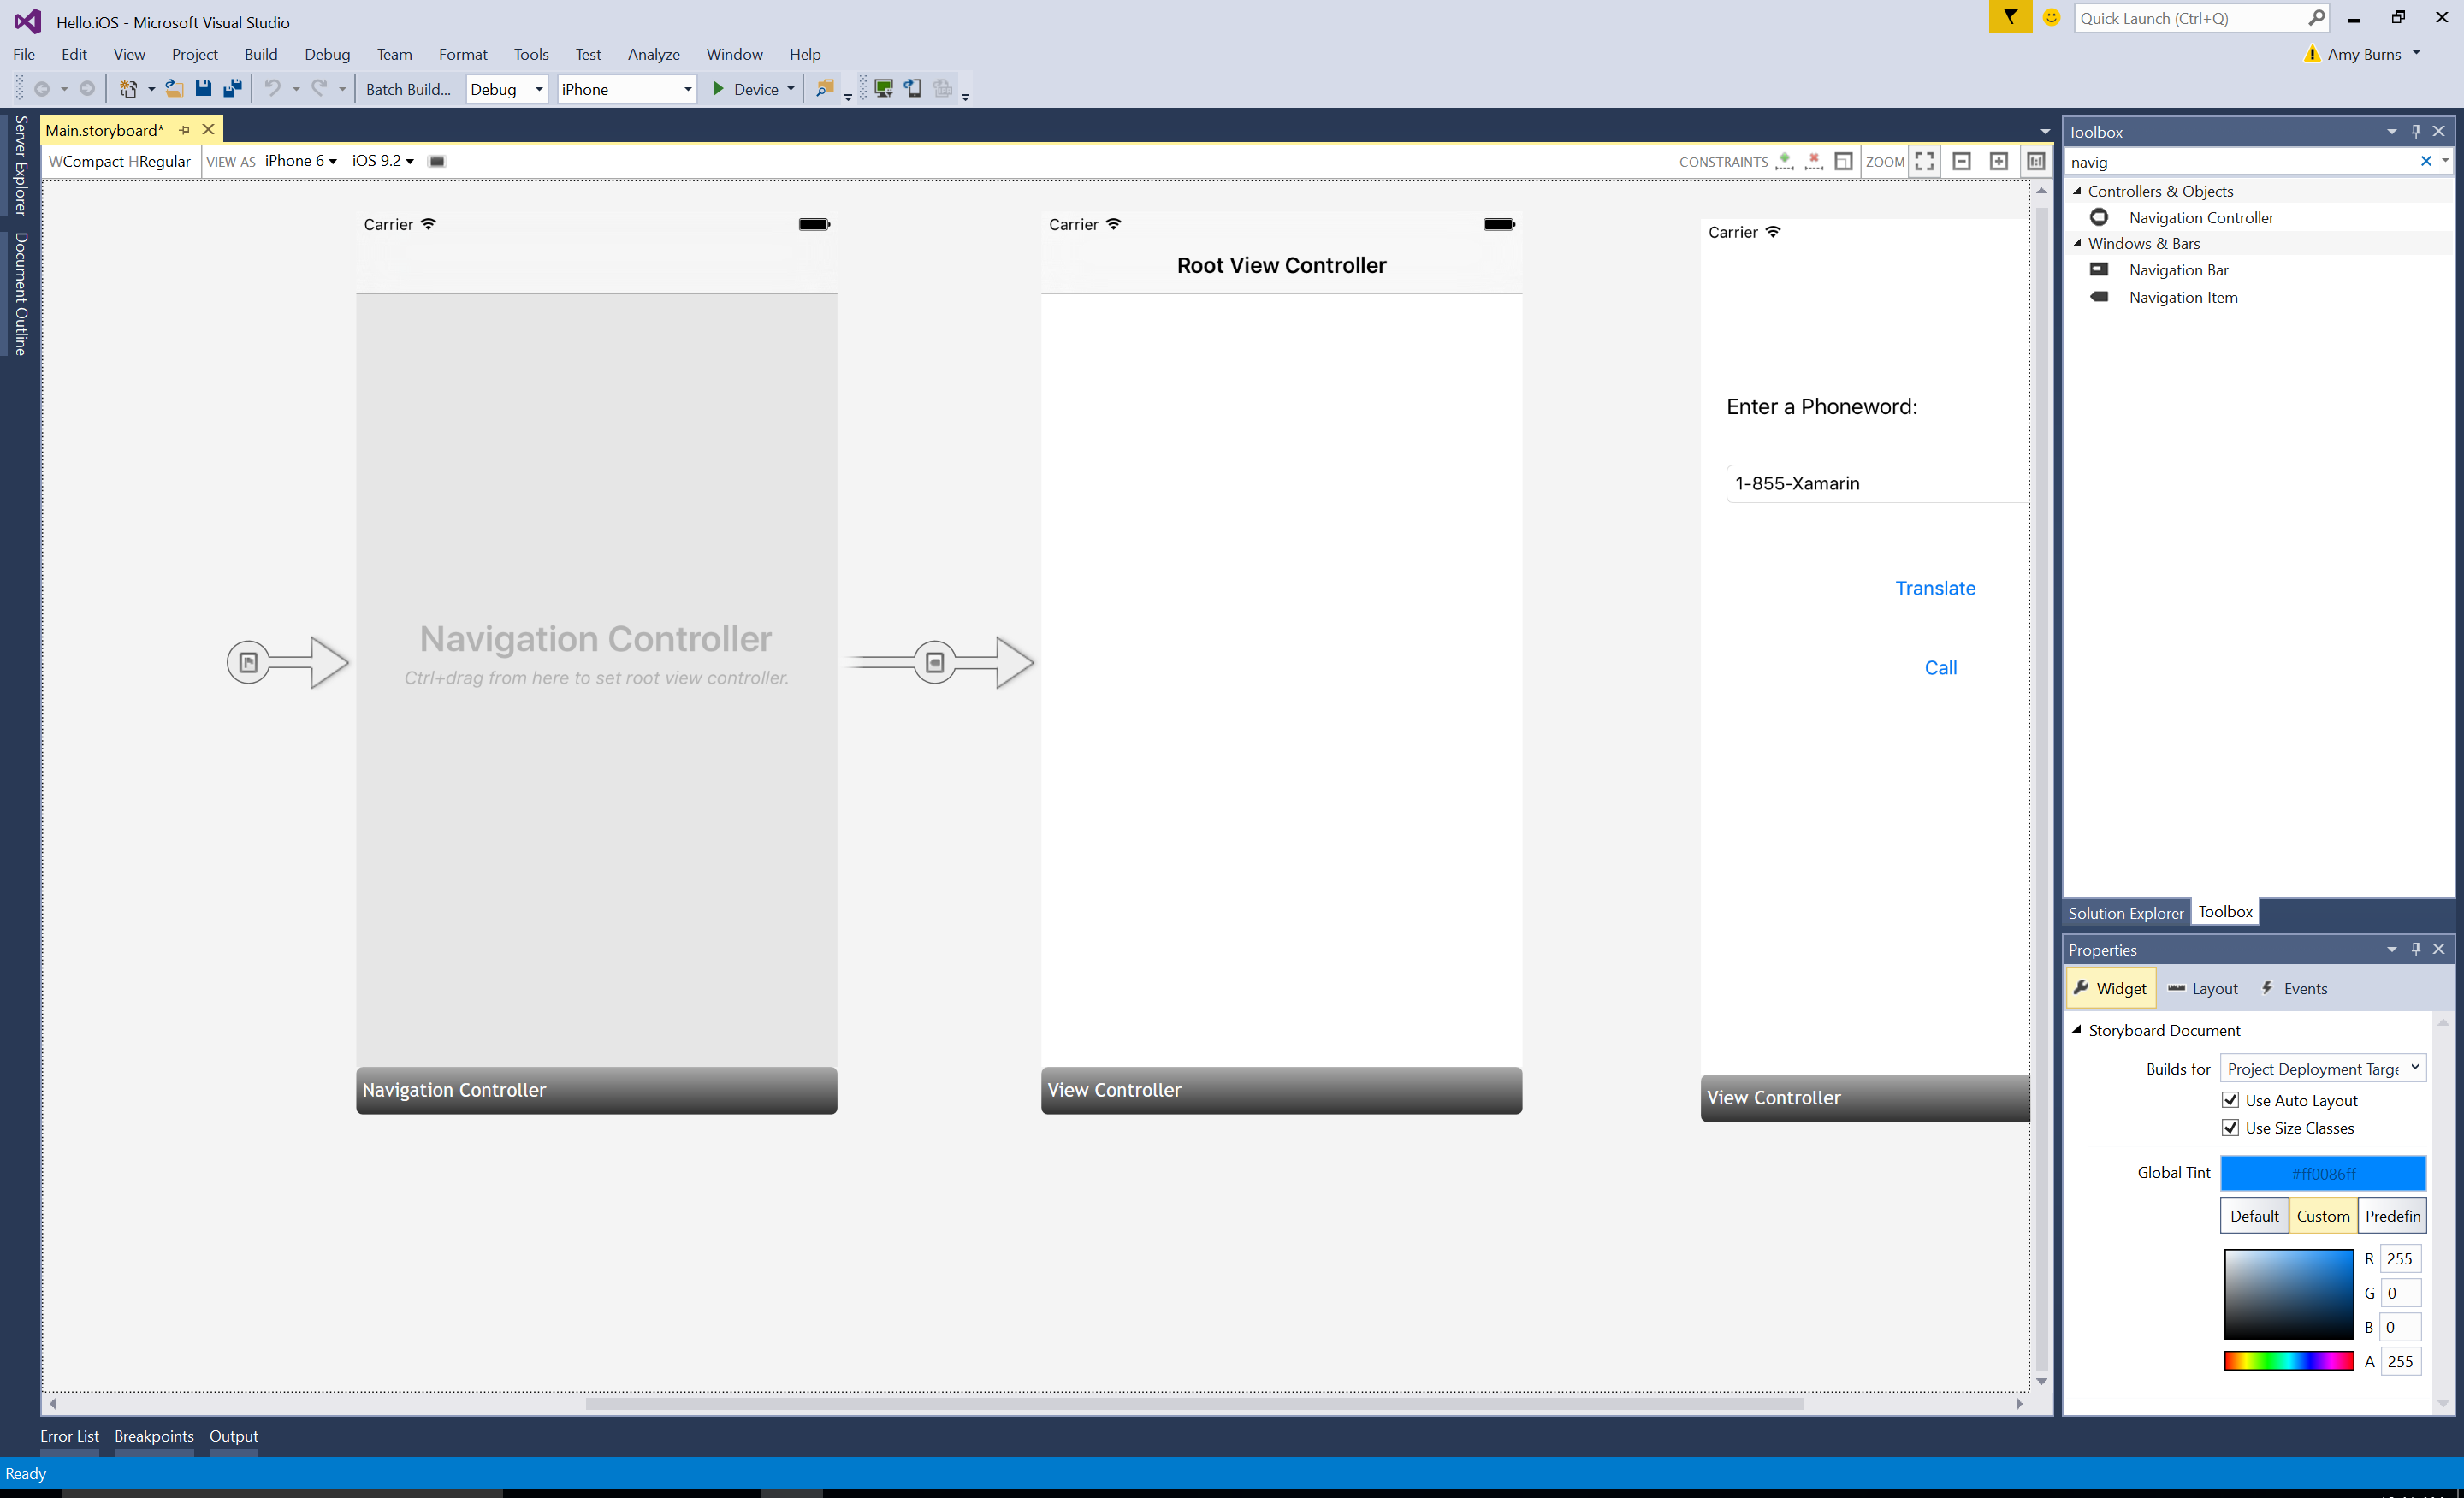
将“导航控制器”从“工具箱”拖动到设计图面上:
将“Sourceless Segue”(即“Phoneword”场景左侧的灰色箭头)从“Phoneword”场景拖动到“导航控制器”,以更改应用程序的起点:
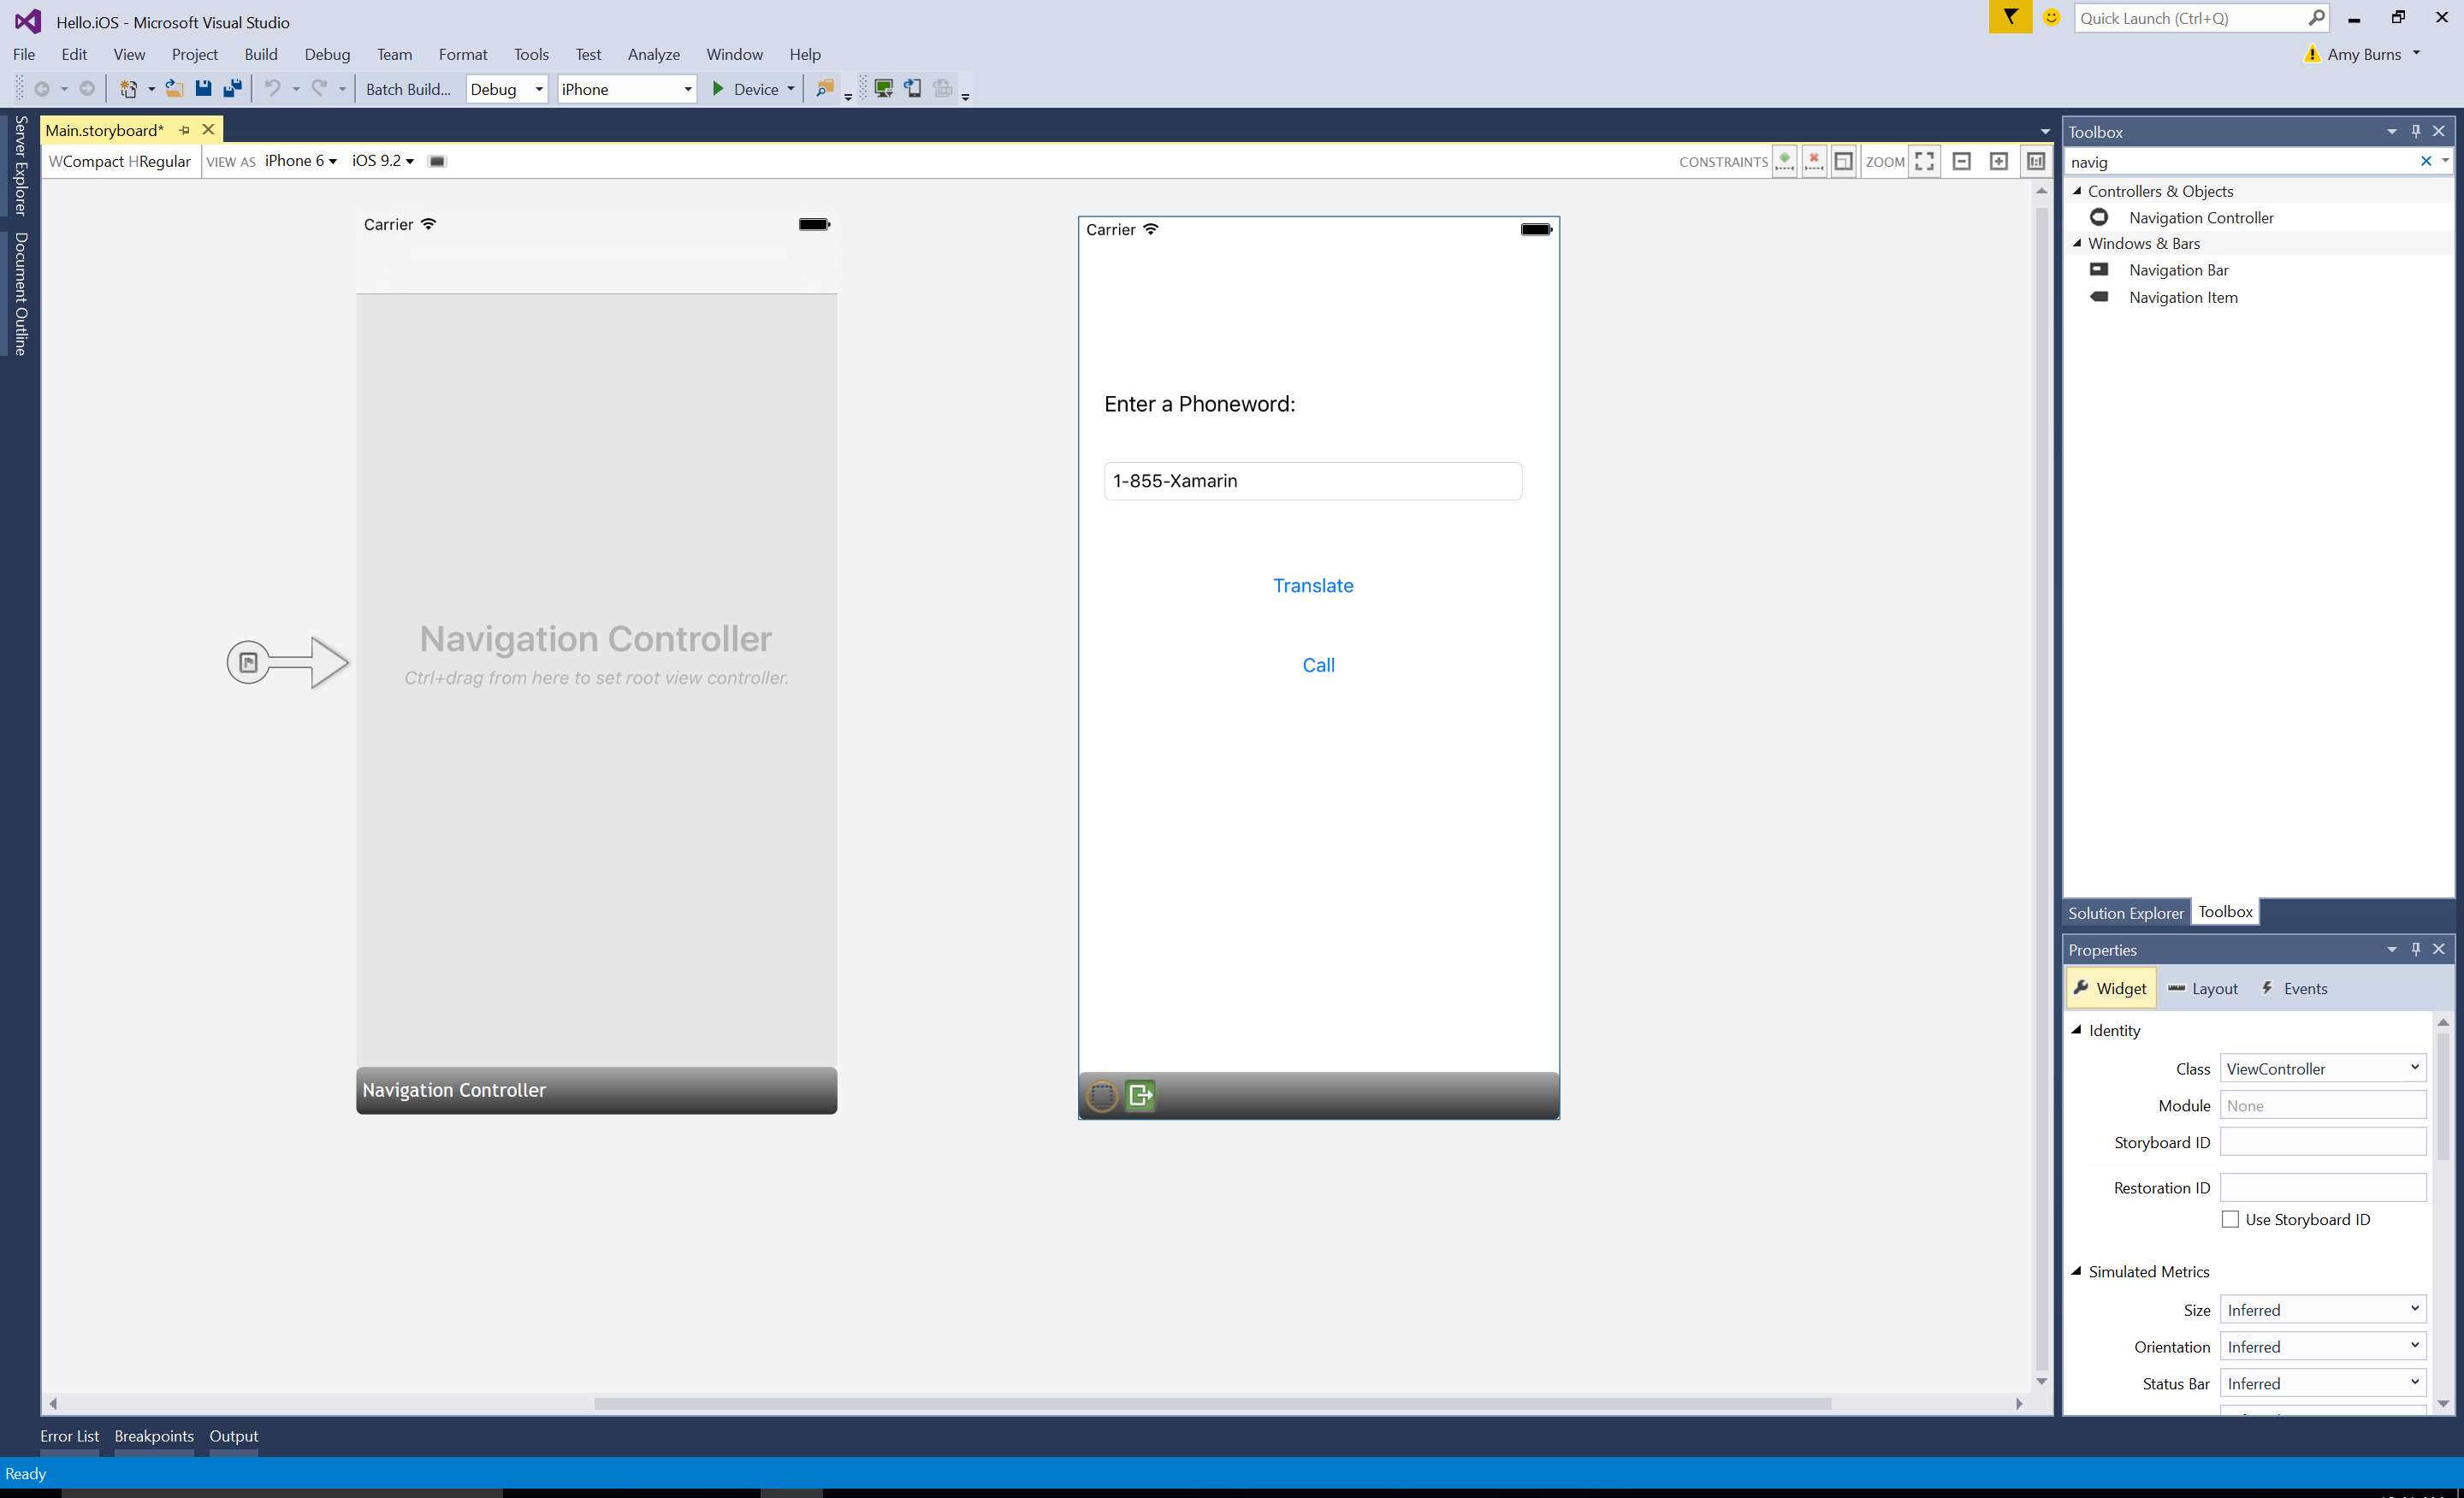
单击黑色栏选择“根视图控制器”,按“删除”将其从设计图面删除。 然后,将 Phoneword 场景移动到“导航控制器”旁:
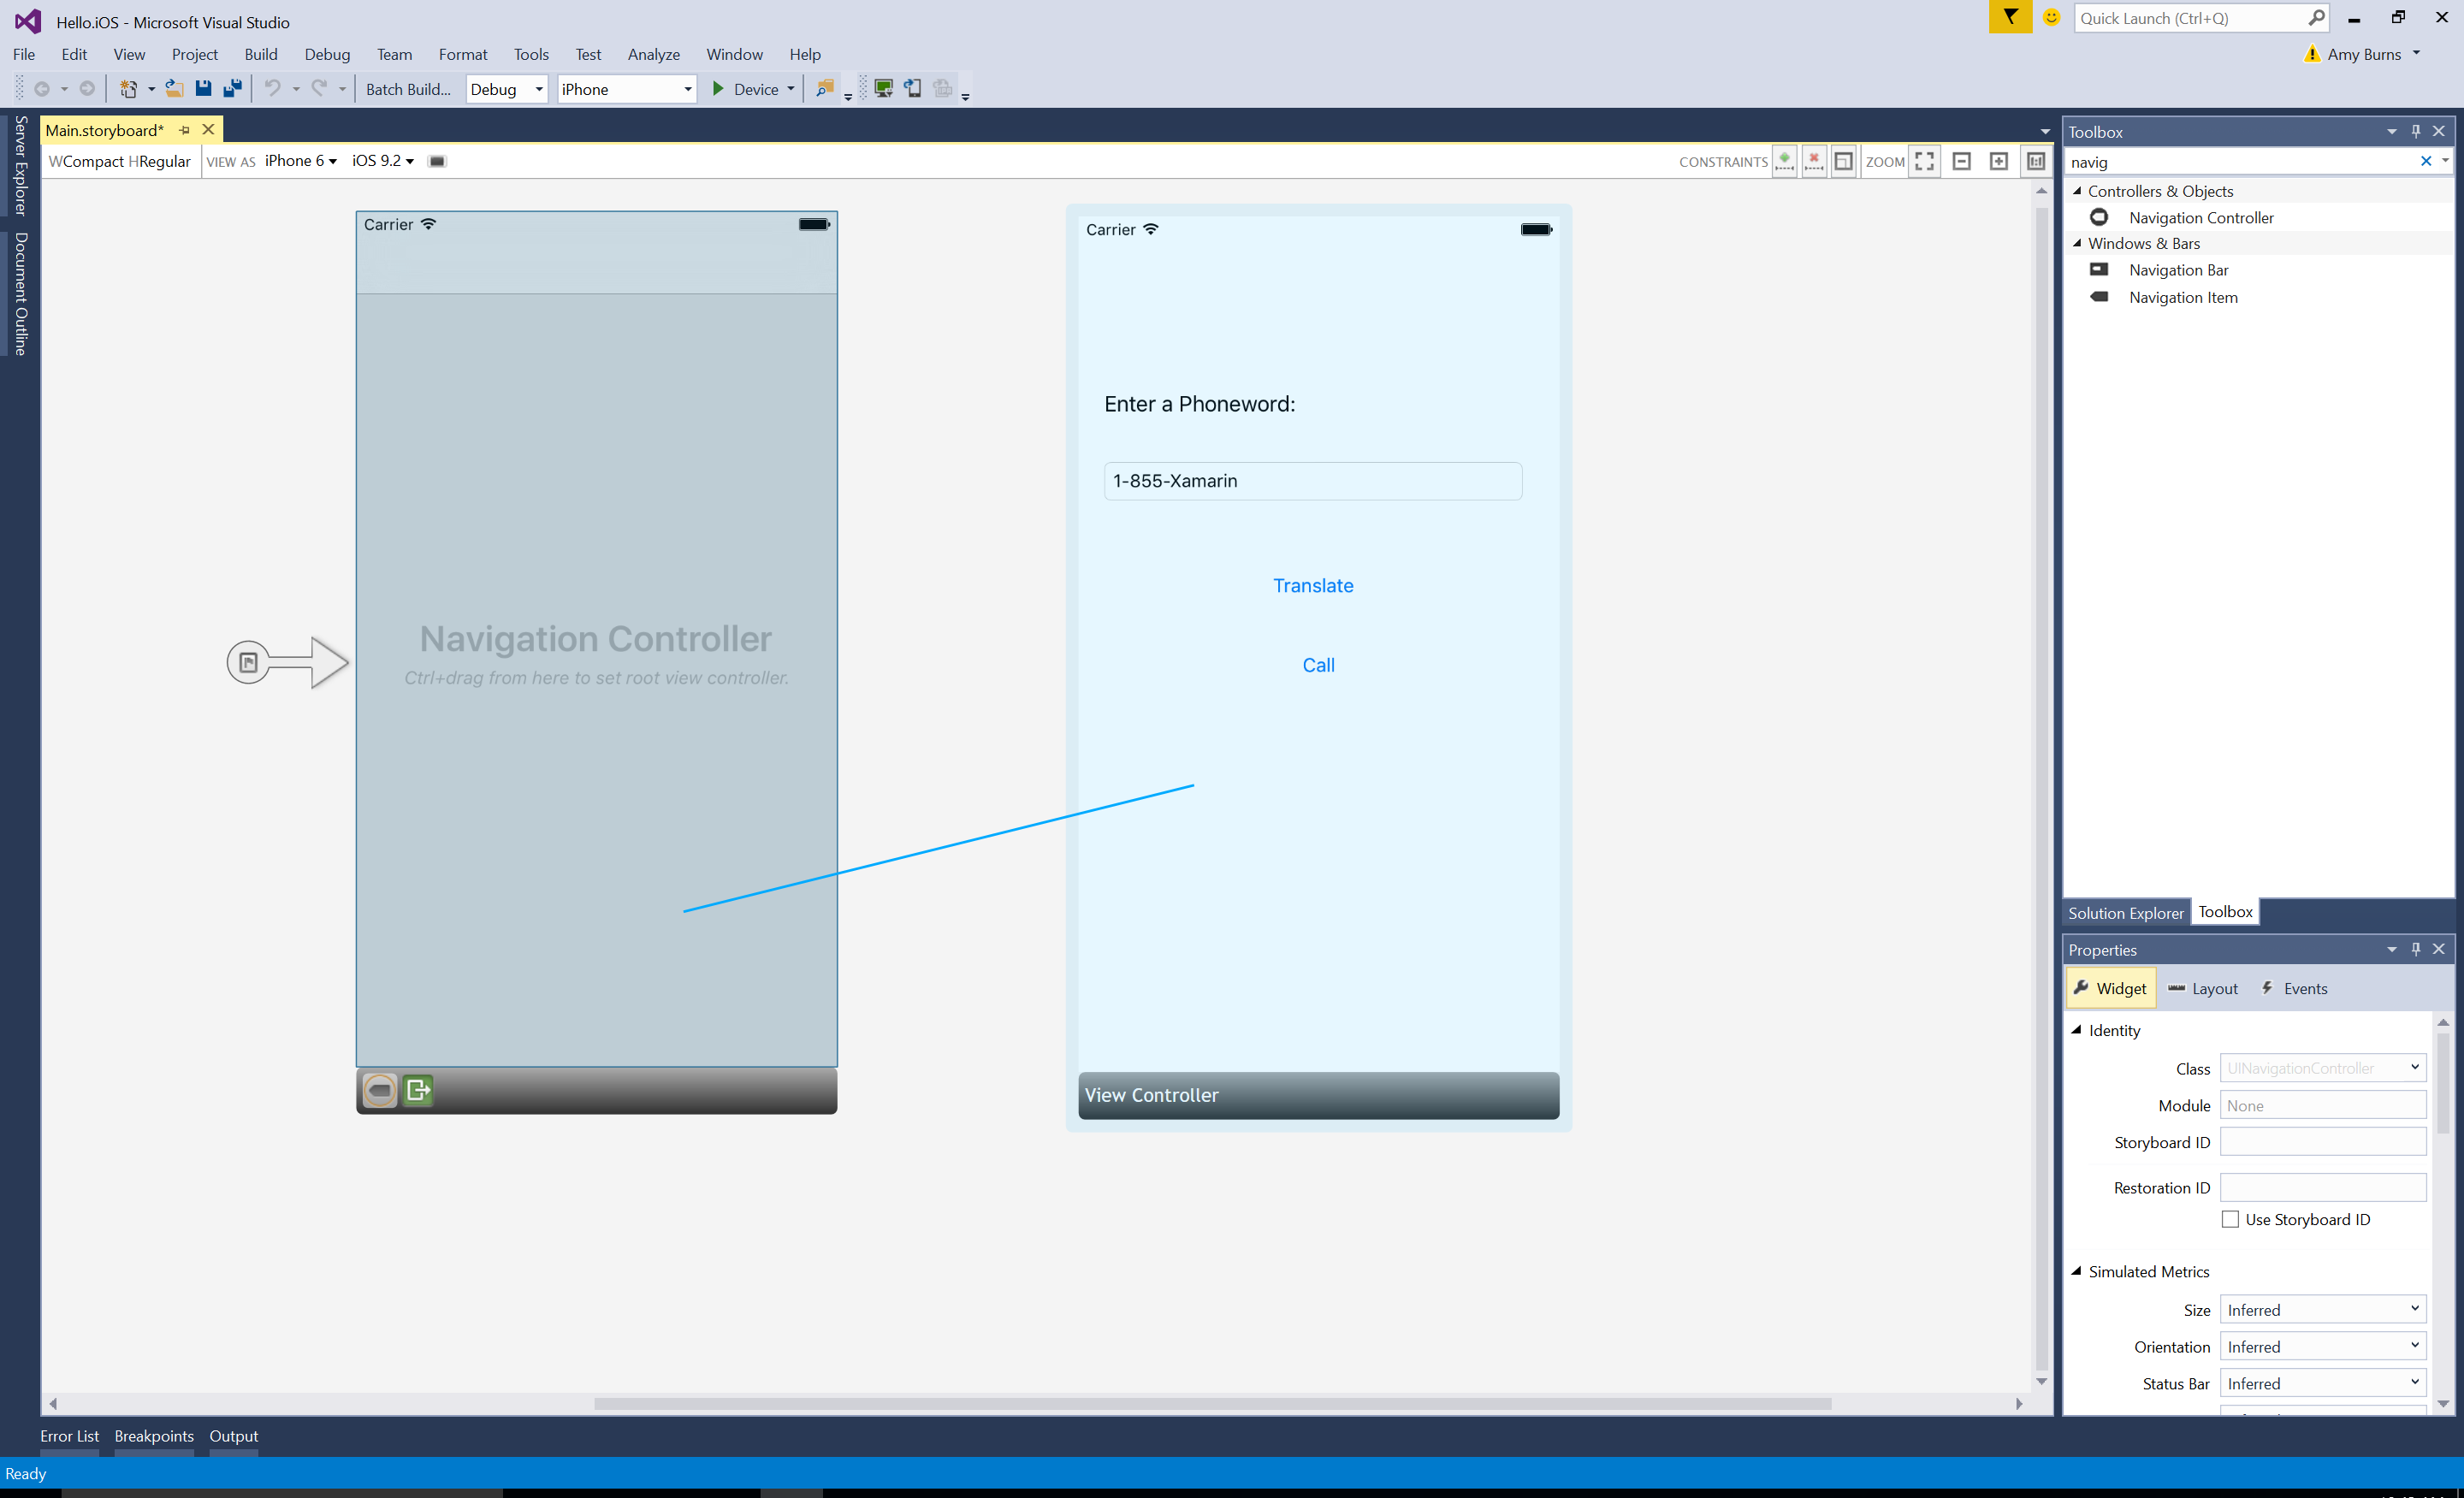
将“ViewController”设为“导航控制器”的“根视图控制器”。 按“Ctrl”键,并在“导航控制器”内单击。 此时应出现一条蓝色线条。 然后,仍然按住“Ctrl”不放,从“导航控制器”拖动到“Phoneword”场景,然后松开。 这称为“按住 Ctrl 键拖动”:
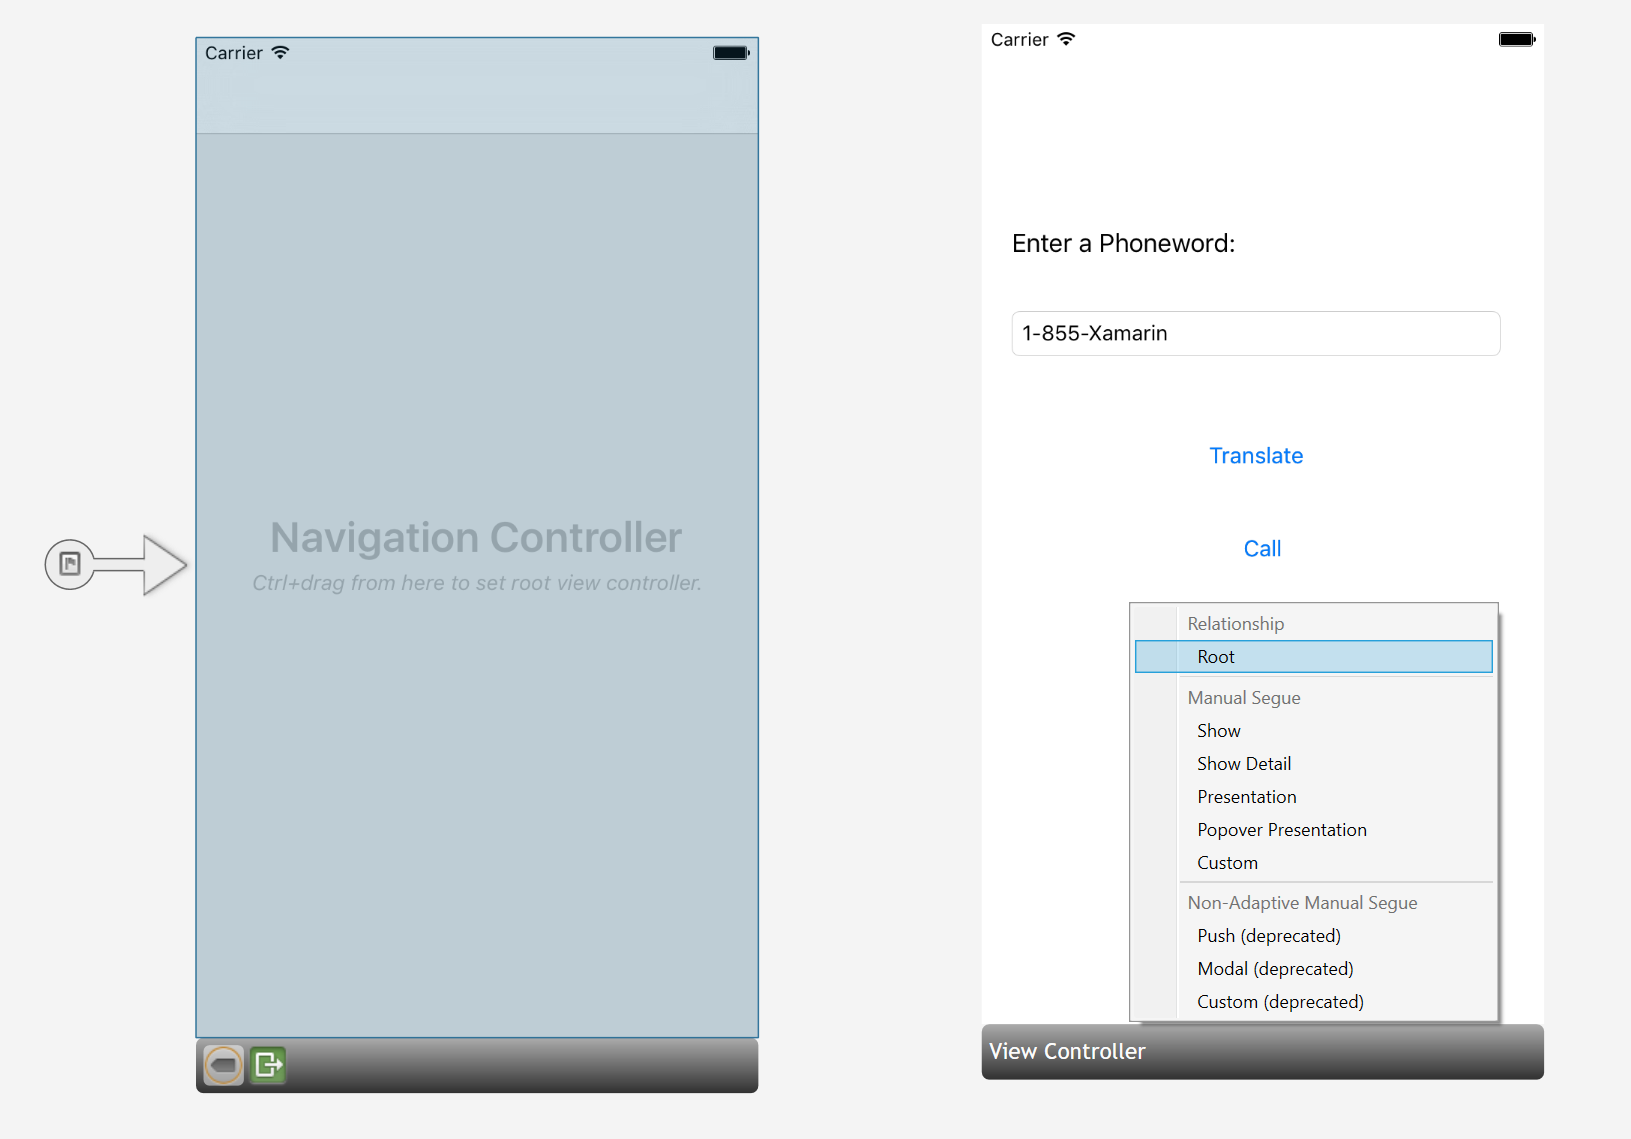
在弹出窗口中,将关系设置为根:
现在,“ViewController”是导航控制器的根视图控制器。
双击 Phoneword 屏幕的“标题”栏,然后将标题更改为 Phoneword:
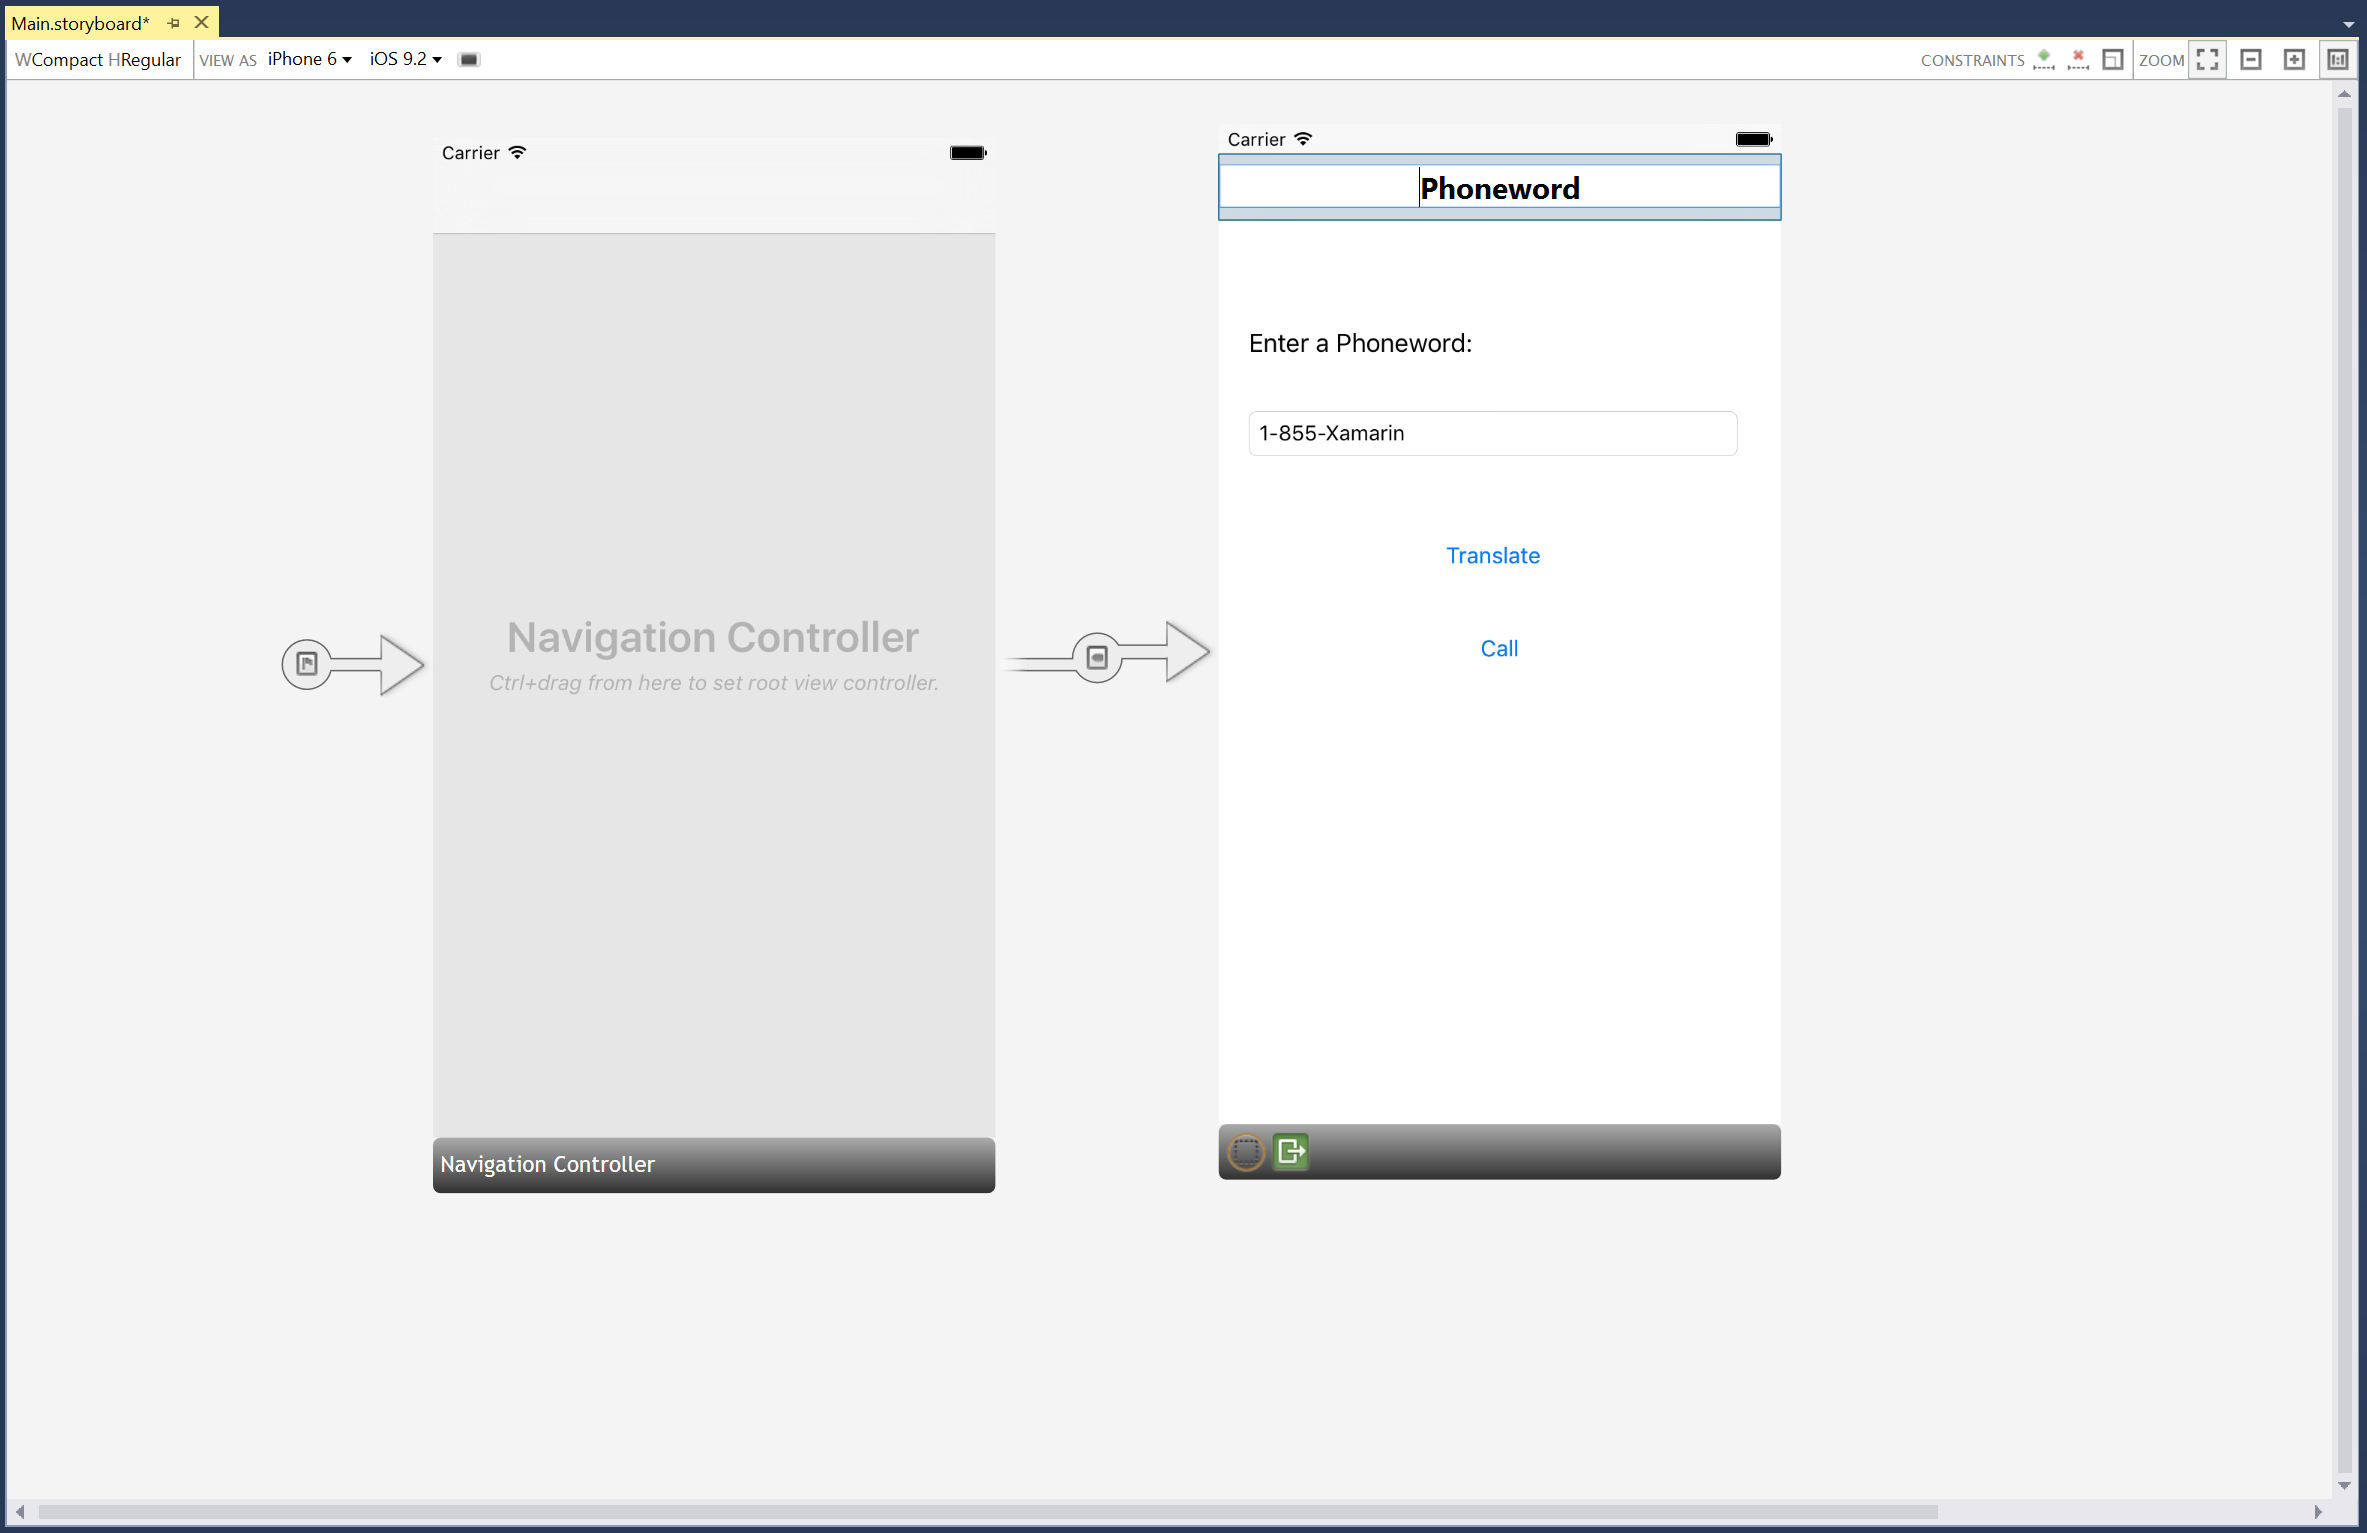
从“工具箱”拖动某个按钮,将其置于“呼叫按钮”下。 拖动图柄,使新的按钮与“呼叫按钮”宽度相同:
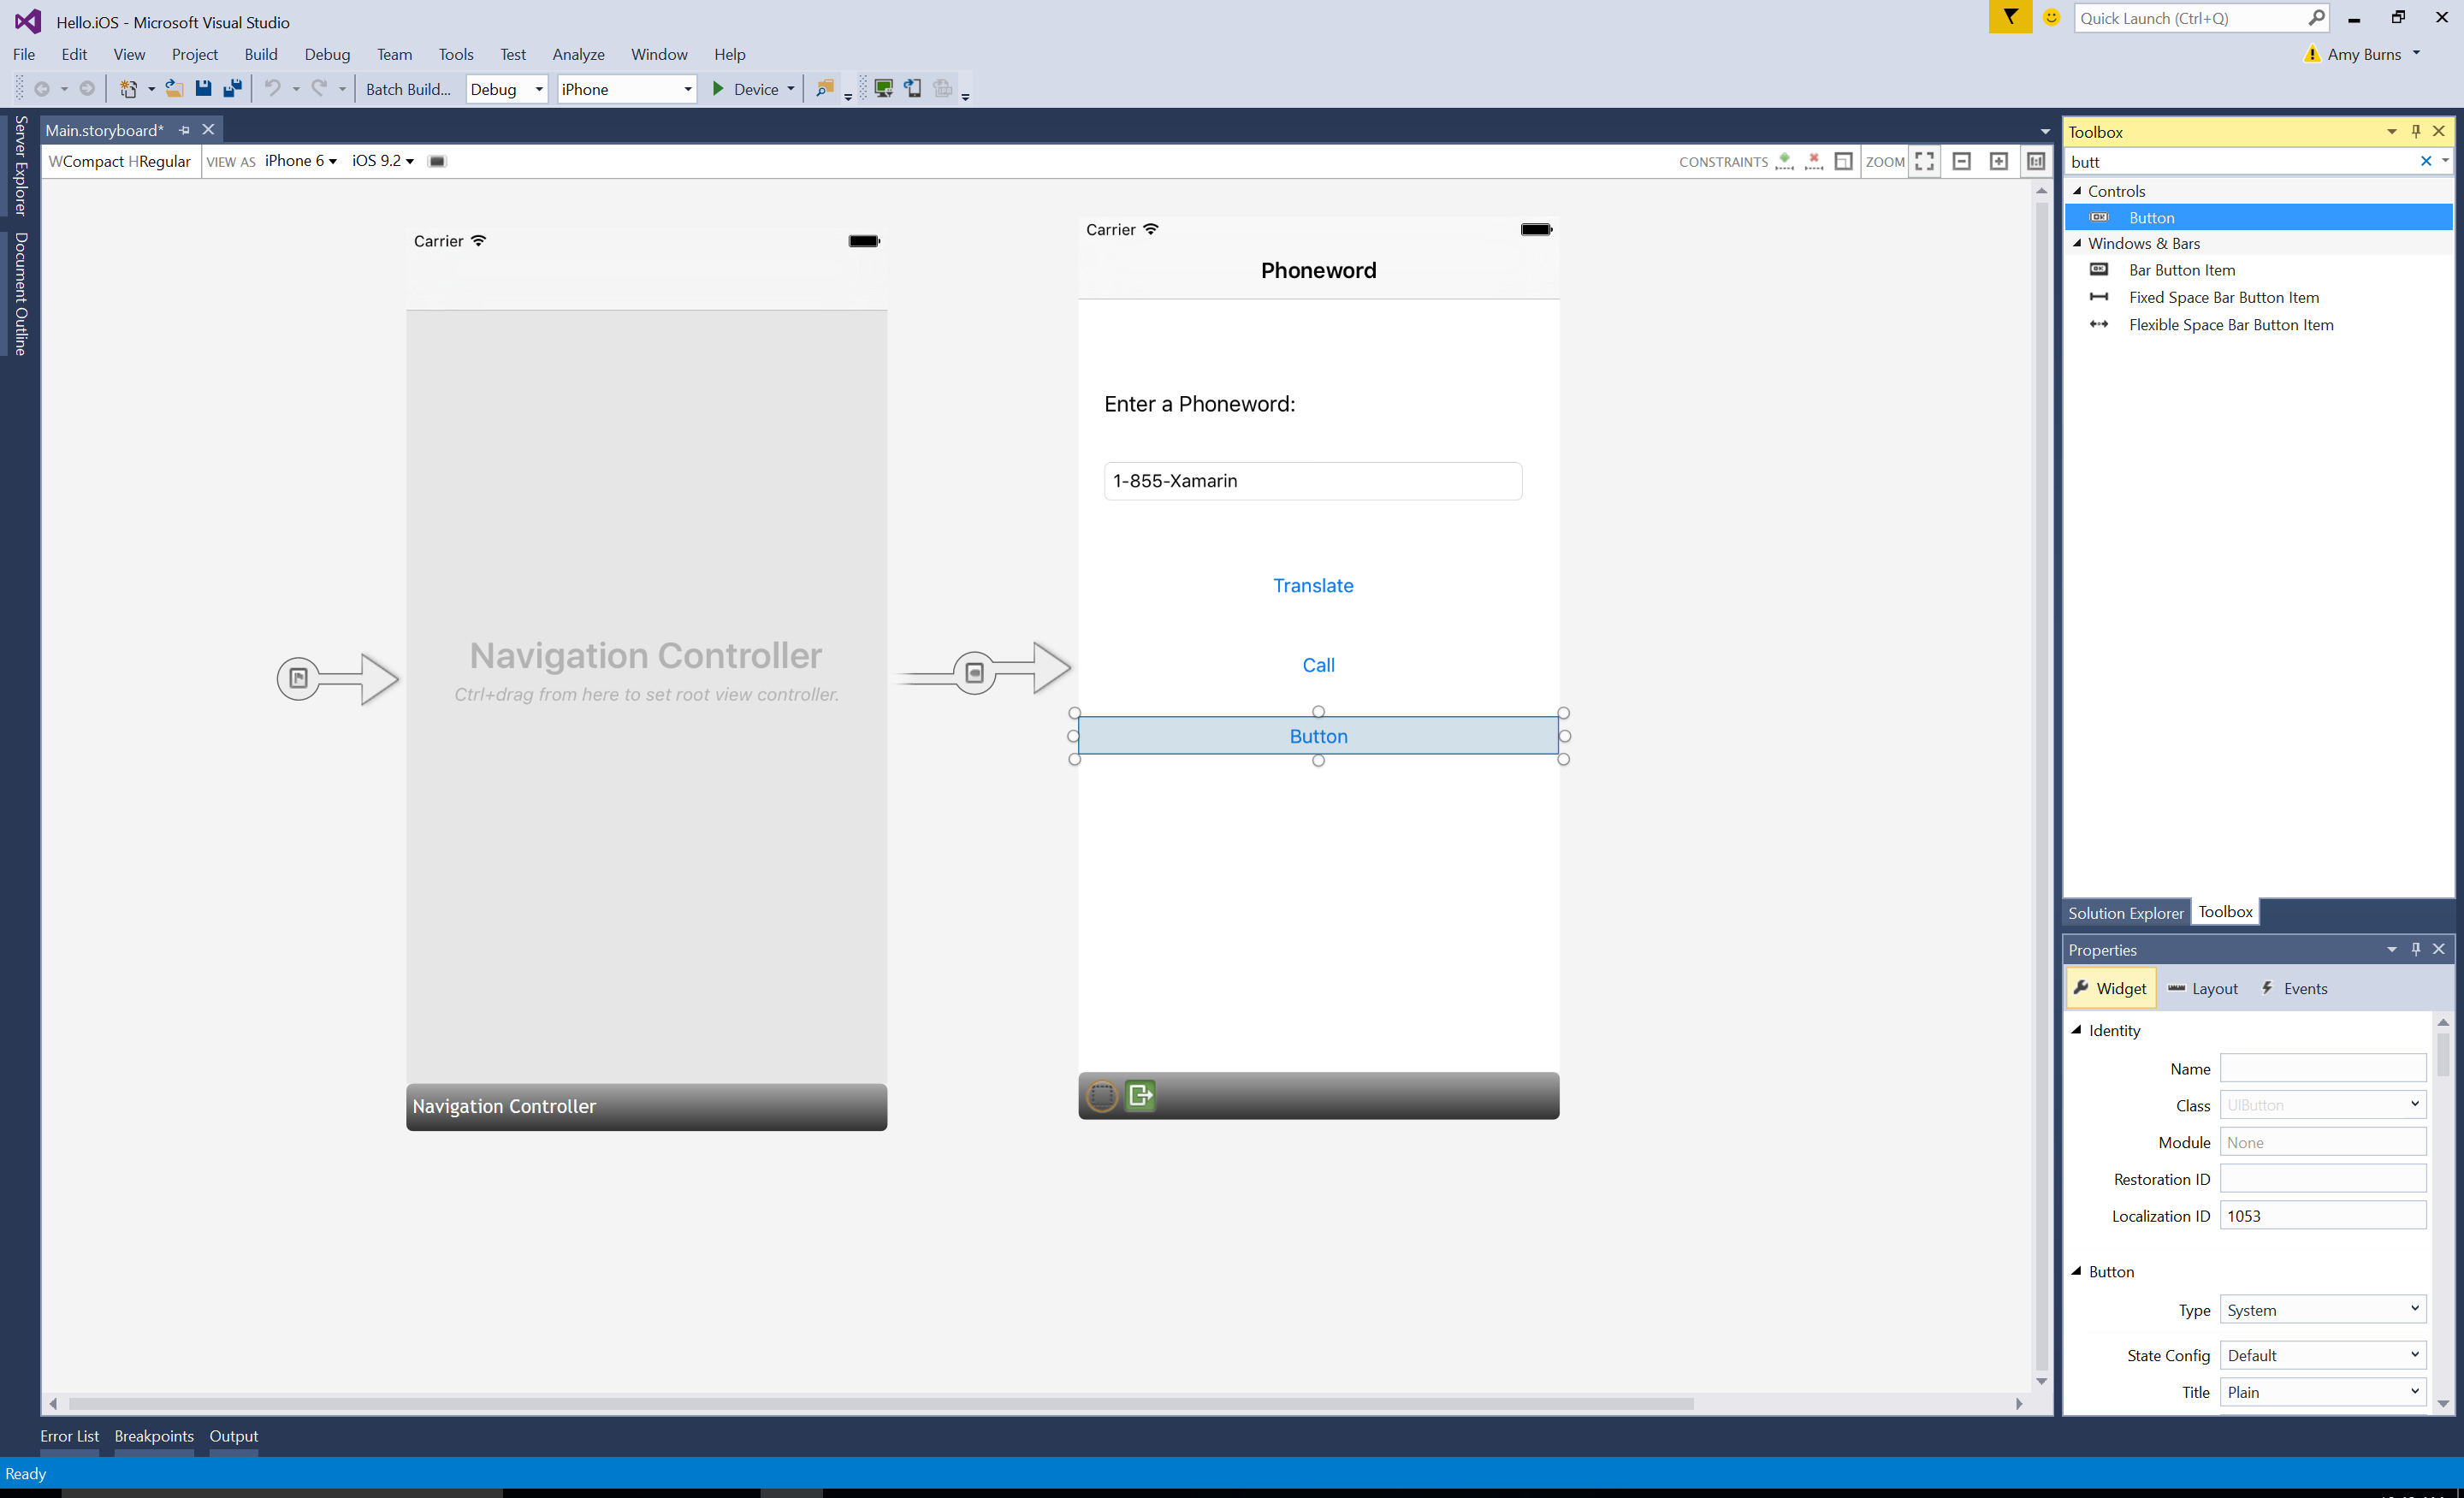
在“属性资源管理器”中,将按钮的名称更改为
CallHistoryButton,并将标题更改为呼叫历史记录: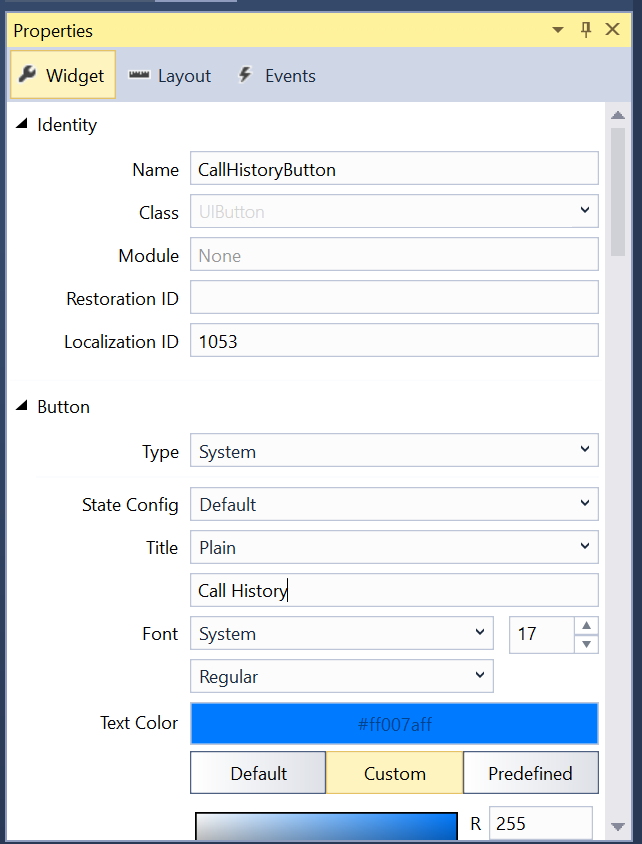
创建“呼叫历史记录”屏幕。 在“工具箱”中,将表格视图控制器拖到设计图面上:
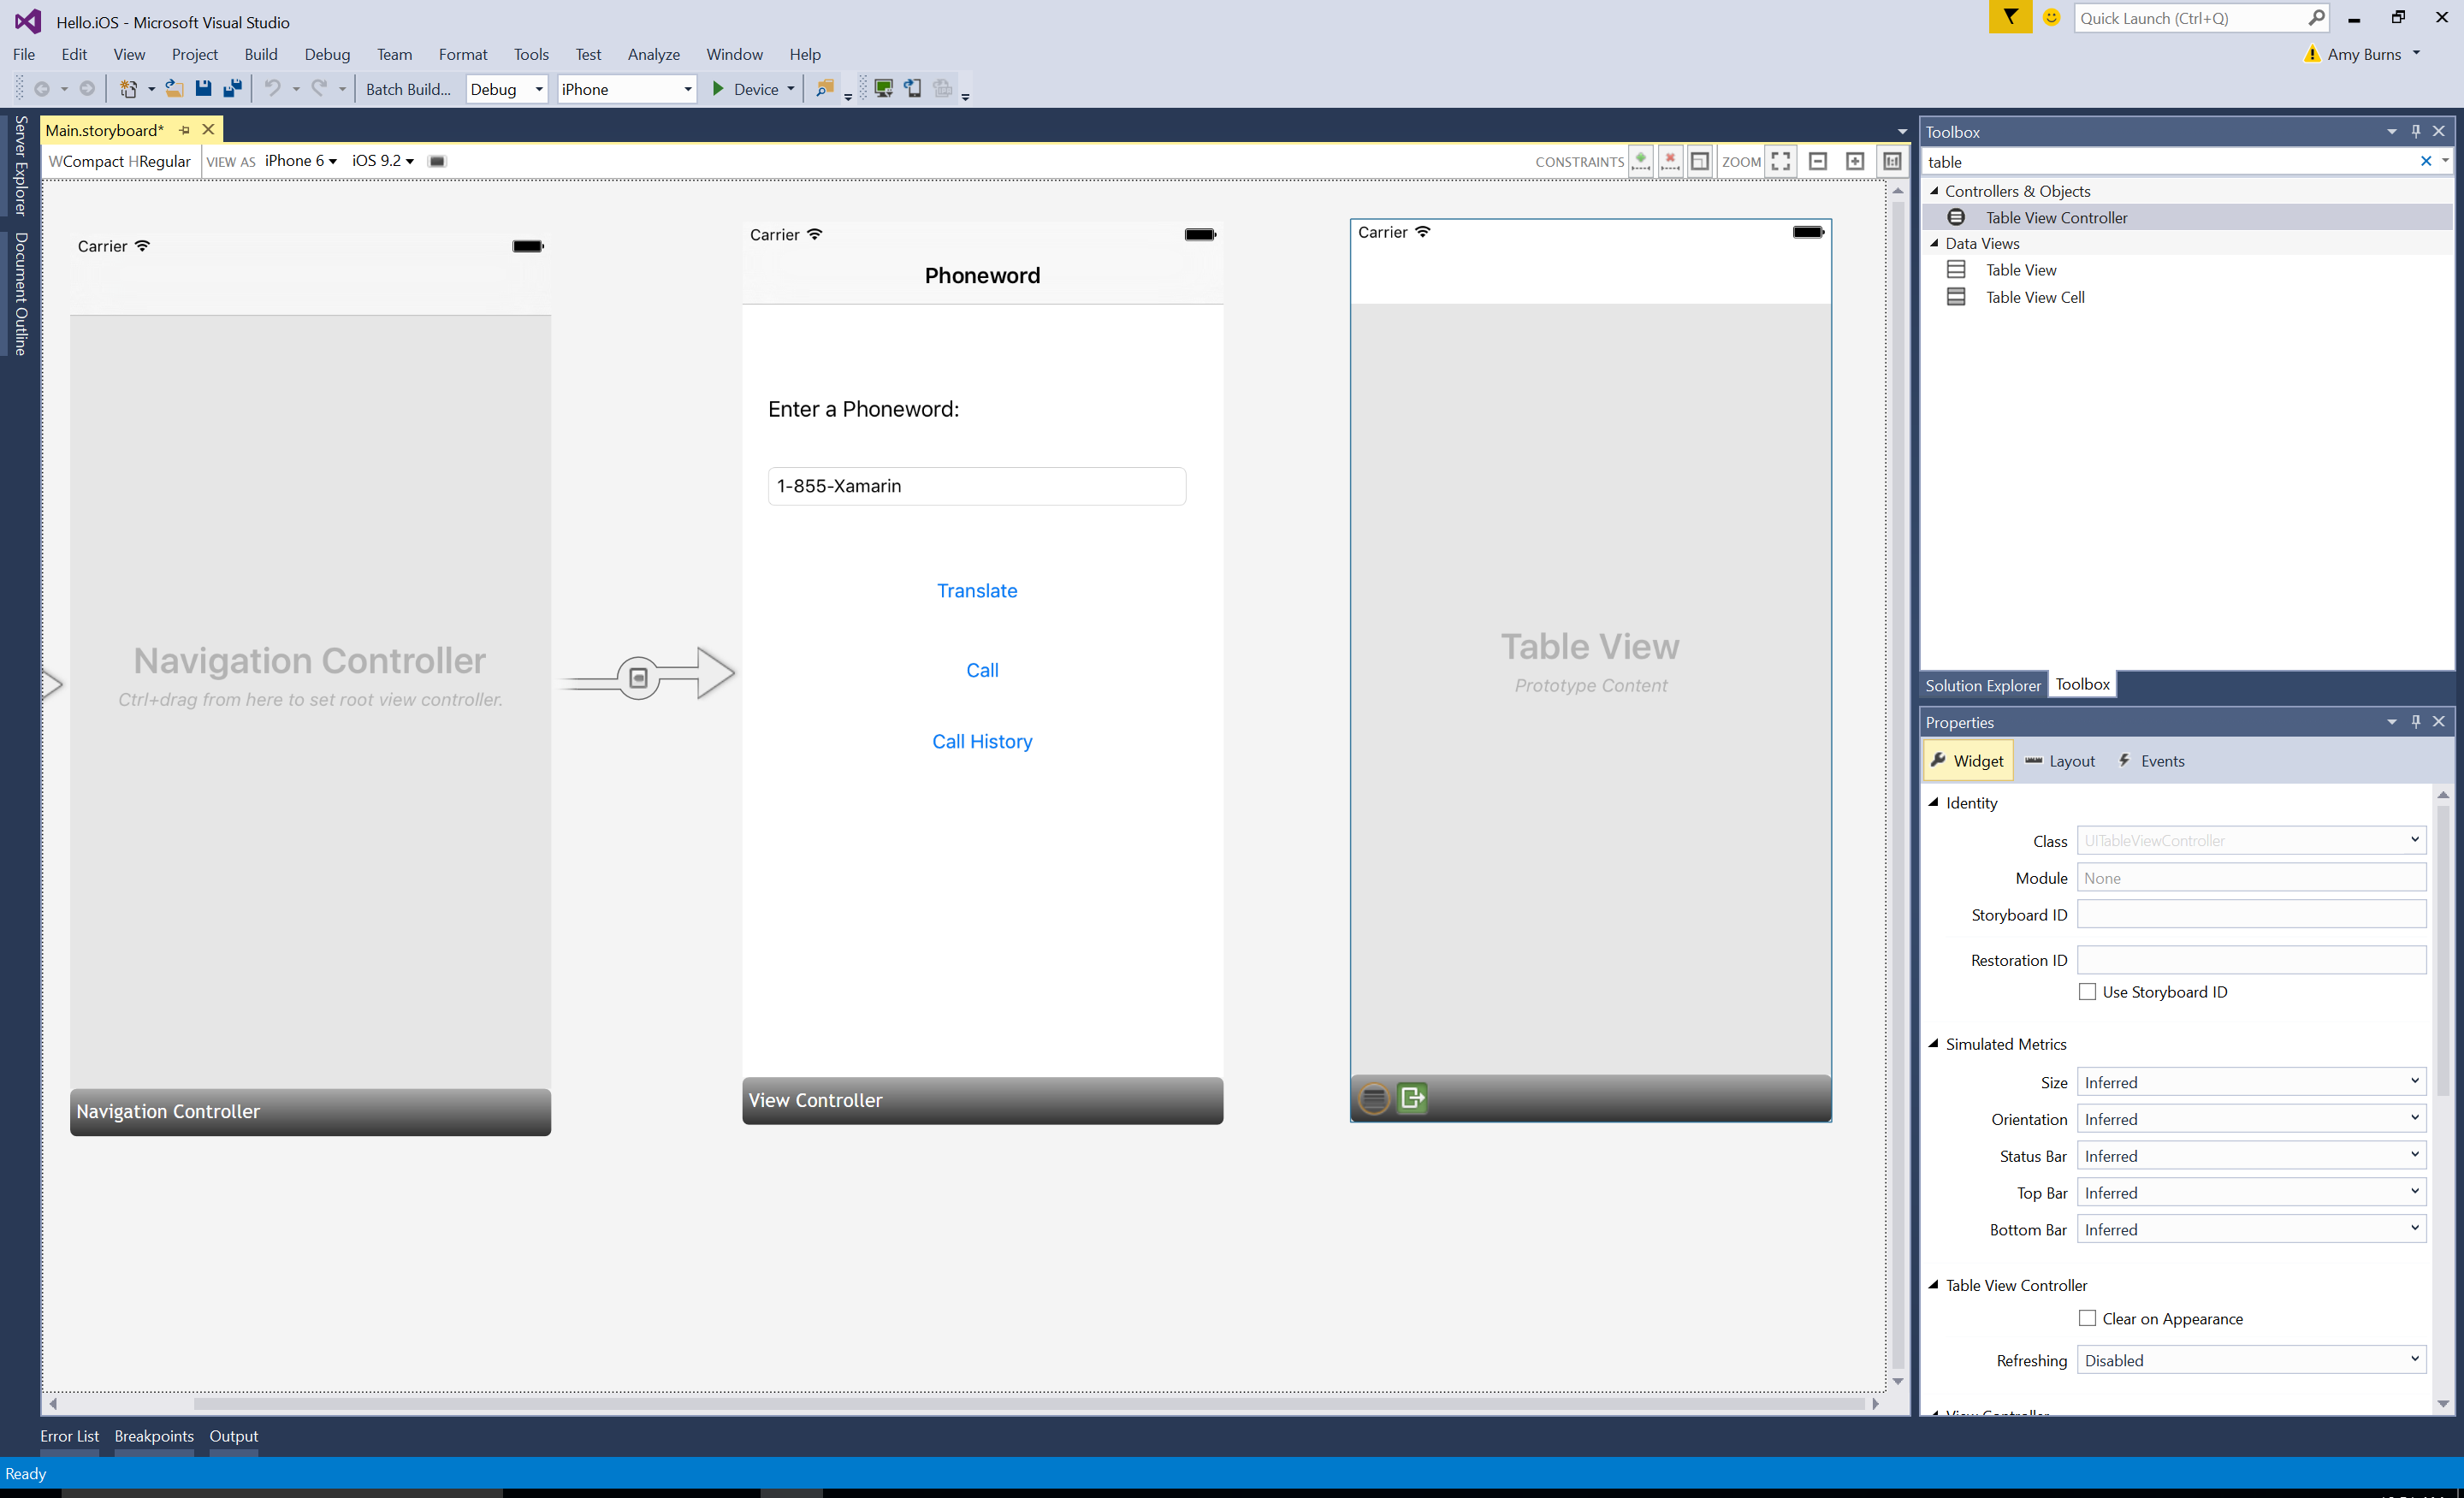
单击“场景”底部的黑色栏,选择“表格视图控制器”。 在“属性资源管理器”中,将表格视图控制器的类更改为
CallHistoryController,并按“Enter”: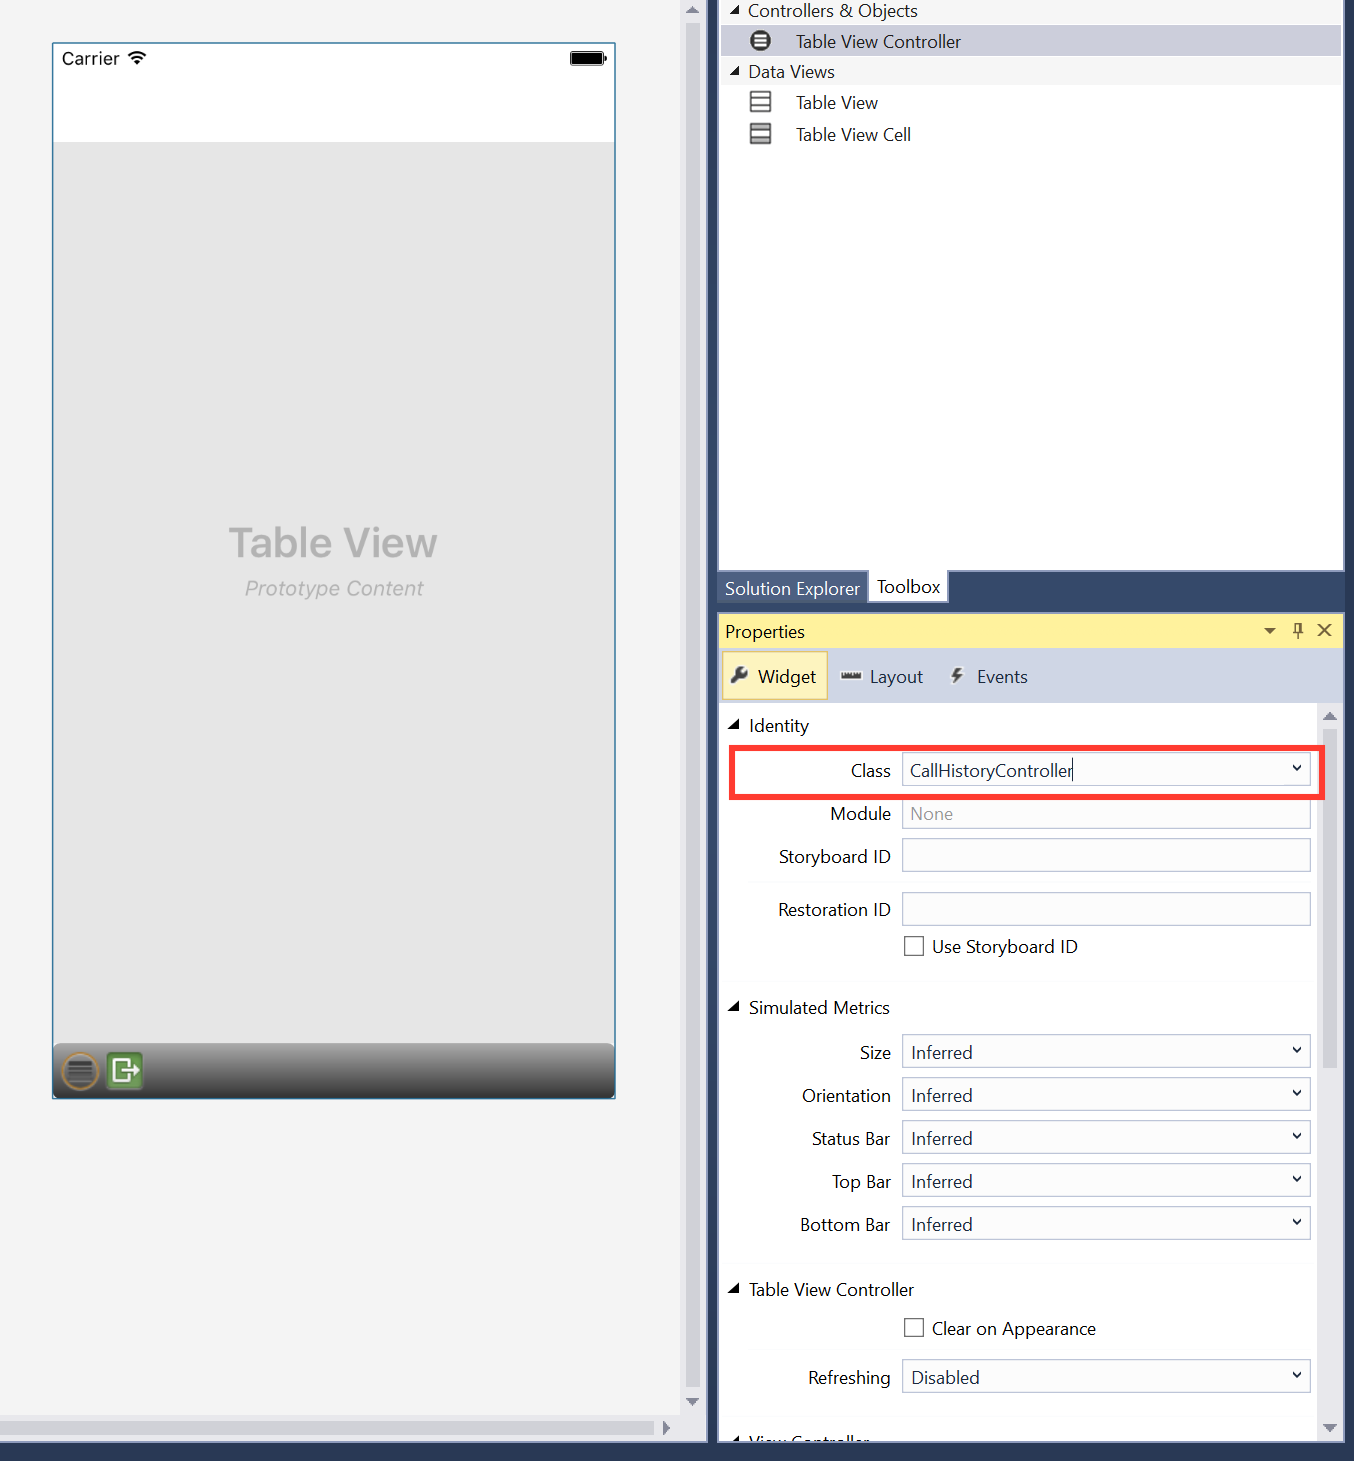
iOS 设计器将生成一个名为
CallHistoryController的自定义后备类,以管理屏幕的“内容视图层次结构”。 CallHistoryController.cs 文件将在解决方案资源管理器中出现: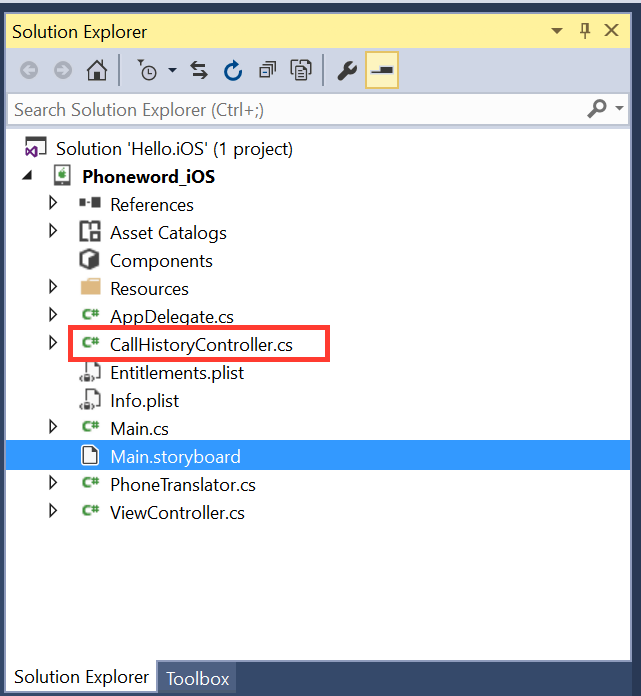
双击 CallHistoryController.cs 文件即可将其打开,并将内容替换为以下代码:
using System;
using Foundation;
using UIKit;
using System.Collections.Generic;

namespace Phoneword
{
    public partial class CallHistoryController : UITableViewController
    {
        public List<String> PhoneNumbers { get; set; }

        static NSString callHistoryCellId = new NSString ("CallHistoryCell");

        public CallHistoryController (IntPtr handle) : base (handle)
        {
            TableView.RegisterClassForCellReuse (typeof(UITableViewCell), callHistoryCellId);
            TableView.Source = new CallHistoryDataSource (this);
            PhoneNumbers = new List<string> ();
        }

        class CallHistoryDataSource : UITableViewSource
        {
            CallHistoryController controller;

            public CallHistoryDataSource (CallHistoryController controller)
            {
                this.controller = controller;
            }

            // Returns the number of rows in each section of the table
            public override nint RowsInSection (UITableView tableView, nint section)
            {
                return controller.PhoneNumbers.Count;
            }

            public override UITableViewCell GetCell (UITableView tableView, NSIndexPath indexPath)
            {
                var cell = tableView.DequeueReusableCell (CallHistoryController.callHistoryCellId);

                int row = indexPath.Row;
                cell.TextLabel.Text = controller.PhoneNumbers [row];
                return cell;
            }
        }
    }
}
保存应用程序,以确保没有错误。 可以暂时忽略所有生成警告。
创建 Phoneword 场景和呼叫历史记录场景之间的 Segue(转换)。 在“Phoneword 场景”中,选择“呼叫历史记录按钮”,然后“按住 Ctrl 拖动”,从“按钮”拖动到“呼叫历史记录”场景:
从“操作 Segue”弹出框,选择“显示”:
iOS 设计器将在两个场景之间添加 Segue:
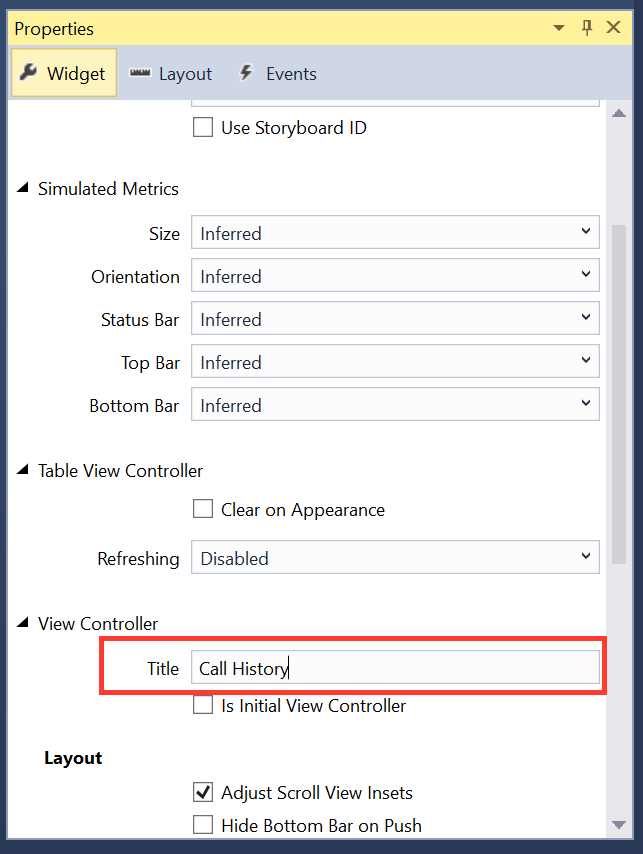
通过选择场景底部的黑色条并将视图控制器标题更改为属性资源管理器中的“调用历史记录”,将标题添加到表视图控制器>:
应用程序运行时,“呼叫历史记录按钮”将打开“呼叫历史记录”屏幕,但表格视图将为空,因为没有代码来记录并显示电话号码。
此应用会将电话号码以字符串列表的形式进行存储。
using在 ViewController 顶部添加指令System.Collections.Generic:using System.Collections.Generic;使用以下代码修改
ViewController类:using System; using System.Collections.Generic; using Foundation; using UIKit; namespace Phoneword_iOS { public partial class ViewController : UIViewController { string translatedNumber = ""; public List<string> PhoneNumbers { get; set; } protected ViewController(IntPtr handle) : base(handle) { //initialize list of phone numbers called for Call History screen PhoneNumbers = new List<string>(); } public override void ViewDidLoad() { base.ViewDidLoad(); // Perform any additional setup after loading the view, typically from a nib. TranslateButton.TouchUpInside += (object sender, EventArgs e) => { // Convert the phone number with text to a number // using PhoneTranslator.cs translatedNumber = PhoneTranslator.ToNumber( PhoneNumberText.Text); // Dismiss the keyboard if text field was tapped PhoneNumberText.ResignFirstResponder(); if (translatedNumber == "") { CallButton.SetTitle("Call ", UIControlState.Normal); CallButton.Enabled = false; } else { CallButton.SetTitle("Call " + translatedNumber, UIControlState.Normal); CallButton.Enabled = true; } }; CallButton.TouchUpInside += (object sender, EventArgs e) => { //Store the phone number that we're dialing in PhoneNumbers PhoneNumbers.Add(translatedNumber); // Use URL handler with tel: prefix to invoke Apple's Phone app... var url = new NSUrl("tel:" + translatedNumber); // otherwise show an alert dialog if (!UIApplication.SharedApplication.OpenUrl(url)) { var alert = UIAlertController.Create("Not supported", "Scheme 'tel:' is not supported on this device", UIAlertControllerStyle.Alert); alert.AddAction(UIAlertAction.Create("Ok", UIAlertActionStyle.Default, null)); PresentViewController(alert, true, null); } }; } public override void PrepareForSegue(UIStoryboardSegue segue, NSObject sender) { base.PrepareForSegue(segue, sender); // set the view controller that’s powering the screen we’re // transitioning to var callHistoryController = segue.DestinationViewController as CallHistoryController; //set the table view controller’s list of phone numbers to the // list of dialed phone numbers if (callHistoryController != null) { callHistoryController.PhoneNumbers = PhoneNumbers; } } } }此处有几个需要注意的要点
- 变量
translatedNumber已从ViewDidLoad方法移到类级变量。 - 修改了 CallButton 代码,以通过调用
PhoneNumbers.Add(translatedNumber)将已拨号码添加到电话号码列表 - 已添加
PrepareForSegue方法
保存并生成应用程序,确保没有错误。
保存并生成应用程序,确保没有错误。
- 变量
在 iOS 模拟器内按“启动”按钮,启动该应用程序:
恭喜,你已完成第一个多屏 Xamarin.iOS 应用程序!
现在,应用可使用 Storyboard Segue 和代码处理导航。 现可详细分析刚刚在了解 Android 多屏显示详述中了解到的工具和技能。