在 Xamarin.iOS 中实现 SiriKit
本文介绍了在 Xamarin.iOS 应用中实现 SiriKit 支持所需的步骤。
SiriKit 是 iOS 10 的新增功能,它允许 Xamarin.iOS 应用提供用户可以在 iOS 设备上使用 Siri 和 Maps 应用访问的服务。 本文介绍了通过添加所需的意向扩展、意向 UI 扩展和词汇在 Xamarin.iOS 应用中实现 SiriKit 支持所需的步骤。
Siri 使用域的概念,即相关任务的一组已知操作。 应用与 Siri 的每次交互都必须属于其已知的服务域之一,如下所示:
- 音频或视频通话。
- 预订车票。
- 管理锻炼。
- 消息。
- 搜索照片。
- 发送或接收付款。
当用户向 Siri 发出涉及应用扩展程序服务之一的请求时,SiriKit 会向扩展发送一个意向对象,该对象会描述用户的请求以及任何支持数据。 然后,应用扩展会为给定的意向生成适当的响应对象,详细说明扩展如何处理请求。
本指南将快速演示将 SiriKit 支持纳入现有应用的示例。 在本示例中,我们将使用假的 MonkeyChat 应用程序:

MonkeyChat 会保留自己的用户好友联系簿,每个好友都与一个屏幕名称相关联(例如 Bobo),并允许用户通过屏幕名称向每个朋友发送文本聊天。
使用 SiriKit 扩展应用
如了解 SiriKit 概念指南中所示,使用 SiriKit 扩展应用涉及三个主要部分:

这些设置包括:
- 意向扩展 - 验证用户响应,确认应用可以处理请求,以及实际执行任务以满足用户请求。
- 意向 UI 扩展 - 可选,为 Siri 环境中的响应提供自定义 UI,并且可以将应用 UI 和品牌引入 Siri 来丰富用户体验。
- 应用 - 为应用提供用户特定的词汇,帮助 Siri 使用它。
下面各节将详细介绍所有这些元素以及将这些元素包含在应用中的步骤。
准备应用
但是,SiriKit 是在将任何扩展添加到应用之前构建的,开发人员需要执行一些操作来帮助采用 SiriKit。
移动常用共享代码
首先,开发人员可以将应用与扩展之间共享的一些常用代码移动到共享项目、可移植类库 (PCL) 或本机库。
扩展需要能够执行应用执行的所有操作。 例如在 MonkeyChat 应用中,查找联系人、添加新联系人、发送消息和检索消息历史记录等操作。
通过将此常用代码移动到共享项目、PCL 或本机库,可以轻松地在一个常用位置维护该代码,并确保扩展和父应用为用户提供统一的体验和功能。
对于示例应用 MonkeyChat,数据模型和处理代码(如网络和数据库访问)将移动到本机库中。
请执行以下操作:
启动 Visual Studio for Mac 并打开 MonkeyChat 应用。
右键单击“Solution Pad”中的“解决方案名称”,然后选择“添加”>“新项目...”:

选择“iOS”>“库”>“类库”,然后单击“下一步”按钮:

输入
MonkeyChatCommon作为“名称”,然后单击“创建”按钮:
在“解决方案资源管理器”中右键单击主应用的“References”文件夹,然后选择“编辑首选项...”。勾选“MonkeyChatCommon”项目,然后单击“确定”按钮:

在“解决方案资源管理器”中,将常用共享代码从主应用拖动到本机库。
对于 MonkeyChat,请将“DataModels”和“Processors”文件夹从主应用拖动到本机库中:


编辑已移动到本机库的任何文件,并更改命名空间以匹配库的命名空间。 例如,将 MonkeyChat 更改为 MonkeyChatCommon:
using System;
namespace MonkeyChatCommon
{
    /// <summary>
    /// A message sent from one user to another within a conversation.
    /// </summary>
    public class MonkeyMessage
    {
        public MonkeyMessage ()
        {
        }
        ...
    }
}
接下来,返回到主应用,在应用使用已移动的类之一的任何位置为本机库的命名空间添加 using 语句:
using System;
using System.Collections.Generic;
using UIKit;
using Foundation;
using CoreGraphics;
using MonkeyChatCommon;

namespace MonkeyChat
{
    public partial class MasterViewController : UITableViewController
    {
        public DetailViewController DetailViewController { get; set; }

        DataSource dataSource;
        ...
    }
}
构建适用于扩展的应用
通常,应用将注册多个意向,开发人员需要确保为适当数量的意向扩展构建应用。
在应用需要多个意向的情况下,开发人员可以选择将所有意向放在一个意向扩展中进行处理,或为每个意向创建单独的意向扩展。
如果选择为每个意向创建单独的意向扩展,开发人员最终可以在每个扩展中复制大量样本代码,并创建大量处理器和内存开销。
为帮助在这两个选项之间进行选择,请查看是否有任何意向在本质上就归属于一起。 例如,发出音频和视频通话的应用可能需要在单个意向扩展中包含这两个意向,因为它们正在处理类似的任务,并且可以最大程度的实现代码重用。
对于不适合现有组的任何意向或意向组,请在应用的解决方案中创建新的意向扩展以包含它们。
设置所需的权利
包含 SiriKit 集成的任何 Xamarin.iOS 应用都必须设置正确的权利。 如果开发人员未正确设置这些所需的权利,则他们将无法在实际 iOS 10(或更高版本)硬件上安装或测试该应用,这也是由于 iOS 10 模拟器不支持 SiriKit 而提出的要求。
请执行以下操作:
在“解决方案资源管理器”中双击
Entitlements.plist文件,将其打开以进行编辑。切换到“源”选项卡。
添加“
com.apple.developer.siri属性”,将“类型”设置为Boolean,将“值”设置为Yes:
保存对文件所做的更改。
在“解决方案资源管理器”中,双击打开“项目文件”进行编辑。
选择“iOS 捆绑包签名”并确保在“自定义权利”字段中选中
Entitlements.plist文件:
单击“确定”按钮保存更改。


完成后,应用的 Entitlements.plist 文件应如下所示(在外部编辑器中打开):
<?xml version="1.0" encoding="UTF-8"?>
<!DOCTYPE plist PUBLIC "-//Apple//DTD PLIST 1.0//EN" "http://www.apple.com/DTDs/PropertyList-1.0.dtd">
<plist version="1.0">
<dict>
    <key>com.apple.developer.siri</key>
    <true/>
</dict>
</plist>
正确预配应用
由于 Apple 在 SiriKit 框架周围配置了严格安全性,实现 SiriKit 的任何 Xamarin.iOS 应用都必须具有正确的应用 ID 和权利(参阅上面的部分),并且必须使用适当的预配配置文件进行签名。
在 Mac 上执行以下操作:
在 Web 浏览器中,导航到 https://developer.apple.com 并登录帐户。
选择“证书、标识符和配置文件”。
选择“预配配置文件”并选择“应用 ID”,然后单击 + 按钮。
输入新配置文件的“名称”。
输入 Apple 命名建议后的“捆绑包 ID。
向下滚动到“应用服务”部分,选择 SiriKit 并单击“继续”按钮:

验证所有设置,然后“提交”应用 ID。
选择“预配配置文件”>“开发”,单击 + 按钮,选择 Apple ID,然后单击“继续”。
单击“全选”,然后单击“继续”。
再次单击“全选”,然后单击“继续”。
输入使用 Apple 的命名建议的配置文件名称,然后单击“继续”。
启动 Xcode。
从 Xcode 菜单中选择“首选项...”
选择“帐户”,然后单击“查看详细信息...”按钮:

在左下角单击“下载所有配置文件”按钮:

确保上面创建的预配配置文件已安装在 Xcode 中。
打开项目以在 Visual Studio for Mac 中添加 SiriKit 支持。
在“解决方案资源管理器”中双击
Info.plist文件。确保捆绑包标识符与上述 Apple 开发人员门户中创建的捆绑包标识符匹配:

在“解决方案资源管理器”中,选择“项目”。
右键单击项目,然后选择“选项”。
选择“iOS 捆绑包签名”,然后选择上面创建的“签名标识”和“预配配置文件”:

单击“确定”按钮保存更改。


重要
测试 SiriKit 仅适用于实际 iOS 10 硬件设备,不适用于 iOS 10 模拟器。 如果在实际硬件上安装启用了 SiriKit 的 Xamarin.iOS 应用时遇到问题,请确保在 Apple 开发人员门户和 Visual Studio for Mac 中正确配置了所需的权利、应用 ID、签名标识符和预配配置文件。
请求 Siri 授权
在应用添加任何用户特定词汇或意向扩展连接到 Siri 之前,它必须向用户请求获得访问 Siri 的授权。
编辑应用的 Info.plist 文件,切换到“源”视图,并使用字符串值添加 NSSiriUsageDescription 键,描述应用如何使用 Siri 以及发送哪些类型的数据。 例如,MonkeyChat 应用可能会说“MonkeyChat 联系人将发送到 Siri”:


首次启动应用时调用 INPreferences 类的 RequestSiriAuthorization 方法。 编辑 AppDelegate.cs 类,使 FinishedLaunching 方法如下所示:
using Intents;
...

public override bool FinishedLaunching (UIApplication application, NSDictionary launchOptions)
{

    // Request access to Siri
    INPreferences.RequestSiriAuthorization ((INSiriAuthorizationStatus status) => {
        // Respond to returned status
        switch (status) {
        case INSiriAuthorizationStatus.Authorized:
            break;
        case INSiriAuthorizationStatus.Denied:
            break;
        case INSiriAuthorizationStatus.NotDetermined:
            break;
        case INSiriAuthorizationStatus.Restricted:
            break;
        }
    });

    return true;
}
首次调用此方法时,会显示一个警报,提示用户允许应用访问 Siri。 开发人员添加到上述 NSSiriUsageDescription 的消息将显示在此警报中。 如果用户最初拒绝访问,他们可以使用设置应用授予对应用的访问权限。
应用随时可以通过调用 INPreferences 类的 SiriAuthorizationStatus 方法来检查应用能否访问 Siri。
本地化和 Siri
在 iOS 设备上,用户可以为 Siri 选择不同于系统默认值的语言。 使用本地化数据时,应用需要使用 INPreferences 类的 SiriLanguageCode 方法从 Siri 获取语言代码。 例如:
var language = INPreferences.SiriLanguageCode();

// Take action based on language
if (language == "en-US") {
    // Do something...
}
添加用户特定词汇
用户特定词汇代表应用程序的各个用户特有的单词或短语。 运行时,主应用(而不是应用扩展)会将这些词汇作为一组有序术语提供,这些术语按用户的使用优先级由高到低排序,最重要的术语位于列表的开头。
用户特定词汇必须属于以下类别之一:
- 联系人姓名(不由联系人框架管理)。
- 照片标记。
- 相册名称。
- 锻炼名称。
选择术语以注册为自定义词汇时,仅选择可能被不熟悉应用的某人误解的术语。 请勿注册常用术语,如“我的锻炼”或“我的专辑”。 例如,MonkeyChat 应用将注册与用户通讯簿中的每个联系人关联的昵称。
应用通过调用 INVocabulary 类的 SetVocabularyStrings 方法并从主应用传入 NSOrderedSet 集合来提供用户特定词汇。 应用应始终先调用 RemoveAllVocabularyStrings 方法,以便在添加新术语之前移除任何现有术语。 例如:
using System;
using System.Linq;
using System.Collections.Generic;
using Foundation;
using Intents;

namespace MonkeyChatCommon
{
    public class MonkeyAddressBook : NSObject
    {
        #region Computed Properties
        public List<MonkeyContact> Contacts { get; set; } = new List<MonkeyContact> ();
        #endregion

        #region Constructors
        public MonkeyAddressBook ()
        {
        }
        #endregion

        #region Public Methods
        public NSOrderedSet<NSString> ContactNicknames ()
        {
            var nicknames = new NSMutableOrderedSet<NSString> ();

            // Sort contacts by the last time used
            var query = Contacts.OrderBy (contact => contact.LastCalledOn);

            // Assemble ordered list of nicknames by most used to least
            foreach (MonkeyContact contact in query) {
                nicknames.Add (new NSString (contact.ScreenName));
            }

            // Return names
            return new NSOrderedSet<NSString> (nicknames.AsSet ());
        }

        // This method MUST only be called on a background thread!
        public void UpdateUserSpecificVocabulary ()
        {
            // Clear any existing vocabulary
            INVocabulary.SharedVocabulary.RemoveAllVocabularyStrings ();

            // Register new vocabulary
            INVocabulary.SharedVocabulary.SetVocabularyStrings (ContactNicknames (), INVocabularyStringType.ContactName);
        }
        #endregion
    }
}
有了此代码,可以按如下所示调用它:
using System;
using System.Threading;
using UIKit;
using MonkeyChatCommon;
using Intents;

namespace MonkeyChat
{
    public partial class ViewController : UIViewController
    {
        #region AppDelegate Access
        public AppDelegate ThisApp {
            get { return (AppDelegate)UIApplication.SharedApplication.Delegate; }
        }
        #endregion

        #region Constructors
        protected ViewController (IntPtr handle) : base (handle)
        {
            // Note: this .ctor should not contain any initialization logic.
        }
        #endregion

        #region Override Methods
        public override void ViewDidLoad ()
        {
            base.ViewDidLoad ();

            // Do we have access to Siri?
            if (INPreferences.SiriAuthorizationStatus == INSiriAuthorizationStatus.Authorized) {
                // Yes, update Siri's vocabulary
                new Thread (() => {
                    Thread.CurrentThread.IsBackground = true;
                    ThisApp.AddressBook.UpdateUserSpecificVocabulary ();
                }).Start ();
            }
        }

        public override void DidReceiveMemoryWarning ()
        {
            base.DidReceiveMemoryWarning ();
            // Release any cached data, images, etc that aren't in use.
        }
        #endregion
    }
}
重要
Siri 将自定义词汇视为提示,并将尽可能多地纳入术语。 但是,自定义词汇的空间有限,因此仅注册可能令人困惑的术语非常重要,从而将注册的术语总数保持在最低水平。
有关详细信息,请参阅我们的用户特定词汇参考和 Apple 的指定自定义词汇参考。
添加应用特定词汇
应用程序特定词汇定义了所有应用程序用户都知道的特定单词和短语,例如车辆类型或锻炼名称。 由于它们是应用程序的一部分,因此它们在 AppIntentVocabulary.plist 文件中被定义为主应用程序包的一部分。 此外,应对这些字词和短语进行本地化处理。
应用特定词汇术语必须属于以下类别之一:
- 骑行选项。
- 锻炼名称。
应用特定词汇文件包含两个根级别键:
ParameterVocabularies必需 - 定义应用适用的自定义术语和意向参数。IntentPhrases可选 - 包含使用ParameterVocabularies中定义的自定义术语的示例短语。
ParameterVocabularies 中的每个条目必须指定一个 ID 字符串、术语和术语适用的意向。 此外,单个术语可能适用于多个意向。
有关可接受的值和所需文件结构的完整列表,请参阅 Apple 的应用词汇文件格式参考。
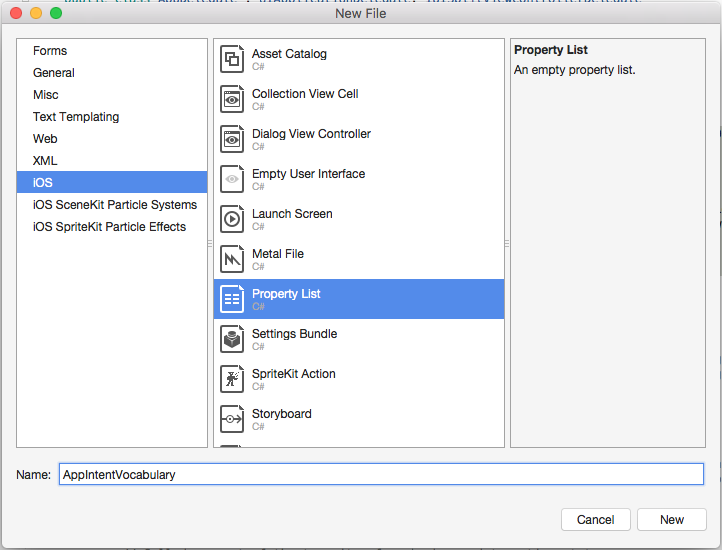
若要向应用项目添加 AppIntentVocabulary.plist 文件,请执行以下操作:
在“解决方案资源管理器”中右键单击项目名称,然后选择“添加”>“新建文件...”>“iOS”:
在“解决方案资源管理器”中双击
AppIntentVocabulary.plist文件,将其打开以进行编辑。单击 + 以添加键,将“名称”设置为
ParameterVocabularies,将“类型”设置为Array:
展开
ParameterVocabularies并单击 + 按钮,然后将“类型”设置为Dictionary:
单击 + 以添加新键,将“名称”设置为
ParameterNames,将“类型”设置为Array:
单击 + 以添加“类型”为
String且值作为可用参数名称的新键。 例如,INStartWorkoutIntent.workoutName:
将
ParameterVocabulary键添加到“类型”为Array的ParameterVocabularies键: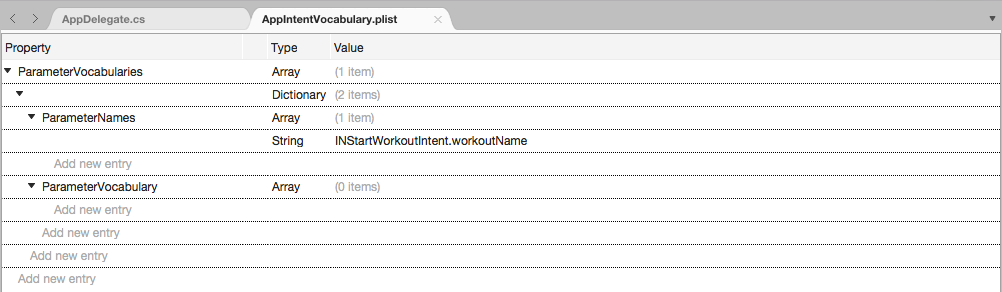
添加“类型”为
Dictionary的新键:
添加“类型”为
String的VocabularyItemIdentifier键,并为术语指定唯一 ID:
添加“类型”为
Array的VocabularyItemSynonyms键:
添加“类型”为
Dictionary的新键:
添加“类型
VocabularyItemPhrase”为String的 键和应用正在定义的术语:
添加“类型”为
String的VocabularyItemPronunciation键和术语的拼音发音:
添加“类型”为
Array的VocabularyItemExamples键:
添加包含术语示例用法的几个
String键:
对应用需要定义的任何其他自定义术语重复上述步骤。
折叠
ParameterVocabularies键。添加“类型”为
Array的IntentPhrases键:
添加“类型”为
Dictionary的新键:
添加“类型”为
String的IntentName键和示例的意向:
添加“类型”为
Array的IntentExamples键:
添加包含术语示例用法的几个
String键:
对应用需要提供示例用法的任何意向重复上述步骤。


重要
在开发过程中,AppIntentVocabulary.plist 将在测试设备上注册 Siri,可能需要一些时间才能将自定义词汇纳入 Siri。 因此,测试人员需要等待几分钟,然后才能尝试在更新应用特定词汇后对其进行测试。
有关详细信息,请参阅我们的应用特定词汇参考和 Apple 的指定自定义词汇参考。
添加意向扩展
现在,应用已准备好采用 SiriKit,开发人员需要将一个(或多个)意向扩展添加到解决方案,以处理 Siri 集成所需的意向。
对于所需的每个意向扩展,请执行以下操作:
- 将意向扩展项目添加到 Xamarin.iOS 应用解决方案。
- 配置意向扩展
Info.plist文件。 - 修改意向扩展主类。
有关详细信息,请参阅我们的意向扩展参考和 Apple 的创建意向扩展参考。
创建扩展
若要将意向扩展添加到解决方案,请执行以下操作:
右键单击 Solution Pad 中的“解决方案名称”,然后选择“添加”>“添加新项目...”。
从对话框中选择“iOS”>“扩展”>“意向扩展”,然后单击“下一步”按钮:

输入意向扩展的“名称”,然后单击“下一步”按钮:

最后,单击“创建”按钮将意向扩展添加到应用解决方案:

在“解决方案资源管理器”中,右键单击新创建的意向扩展的“References”文件夹。 检查常用共享代码库项目的名称(上面创建的应用)并单击“确定”按钮:


针对应用将需要的意向扩展数重复这些步骤(基于上面的构建适用于扩展的应用部分)。
配置 Info.plist
对于已添加到应用解决方案的每个意向扩展,必须在 Info.plist 文件中进行配置才能使用应用。
与任何典型的应用扩展一样,应用将具有现有键 NSExtension 和 NSExtensionAttributes。 对于意向扩展,必须配置两个新属性:

- IntentsSupported - 是必需的,并且由应用希望从意向扩展支持的一组意向类名称组成。
- IntentsRestrictedWhileLocked - 是应用指定扩展锁屏行为的可选键。 它包含应用希望要求用户登录才能从意向扩展使用的一组意向类名称。
若要配置意向扩展的 Info.plist 文件,请在“解决方案资源管理器”中双击打开它进行编辑。 接下来,切换到“源”视图,然后在编辑器中展开 NSExtension 和 NSExtensionAttributes 键:


展开 IntentsSupported 键并添加此扩展将支持的任何意向类的名称。 对于示例 MonkeyChat 应用,它支持 INSendMessageIntent:


如果应用(可选)要求用户登录到设备才能使用给定意向,请展开 IntentRestrictedWhileLocked 键并添加具有受限访问权限的意向的类名称。 对于示例 MonkeyChat 应用,用户必须登录才能发送聊天消息,因此我们添加了 INSendMessageIntent:


有关可用意向域的完整列表,请参阅 Apple 的 意向域参考。
配置主类
接下来,开发人员需要配置主类,该类充当 Siri 中意向扩展的主要入口点。 它必须是符合 IINIntentHandler 委托的 INExtension 的子类。 例如:
using System;
using System.Collections.Generic;

using Foundation;
using Intents;

namespace MonkeyChatIntents
{
    [Register ("IntentHandler")]
    public class IntentHandler : INExtension, IINSendMessageIntentHandling, IINSearchForMessagesIntentHandling, IINSetMessageAttributeIntentHandling
    {
        #region Constructors
        protected IntentHandler (IntPtr handle) : base (handle)
        {
            // Note: this .ctor should not contain any initialization logic.
        }
        #endregion

        #region Override Methods
        public override NSObject GetHandler (INIntent intent)
        {
            // This is the default implementation.  If you want different objects to handle different intents,
            // you can override this and return the handler you want for that particular intent.

            return this;
        }
        #endregion
        ...
    }
}
应用必须在意向扩展主类上实现一个单独方法,即 GetHandler 方法。 此方法由 SiriKit 传递意向,应用必须返回与给定意向的类型匹配的意向处理程序。
由于示例 MonkeyChat 应用只处理一个意向,因此它在 GetHandler 方法中返回自身。 如果扩展处理了多个意向,开发人员会为每个意向类型添加一个类,并根据传递给该方法的 Intent 返回一个实例。
处理解析阶段
解决阶段是意向扩展将阐明和验证从 Siri 传入的参数的位置,并且已通过用户的聊天进行设置。
对于从 Siri 发送的每个参数,都有一个 Resolve 方法。 应用需要为应用可能需要 Siri 帮助才能从用户处获取正确答案的每个参数实现此方法。
对于示例 MonkeyChat 应用,意向扩展需要一个或多个收件人向其发送消息。 对于列表中的每个收件人,该扩展需要执行联系人搜索,可能产生以下结果:
- 找到一个精确匹配的联系人。
- 找到两个或更多匹配的联系人。
- 未找到匹配的联系人。
此外,MonkeyChat 要求消息的正文有内容。 如果用户尚未提供,Siri 需要提示用户输入内容。
意向扩展需要正常处理其中的每种情况。
[Export ("resolveRecipientsForSearchForMessages:withCompletion:")]
public void ResolveRecipients (INSendMessageIntent intent, Action<INPersonResolutionResult []> completion)
{
    var recipients = intent.Recipients;
    // If no recipients were provided we'll need to prompt for a value.
    if (recipients.Length == 0) {
        completion (new INPersonResolutionResult [] { (INPersonResolutionResult)INPersonResolutionResult.NeedsValue });
        return;
    }

    var resolutionResults = new List<INPersonResolutionResult> ();

    foreach (var recipient in recipients) {
        var matchingContacts = new INPerson [] { recipient }; // Implement your contact matching logic here to create an array of matching contacts
        if (matchingContacts.Length > 1) {
            // We need Siri's help to ask user to pick one from the matches.
            resolutionResults.Add (INPersonResolutionResult.GetDisambiguation (matchingContacts));
        } else if (matchingContacts.Length == 1) {
            // We have exactly one matching contact
            resolutionResults.Add (INPersonResolutionResult.GetSuccess (recipient));
        } else {
            // We have no contacts matching the description provided
            resolutionResults.Add ((INPersonResolutionResult)INPersonResolutionResult.Unsupported);
        }
    }

    completion (resolutionResults.ToArray ());
}

[Export ("resolveContentForSendMessage:withCompletion:")]
public void ResolveContent (INSendMessageIntent intent, Action<INStringResolutionResult> completion)
{
    var text = intent.Content;
    if (!string.IsNullOrEmpty (text))
        completion (INStringResolutionResult.GetSuccess (text));
    else
        completion ((INStringResolutionResult)INStringResolutionResult.NeedsValue);
}
有关详细信息,请参阅我们的解析阶段参考和 Apple 的解析和处理意向参考。
处理确认阶段
确认阶段是意向扩展检查以确保它具有满足用户请求的所有信息的位置。 应用希望在发送确认信息时一起发送 Siri 即将发生的情况的所有支持详细信息,以便可以与用户确认这是预期操作。
[Export ("confirmSendMessage:completion:")]
public void ConfirmSendMessage (INSendMessageIntent intent, Action<INSendMessageIntentResponse> completion)
{
    // Verify user is authenticated and the app is ready to send a message.
    ...

    var userActivity = new NSUserActivity (nameof (INSendMessageIntent));
    var response = new INSendMessageIntentResponse (INSendMessageIntentResponseCode.Ready, userActivity);
    completion (response);
}
有关详细信息,请参阅我们的确认阶段参考。
处理意向
意向扩展会在此实际执行任务来满足用户的请求并将结果传回 Siri,以便通知用户。
public void HandleSendMessage (INSendMessageIntent intent, Action<INSendMessageIntentResponse> completion)
{
    // Implement the application logic to send a message here.
    ...

    var userActivity = new NSUserActivity (nameof (INSendMessageIntent));
    var response = new INSendMessageIntentResponse (INSendMessageIntentResponseCode.Success, userActivity);
    completion (response);
}

public void HandleSearchForMessages (INSearchForMessagesIntent intent, Action<INSearchForMessagesIntentResponse> completion)
{
    // Implement the application logic to find a message that matches the information in the intent.
    ...

    var userActivity = new NSUserActivity (nameof (INSearchForMessagesIntent));
    var response = new INSearchForMessagesIntentResponse (INSearchForMessagesIntentResponseCode.Success, userActivity);

    // Initialize with found message's attributes
    var sender = new INPerson (new INPersonHandle ("sarah@example.com", INPersonHandleType.EmailAddress), null, "Sarah", null, null, null);
    var recipient = new INPerson (new INPersonHandle ("+1-415-555-5555", INPersonHandleType.PhoneNumber), null, "John", null, null, null);
    var message = new INMessage ("identifier", "I am so excited about SiriKit!", NSDate.Now, sender, new INPerson [] { recipient });
    response.Messages = new INMessage [] { message };
    completion (response);
}

public void HandleSetMessageAttribute (INSetMessageAttributeIntent intent, Action<INSetMessageAttributeIntentResponse> completion)
{
    // Implement the application logic to set the message attribute here.
    ...

    var userActivity = new NSUserActivity (nameof (INSetMessageAttributeIntent));
    var response = new INSetMessageAttributeIntentResponse (INSetMessageAttributeIntentResponseCode.Success, userActivity);
    completion (response);
}
有关详细信息,请参阅我们的处理阶段参考。
添加意向 UI 扩展
借助可选的意向 UI 扩展,可将应用的 UI 和品牌融入 Siri 体验并使用户感觉已与应用建立连接。 通过此扩展,应用可以将品牌以及视觉信息和其他信息引入脚本。

与意向扩展一样,开发人员将为意向 UI 扩展执行以下步骤:
- 将意向 UI 扩展项目添加到 Xamarin.iOS 应用解决方案。
- 配置意向 UI 扩展
Info.plist文件。 - 修改意向 UI 扩展主类。
有关详细信息,请参阅我们的 意向 UI 扩展参考和 Apple 的提供自定义接口参考。
创建扩展
若要将意向 UI 扩展添加到解决方案,请执行以下操作:
右键单击 Solution Pad 中的“解决方案名称”,然后选择“添加”>“添加新项目...”。
从对话框中选择“iOS”>“扩展”>“意向 UI 扩展”,然后单击“下一步”按钮:

输入意向扩展的“名称”,然后单击“下一步”按钮:

最后,单击“创建”按钮将意向扩展添加到应用解决方案:

在“解决方案资源管理器”中,右键单击新创建的意向扩展的“References”文件夹。 检查常用共享代码库项目的名称(上面创建的应用)并单击“确定”按钮:


配置 Info.plist
配置意向 UI 扩展的 Info.plist 文件以使用应用。
与任何典型的应用扩展一样,应用将具有现有键 NSExtension 和 NSExtensionAttributes。 对于意向扩展,必须配置一个新属性:

IntentsSupported 是必需的,并且由应用希望从意向扩展支持的一组意向类名称组成。
若要配置意向 UI 扩展的 Info.plist 文件,请在“解决方案资源管理器”中双击打开它进行编辑。 接下来,切换到“源”视图,然后在编辑器中展开 NSExtension 和 NSExtensionAttributes 键:


展开 IntentsSupported 键并添加此扩展将支持的任何意向类的名称。 对于示例 MonkeyChat 应用,它支持 INSendMessageIntent:


有关可用意向域的完整列表,请参阅 Apple 的 意向域参考。
配置主类
配置充当意向 UI 扩展进入 Siri 的主要入口点的主类。 它必须是符合 IINUIHostedViewController 接口的 UIViewController 的子类。 例如:
using System;
using Foundation;
using CoreGraphics;
using Intents;
using IntentsUI;
using UIKit;

namespace MonkeyChatIntentsUI
{
    public partial class IntentViewController : UIViewController, IINUIHostedViewControlling
    {
        #region Constructors
        protected IntentViewController (IntPtr handle) : base (handle)
        {
            // Note: this .ctor should not contain any initialization logic.
        }
        #endregion

        #region Override Methods
        public override void ViewDidLoad ()
        {
            base.ViewDidLoad ();

            // Do any required interface initialization here.
        }

        public override void DidReceiveMemoryWarning ()
        {
            // Releases the view if it doesn't have a superview.
            base.DidReceiveMemoryWarning ();

            // Release any cached data, images, etc that aren't in use.
        }
        #endregion

        #region Public Methods
        [Export ("configureWithInteraction:context:completion:")]
        public void Configure (INInteraction interaction, INUIHostedViewContext context, Action<CGSize> completion)
        {
            // Do configuration here, including preparing views and calculating a desired size for presentation.

            if (completion != null)
                completion (DesiredSize ());
        }

        [Export ("desiredSize:")]
        public CGSize DesiredSize ()
        {
            return ExtensionContext.GetHostedViewMaximumAllowedSize ();
        }
        #endregion
    }
}
Siri 会将 INInteraction 类实例传递给意向 UI 扩展内的 UIViewController 实例的 Configure 方法。
INInteraction 对象向扩展提供三个关键信息片段:
- 正在处理的意向对象。
- 意向响应对象,来自意向扩展的
Confirm和Handle方法。 - 交互状态,定义应用与 Siri 之间交互的状态。
UIViewController 实例是与 Siri 交互的原则类,因为它继承自 UIViewController 类,所以可以访问 UIKit 的所有功能。
当 Siri 调用 UIViewController 的 Configure 方法时,它会传入视图上下文,指出视图控制器将在 Siri Snippit 或 Maps Card 中托管。
Siri 还将传入完成处理程序,应用在完成配置后需要它才能返回视图的所需大小。
在 iOS 设计器中设计 UI
在 iOS 设计器中布局意向 UI 扩展的用户界面。 在“解决方案资源管理器”中,双击打开扩展的 MainInterface.storyboard 文件进行编辑。 拖动所有必需的 UI 元素以生成用户界面并保存更改。
重要
虽然可以向意向 UI 扩展的 UIViewController 中添加交互式元素,例如 UIButtons 或 UITextFields,但这些都是严格禁止的,因为意向 UI 处于非交互式状态,用户将无法与它们交互。
关联用户界面
使用在 iOS 设计器中创建的意向 UI 扩展用户界面,编辑 UIViewController 子类并重写 Configure 方法,如下所示:
[Export ("configureWithInteraction:context:completion:")]
public void Configure (INInteraction interaction, INUIHostedViewContext context, Action<CGSize> completion)
{
    // Do configuration here, including preparing views and calculating a desired size for presentation.
    ...

    // Return desired size
    if (completion != null)
        completion (DesiredSize ());
}

[Export ("desiredSize:")]
public CGSize DesiredSize ()
{
    return ExtensionContext.GetHostedViewMaximumAllowedSize ();
}
重写默认 Siri UI
意向 UI 扩展将始终与其他 Siri 内容一起显示,例如 UI 顶部的应用图标和名称,或者根据意向,按钮(如发送或取消)可能会显示在底部。
在某些情况下,应用程序可以替换 Siri 默认向用户显示的信息,例如消息或地图,应用程序可以将默认体验替换为针对应用程序定制的体验。
如果意向 UI 扩展需要重写默认 Siri UI 的元素,则 UIViewController 子类需要实现 IINUIHostedViewSiriProviding 接口并选择加入以显示特定接口元素。
将以下代码添加到 UIViewController 子类,告知 Siri 意向 UI 扩展已显示消息内容:
public bool DisplaysMessage {
    get {return true;}
}
注意事项
Apple 建议开发人员在设计和实现意向 UI 扩展时考虑以下注意事项:
- 注意内存使用情况 - 由于意向 UI 扩展是临时的,并且仅在短时间内显示,因此系统将施加比完整应用更严格的内存约束。
- 考虑最小和最大视图大小 - 确保意向 UI 扩展在每个 iOS 设备类型、大小和方向上看起来都不错。 此外,应用发送回 Siri 的所需大小可能无法授予。
- 使用灵活和自适应布局模式 - 再次确保 UI 在每个设备上看起来适合。
总结
本文介绍了 SiriKit,并展示了如何将它添加到 Xamarin.iOS 应用,以提供用户可以在 iOS 设备上使用 Siri 和 Maps 应用访问的服务。