快速入門:將您的通話應用程式加入 Teams 自動語音應答
在本快速入門中,您將瞭解如何從 Azure 通訊服務 使用者到 Teams 自動語音應答開始通話。 您將使用下列步驟來達成此目的:
- 使用 Teams 租使用者啟用 Azure 通訊服務 資源的同盟。
- 透過 Teams 管理員 中心選取或建立 Teams 自動語音應答。
- 透過 Teams 管理員 中心取得自動語音應答的電子郵件位址。
- 透過圖形 API 取得自動語音應答的物件識別碼。
- 使用 Azure 通訊服務呼叫 SDK 啟動呼叫。
如果您想要直接跳到結尾,您可以在 GitHub 上下載本快速入門作為範例。
在您的 Teams 租用戶中啟用互操作性
具有 Teams 系統管理員角色 的 Microsoft Entra 使用者可以使用 MicrosoftTeams 模組執行 PowerShell Cmdlet,以啟用租使用者中的通訊服務資源。
1.準備 Microsoft Teams 模組
首先,開啟 PowerShell,並使用下列命令驗證 Teams 模組是否存在:
Get-module *teams*
如果您沒有看到模組 MicrosoftTeams ,請先加以安裝。 若要安裝模組,您必須以系統管理員身分執行 PowerShell。 然後執行下列命令:
Install-Module -Name MicrosoftTeams
系統會通知您將要安裝的模組,您可以用 Y 或 A 答案進行確認。 如果模組已安裝但已過期,您可以執行下列命令來更新模組:
Update-Module MicrosoftTeams
2. 連線 至 Microsoft Teams 課程模組
安裝模組並就緒時,您可以使用下列命令連線到MicrosftTeams模組。 系統會提示您輸入互動式視窗來登入。 您將使用的使用者帳戶必須具有 Teams 系統管理員許可權。 否則,您可能會在下一 access denied 個步驟中取得回應。
Connect-MicrosoftTeams
3.啟用租用戶設定
與通訊服務資源的互操作性是透過租用戶設定和指派的原則來控制。 Teams 租使用者具有單一租用戶設定,且 Teams 使用者已指派全域原則或自定義原則。 如需詳細資訊,請參閱 在Teams中指派原則。
成功登入之後,您可以執行 Cmdlet Set-CsTeamsAcsFederationConfiguration ,以在您的租用戶中啟用通訊服務資源。 以通訊資源中的不可變資源識別碼取代文字 IMMUTABLE_RESOURCE_ID 。 您可以在這裡找到有關如何取得這項資訊的詳細資訊。
$allowlist = @('IMMUTABLE_RESOURCE_ID')
Set-CsTeamsAcsFederationConfiguration -EnableAcsUsers $True -AllowedAcsResources $allowlist
4.啟用租用戶原則
每個 Teams 使用者都已指派 , External Access Policy 以判斷通訊服務使用者是否可以呼叫此 Teams 使用者。 使用 Cmdlet Set-CsExternalAccessPolicy 來確保指派給 Teams 使用者的原則已設定 EnableAcsFederationAccess 為 $true
Set-CsExternalAccessPolicy -Identity Global -EnableAcsFederationAccess $true
建立或選取Teams自動語音應答
Teams 自動語音應答是系統,可為來電提供自動化通話處理系統。 它作為虛擬接待員,允許來電者自動路由傳送到適當的人員或部門,而不需要人類操作員。 您可以透過 Teams 管理員 中心選取現有或建立新的自動語音應答。
在這裡深入瞭解如何使用Teams 管理員中心建立自動語音應答。
尋找自動語音應答的物件標識碼
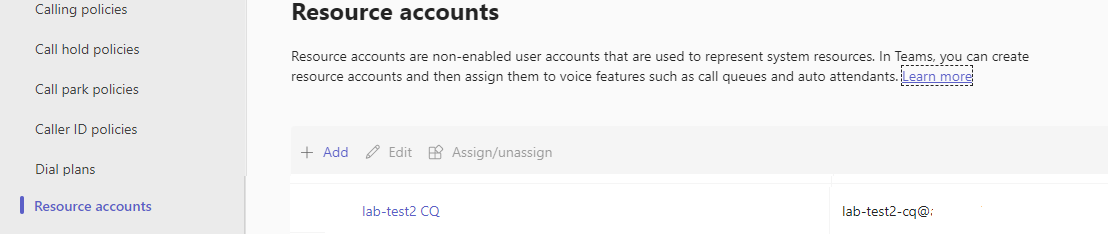
建立自動語音應答之後,我們需要尋找相互關聯的物件標識符,以供稍後呼叫使用。 物件標識符會連線到連結至自動語音應答的資源帳戶 - 在 Teams 中開啟 [資源帳戶] 索引卷標,管理員 並尋找帳戶的電子郵件。
 資源帳戶的所有必要資訊都可以在 Microsoft Graph 總管中使用此電子郵件在搜尋中找到。
https://graph.microsoft.com/v1.0/users/lab-test2-cq-@contoso.com
在結果中,我們可以找到 [標識符] 字段
    "userPrincipalName": "lab-test2-cq@contoso.com",
    "id": "31a011c2-2672-4dd0-b6f9-9334ef4999db"
必要條件
- 取得具有使用中訂用帳戶的 Azure 帳戶。 免費建立帳戶。
- Node.js Active LTS 和維護 LTS 版本 (8.11.1 和 10.14.1)
- 建立作用中的通訊服務資源。 建立通訊服務資源。
設定
建立新的 Node.js 應用程式
開啟終端機或命令視窗,為您的應用程式建立新的目錄,然後瀏覽至目錄。
mkdir calling-quickstart && cd calling-quickstart
Install the package
npm install使用 命令來安裝 Azure 通訊服務呼叫 SDK for JavaScript。
重要
這個快速入門使用 Azure 通訊服務 呼叫 SDK 版本 next。
npm install @azure/communication-common@next --save
npm install @azure/communication-calling@next --save
設定應用程式架構
本快速入門會使用 webpack 來組合應用程式資產。 執行下列命令以安裝webpack、 和 webpack-dev-server npm 套件,webpack-cli並將其列為開發package.json相依性:
npm install copy-webpack-plugin@^11.0.0 webpack@^5.88.2 webpack-cli@^5.1.4 webpack-dev-server@^4.15.1 --save-dev
在專案的根目錄中建立 index.html 檔案。 我們將使用此檔案來設定基本版面配置,讓用戶能夠撥打 1:1 視訊通話。
程式碼如下:
<!-- index.html -->
<!DOCTYPE html>
<html>
    <head>
        <title>Azure Communication Services - Calling Web SDK</title>
    </head>
    <body>
        <h4>Azure Communication Services - Calling Web SDK</h4>
        <input id="user-access-token"
            type="text"
            placeholder="User access token"
            style="margin-bottom:1em; width: 500px;"/>
        <button id="initialize-teams-call-agent" type="button">Initialize Call Agent</button>
        <br>
        <br>
        <input id="application-object-id"
            type="text"
            placeholder="Enter application objectId identity in format: 'APP_GUID'"
            style="margin-bottom:1em; width: 500px; display: block;"/>
        <button id="start-call-button" type="button" disabled="true">Start Call</button>
        <button id="hangup-call-button" type="button" disabled="true">Hang up Call</button>
        <button id="accept-call-button" type="button" disabled="true">Accept Call</button>
        <button id="start-video-button" type="button" disabled="true">Start Video</button>
        <button id="stop-video-button" type="button" disabled="true">Stop Video</button>
        <br>
        <br>
        <div id="connectedLabel" style="color: #13bb13;" hidden>Call is connected!</div>
        <br>
        <div id="remoteVideoContainer" style="width: 40%;" hidden>Remote participants' video streams:</div>
        <br>
        <div id="localVideoContainer" style="width: 30%;" hidden>Local video stream:</div>
        <!-- points to the bundle generated from client.js -->
        <script src="./main.js"></script>
    </body>
</html>
Azure 通訊服務呼叫 Web SDK 物件模型
下列類別和介面會處理 Azure 通訊服務 呼叫 SDK 的一些主要功能:
| 名稱 | 描述 |
|---|---|
CallClient |
呼叫 SDK 的主要進入點。 |
CallAgent |
用來啟動和管理話務。 |
DeviceManager |
用來管理媒體裝置。 |
Call |
用於表示通話。 |
LocalVideoStream |
用於在本機系統上建立相機裝置的本機視訊串流。 |
RemoteParticipant |
用於代表通話中的遠程參與者。 |
RemoteVideoStream |
用於表示來自遠端參與者的遠端視訊串流。 |
在名為 client.js 的專案根目錄中建立檔案,以包含本快速入門的應用程式邏輯。 將下列程式代碼新增至client.js:
// Make sure to install the necessary dependencies
const { CallClient, VideoStreamRenderer, LocalVideoStream } = require('@azure/communication-calling');
const { AzureCommunicationTokenCredential } = require('@azure/communication-common');
const { AzureLogger, setLogLevel } = require("@azure/logger");
// Set the log level and output
setLogLevel('verbose');
AzureLogger.log = (...args) => {
    console.log(...args);
};
// Calling web sdk objects
let callAgent;
let deviceManager;
let call;
let incomingCall;
let localVideoStream;
let localVideoStreamRenderer;
// UI widgets
let userAccessToken = document.getElementById('user-access-token');
let applicationObjectId = document.getElementById('application-object-id');
let initializeCallAgentButton = document.getElementById('initialize-teams-call-agent');
let startCallButton = document.getElementById('start-call-button');
let hangUpCallButton = document.getElementById('hangup-call-button');
let acceptCallButton = document.getElementById('accept-call-button');
let startVideoButton = document.getElementById('start-video-button');
let stopVideoButton = document.getElementById('stop-video-button');
let connectedLabel = document.getElementById('connectedLabel');
let remoteVideoContainer = document.getElementById('remoteVideoContainer');
let localVideoContainer = document.getElementById('localVideoContainer');
/**
 * Create an instance of CallClient. Initialize a CallAgent instance with a AzureCommunicationTokenCredential via created CallClient. CallAgent enables us to make outgoing calls and receive incoming calls.
 * You can then use the CallClient.getDeviceManager() API instance to get the DeviceManager.
 */
initializeCallAgentButton.onclick = async () => {
    try {
        const callClient = new CallClient();
        tokenCredential = new AzureCommunicationTokenCredential(userAccessToken.value.trim());
        callAgent = await callClient.createCallAgent(tokenCredential)
        // Set up a camera device to use.
        deviceManager = await callClient.getDeviceManager();
        await deviceManager.askDevicePermission({ video: true });
        await deviceManager.askDevicePermission({ audio: true });
        // Listen for an incoming call to accept.
        callAgent.on('incomingCall', async (args) => {
            try {
                incomingCall = args.incomingCall;
                acceptCallButton.disabled = false;
                startCallButton.disabled = true;
            } catch (error) {
                console.error(error);
            }
        });
        startCallButton.disabled = false;
        initializeCallAgentButton.disabled = true;
    } catch(error) {
        console.error(error);
    }
}
/**
 * Place a 1:1 outgoing video call to an Teams Auto attendant
 * Add an event listener to initiate a call when the `startCallButton` is selected.
 * Enumerate local cameras using the deviceManager `getCameraList` API.
 * In this quickstart, we're using the first camera in the collection. Once the desired camera is selected, a
 * LocalVideoStream instance will be constructed and passed within `videoOptions` as an item within the
 * localVideoStream array to the call method. When the call connects, your application will be sending a video stream to the other participant.
 */
startCallButton.onclick = async () => {
    try {
        const localVideoStream = await createLocalVideoStream();
        const videoOptions = localVideoStream ? { localVideoStreams: [localVideoStream] } : undefined;
        call = callAgent.startCall([{ teamsAppId: applicationObjectId.value.trim(), cloud:"public" }], { videoOptions: videoOptions });
        // Subscribe to the call's properties and events.
        subscribeToCall(call);
    } catch (error) {
        console.error(error);
    }
}
/**
 * Accepting an incoming call with a video
 * Add an event listener to accept a call when the `acceptCallButton` is selected.
 * You can accept incoming calls after subscribing to the `CallAgent.on('incomingCall')` event.
 * You can pass the local video stream to accept the call with the following code.
 */
acceptCallButton.onclick = async () => {
    try {
        const localVideoStream = await createLocalVideoStream();
        const videoOptions = localVideoStream ? { localVideoStreams: [localVideoStream] } : undefined;
        call = await incomingCall.accept({ videoOptions });
        // Subscribe to the call's properties and events.
        subscribeToCall(call);
    } catch (error) {
        console.error(error);
    }
}
// Subscribe to a call obj.
// Listen for property changes and collection udpates.
subscribeToCall = (call) => {
    try {
        // Inspect the initial call.id value.
        console.log(`Call Id: ${call.id}`);
        //Subsribe to call's 'idChanged' event for value changes.
        call.on('idChanged', () => {
            console.log(`Call ID changed: ${call.id}`);
        });
        // Inspect the initial call.state value.
        console.log(`Call state: ${call.state}`);
        // Subscribe to call's 'stateChanged' event for value changes.
        call.on('stateChanged', async () => {
            console.log(`Call state changed: ${call.state}`);
            if(call.state === 'Connected') {
                connectedLabel.hidden = false;
                acceptCallButton.disabled = true;
                startCallButton.disabled = true;
                hangUpCallButton.disabled = false;
                startVideoButton.disabled = false;
                stopVideoButton.disabled = false;
            } else if (call.state === 'Disconnected') {
                connectedLabel.hidden = true;
                startCallButton.disabled = false;
                hangUpCallButton.disabled = true;
                startVideoButton.disabled = true;
                stopVideoButton.disabled = true;
                console.log(`Call ended, call end reason={code=${call.callEndReason.code}, subCode=${call.callEndReason.subCode}}`);
            }
        });

        call.on('isLocalVideoStartedChanged', () => {
            console.log(`isLocalVideoStarted changed: ${call.isLocalVideoStarted}`);
        });
        console.log(`isLocalVideoStarted: ${call.isLocalVideoStarted}`);
        call.localVideoStreams.forEach(async (lvs) => {
            localVideoStream = lvs;
            await displayLocalVideoStream();
        });
        call.on('localVideoStreamsUpdated', e => {
            e.added.forEach(async (lvs) => {
                localVideoStream = lvs;
                await displayLocalVideoStream();
            });
            e.removed.forEach(lvs => {
               removeLocalVideoStream();
            });
        });

        // Inspect the call's current remote participants and subscribe to them.
        call.remoteParticipants.forEach(remoteParticipant => {
            subscribeToRemoteParticipant(remoteParticipant);
        });
        // Subscribe to the call's 'remoteParticipantsUpdated' event to be
        // notified when new participants are added to the call or removed from the call.
        call.on('remoteParticipantsUpdated', e => {
            // Subscribe to new remote participants that are added to the call.
            e.added.forEach(remoteParticipant => {
                subscribeToRemoteParticipant(remoteParticipant)
            });
            // Unsubscribe from participants that are removed from the call
            e.removed.forEach(remoteParticipant => {
                console.log('Remote participant removed from the call.');
            });
        });
    } catch (error) {
        console.error(error);
    }
}
// Subscribe to a remote participant obj.
// Listen for property changes and collection udpates.
subscribeToRemoteParticipant = (remoteParticipant) => {
    try {
        // Inspect the initial remoteParticipant.state value.
        console.log(`Remote participant state: ${remoteParticipant.state}`);
        // Subscribe to remoteParticipant's 'stateChanged' event for value changes.
        remoteParticipant.on('stateChanged', () => {
            console.log(`Remote participant state changed: ${remoteParticipant.state}`);
        });
        // Inspect the remoteParticipants's current videoStreams and subscribe to them.
        remoteParticipant.videoStreams.forEach(remoteVideoStream => {
            subscribeToRemoteVideoStream(remoteVideoStream)
        });
        // Subscribe to the remoteParticipant's 'videoStreamsUpdated' event to be
        // notified when the remoteParticiapant adds new videoStreams and removes video streams.
        remoteParticipant.on('videoStreamsUpdated', e => {
            // Subscribe to newly added remote participant's video streams.
            e.added.forEach(remoteVideoStream => {
                subscribeToRemoteVideoStream(remoteVideoStream)
            });
            // Unsubscribe from newly removed remote participants' video streams.
            e.removed.forEach(remoteVideoStream => {
                console.log('Remote participant video stream was removed.');
            })
        });
    } catch (error) {
        console.error(error);
    }
}
/**
 * Subscribe to a remote participant's remote video stream obj.
 * You have to subscribe to the 'isAvailableChanged' event to render the remoteVideoStream. If the 'isAvailable' property
 * changes to 'true' a remote participant is sending a stream. Whenever the availability of a remote stream changes
 * you can choose to destroy the whole 'Renderer' a specific 'RendererView' or keep them. Displaying RendererView without a video stream will result in a blank video frame.
 */
subscribeToRemoteVideoStream = async (remoteVideoStream) => {
    // Create a video stream renderer for the remote video stream.
    let videoStreamRenderer = new VideoStreamRenderer(remoteVideoStream);
    let view;
    const renderVideo = async () => {
        try {
            // Create a renderer view for the remote video stream.
            view = await videoStreamRenderer.createView();
            // Attach the renderer view to the UI.
            remoteVideoContainer.hidden = false;
            remoteVideoContainer.appendChild(view.target);
        } catch (e) {
            console.warn(`Failed to createView, reason=${e.message}, code=${e.code}`);
        }
    }

    remoteVideoStream.on('isAvailableChanged', async () => {
        // Participant has switched video on.
        if (remoteVideoStream.isAvailable) {
            await renderVideo();
        // Participant has switched video off.
        } else {
            if (view) {
                view.dispose();
                view = undefined;
            }
        }
    });
    // Participant has video on initially.
    if (remoteVideoStream.isAvailable) {
        await renderVideo();
    }
}
// Start your local video stream.
// This will send your local video stream to remote participants so they can view it.
startVideoButton.onclick = async () => {
    try {
        const localVideoStream = await createLocalVideoStream();
        await call.startVideo(localVideoStream);
    } catch (error) {
        console.error(error);
    }
}
// Stop your local video stream.
// This will stop your local video stream from being sent to remote participants.
stopVideoButton.onclick = async () => {
    try {
        await call.stopVideo(localVideoStream);
    } catch (error) {
        console.error(error);
    }
}
/**
 * To render a LocalVideoStream, you need to create a new instance of VideoStreamRenderer, and then
 * create a new VideoStreamRendererView instance using the asynchronous createView() method.
 * You may then attach view.target to any UI element.
 */
// Create a local video stream for your camera device
createLocalVideoStream = async () => {
    const camera = (await deviceManager.getCameras())[0];
    if (camera) {
        return new LocalVideoStream(camera);
    } else {
        console.error(`No camera device found on the system`);
    }
}
// Display your local video stream preview in your UI
displayLocalVideoStream = async () => {
    try {
        localVideoStreamRenderer = new VideoStreamRenderer(localVideoStream);
        const view = await localVideoStreamRenderer.createView();
        localVideoContainer.hidden = false;
        localVideoContainer.appendChild(view.target);
    } catch (error) {
        console.error(error);
    }
}
// Remove your local video stream preview from your UI
removeLocalVideoStream = async() => {
    try {
        localVideoStreamRenderer.dispose();
        localVideoContainer.hidden = true;
    } catch (error) {
        console.error(error);
    }
}
// End the current call
hangUpCallButton.addEventListener("click", async () => {
    // end the current call
    await call.hangUp();
});
新增 Webpack 本地伺服器程式代碼
在名為 webpack.config.js 的專案根目錄中建立檔案,以包含本快速入門的本機伺服器邏輯。 將下列程式代碼新增至 webpack.config.js:
const path = require('path');
const CopyPlugin = require("copy-webpack-plugin");

module.exports = {
    mode: 'development',
    entry: './client.js',
    output: {
        filename: 'main.js',
        path: path.resolve(__dirname, 'dist'),
    },
    devServer: {
        static: {
            directory: path.join(__dirname, './')
        },
    },
    plugins: [
        new CopyPlugin({
            patterns: [
                './index.html'
            ]
        }),
    ]
};
執行程式碼
webpack-dev-server使用來建置並執行您的應用程式。 執行下列命令,將應用程式主機組合在本機 Web 伺服器中:
npx webpack serve --config webpack.config.js
手動設定呼叫的步驟:
- 開啟瀏覽器並流覽至 http://localhost:8080/.
- 輸入有效的使用者存取令牌。 如果您還沒有可用的存取令牌,請參閱使用者存取令牌檔。
- 按兩下 [初始化呼叫代理程式] 按鈕。
- 輸入自動語音應答物件標識符,然後選取 [開始通話] 按鈕。 應用程式會啟動具有指定物件標識碼之自動語音應答的傳出呼叫。
- 通話已連線到自動語音應答。
- 通訊服務用戶會根據其設定,透過自動語音應答路由傳送。
清除資源
如果您想要清除並移除通訊服務訂用帳戶,您可以刪除資源或資源群組。 刪除資源群組也會刪除與其相關聯的任何其他資源。 深入瞭解清除 資源。
下一步
如需詳細資訊,請參閱下列文章:
- 開始使用 對 Teams 語音應用程式的 UI 通話
- 了解 通話 SDK 功能
- 深入瞭解 通話的運作方式