快速入門:建立您的第一個數據流以取得和轉換數據
數據流是自助、雲端式、數據準備技術。 在本文中,您會建立第一個數據流、取得數據流的數據,然後轉換數據併發佈數據流。
必要條件
開始之前,需要下列必要條件:
建立資料流程
在本節中,您會建立第一個數據流。
切換至 Data Factory 體驗。
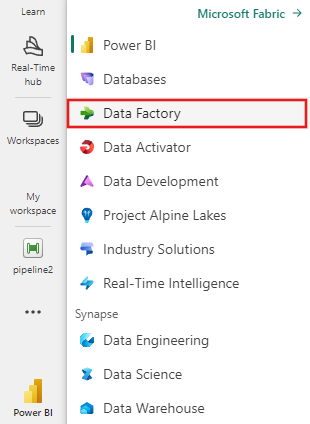
流覽至您的 Microsoft Fabric 工作區。
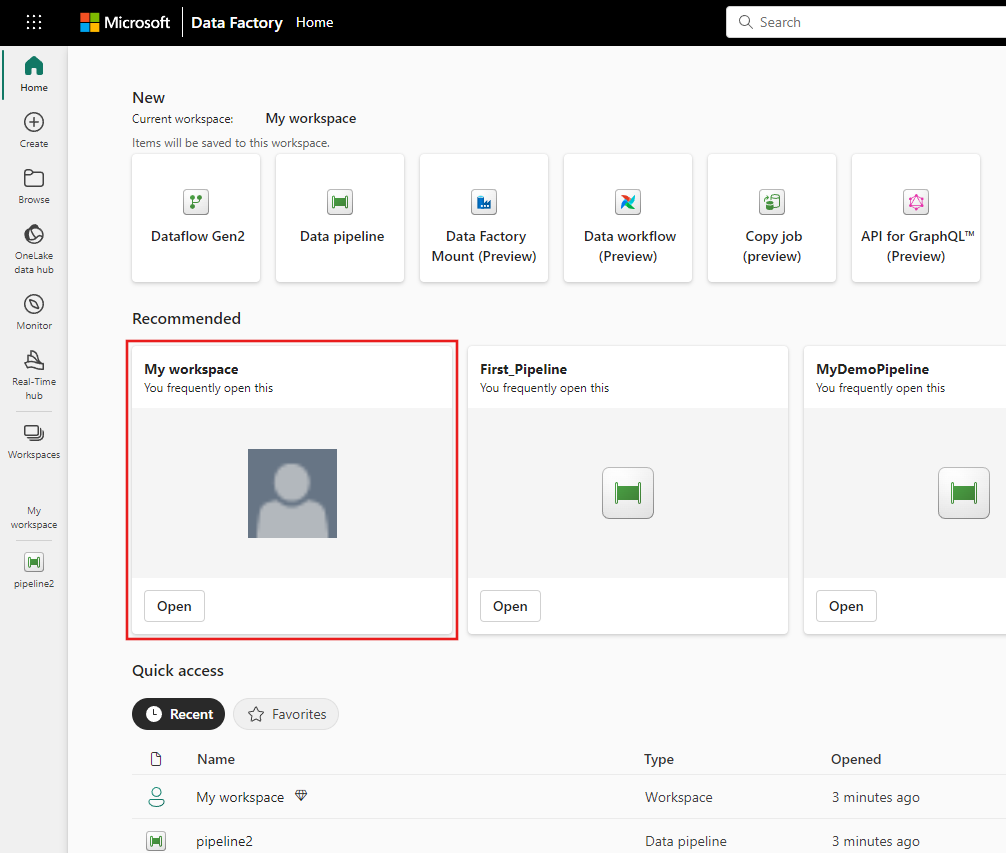
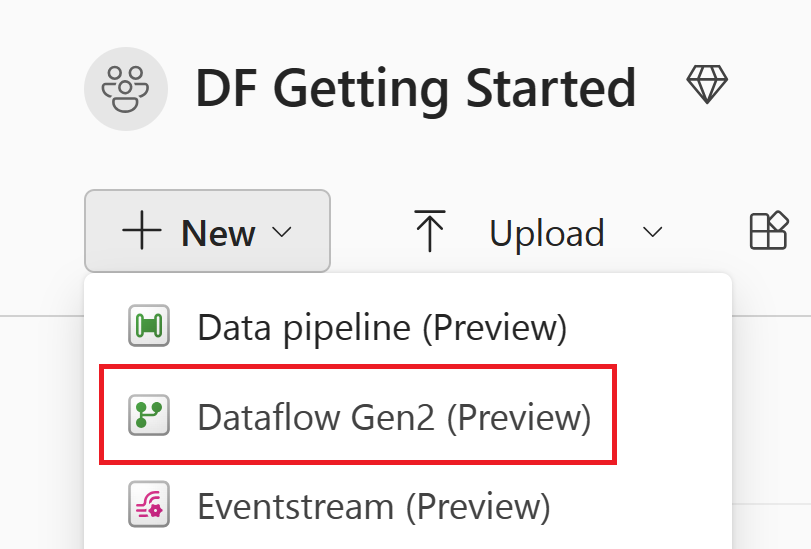
選取 [ 新增],然後選取 [數據流 Gen2]。

取得 資料
讓我們取得一些數據! 在此範例中,您會從 OData 服務取得數據。 使用下列步驟來取得數據流中的數據。
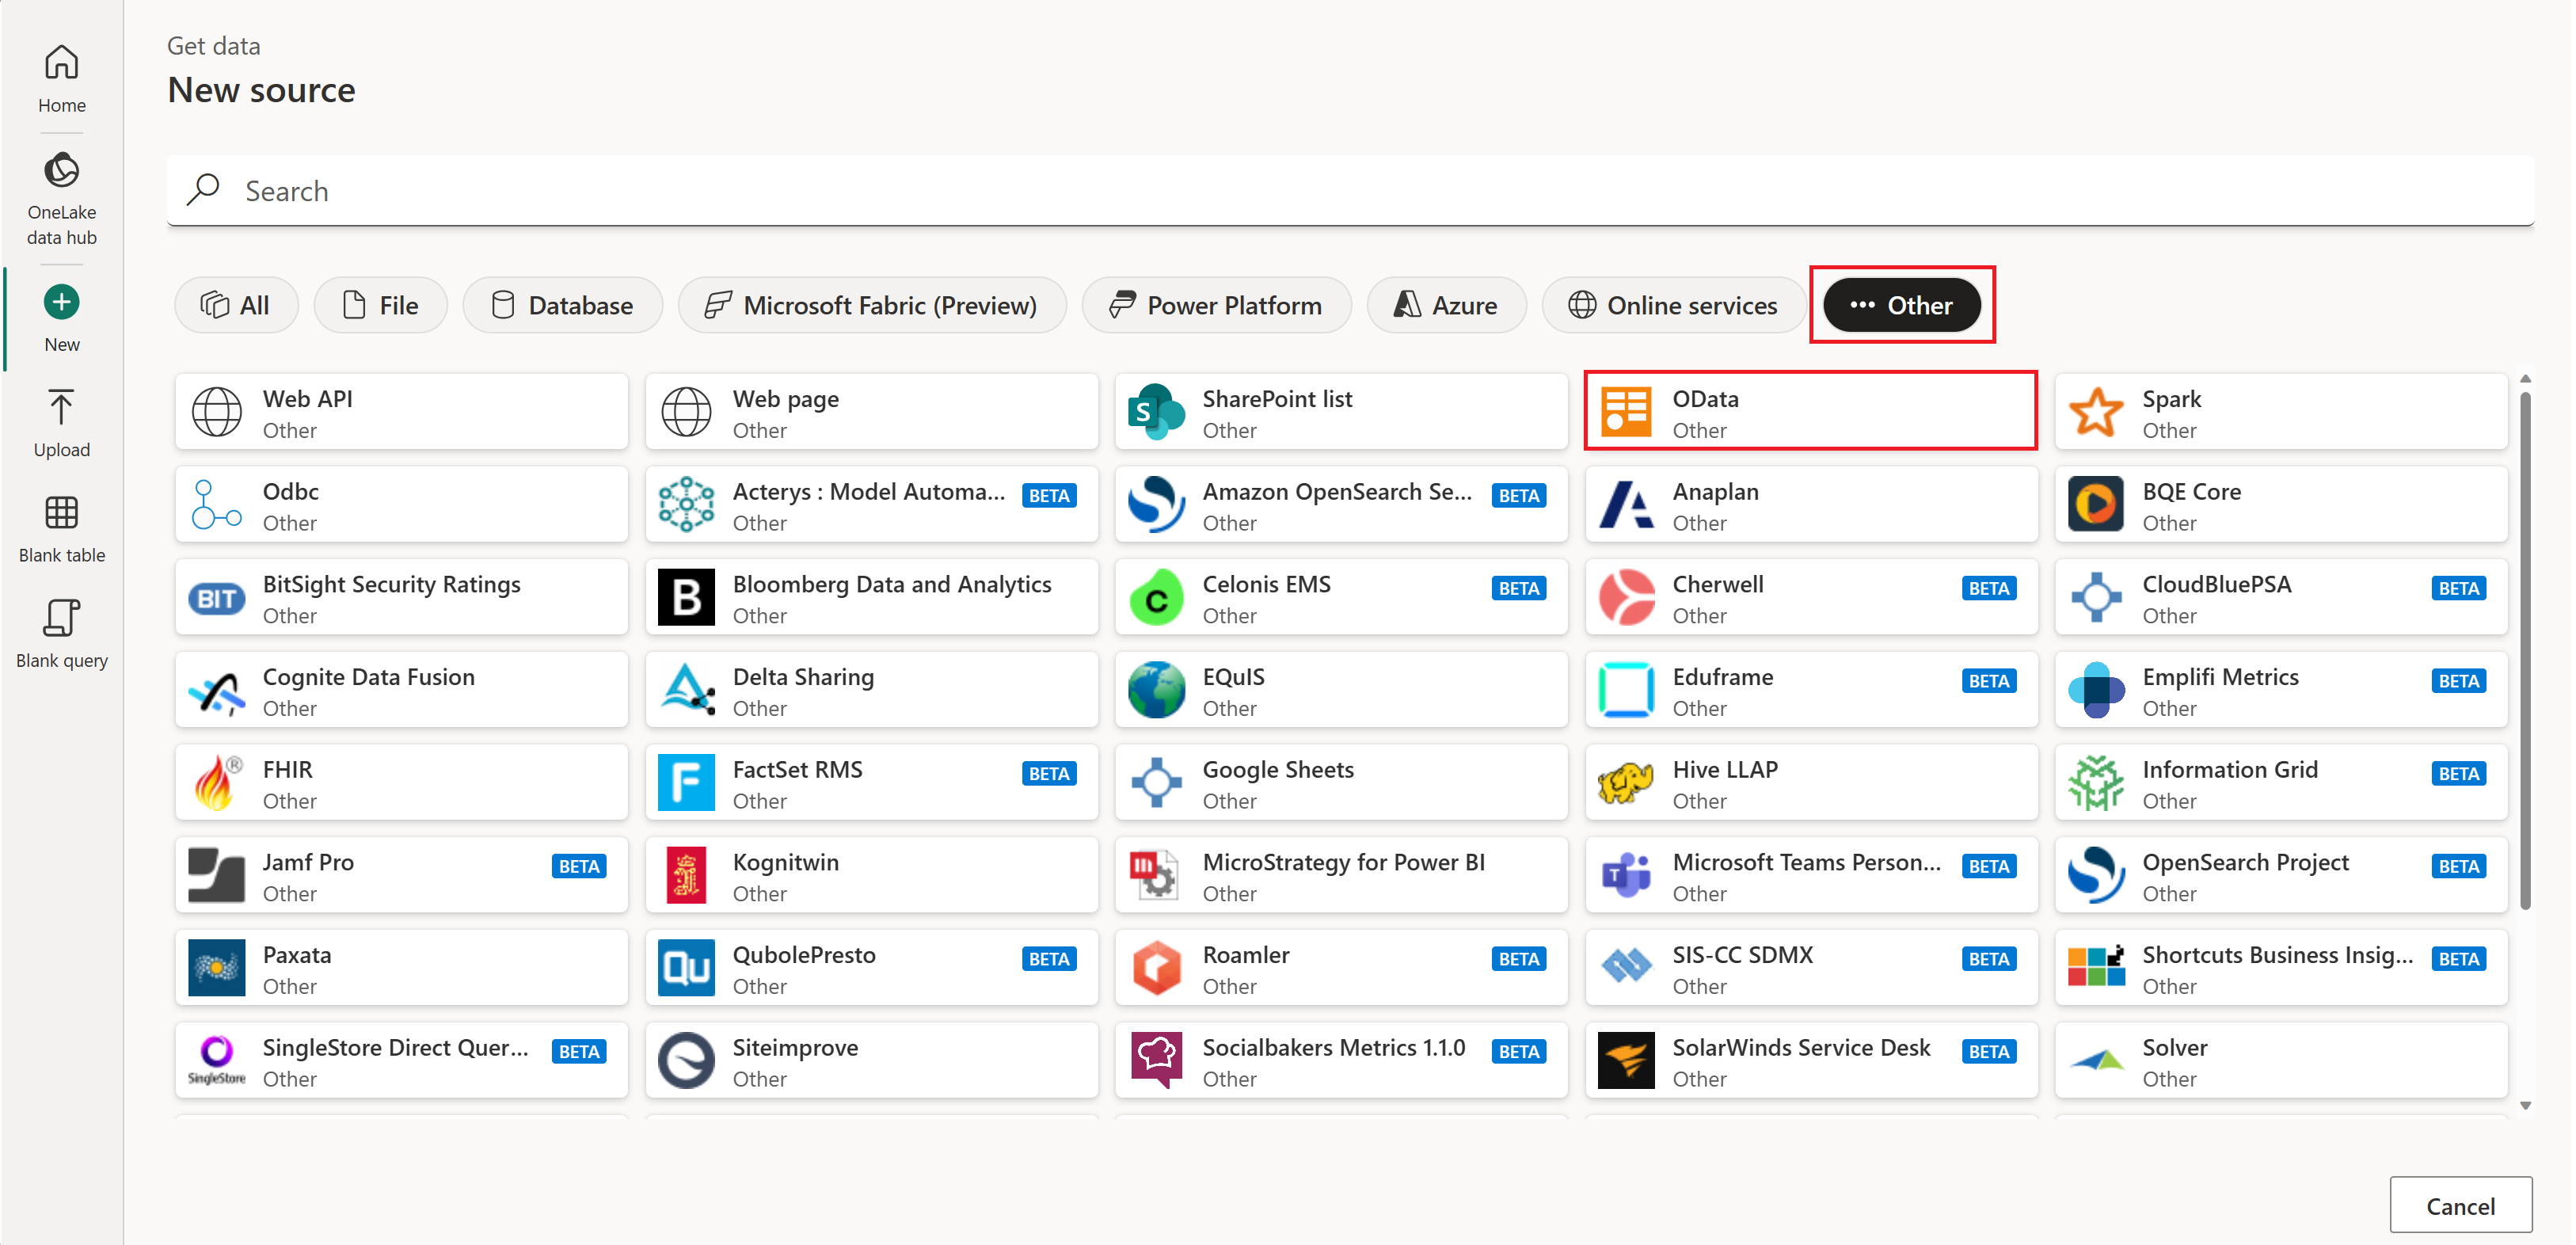
在數據流編輯器中,選取 [取得數據],然後選取 [更多]。

在 [ 選擇數據源] 中,選取 [ 檢視更多]。
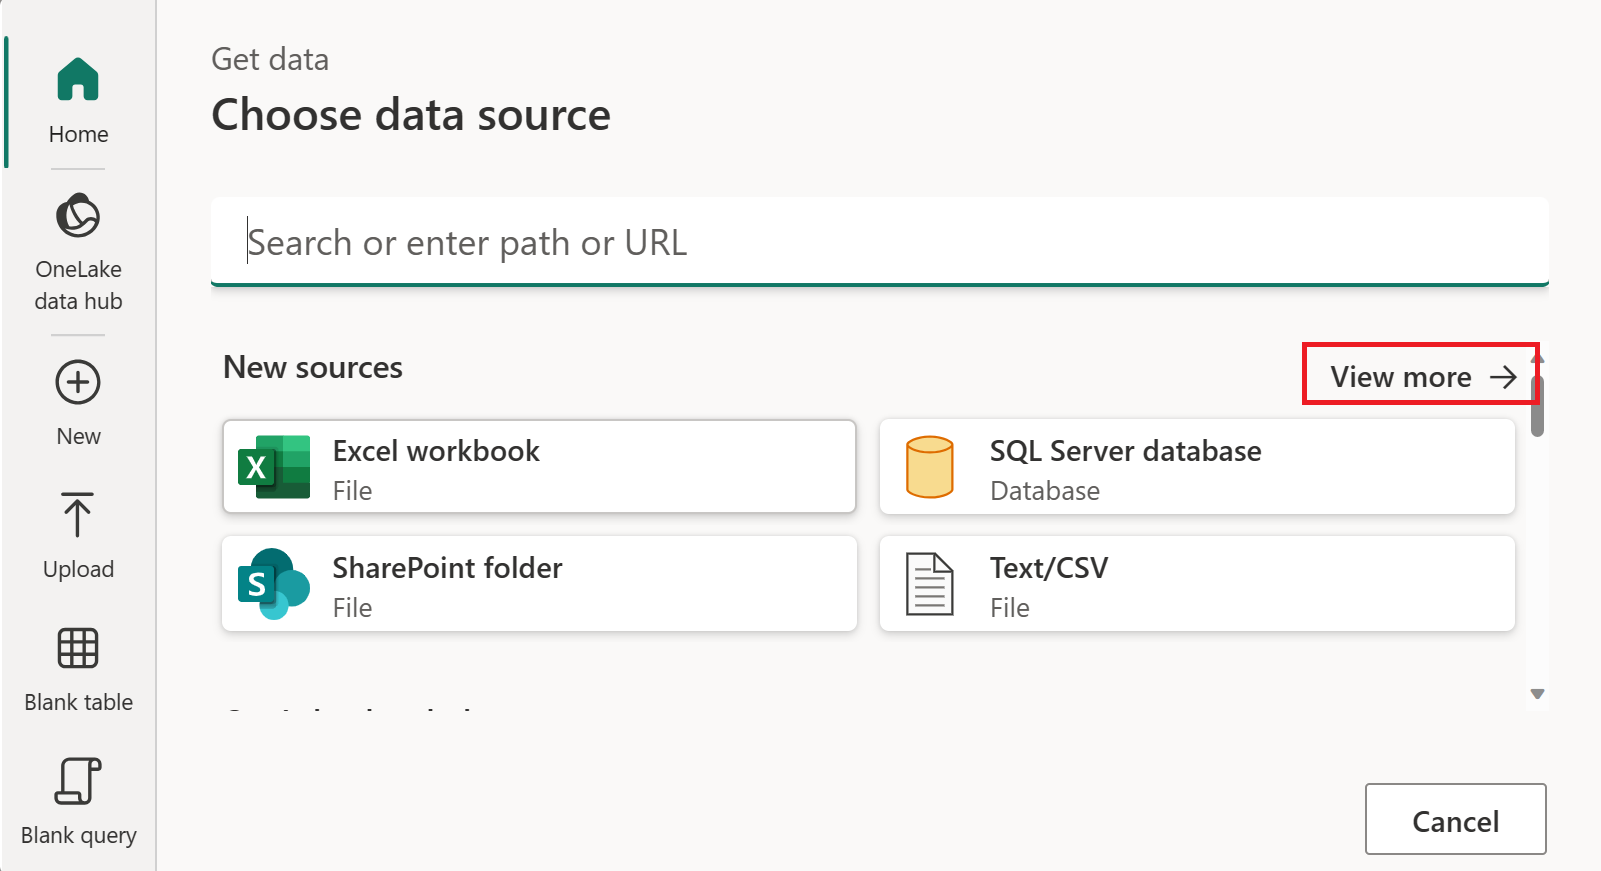
在 [新增來源] 中,選取 [其他>OData] 作為數據源。
輸入 URL
https://services.odata.org/v4/northwind/northwind.svc/,然後選取 [ 下一步]。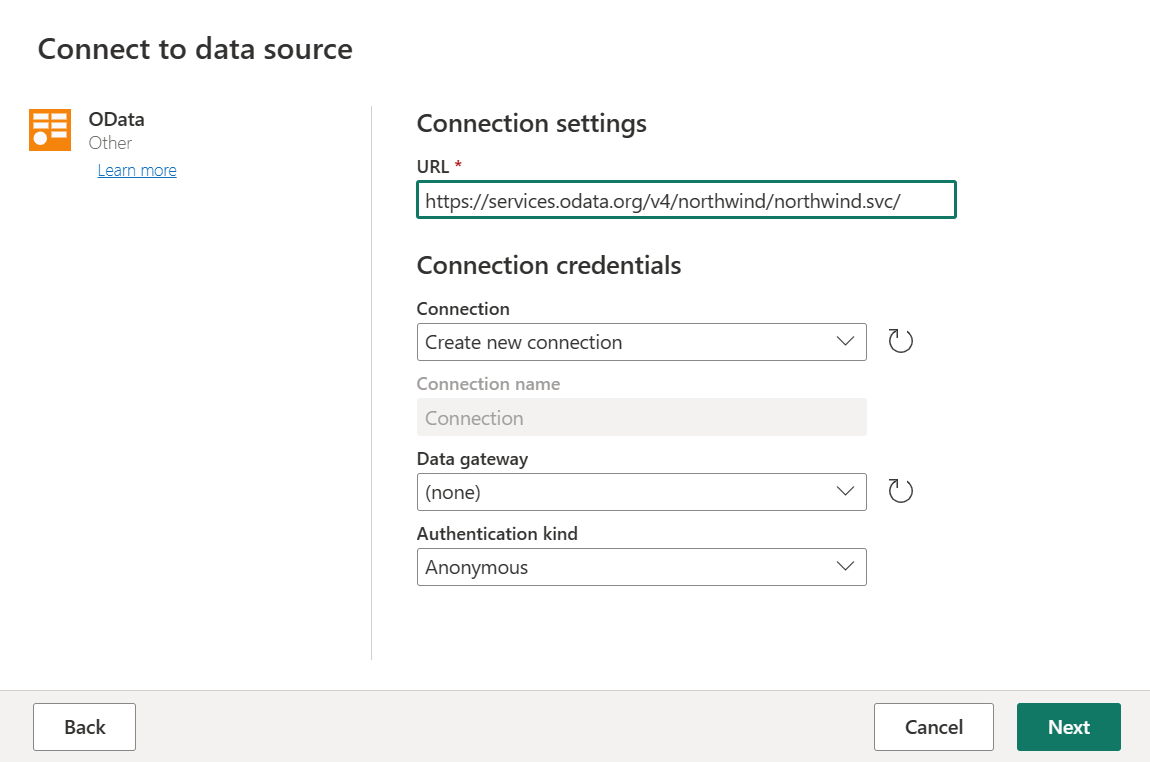
選取 [ 訂單 ] 和 [客戶 ] 數據表,然後選取 [ 建立]。
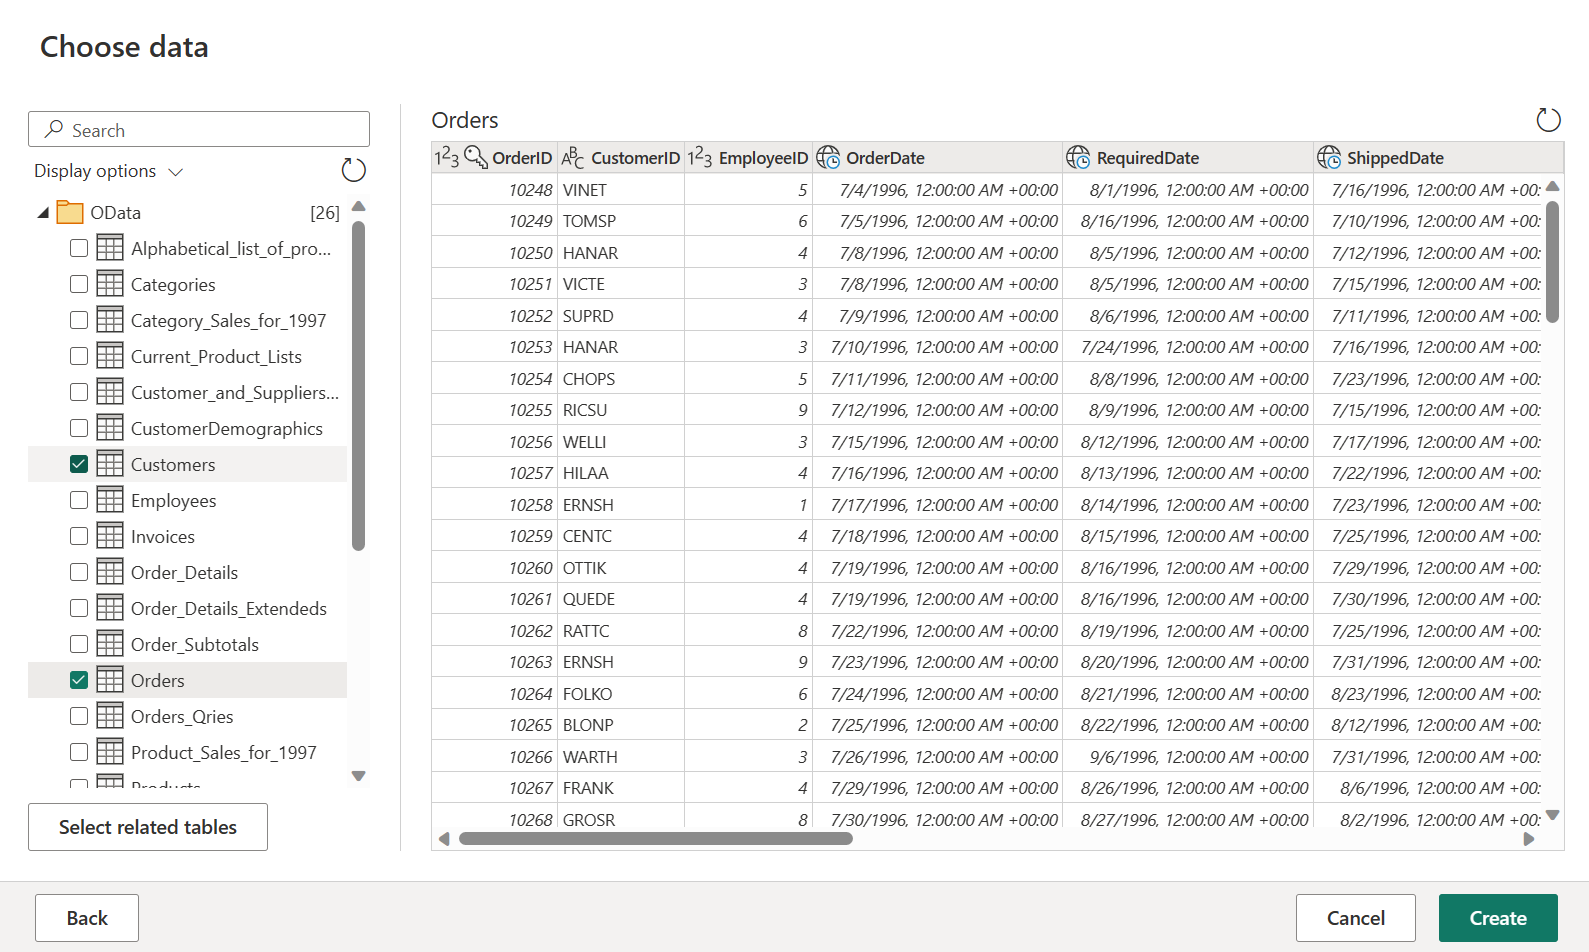


您可以在取得數據概觀深入瞭解取得數據體驗和功能。
套用轉換和發佈
您現在已將數據載入第一個數據流,恭喜您! 現在是時候套用數個轉換,以便將此數據帶入所需的圖形。
您將會從 Power Query 編輯器執行這項工作。 您可以在 Power Query 使用者介面中找到 Power Query 編輯器的詳細概觀。
請遵循下列步驟來套用轉換並發佈:
瀏覽至 [首頁>選項] [全域選項>],確定已啟用資料分析工具。
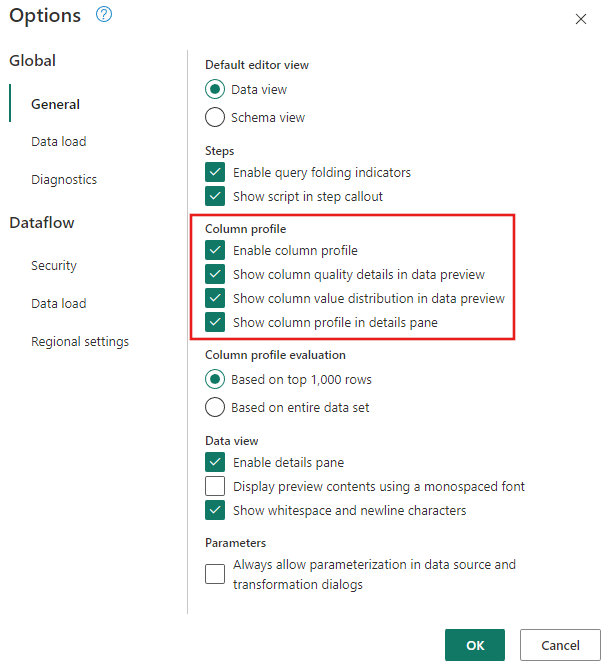
此外,請確定您已使用Power Query 編輯器功能區中 [檢視] 索引標籤底下的選項來啟用圖表檢視,或選取 [Power Query] 視窗右下角的圖表檢視示。

在 Orders 數據表中,您可以計算每位客戶的訂單總數。 若要達成此目標,請選取數據預覽中的 CustomerID 數據行,然後在功能區的 [轉換] 索引卷標下選取 [群組依據]。
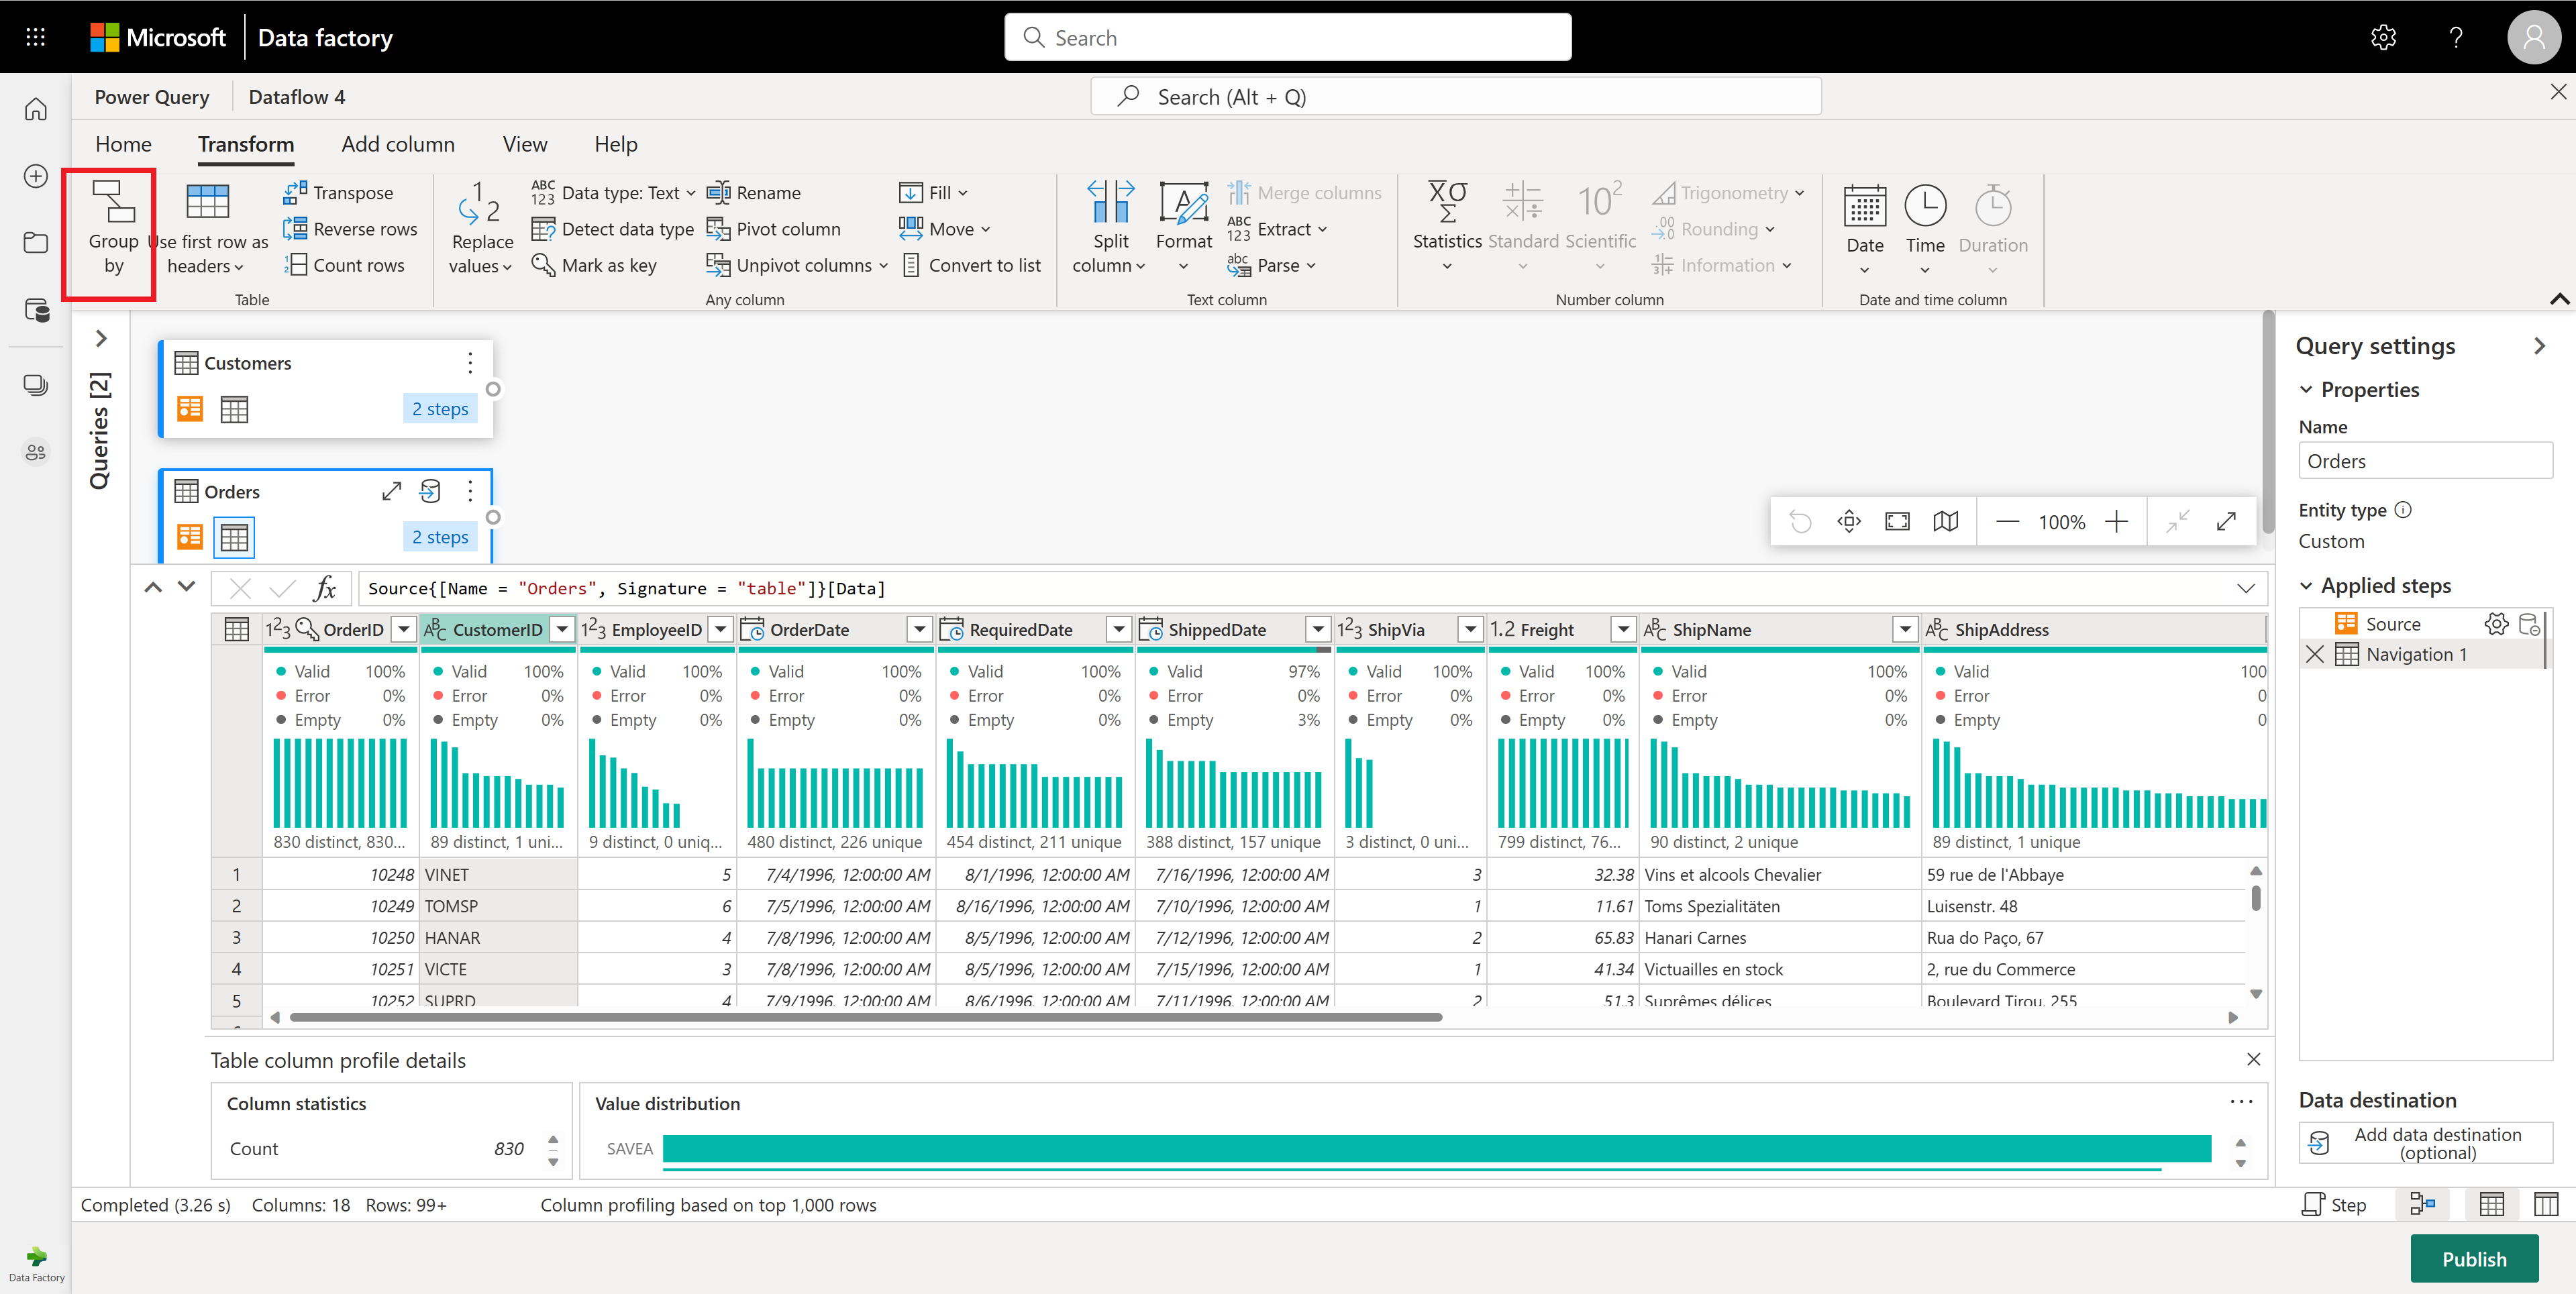
您可以執行數據列計數做為 Group By 內的匯總。 您可以在群組或摘要數據列深入瞭解群組依據功能。

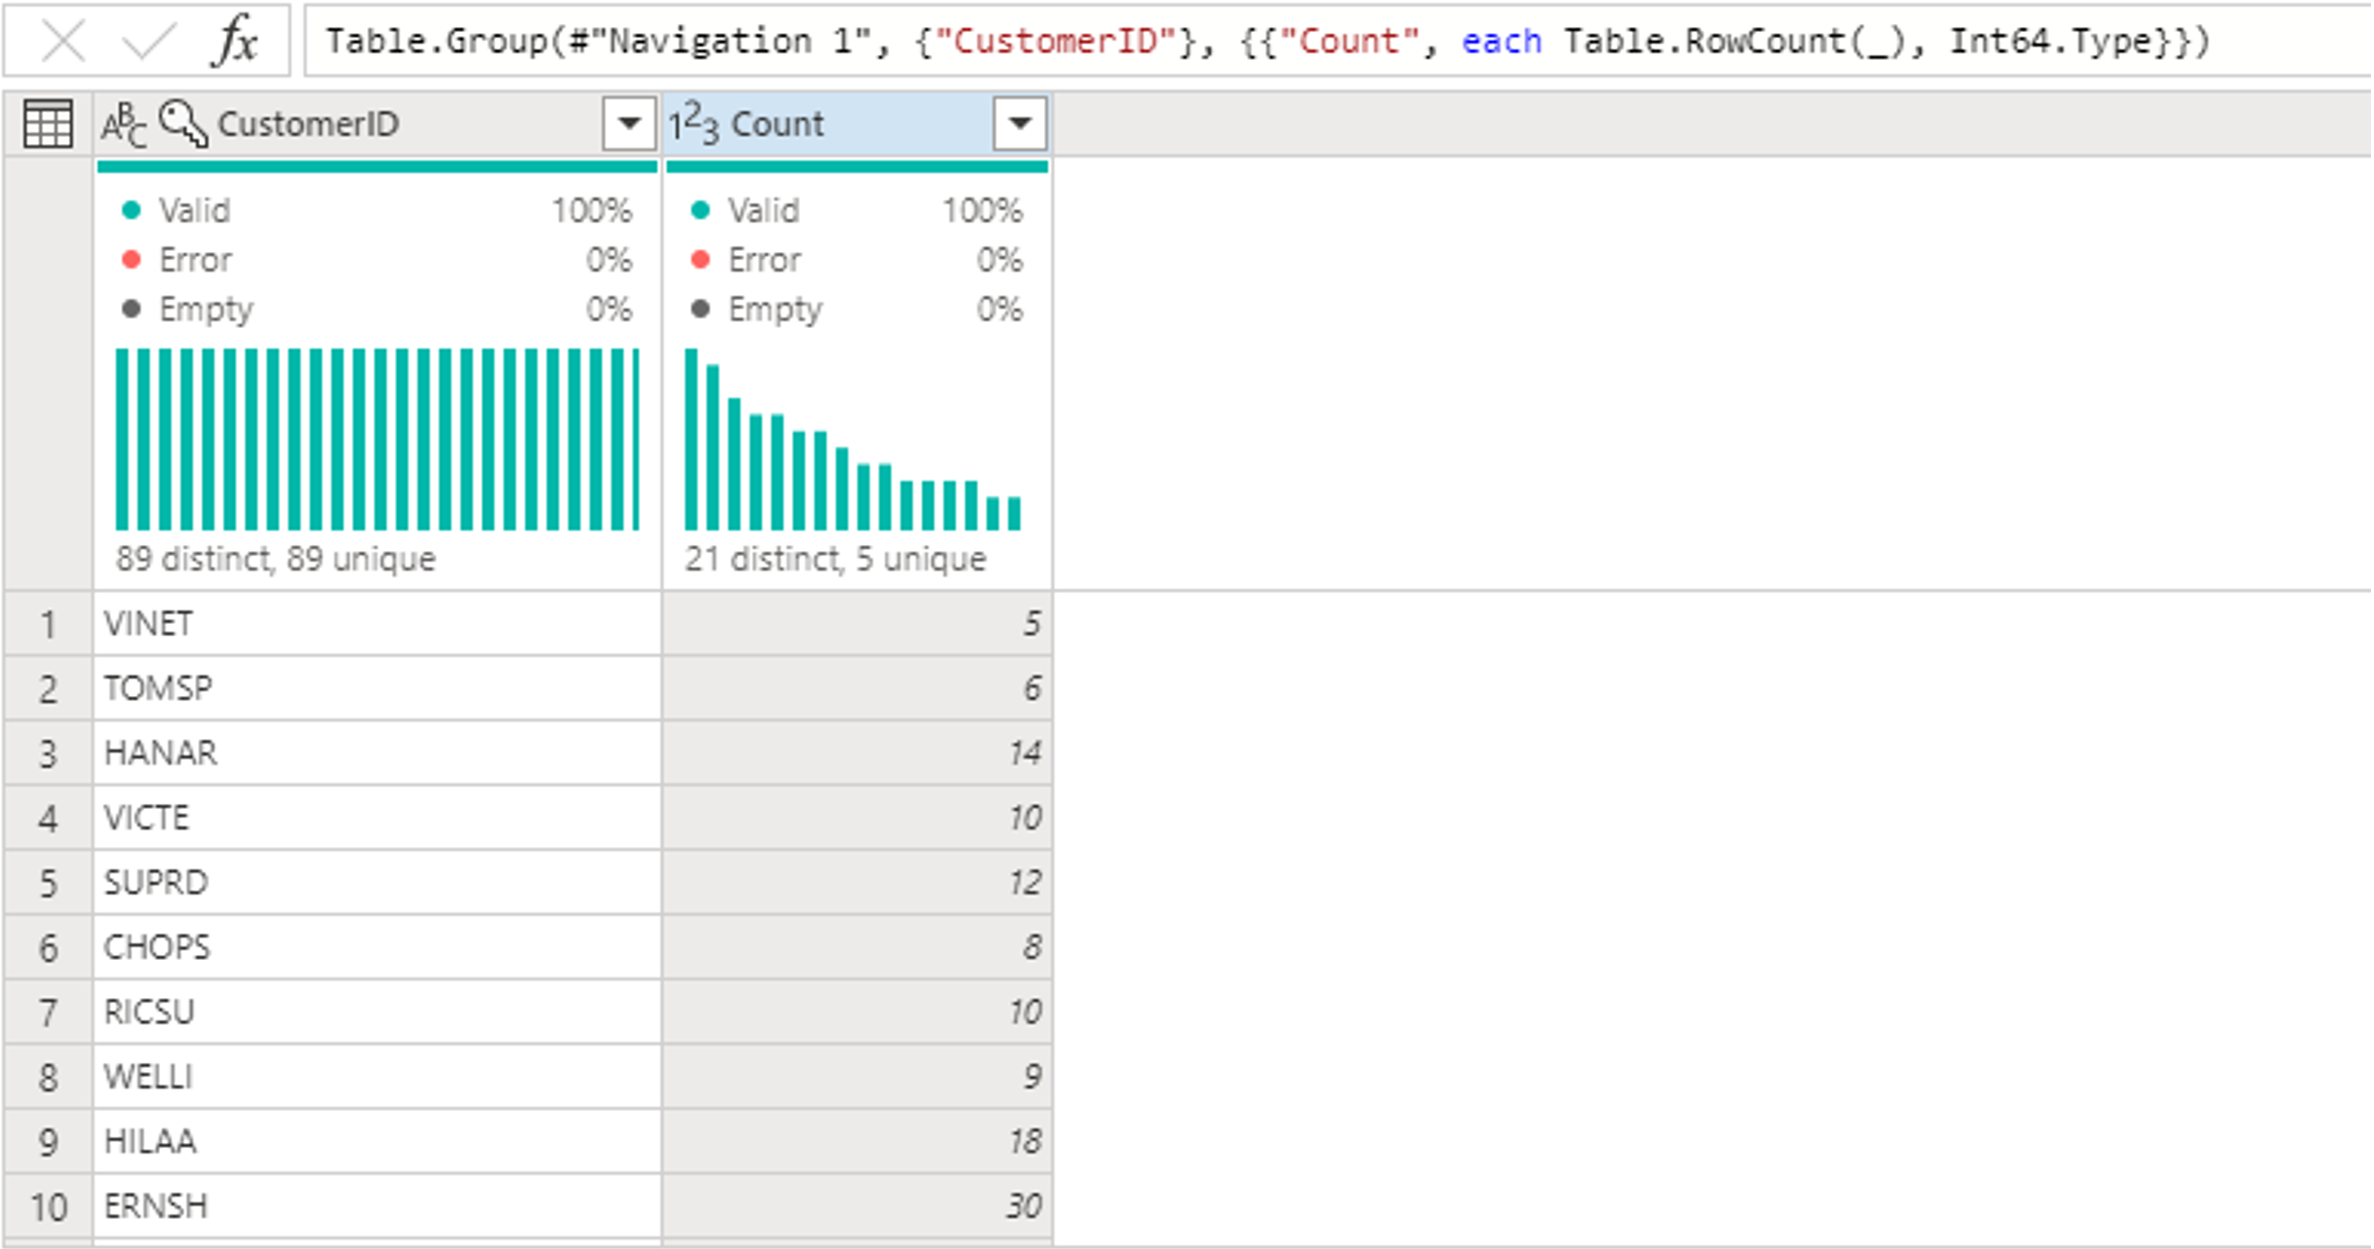
將 Orders 數據表中的數據分組之後,我們將取得 CustomerID 和 Count 作為數據行的兩個數據行數據表。
接下來,您想要結合 Customers 數據表中的數據與每位客戶的訂單計數。 若要合併數據,請選取 [圖表檢視] 中的 [客戶] 查詢,並使用 [⋮] 功能表來存取 合併查詢作為新的 轉換。

選取 CustomerID 作為這兩個數據表中的相符數據行,以設定合併作業,如下列螢幕快照所示。 然後選取確定。
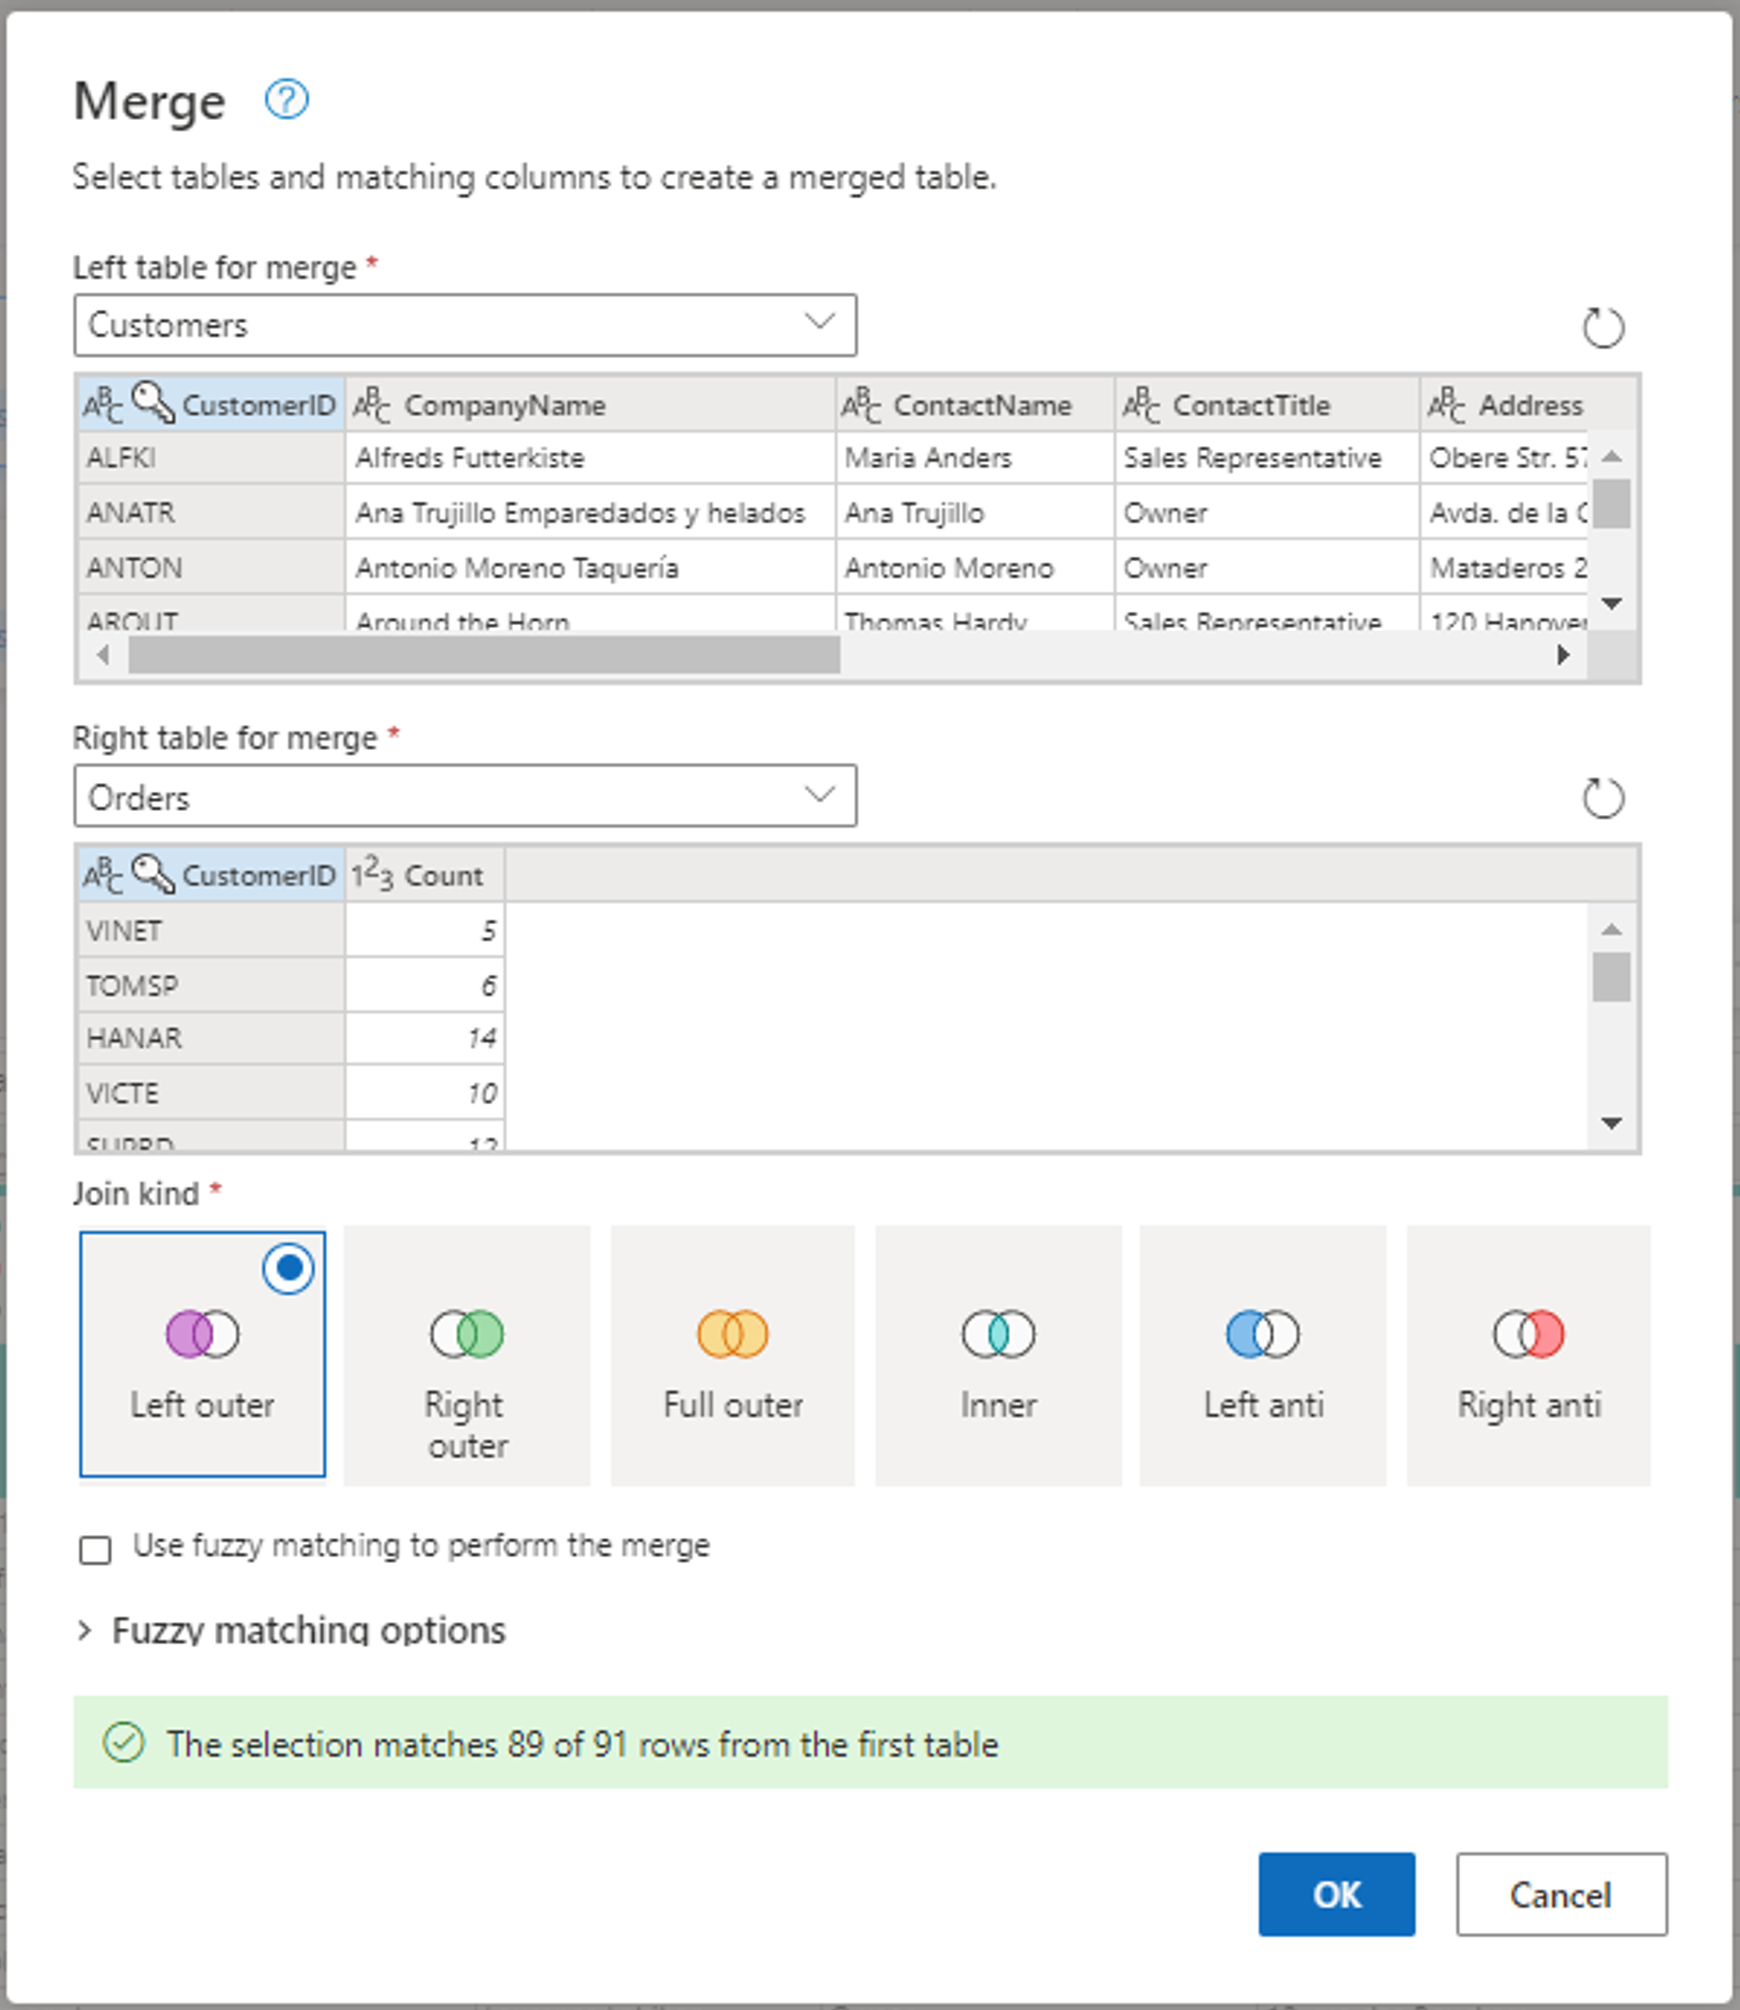
[合併] 視窗的螢幕快照,其中合併的左側數據表已設定為 Customers 數據表,而合併的 Right 資料表則設定為 Orders 數據表。 針對 Customers 和 Orders 資料表選取 [CustomerID] 數據行。 此外,聯結種類會設定為左方外部。 所有其他選取項目都會設定為預設值。
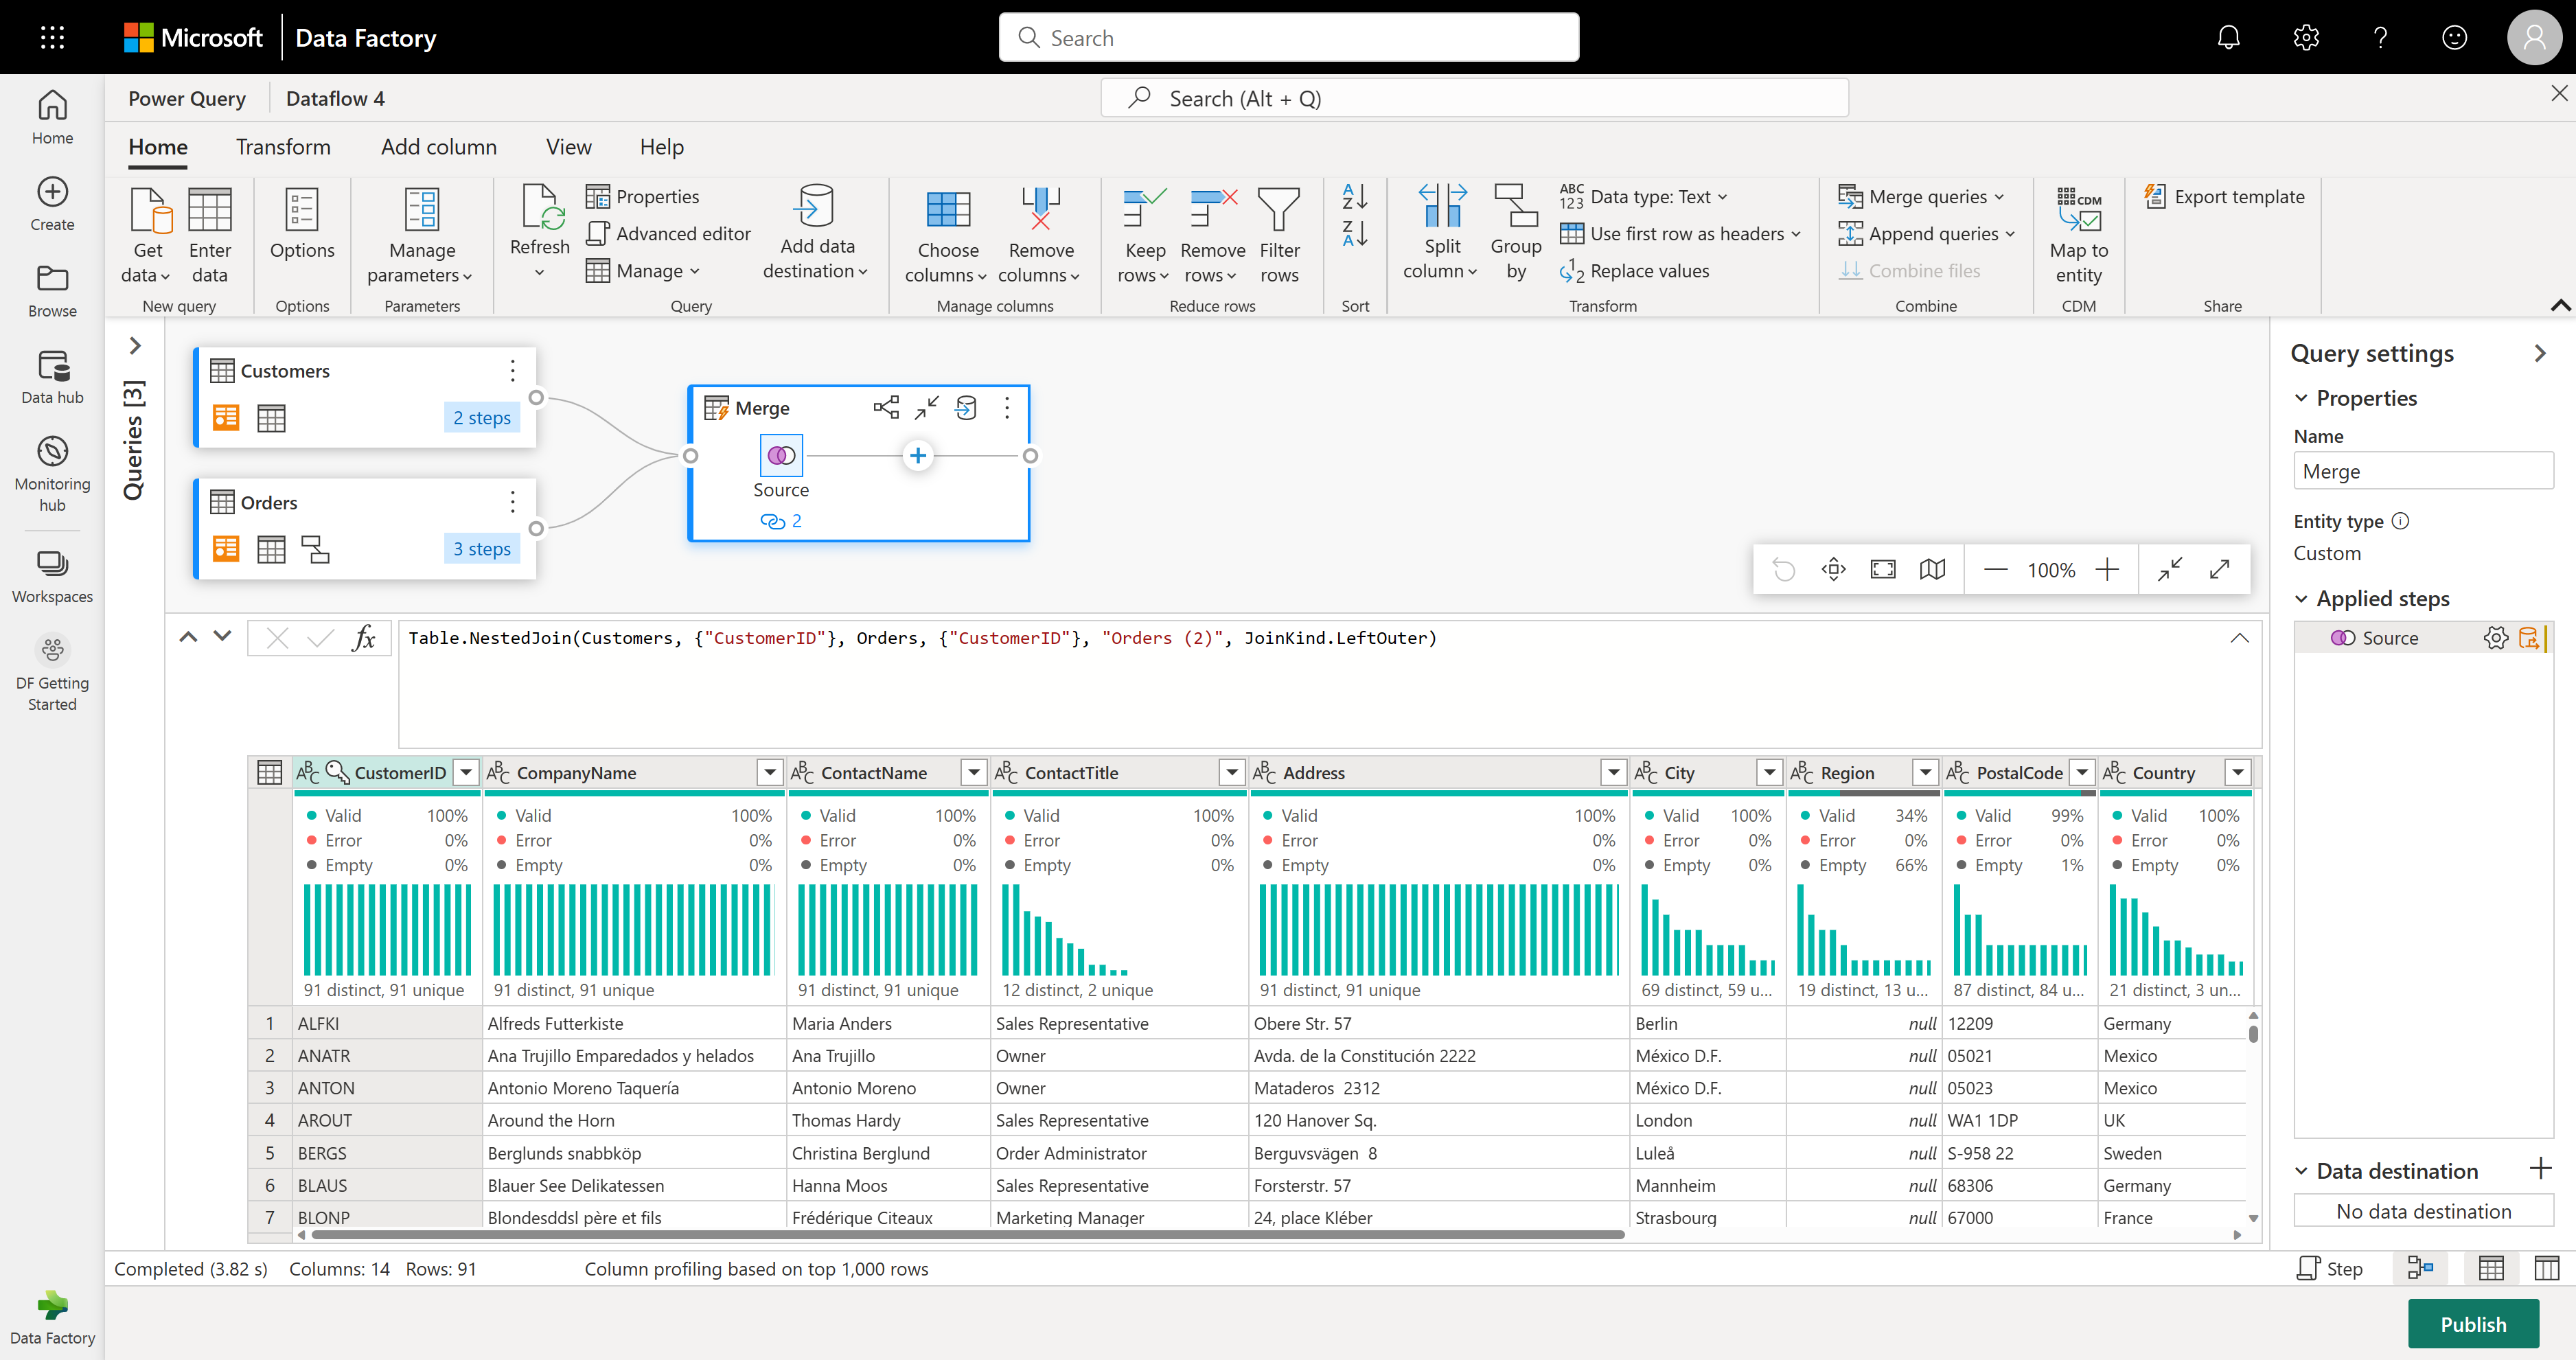
將 合併查詢當做新 作業執行時,您會從 Customers 數據表取得具有所有數據行的新查詢,並從 Orders 數據表取得一個具有巢狀數據的數據行。
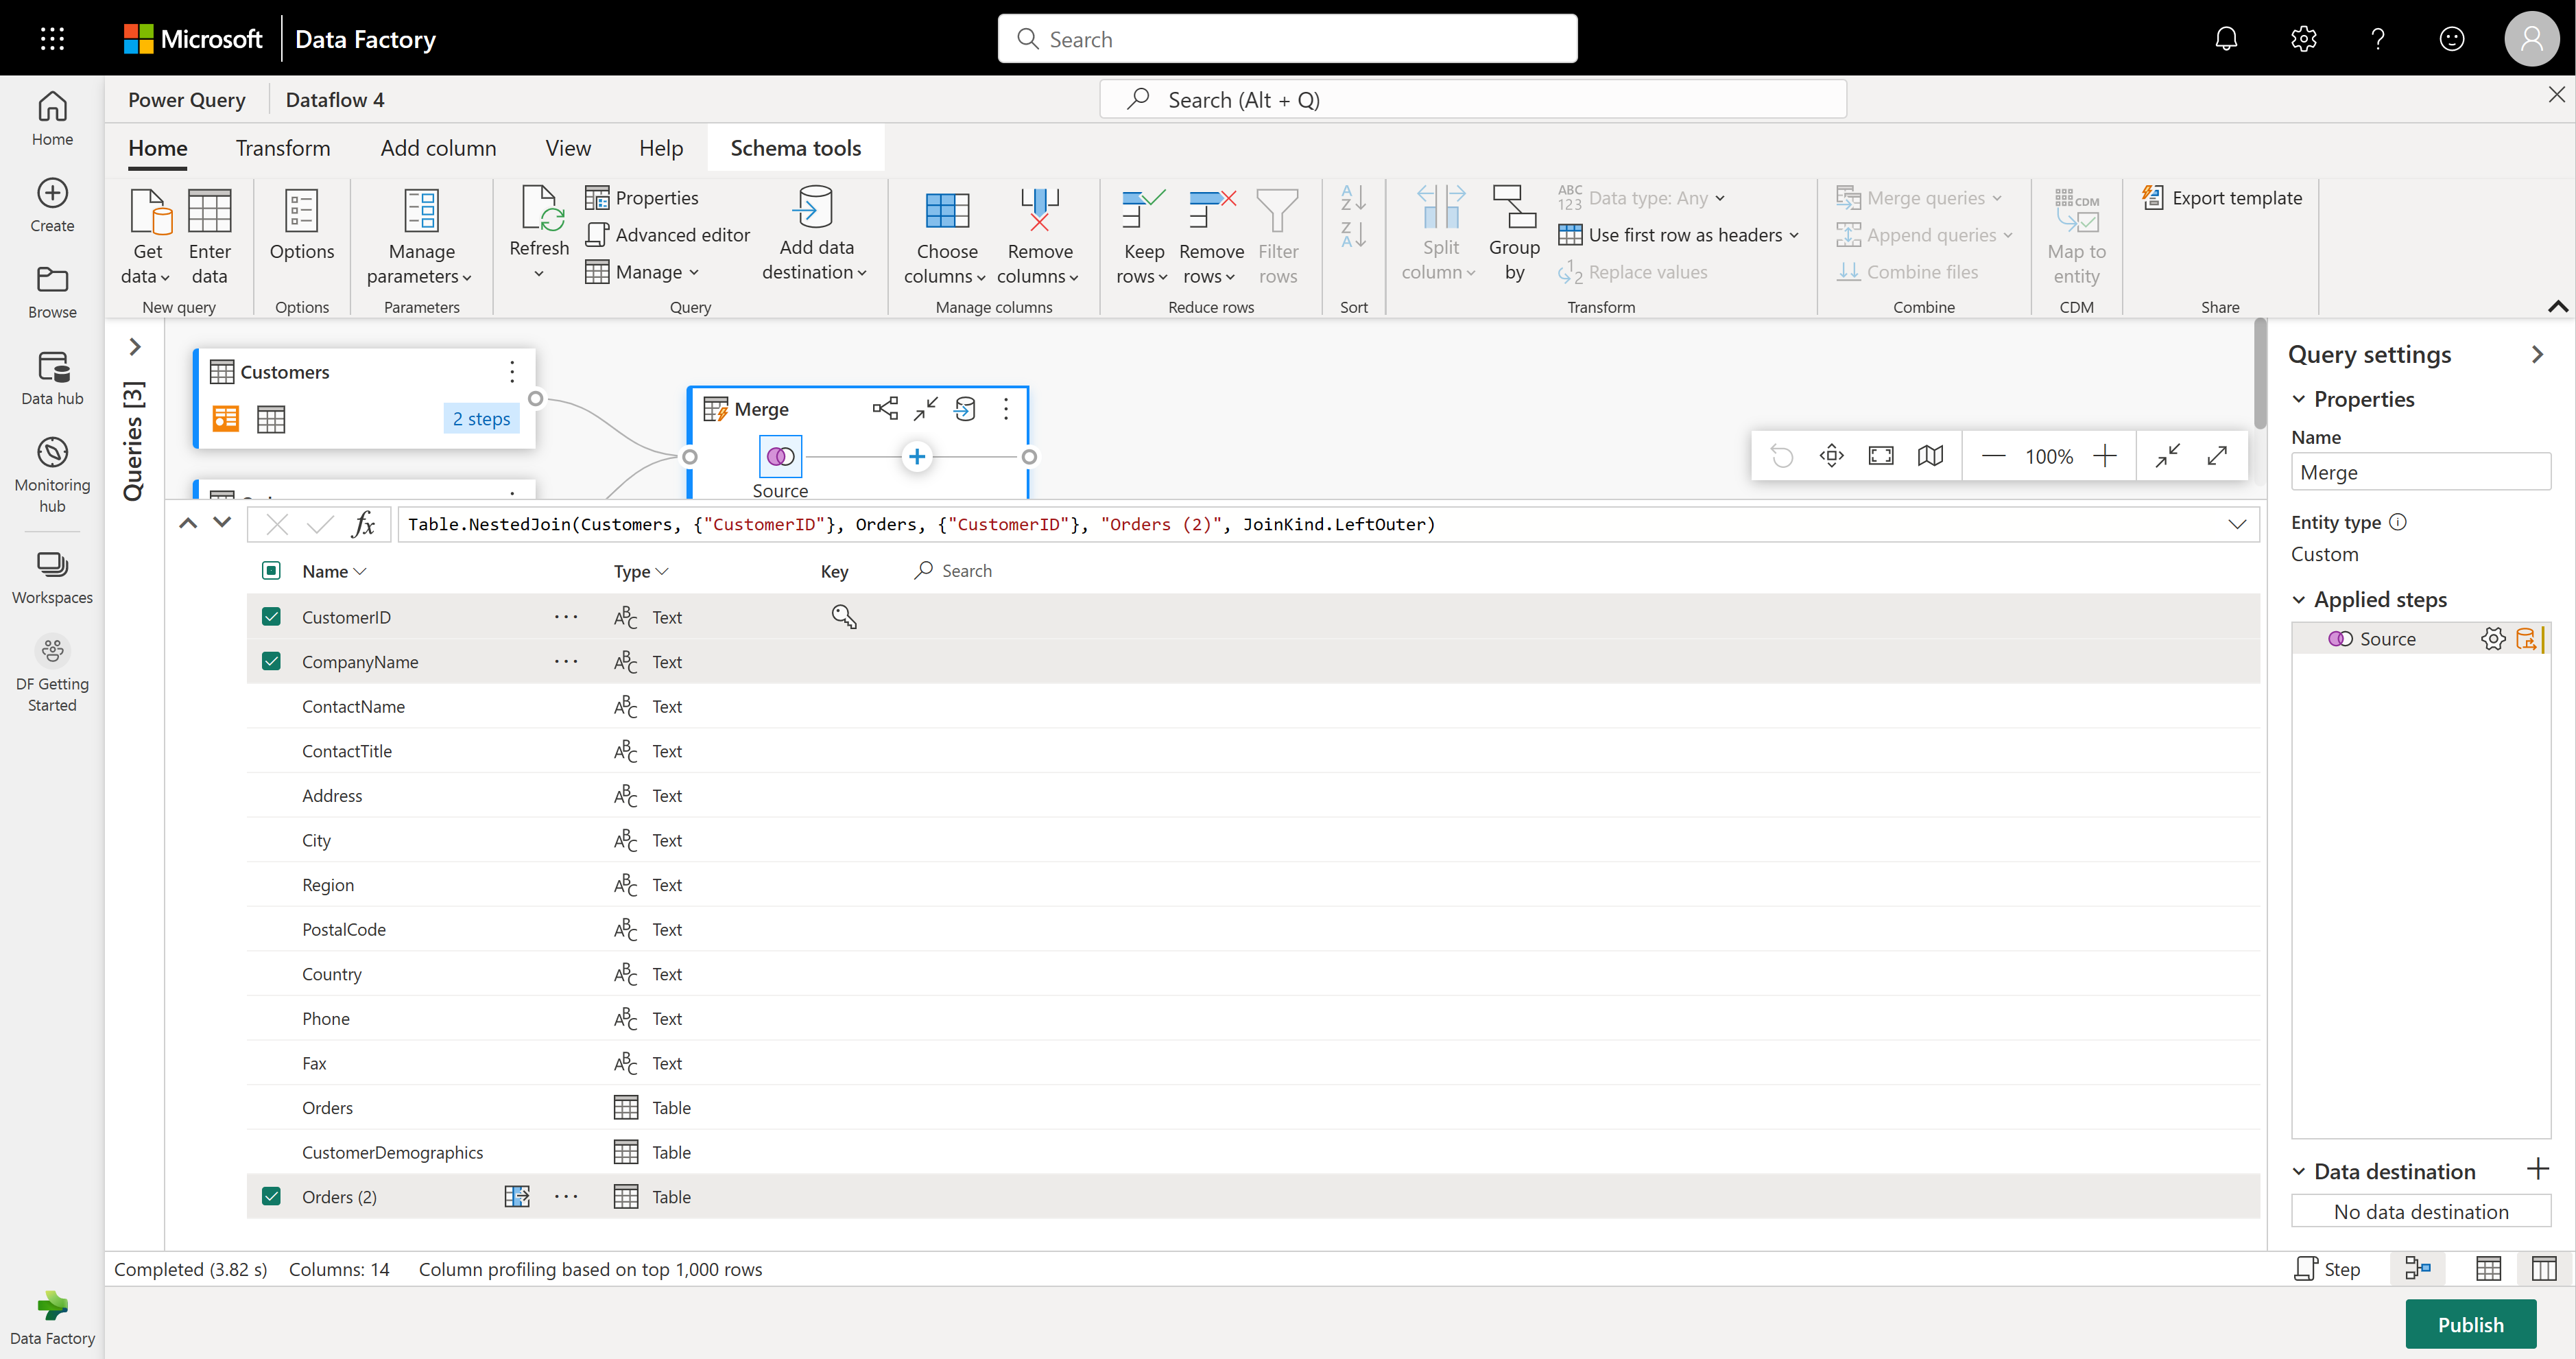
在此範例中,您只對 Customers 數據表中的數據行子集感興趣。 您可以使用架構檢視來選取這些數據行。 在數據流編輯器右下角的切換按鈕內啟用架構檢視。

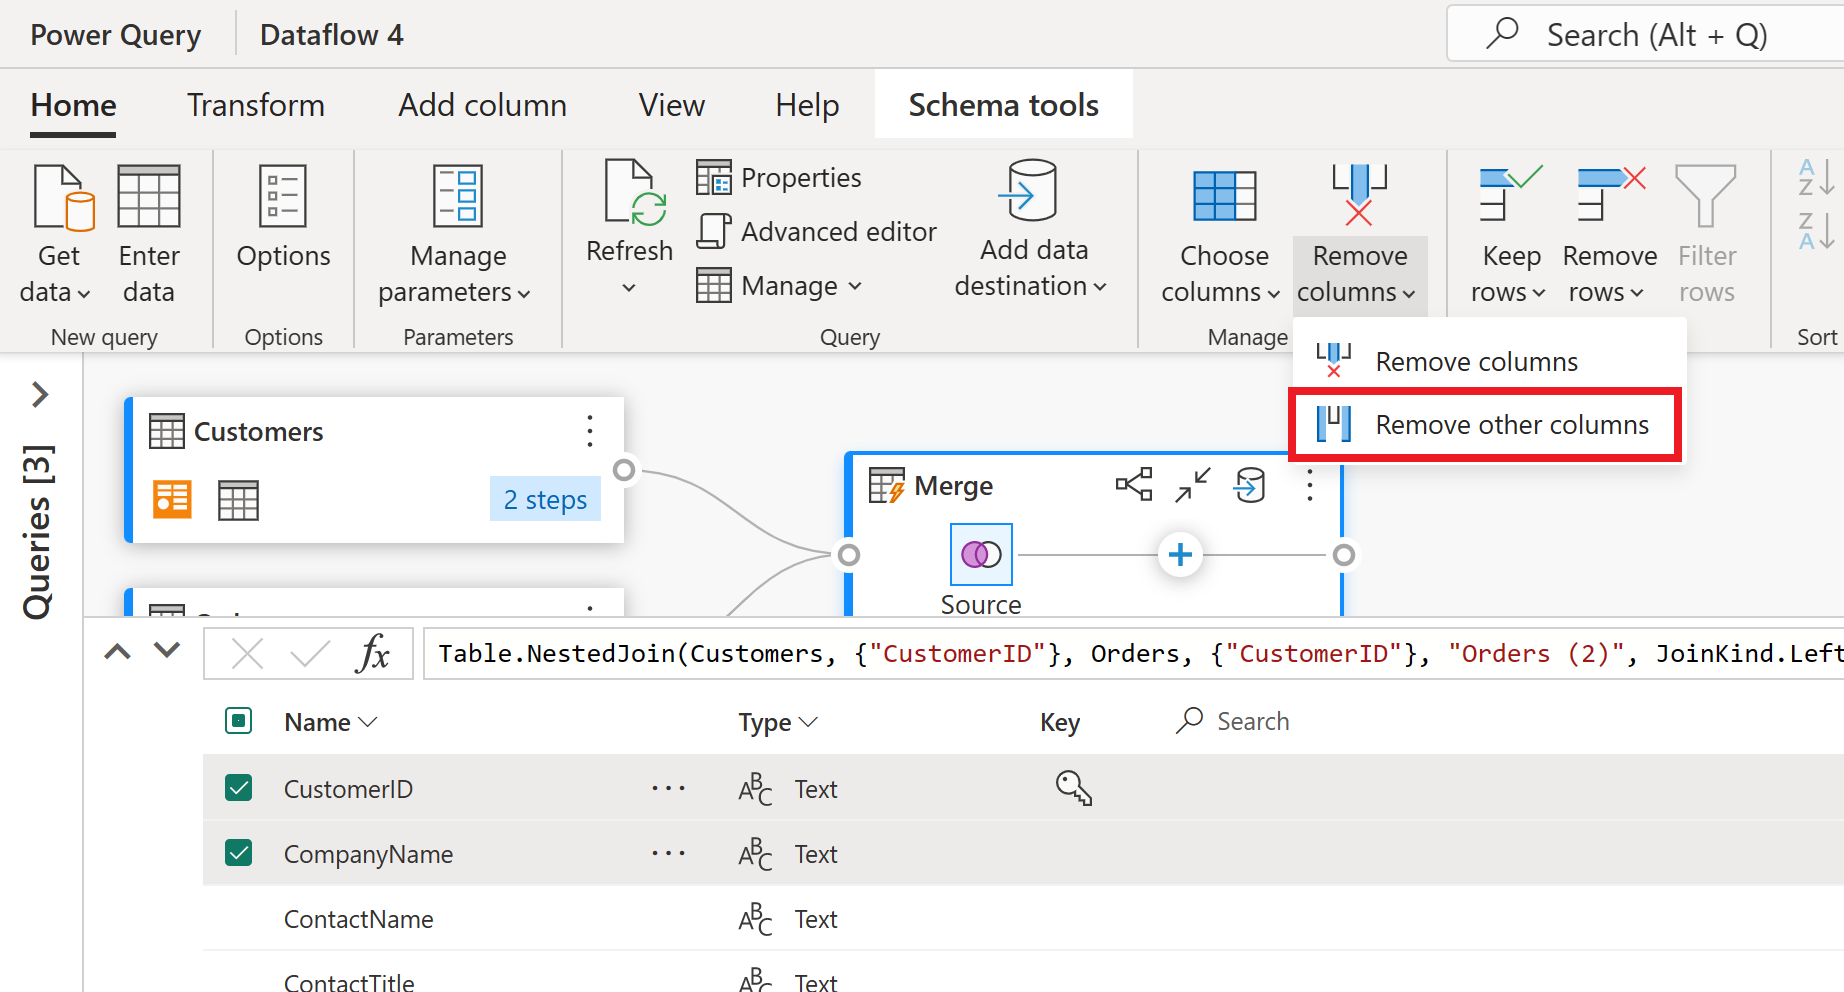
架構檢視會將焦點檢視提供給數據表的架構資訊,包括數據行名稱和數據類型。 架構檢視有一組可透過內容相關功能區索引標籤提供的架構工具。在此案例中,您會選取 CustomerID、CompanyName 和 Orders (2) 數據行,然後選取 [移除數據行] 按鈕,然後選取 [架構工具] 索引卷標的 [移除其他數據行]。
Orders (2) 資料行包含您稍早執行之合併作業所產生的巢狀資訊。 現在,選取 UI 右下角 [顯示架構檢視] 按鈕旁的 [顯示資料檢視] 按鈕,切換回數據檢視。 然後使用 Orders (2) 資料行標頭中的 [展開資料行] 轉換來選取 [計數] 資料行。
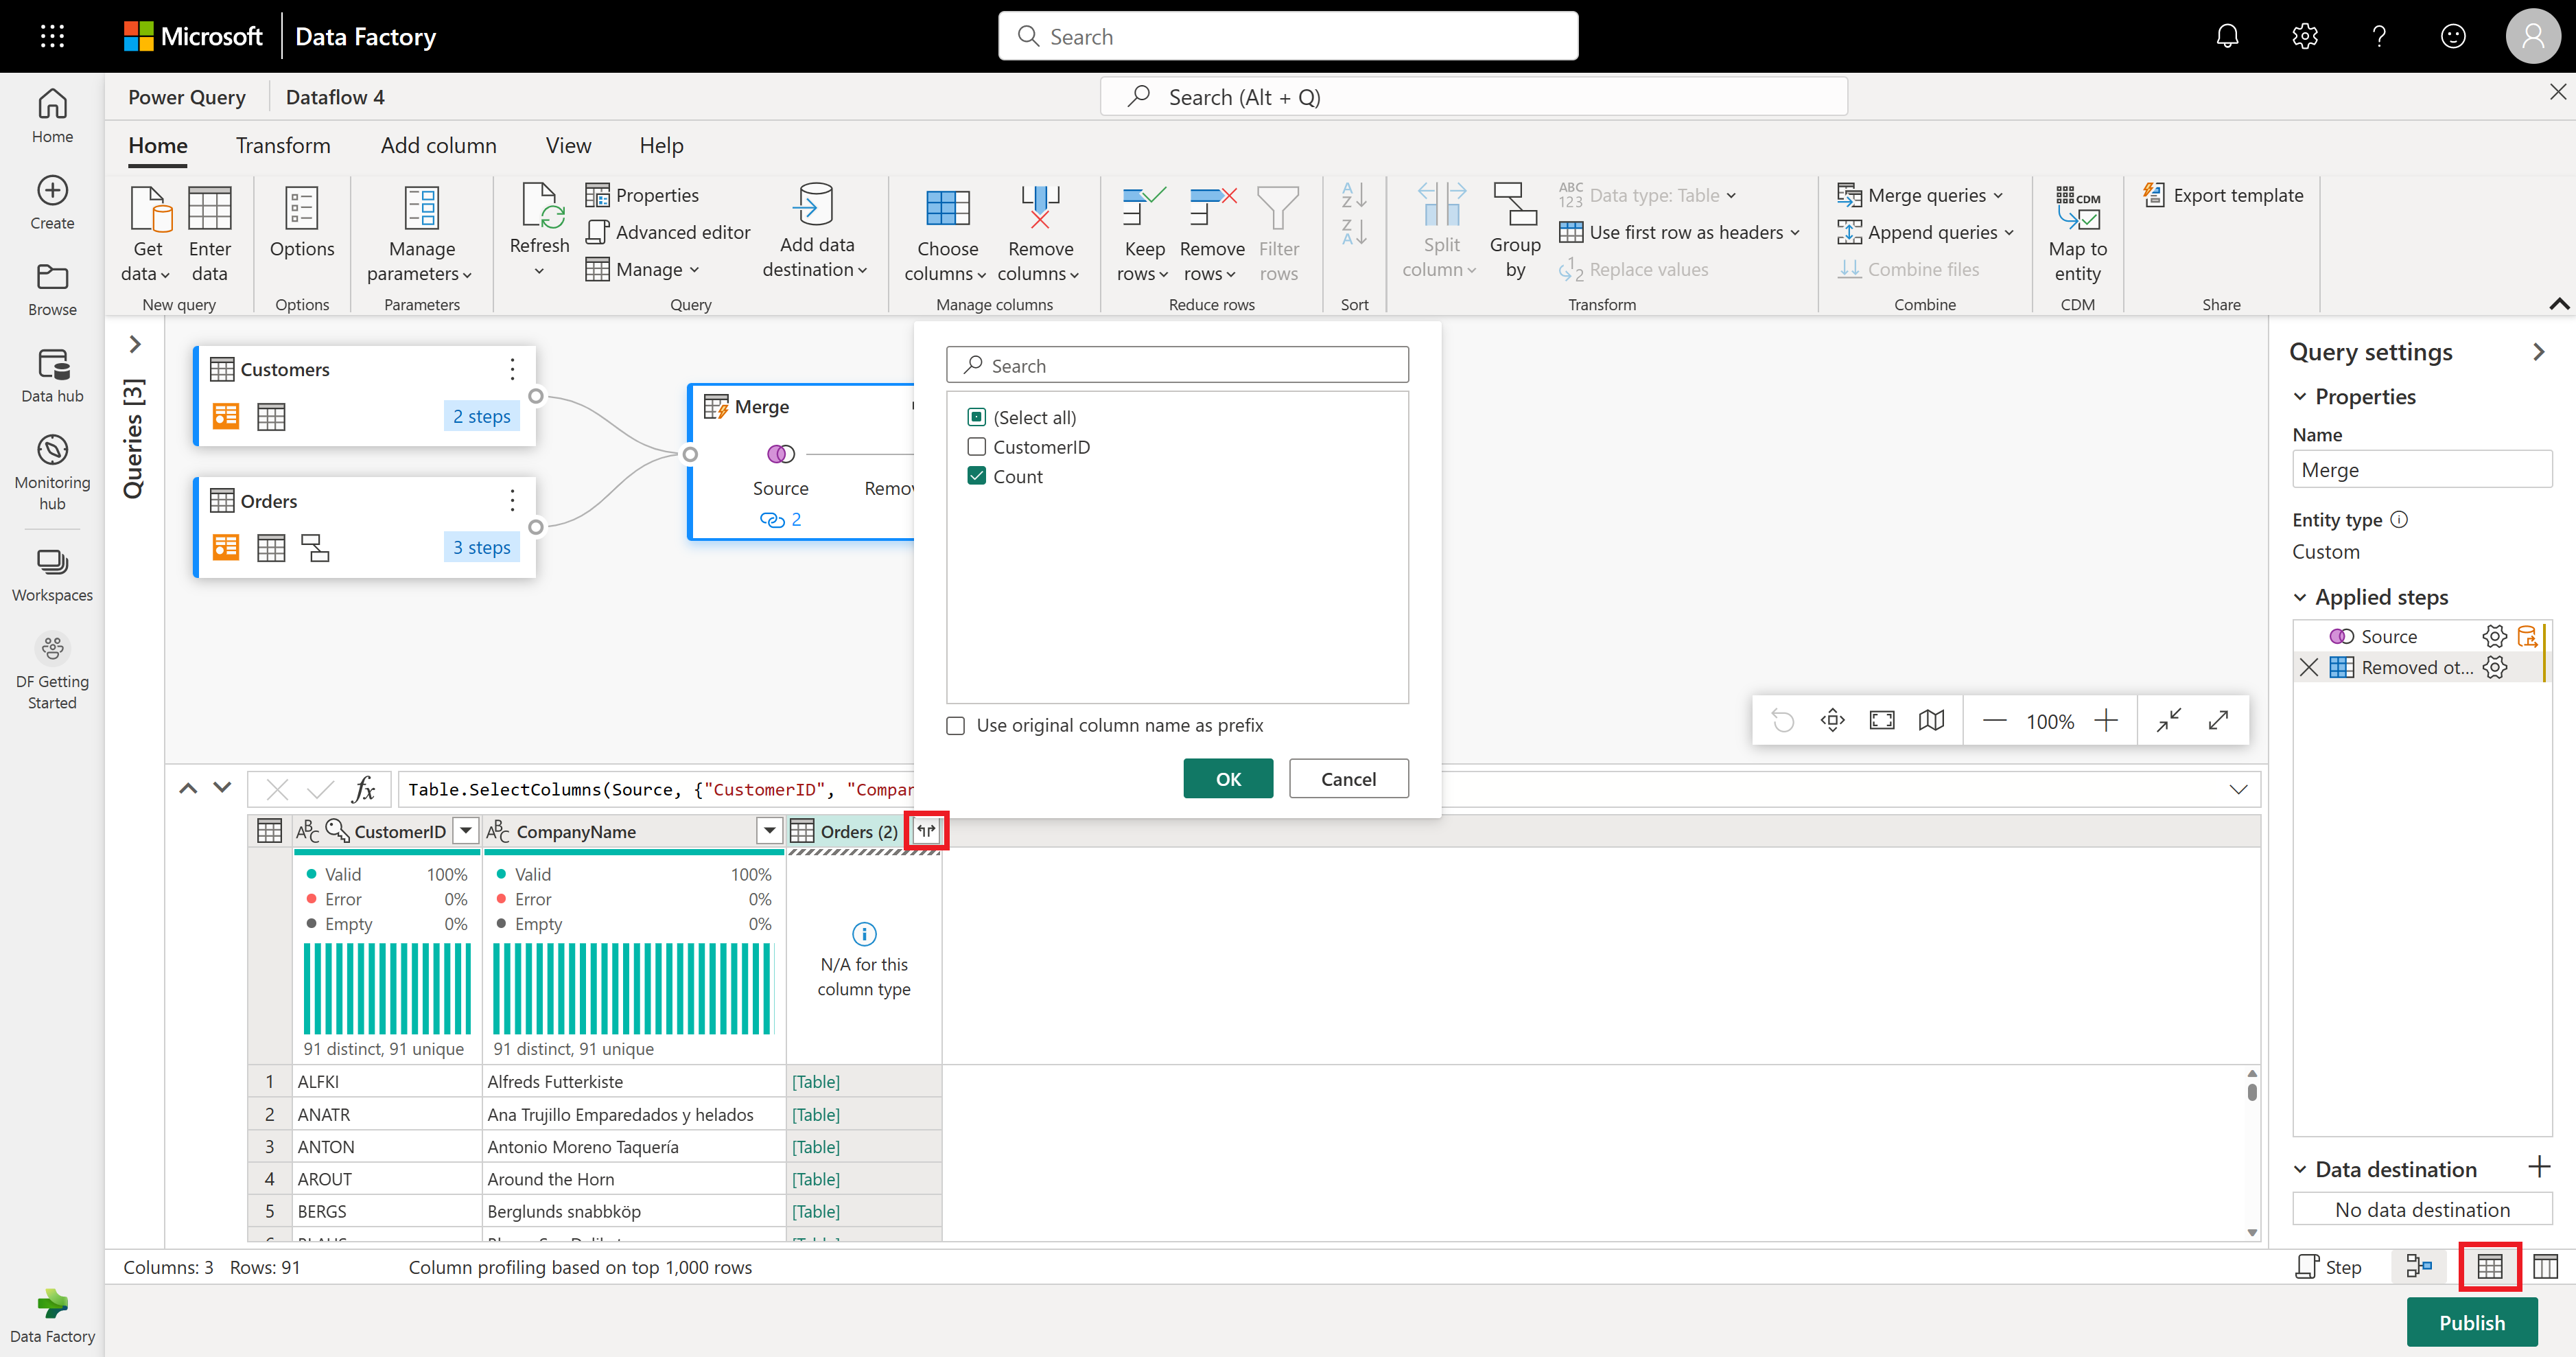
數據流編輯器的螢幕快照,其中顯示右下角的 [顯示數據檢視] 按鈕、[Orders (2)] 資料行中的展開數據行圖示,以及展開數據行視窗中選取的 [計數] 資料行。
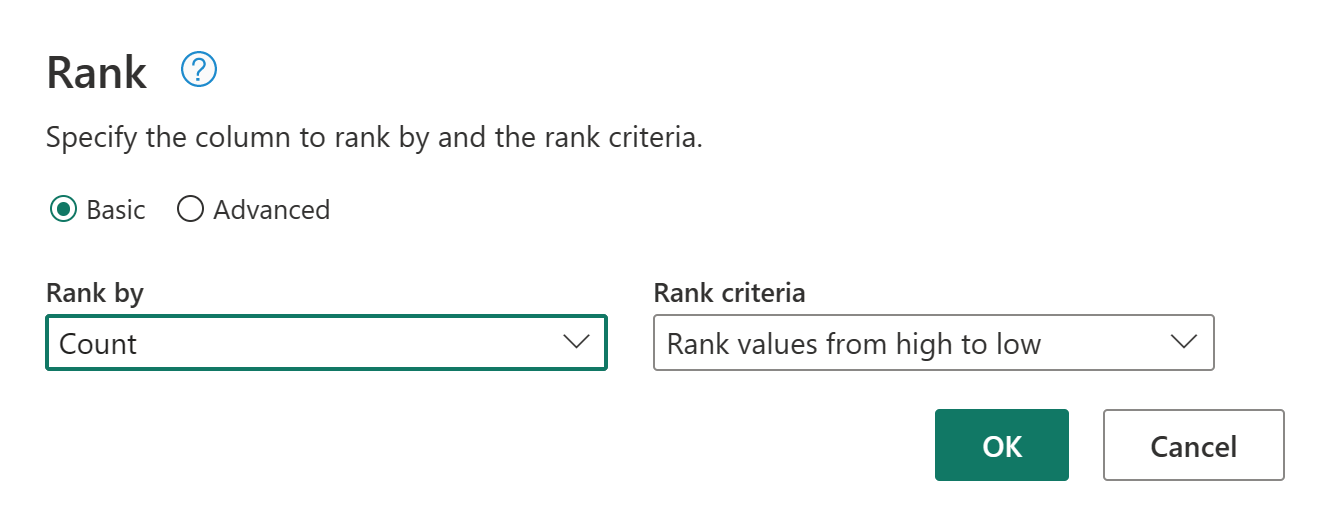
作為最終作業,您想要根據客戶訂單數目來排名客戶。 選取 [計數] 數據行,然後選取功能區中 [新增數據行] 索引卷標底下的 [排名] 數據行按鈕。

將預設設定保留在排名數據行中。 然後選取 [ 確定 ] 以套用此轉換。
現在,使用畫面右側的 [查詢設定] 窗格,將產生的查詢重新命名為 [排名客戶]。

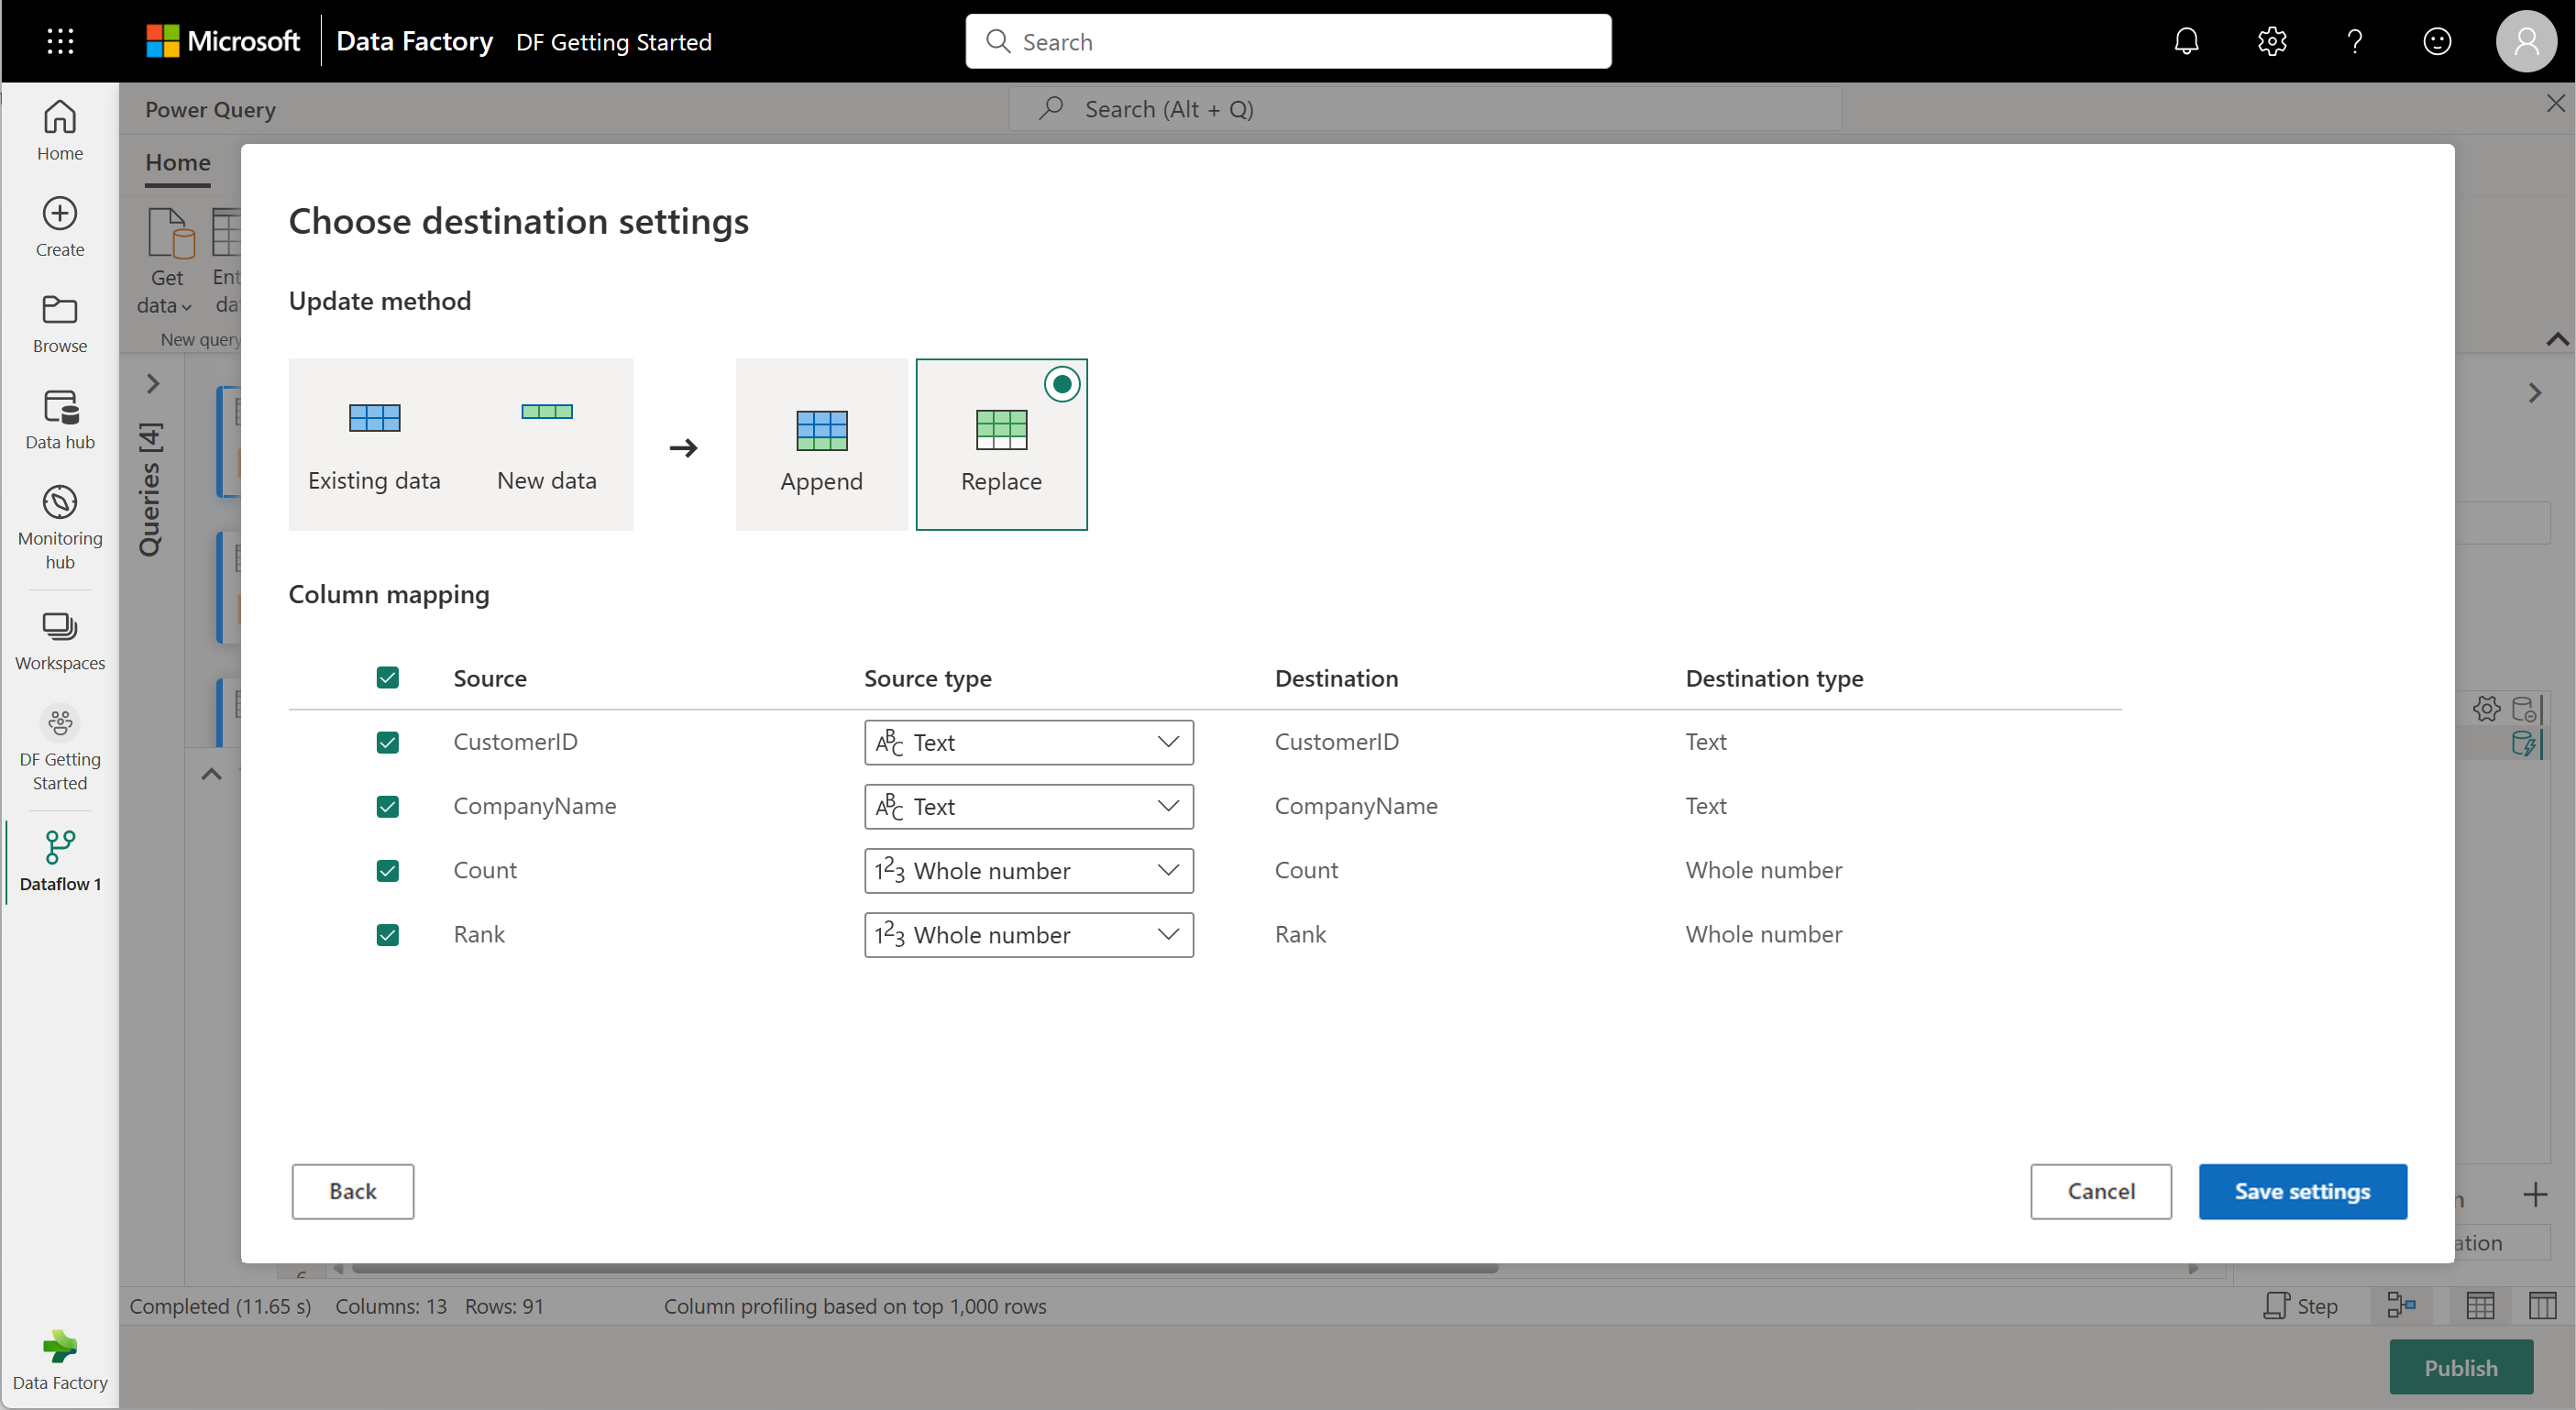
您已完成資料的轉換和合併。 因此,您現在會設定其輸出目的地設定。 選取 [查詢設定] 窗格底部的 [選擇資料目的地]。

在此步驟中,如果您有可用的輸出,您可以設定 Lakehouse 的輸出,或如果您沒有的話,請略過此步驟。 在此體驗中,除了更新方法 (Append 或 Replace) 之外,您還可以設定查詢結果的目的地 Lakehouse 和數據表。

您的數據流現在已準備好發佈。 檢視表檢視表檢視中的查詢,然後選取 [ 發佈]。
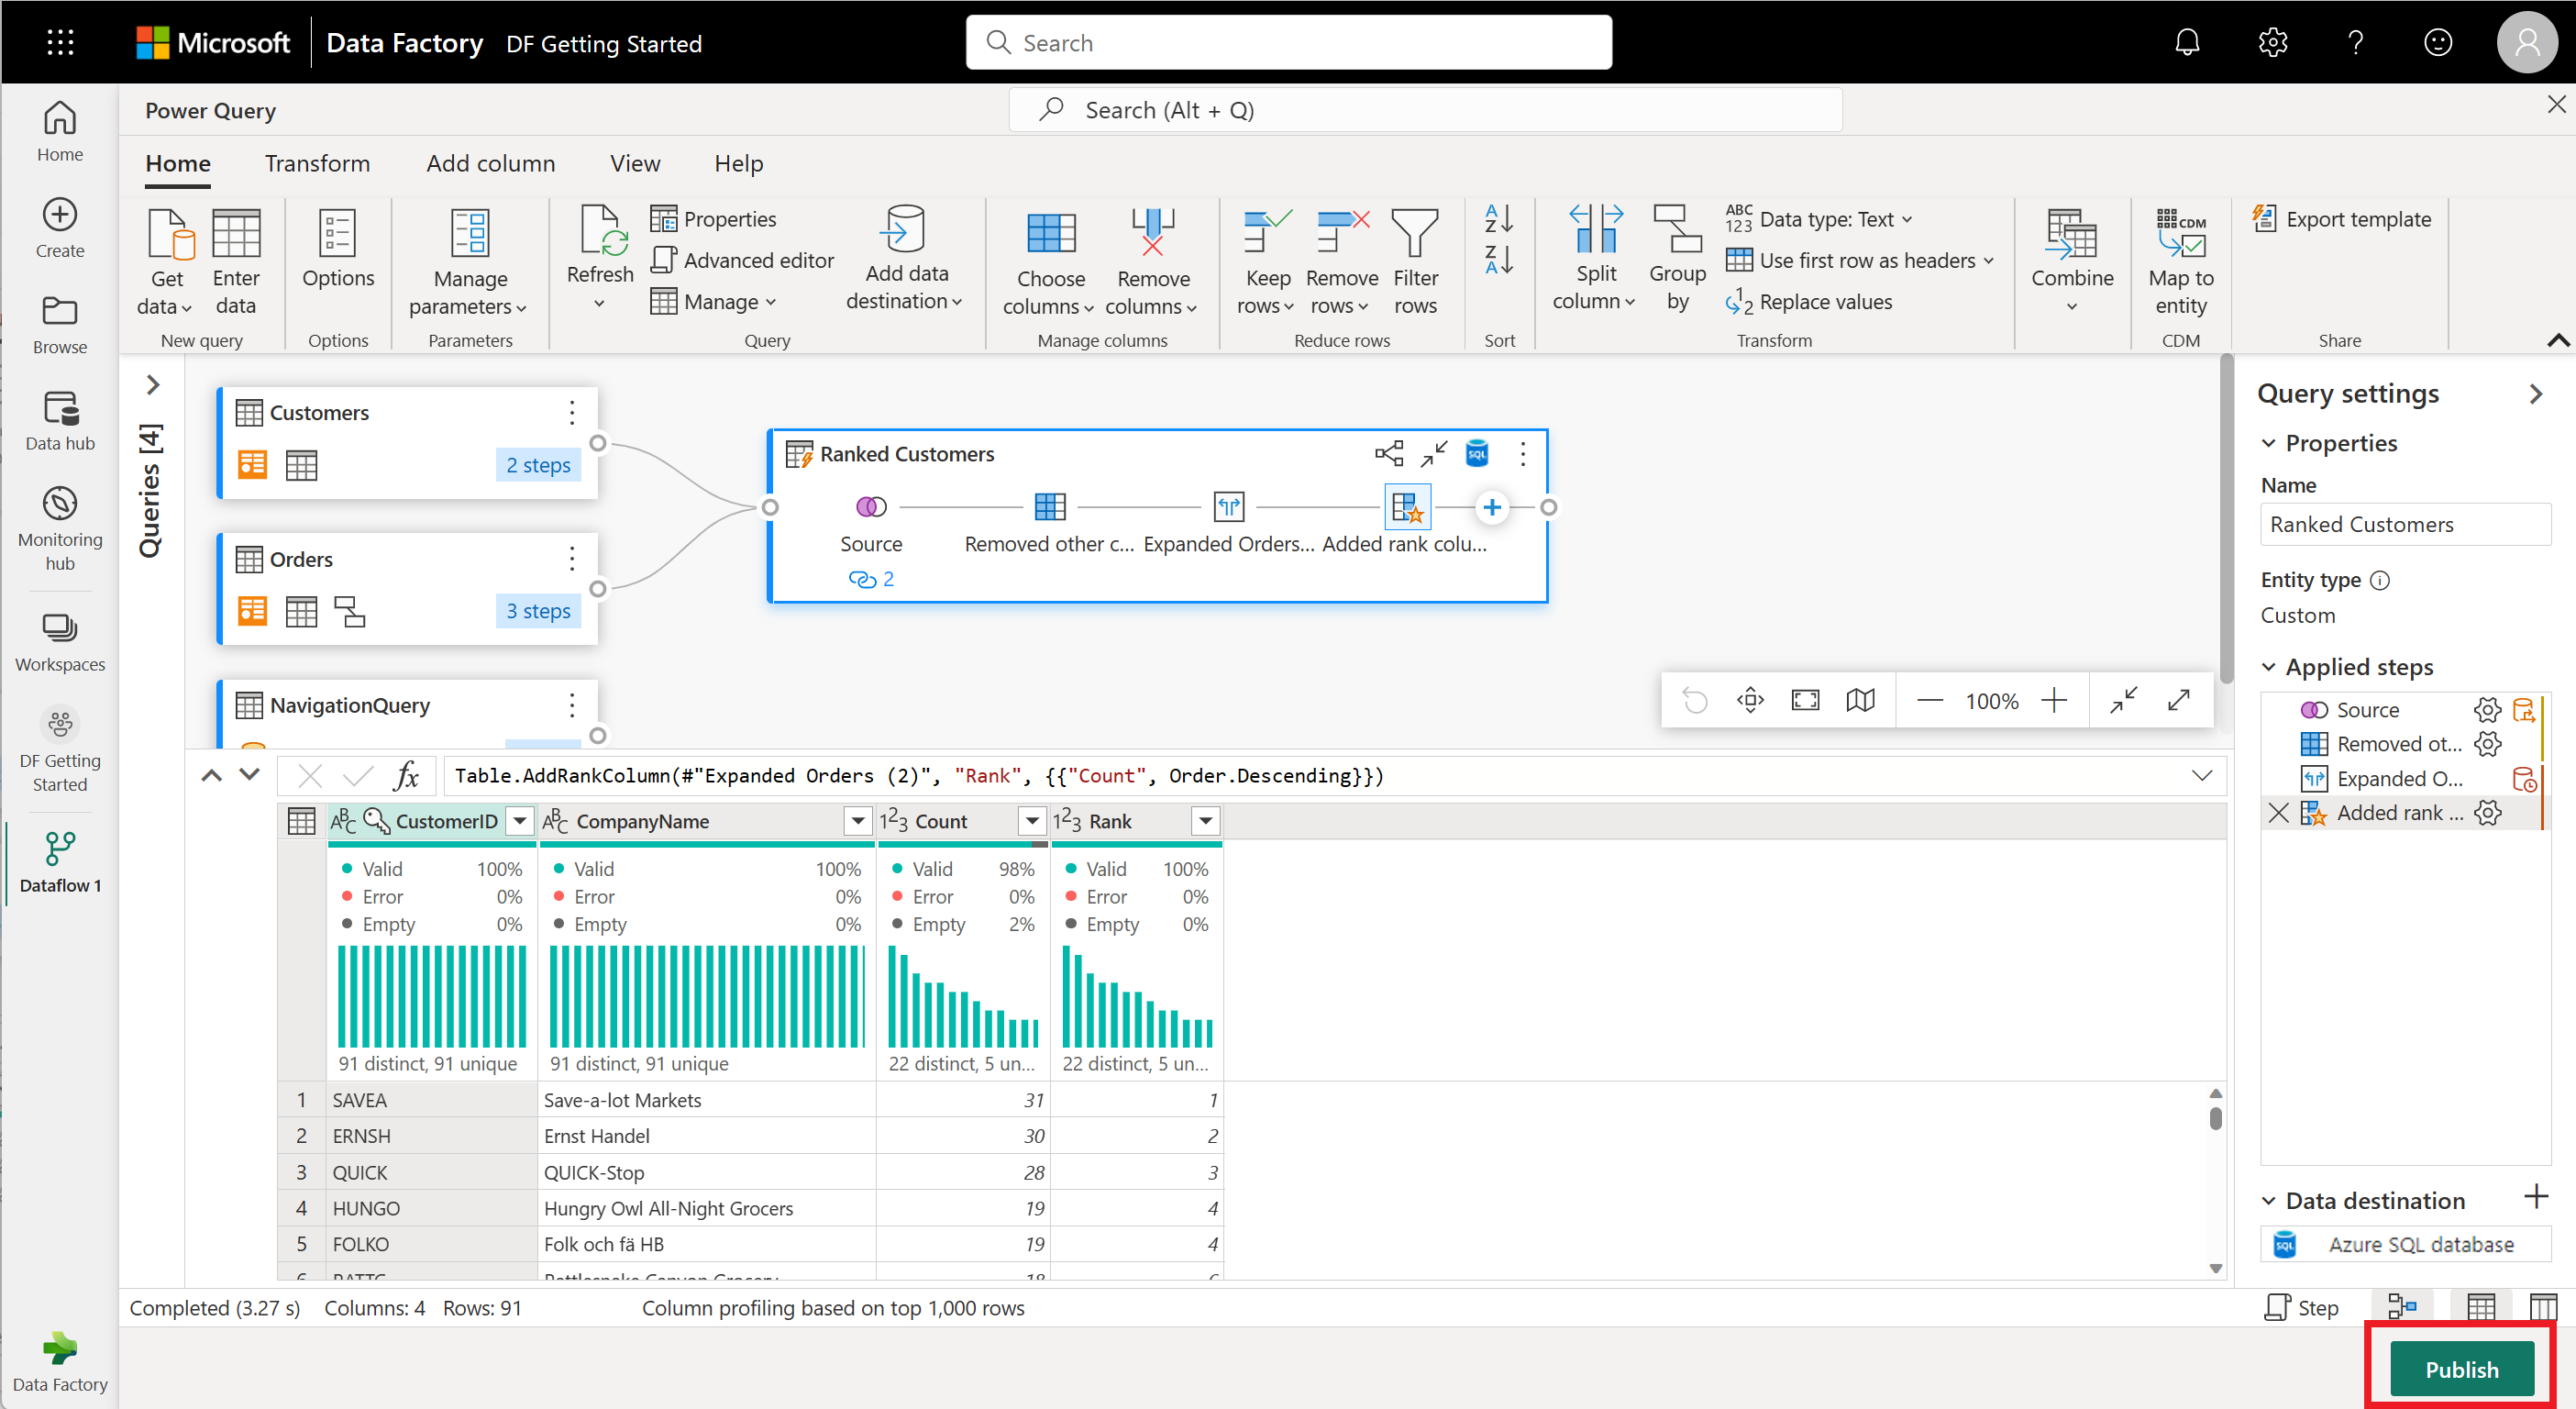
您現在會返回工作區。 數據流名稱旁的微調圖示表示發佈正在進行中。 發佈完成後,您的數據流便已準備好重新整理!
重要
在工作區中建立第一個數據流 Gen2 時,會連同其相關的 SQL 分析端點和語意模型一起布建 Lakehouse 和 Warehouse 專案。 這些專案會由工作區中的所有數據流共用,而且數據流 Gen2 必須運作、不應該刪除,而且不適合直接供使用者使用。 這些專案是數據流 Gen2 的實作詳細數據。 這些專案不會顯示在工作區中,但在其他體驗中可能無法存取,例如 Notebook、SQL 分析端點、Lakehouse 和 Warehouse 體驗。 您可以在名稱中依專案的前置詞來辨識專案。 專案的前置詞是 『DataflowsStaging』。
在您的工作區中,選取 [排程重新整理] 圖示。

開啟排程的重新整理,選取 [新增其他時間],然後設定重新整理,如下列螢幕快照所示。
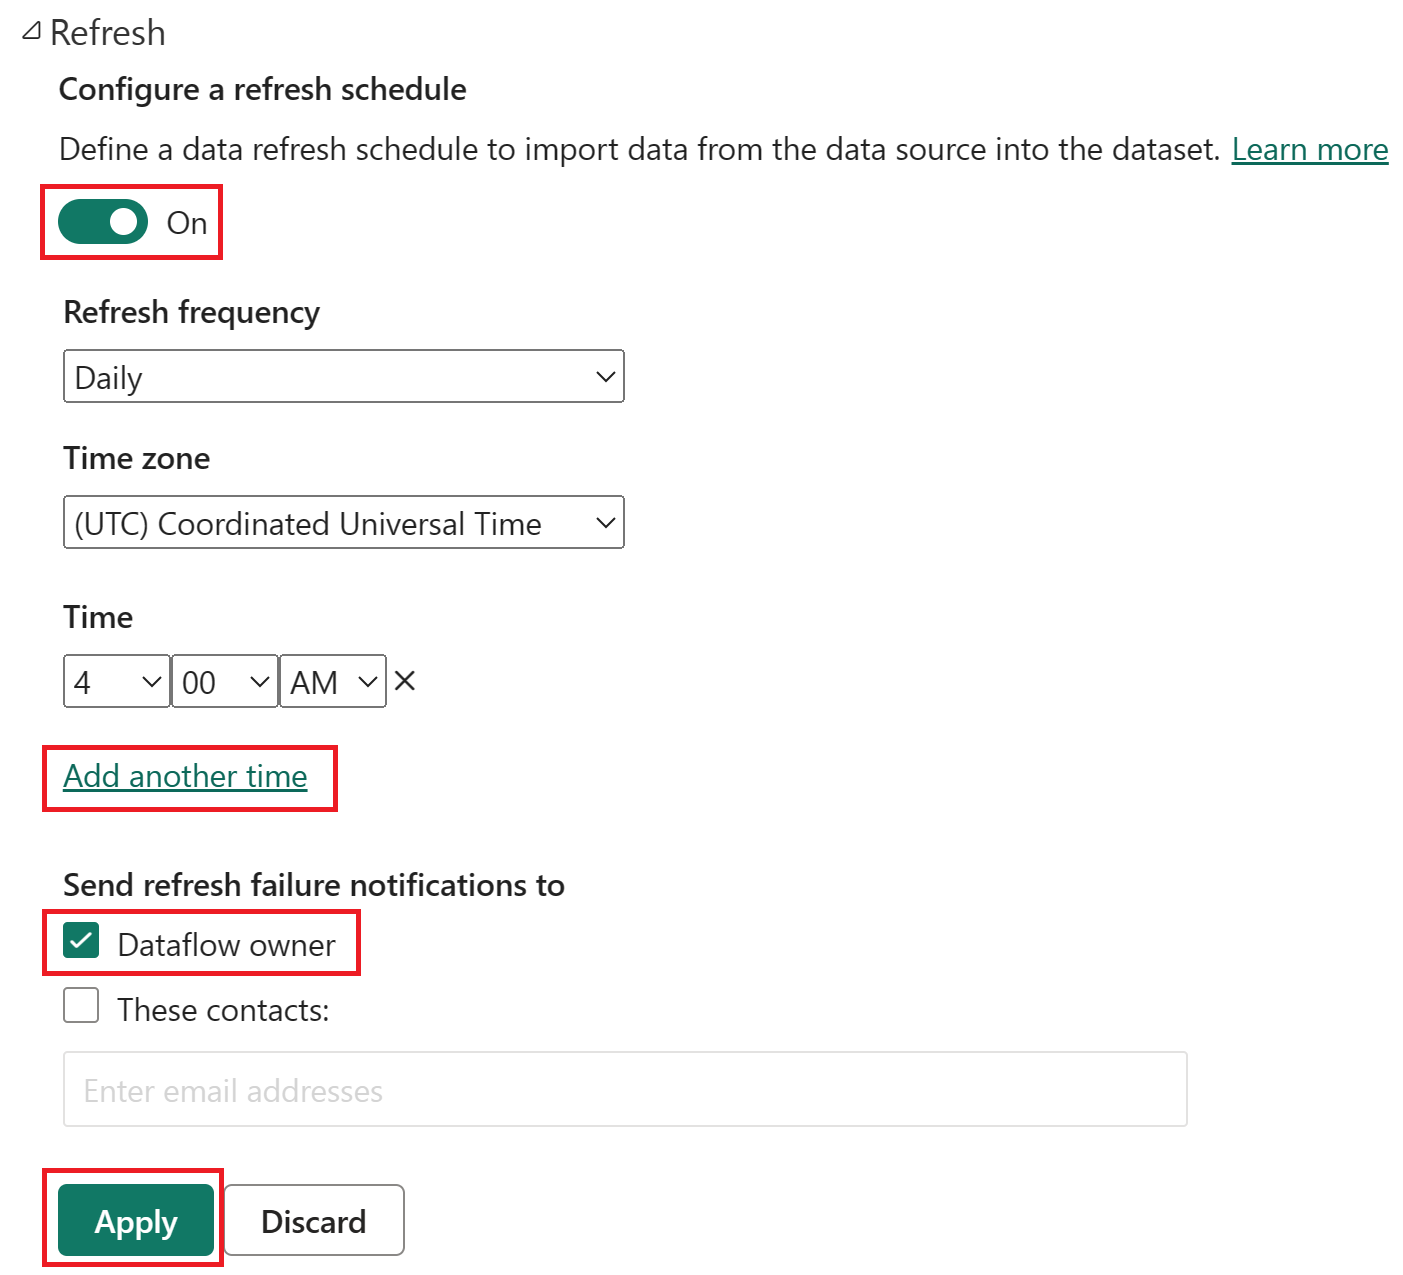
已排程重新整理選項的螢幕快照,其中已開啟排程重新整理,重新整理頻率設定為 [每日]、[時區] 設定為國際標準時間,並將 [時間] 設定為上午 4:00。 [開啟] 按鈕、[新增另一個時間選取專案]、[數據流擁有者] 和 [套用] 按鈕全都會強調。


清除資源
如果您不打算繼續使用此資料流,請使用下列步驟刪除資料流:
流覽至您的 Microsoft Fabric 工作區。
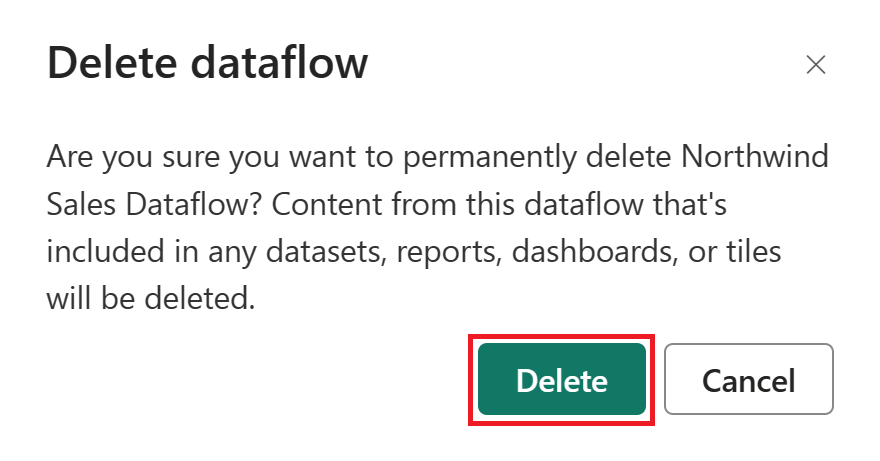
選取數據流名稱旁的垂直省略號,然後選取 [ 刪除]。

選取 [ 刪除 ] 以確認刪除資料流。
相關內容
此範例中的數據流會示範如何在Dataflow Gen2中載入和轉換數據。 您已了解如何︰
- 建立數據流 Gen2。
- 轉換資料。
- 設定已轉換數據的目的地設定。
- 執行並排程您的數據管線。
請前進到下一篇文章,瞭解如何建立您的第一個數據管線。
意見反應
即將登場:在 2024 年,我們將逐步淘汰 GitHub 問題作為內容的意見反應機制,並將它取代為新的意見反應系統。 如需詳細資訊,請參閱:https://aka.ms/ContentUserFeedback。
提交並檢視相關的意見反應