教學課程:與 3D 物件互動
瞭解如何使用 Babylon.js 為Mixed Reality體驗建立 3D 物件和互動。 在本節中,您會從簡單的專案開始,例如在選取物件時繪製 Cube 的臉部。
本教學課程涵蓋下列主題:
- 如何新增互動
- 啟用 WebXR 沉浸式模式
- 在Windows Mixed Reality模擬器上執行應用程式
- 在 Android Chrome 上執行和偵錯應用程式
開始之前
在上一個教學課程步驟中,已建立具有場景的基本網頁。 讓主控網頁開啟以進行編輯。
<html>
<head>
    <script src="https://cdn.babylonjs.com/babylon.js"></script>
    <style>
        body,#renderCanvas { width: 100%; height: 100%;}
    </style>
</head>
<body>
    <canvas id="renderCanvas"></canvas>
    <script>
        const canvas = document.getElementById("renderCanvas");
        const engine = new BABYLON.Engine(canvas, true);

        const createScene = function() {
            const scene = new BABYLON.Scene(engine);
            scene.clearColor = new BABYLON.Color3.Black;

            const alpha =  Math.PI/4;
            const beta = Math.PI/3;
            const radius = 8;
            const target = new BABYLON.Vector3(0, 0, 0);

            const camera = new BABYLON.ArcRotateCamera("Camera", alpha, beta, radius, target, scene);
            camera.attachControl(canvas, true);

            const light = new BABYLON.HemisphericLight("light", new BABYLON.Vector3(1, 1, 0));

            const box = BABYLON.MeshBuilder.CreateBox("box", {});
            box.position.x = 0.5;
            box.position.y = 1;

            return scene;
        };

        const sceneToRender = createScene();
        engine.runRenderLoop(function(){
            sceneToRender.render();
        });
    </script>
</body>
</html>
新增互動
首先,讓我們更新建立 Cube 的程式碼,讓立方體以隨機色彩繪製。 若要這樣做,我們會將 材質 新增至 Cube。 材質可讓我們指定色彩和紋理,並可用來涵蓋其他物件。 材質的出現方式取決於場景中所使用的光線或光線,以及其設定為回應的方式。 例如,diffuseColor 會將色彩散佈到其所連接的網格上。 新增下列程式碼:
const boxMaterial = new BABYLON.StandardMaterial("material", scene);
boxMaterial.diffuseColor = BABYLON.Color3.Random();
box.material = boxMaterial;
現在,Cube 會以隨機色彩繪製,讓我們將互動新增至:
- 按一下 Cube 時變更色彩
- 變更色彩之後移動立方體
若要新增互動,我們應該使用 動作。 動作會啟動以回應事件觸發程式。 例如,當使用者按一下 Cube 時。 我們只需要具現化 BABYLON。ActionManager 並註冊特定觸發程式的動作。 BABYLON。當有人按一下 Cube 時,ExecuteCodeAction 將會執行我們的 JavaScript 函式:
box.actionManager = new BABYLON.ActionManager(scene);
box.actionManager.registerAction(new BABYLON.ExecuteCodeAction(
    BABYLON.ActionManager.OnPickTrigger,
    function (evt) {
        const sourceBox = evt.meshUnderPointer;

        //move the box upright
        sourceBox.position.x += 0.1;
        sourceBox.position.y += 0.1;

        //update the color
        boxMaterial.diffuseColor = BABYLON.Color3.Random();
    }));
網頁的最終程式碼如下所示:
<html>
<head>
    <script src="https://cdn.babylonjs.com/babylon.js"></script>
    <style>
        body,#renderCanvas { width: 100%; height: 100%;}
    </style>
</head>
<body>
    <canvas id="renderCanvas"></canvas>
    <script>
        const canvas = document.getElementById("renderCanvas");
        const engine = new BABYLON.Engine(canvas, true);

        const createScene = function() {
            const scene = new BABYLON.Scene(engine);
            scene.clearColor = new BABYLON.Color3.Black;

            const alpha =  Math.PI/4;
            const beta = Math.PI/3;
            const radius = 8;
            const target = new BABYLON.Vector3(0, 0, 0);

            const camera = new BABYLON.ArcRotateCamera("Camera", alpha, beta, radius, target, scene);
            camera.attachControl(canvas, true);

            const light = new BABYLON.HemisphericLight("light", new BABYLON.Vector3(1, 1, 0));

            const box = BABYLON.MeshBuilder.CreateBox("box", {});
            box.position.x = 0.5;
            box.position.y = 1;

            const boxMaterial = new BABYLON.StandardMaterial("material", scene);
            boxMaterial.diffuseColor = BABYLON.Color3.Random();
            box.material = boxMaterial;

            box.actionManager = new BABYLON.ActionManager(scene);
            box.actionManager.registerAction(
                new BABYLON.ExecuteCodeAction(BABYLON.ActionManager.OnPickTrigger,
                function (evt) {
                    const sourceBox = evt.meshUnderPointer;
                    sourceBox.position.x += 0.1;
                    sourceBox.position.y += 0.1;

                    boxMaterial.diffuseColor = BABYLON.Color3.Random();
                }));

            return scene;
        };

        const sceneToRender = createScene();
        engine.runRenderLoop(function(){
            sceneToRender.render();
        });
    </script>
</body>
</html>
啟用 WebXR 沉浸式體驗
現在,我們的 Cube 正在變更色彩,我們已準備好嘗試沉浸式體驗。
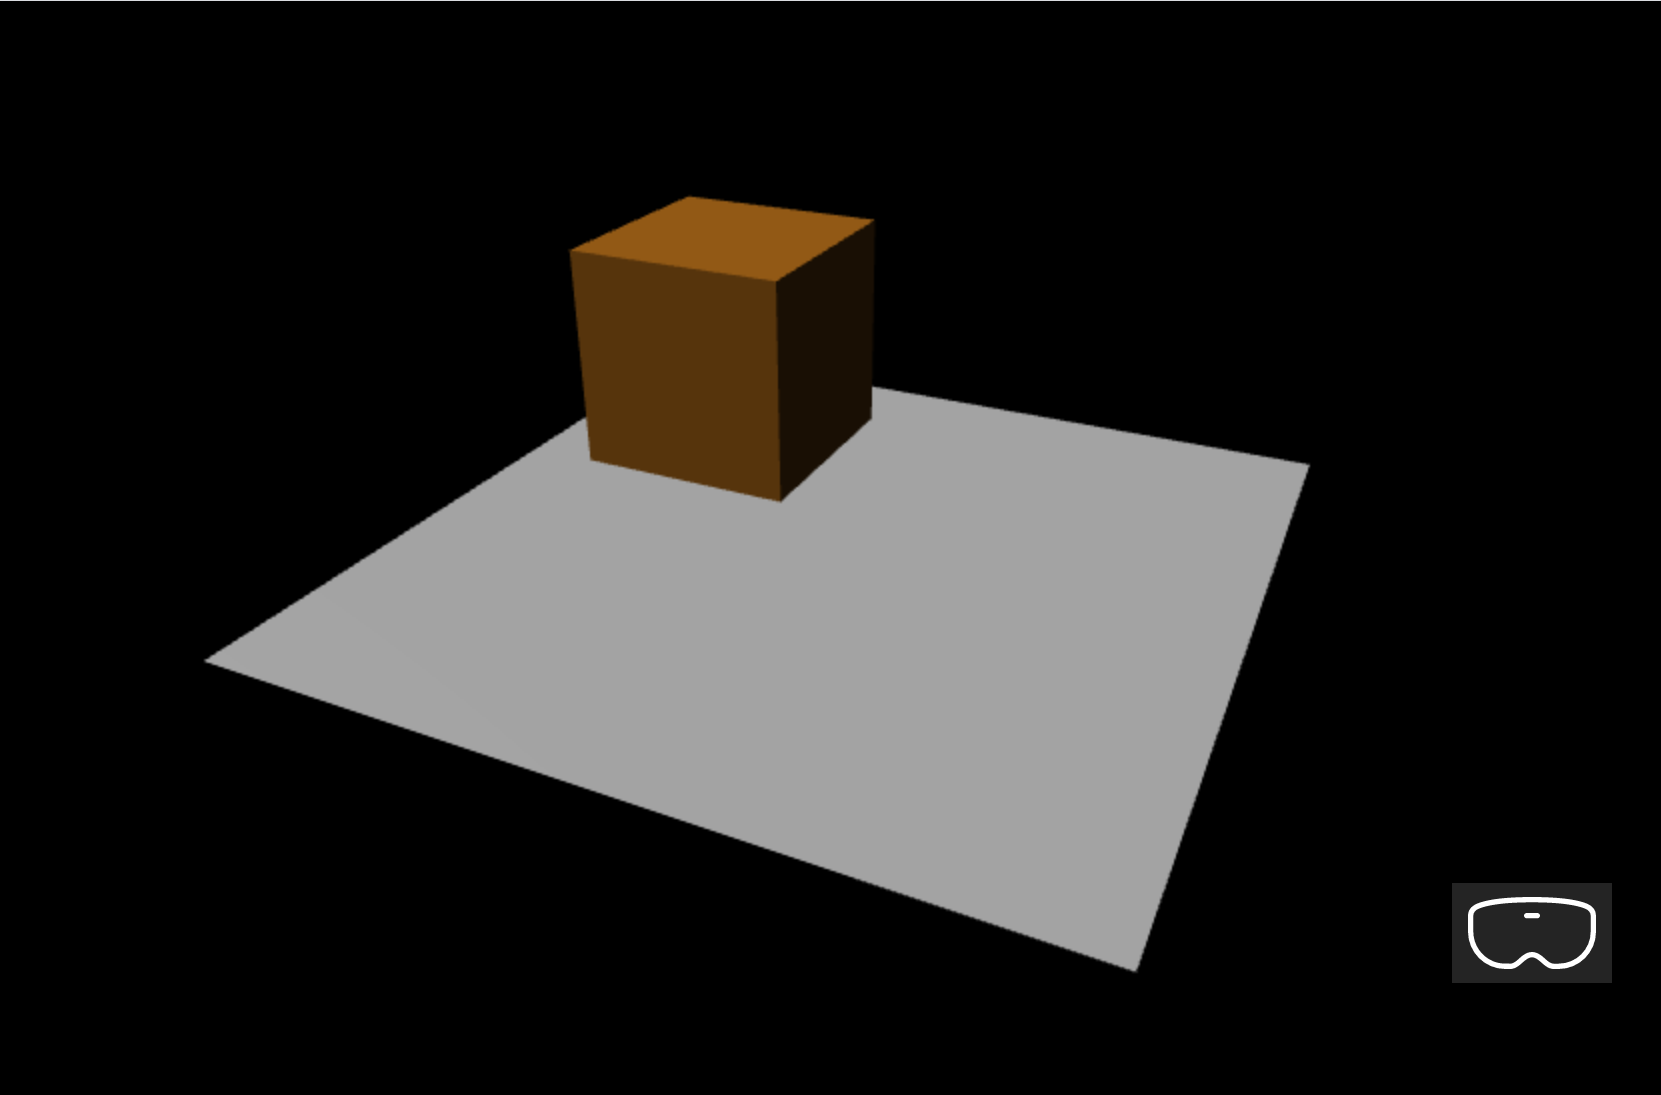
在此步驟中,我們將介紹 一個基礎。 立方體會在空中懸空,而我們將會在底部看到一個樓層。 新增地面,如下所示:
const ground = BABYLON.MeshBuilder.CreateGround("ground", {width: 4, height: 4});這會建立簡單的 4x4 計量樓層。
若要新增 WebXR 支援,我們需要呼叫 createDefaultXRExperienceAsync,其具有 Promise 結果。 在 createScene 函式結尾處新增此程式碼,而不是 傳回場景;:
const xrPromise = scene.createDefaultXRExperienceAsync({
    floorMeshes: [ground]
});
return xrPromise.then((xrExperience) => {
    console.log("Done, WebXR is enabled.");
    return scene;
});
由於 createScene 函式現在會傳回 promise 而不是場景,因此我們必須修改 createScene 和 engine.runRenderLoop 的呼叫方式。 以下列程式碼取代這些函式的目前呼叫,這些函式位於/script > 標籤之前 <:
createScene().then(sceneToRender => {
    engine.runRenderLoop(() => sceneToRender.render());
});
網頁的最終程式碼如下所示:
<html>
<head>
    <script src="https://cdn.babylonjs.com/babylon.js"></script>
    <style>
        body,#renderCanvas { width: 100%; height: 100%;}
    </style>
</head>
<body>
    <canvas id="renderCanvas"></canvas>
    <script>
        const canvas = document.getElementById("renderCanvas");
        const engine = new BABYLON.Engine(canvas, true);

        const createScene = function() {
            const scene = new BABYLON.Scene(engine);
            scene.clearColor = new BABYLON.Color3.Black;

            const alpha =  Math.PI/4;
            const beta = Math.PI/3;
            const radius = 8;
            const target = new BABYLON.Vector3(0, 0, 0);

            const camera = new BABYLON.ArcRotateCamera("Camera", alpha, beta, radius, target, scene);
            camera.attachControl(canvas, true);

            const light = new BABYLON.HemisphericLight("light", new BABYLON.Vector3(1, 1, 0));

            const box = BABYLON.MeshBuilder.CreateBox("box", {});
            box.position.x = 0.5;
            box.position.y = 1;

            const boxMaterial = new BABYLON.StandardMaterial("material", scene);
            boxMaterial.diffuseColor = BABYLON.Color3.Random();
            box.material = boxMaterial;

            box.actionManager = new BABYLON.ActionManager(scene);
            box.actionManager.registerAction(
                new BABYLON.ExecuteCodeAction(BABYLON.ActionManager.OnPickTrigger,
                function (evt) {
                    const sourceBox = evt.meshUnderPointer;
                    sourceBox.position.x += 0.1;
                    sourceBox.position.y += 0.1;

                    boxMaterial.diffuseColor = BABYLON.Color3.Random();
                }));

            const ground = BABYLON.MeshBuilder.CreateGround("ground", {width: 4, height: 4});

            const xrPromise = scene.createDefaultXRExperienceAsync({
                floorMeshes: [ground]
            });

            return xrPromise.then((xrExperience) => {
                console.log("Done, WebXR is enabled.");
                return scene;
            });
        };

        createScene().then(sceneToRender => {
            engine.runRenderLoop(() => sceneToRender.render());
        });
    </script>
</body>
</html>
上述程式碼會在瀏覽器視窗中產生下列輸出:
在Windows Mixed Reality模擬器上執行
如果您過去尚未這麼做,請啟用Windows Mixed Reality模擬器。
選取右下角的沈浸式 VR 按鈕:

此動作將會啟動 [Windows Mixed Reality模擬器] 視窗,如下所示:
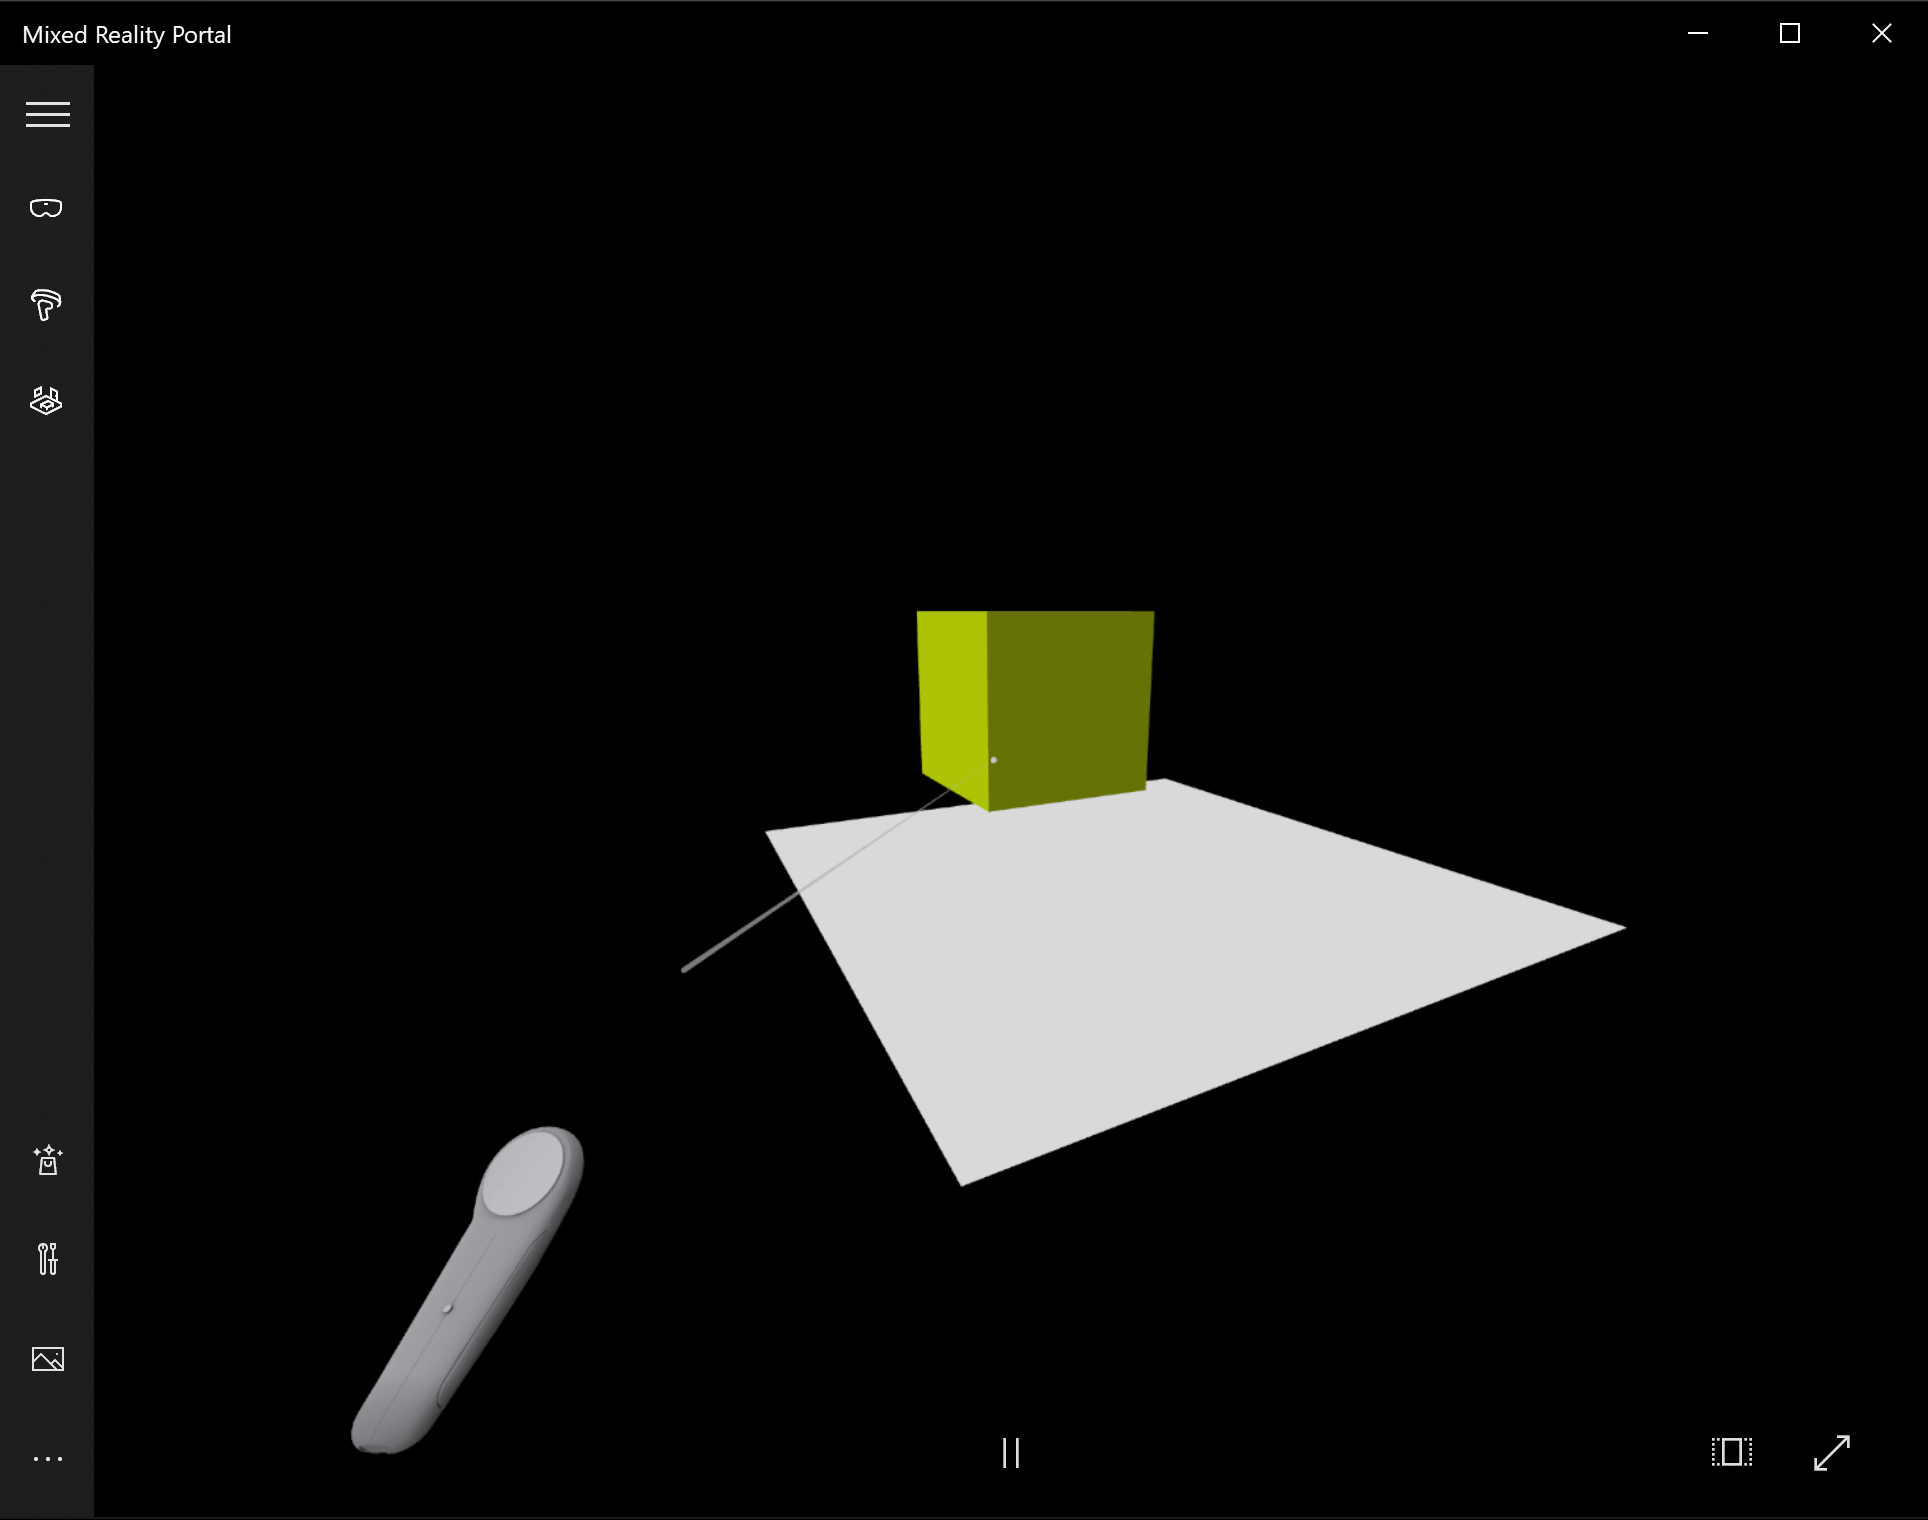
使用鍵盤上的 W、A、S 和 D 鍵,據以往前、往後向左和向右進行。 使用模擬手以立方體為目標,然後按鍵盤上的 Enter 鍵來執行按一下動作。 Cube 會變更其色彩,並移至新的位置。
注意
以立方體為目標時,請確定手部光線的結尾 (白色圓圈) 與立方體交集,如上圖所示。 深入瞭解 使用手部點和認可。
在 Android 裝置上執行和偵錯
執行下列步驟,以在您的 Android 裝置上啟用偵錯:
必要條件
在安全內容中提供靜態 html 網頁的網頁伺服器, (HTTPs:// 或透過開發電腦上的 localhost) 埠轉送。 例如,利用 npm 套件作為提供靜態 HTML 檔案的簡單輕量型 Web 服務器,請檢查更多 npm serve
最初隨附于 Google Play 市集的裝置,且必須執行 Android 7.0 或更新版本
開發工作站和裝置上最新版的Google Chrome
若要確認裝置已正確設定為執行 WebXR,請流覽至裝置上的 範例 WebXR 頁面 。 您應該會看到訊息,例如:
如果您的瀏覽器支援 WebXR,而且如果您有適當的硬體,則可以執行虛擬實境和擴增實境體驗。
在 Android 裝置上啟用開發人員模式和 USB 偵錯。 請參閱官方檔頁面設定裝置上的開發人員選項,瞭解如何為您的 Android 版本執行這項操作
接下來,透過 USB 纜線將 Android 裝置連線到您的開發電腦或膝上型電腦
確定開發電腦上的網頁伺服器正在執行。 例如,流覽至包含 Web 主控頁面的根資料夾 (index.html) ,並執行下列程式碼 (假設您使用 npm 套件) :
serve在您的開發電腦上開啟 Google Chrome,然後在網址列中輸入下列文字:
chrome://check#devices

確定已啟用 [ 探索 USB 裝置 ] 核取方塊
按一下 [ 埠轉送 ] 按鈕,並確定已啟用 埠轉 送,並包含 localhost:5000 專案,如下所示:

在連線的 Android 裝置中,開啟 Google Chrome 視窗並流覽至 http://localhost:5000 ,您應該會看到 Cube
在開發電腦上,在 Chrome 中,您會看到您的裝置和目前在該處開啟的網頁清單:
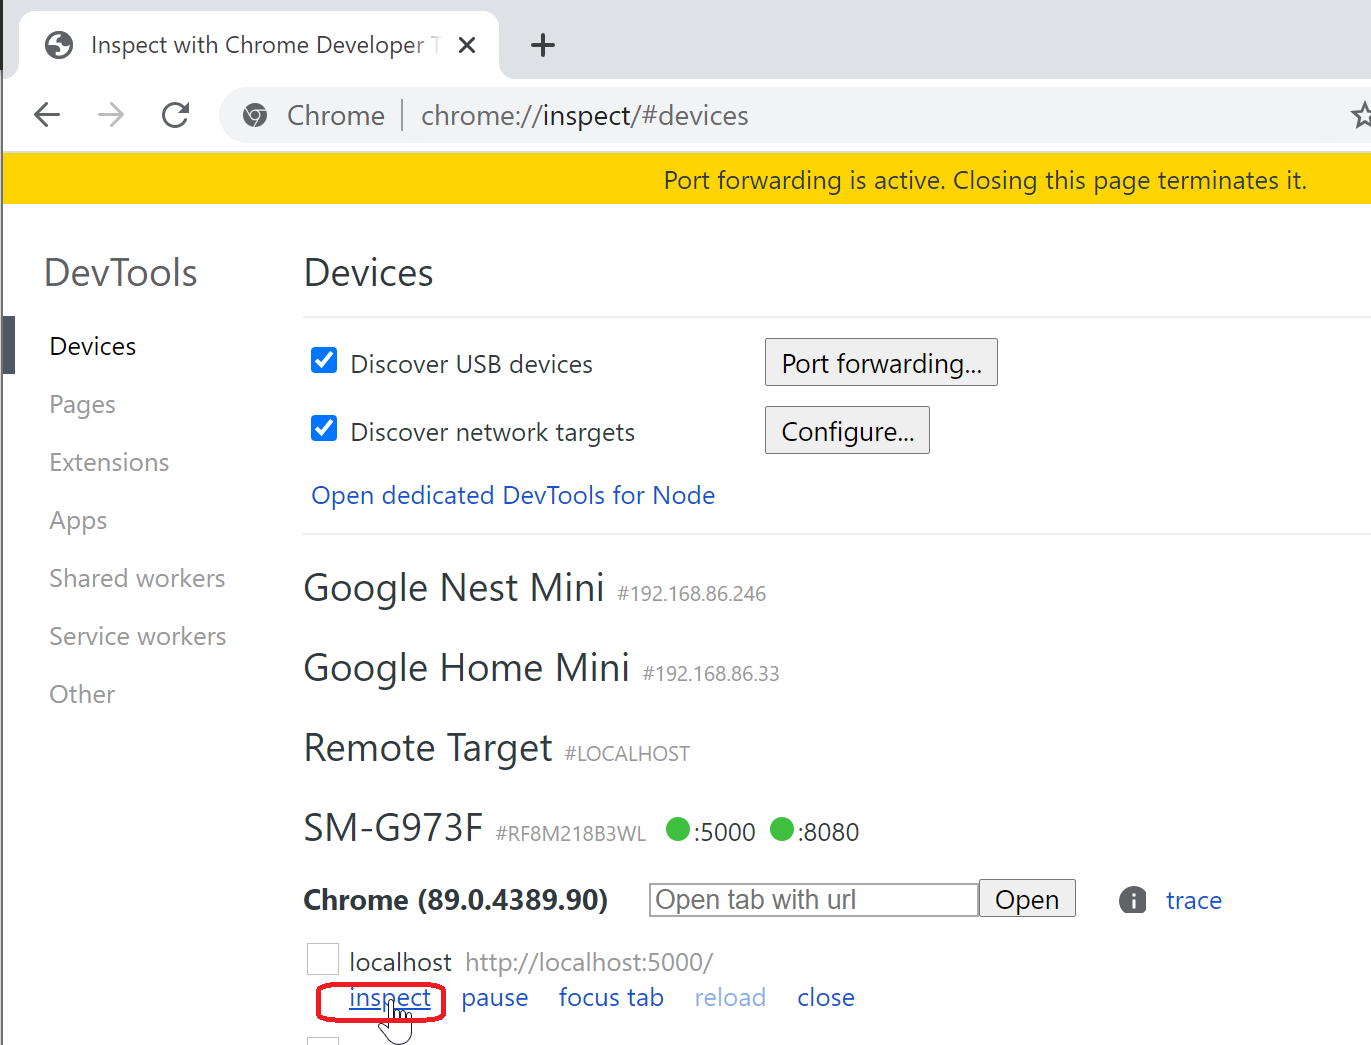
按一下專案 http://localhost:5000 旁的 [檢查] 按鈕:

使用 Chrome DevTools 對頁面進行偵錯
重要心得
以下是本教學課程最重要的重點:
- Babylon.js可讓您輕鬆地使用 JavaScript 建立沉浸式體驗
- 若要建立虛擬場景,您不需要撰寫低階程式碼或學習新技術
- 您可以使用 WebXR 支援的瀏覽器建置Mixed Reality應用程式,而不需要購買頭戴式裝置
後續步驟
恭喜! 您已完成我們的一系列Babylon.js教學課程,並瞭解如何:
- 設定開發環境
- 建立新的網頁以顯示結果
- 用來建立和與基本 3D 元素互動的Babylon.js API
- 在Windows Mixed Reality模擬器中執行及測試應用程式
如需 javaScript 開發Mixed Reality的詳細資訊,請參閱JavaScript 開發概觀。
如果您要尋找另一個Babylon.js教學課程,請參閱 「基本建 置教學課程系列」,瞭解如何使用 Babylon.js 在 VR 空間中建置一個Babylon.js。