Prepare SQL Server 2016 prerequisites - Azure SQL Managed Instance link
Applies to: ![]() Azure SQL Managed Instance
Azure SQL Managed Instance
This article teaches you how to enable Always On with Windows Server Failover Cluster (WSFC) on your SQL Server 2016 as an extra step to prepare your environment for Managed Instance link.
Extra steps described in this guide are mandatory for SQL Server 2016 only, as this version of SQL Server can't enable availability groups without Windows Server Failover Cluster present on the host Windows OS machine. The minimum requirement to enable availability groups on SQL Server 2016 is to create a local single-node (single machine) cluster. No multiple nodes, and therefore no additional SQL Servers, are required. The link can however also support multiple-node cluster configurations as optional, in case you have this type of environment for any SQL Server version (2016-2022).
Install WSFC module on Windows Server
Run the following PowerShell command as Administrator on Windows Server hosting the SQL Server to install Windows Server Failover Cluster module.
# Run as Administrator in PowerShell on Windows Server OS hosting the SQL Server
# This installs WSFC module on the host OS
Install-WindowsFeature -Name Failover-Clustering –IncludeManagementTools
Alternatively, you can also use Server Manager to install WSFC module using the graphical user interface.
Create single-node cluster
The next step is to create a cluster on the Windows OS hosting SQL Server. This can be achieved using two methods:
- Simple PowerShell command -- has certain limitations listed below, or
- Failover Cluster Manager application -- provides full configuration flexibility.
Both methods are described below.
Create cluster using PowerShell
The simplest method to create a local single-node cluster is through executing a simple PowerShell command on the Windows Server OS hosting SQL Server. This method has limitations as it is intended for single-server machines not joined in a domain. Creating a cluster using this method won't allow you to administer it using the graphical user interface Failover Cluster Manager.
If you need a quick way to create a single-node cluster on your machine, execute the below provided PowerShell command. Replace:
<ClusterName>in the script with your desired cluster name. The name should be a single word, with no spaces or special characters (for exampleWSFCluster)
# Run as Administrator in PowerShell on Windows Server OS hosting the SQL Server
# This creates a single-node cluster on the host OS, not joined in the domain
New-Cluster -Name "<ClusterName>" -AdministrativeAccessPoint None -Verbose -Force
In case you need to remove the cluster in the future, for some reason, this can only be done with PowerShell command Remove-Cluster.
If you have successfully created cluster using this method, skip ahead to Grant permissions in SQL Server for WSFC
Create cluster using Failover Cluster Manager application
Alternatively, a more flexible way to create a cluster on the Windows OS hosting the SQL Server is through the graphical user interface, using the Failover Cluster Manager application. Follow these steps:
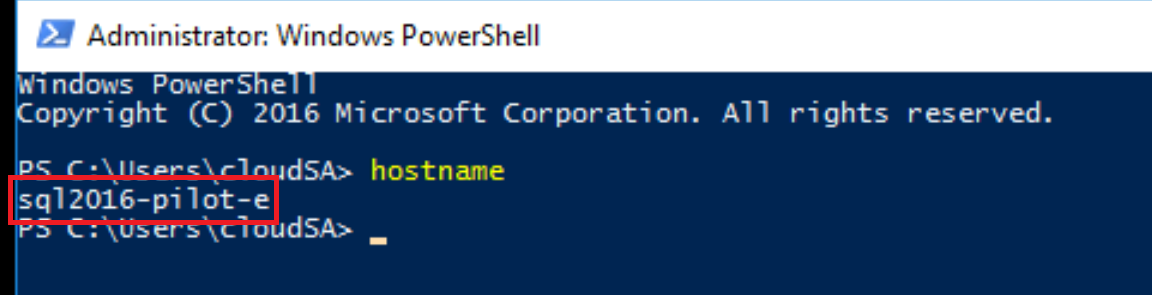
Find out your Windows Server name by executing
hostnamecommand from the command prompt.Record the output of this command (sample output marked in the image below), or keep this window open as you'll use this name in one of the next steps.
Open Failover Cluster Manager by pressing Windows key + R on the keyboard, type
%windir%\system32\Cluadmin.msc, and click OK.- Alternatively, Failover Cluster Manager can be accessed by opening Server Manager, selecting Tools in the upper right corner, and then selecting Failover Cluster Manager.
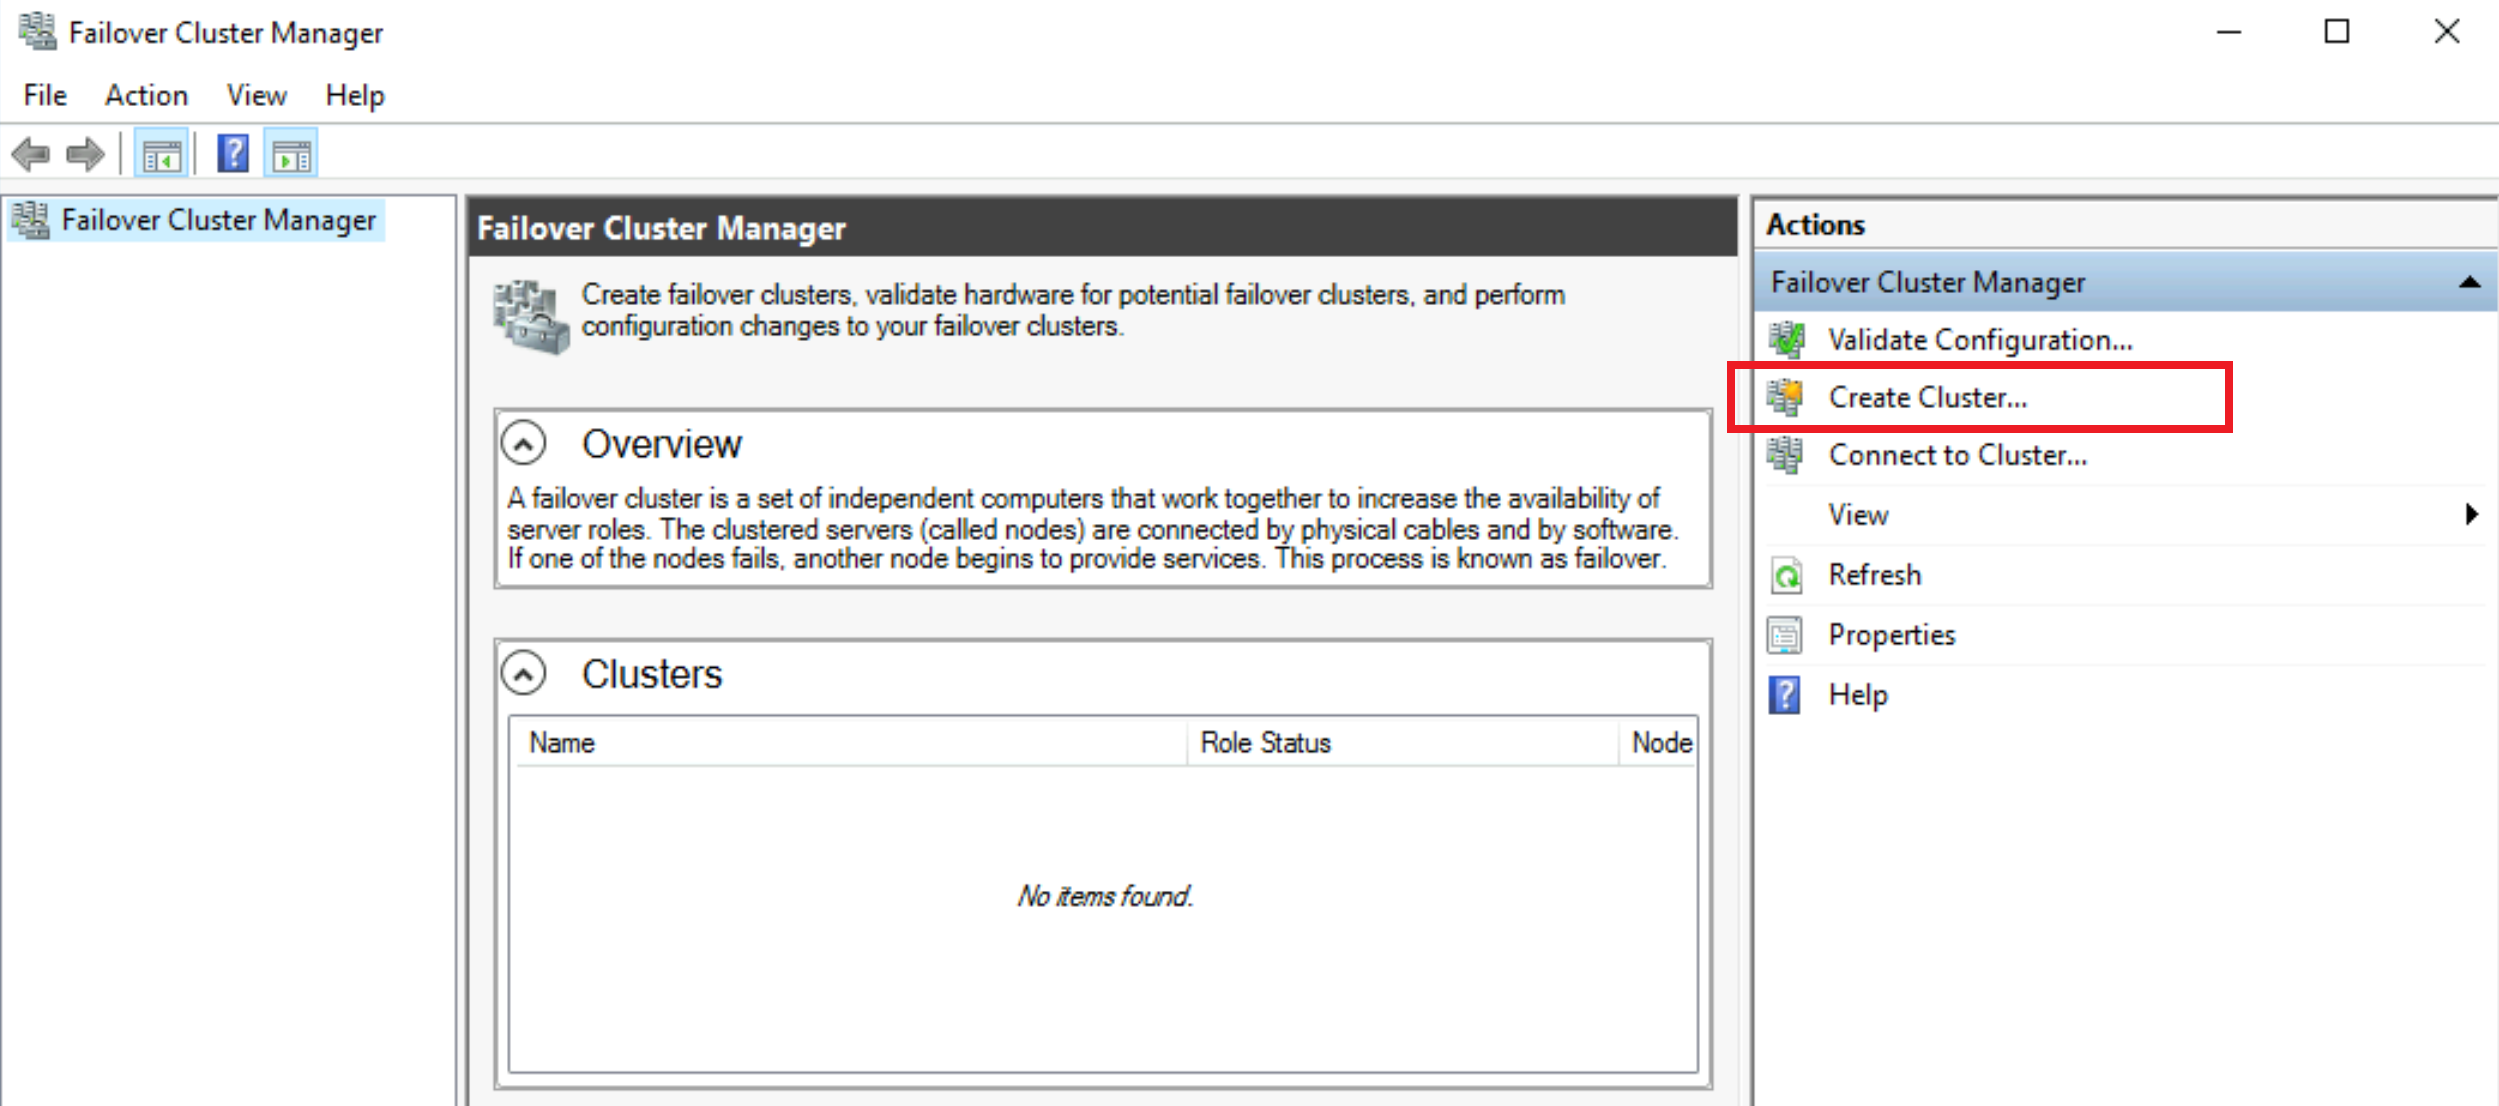
In Windows Cluster manager, click on Create Cluster option.
On the Before You Begin screen, click Next.
On the Select Server screen, enter your Windows Server name (type, or copy-paste the output from the earlier executed
hostnamecommand), click Add, and then Next.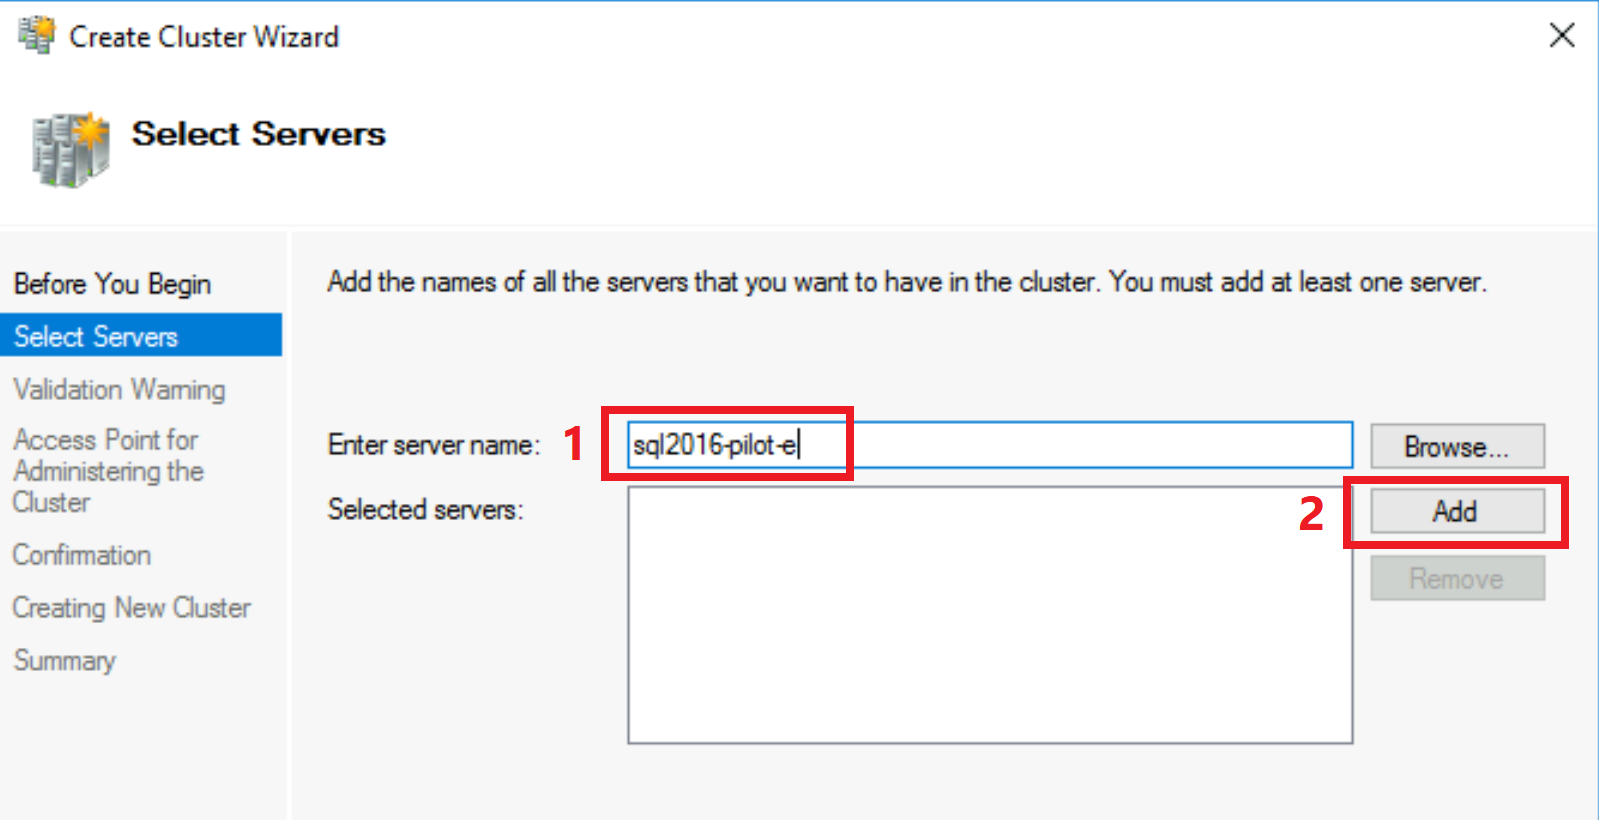
On the Validation Warning screen, leave Yes on, click Next.
On the Before You Being screen, click Next.
On the Testing Options screen, leave Run all tests on, and click Next.
On the Confirmation screen, click Next.
On the Validation screen, wait for the validation to complete.
On the Summary screen, click Finish.
On the Access Point for Administering the Cluster screen, type your cluster name, for example
WSFCluster, and then click Next.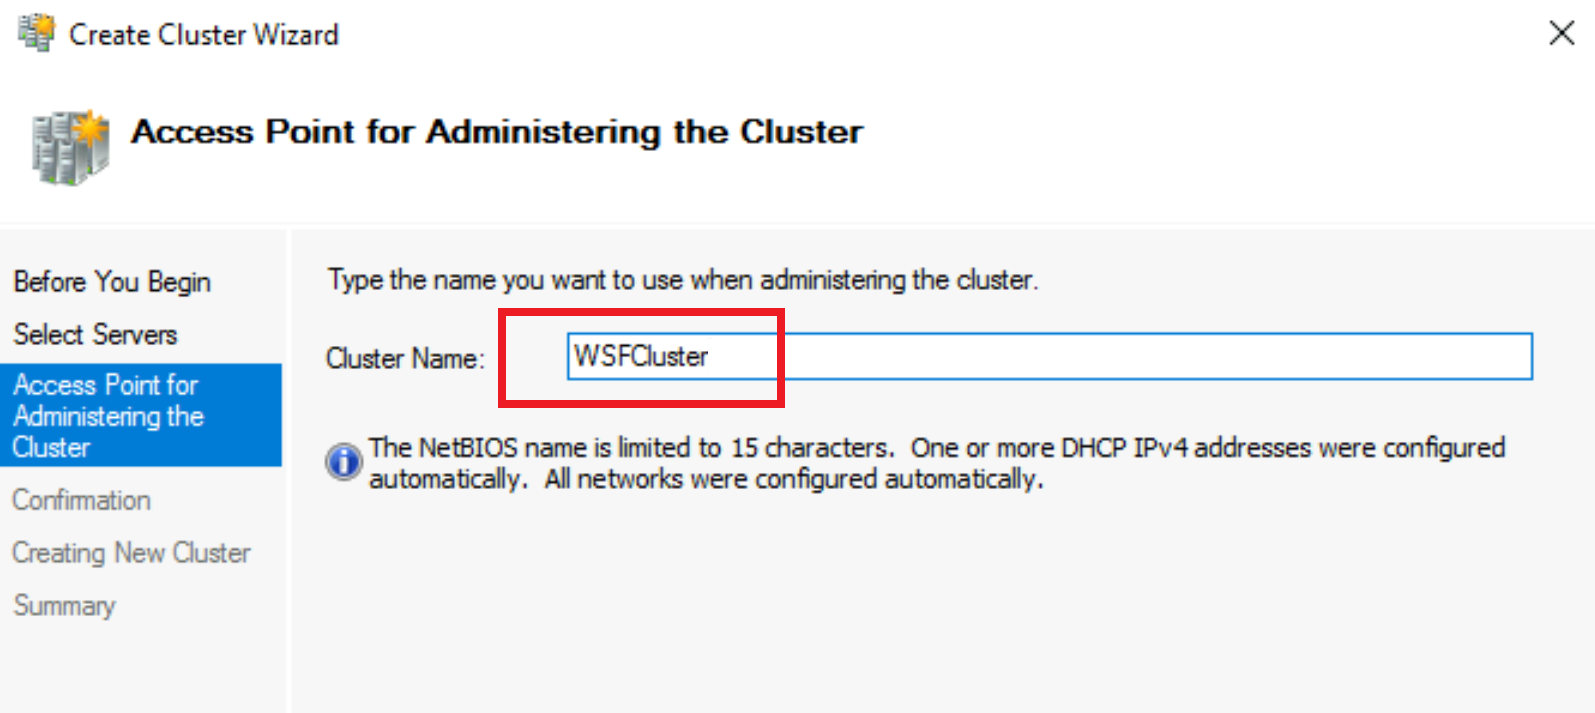
On the Confirmation screen, click Next.
On the Creating New Cluster screen, wait for the creation to complete.
On the Summary screen, click Finish.
With the above steps, you've created the local single-node Windows Server Failover Cluster.
Verification
To verify that single-node WSFC cluster has been created, follow these steps:
In the Failover Cluster Manager, click on the cluster name on the left-hand side, and expand it by clicking on the
>arrow.- In case that you've closed and reopened Failover Cluster Manager after its creation, the cluster name might not show up on the left-hand side (see the image below).
Click on Connect to Cluster on the right-hand side, choose to connect to
<Cluster on this server...>, and click OK.Click on Nodes.
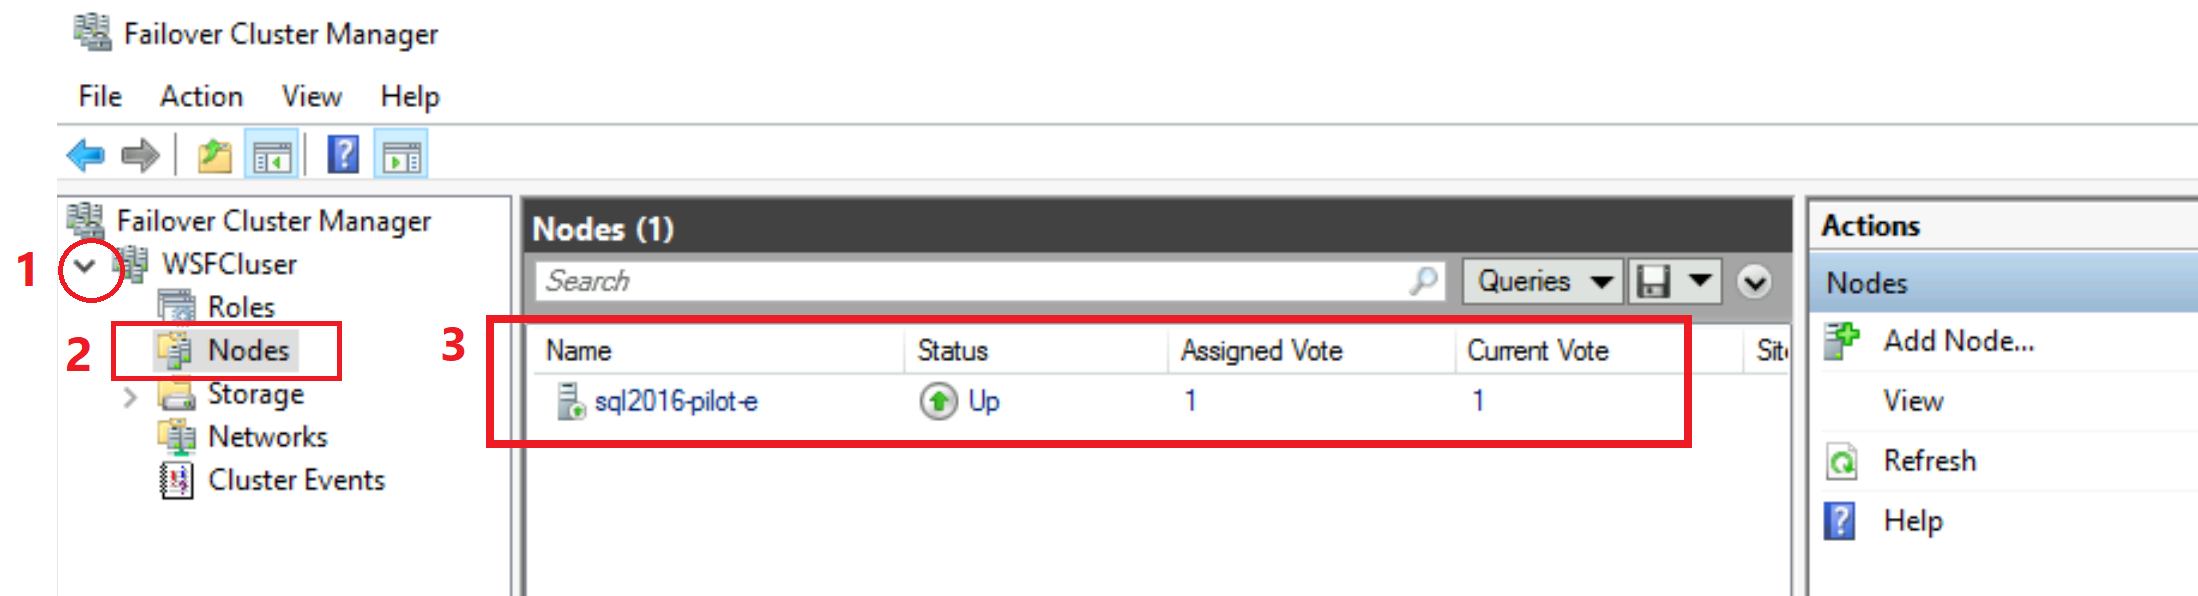
- You should be able to see the local machine single-node added to this cluster and with the Status being
Up. This verification confirms the WSFC configuration has been completed successfully. You can now close the Failover Cluster Manager tool.
- You should be able to see the local machine single-node added to this cluster and with the Status being
Next, verify that Always On option can be enabled on SQL Server by following these steps:
Open SQL Server Configuration Manager
Double-click on SQL Server
Click on Always On High Availability tab
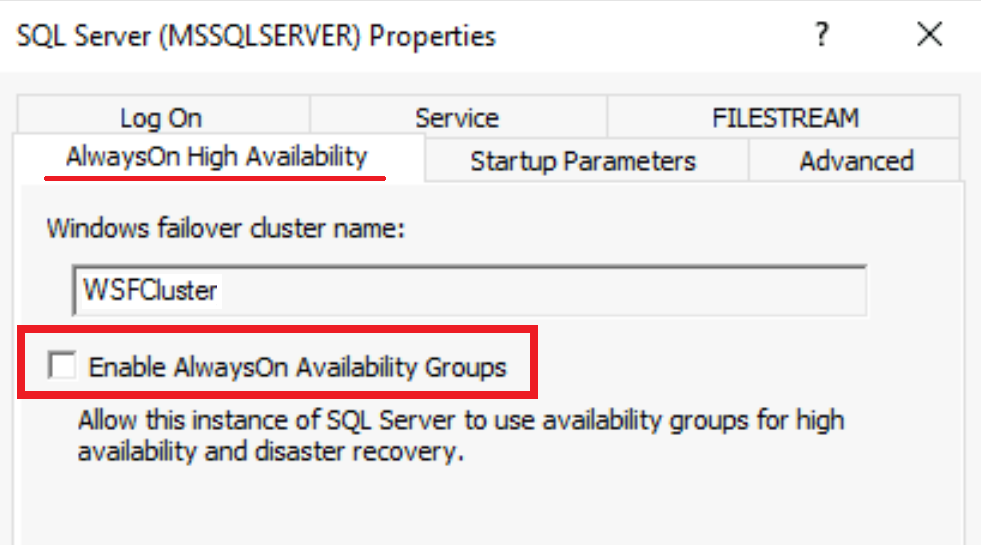
- You should be able to see the name of the WSFC you've created, and you should be able to check-on the Enable Always On Availability Groups should option. This verification confirms the configuration has been completed successfully.
Grant permissions in SQL Server for WSFC
Important
Granting permissions in SQL Server 2016 to Windows OS system account is mandatory. These permissions enable the SQL Server to work with Windows Server Failover Cluster. Without these permissions, creating an Availability Group on SQL Server 2016 will fail.
Next, grant permissions on SQL Server to NT Authority \ System Windows host OS system account, to enable creation of Availability Groups in SQL Server using WSFC. Execute the following T-SQL script on your SQL Server:
- Log in to your SQL Server, using a client such is SSMS
- Execute the following T-SQL script
-- Run on SQL Server
-- Grant permissions to NT Authority \ System to create AG on this SQL Server
GRANT ALTER ANY AVAILABILITY GROUP TO [NT AUTHORITY\SYSTEM]
GO
GRANT CONNECT SQL TO [NT AUTHORITY\SYSTEM]
GO
GRANT VIEW SERVER STATE TO [NT AUTHORITY\SYSTEM]
GO
Next steps
- Continue environment preparation for the link by returning to enable availability groups on your SQL Server section in prepare your environment for a link guide.
- To learn more about configuring multiple-node WSFC (not mandatory, and only optional for the link), see Create a failover cluster guide for Windows Server.
Feedback
Coming soon: Throughout 2024 we will be phasing out GitHub Issues as the feedback mechanism for content and replacing it with a new feedback system. For more information see: https://aka.ms/ContentUserFeedback.
Submit and view feedback for