Register your servers and assign permissions for Azure Stack HCI, version 23H2 deployment
Applies to: Azure Stack HCI, version 23H2
This article describes how to register your Azure Stack HCI servers and then set up the required permissions to deploy an Azure Stack HCI, version 23H2 cluster.
Prerequisites
Before you begin, make sure you've completed the following prerequisites:
Satisfy the prerequisites and complete deployment checklist.
Prepare your Active Directory environment.
Install the Azure Stack HCI, version 23H2 operating system on each server.
Register your subscription with the required resource providers (RPs). You can use either the Azure portal or the Azure PowerShell to register. You need to be an owner or contributor on your subscription to register the following resource RPs:
- Microsoft.HybridCompute
- Microsoft.GuestConfiguration
- Microsoft.HybridConnectivity
- Microsoft.AzureStackHCI
Note
The assumption is that the person registering the Azure subscription with the resource providers is a different person than the one who is registering the Azure Stack HCI servers with Arc.
If you're registering the servers as Arc resources, make sure that you have the following permissions on the resource group where the servers were provisioned:
To verify that you have these roles, follow these steps in the Azure portal:
- Go to the subscription that you use for the Azure Stack HCI deployment.
- Go to the resource group where you're planning to register the servers.
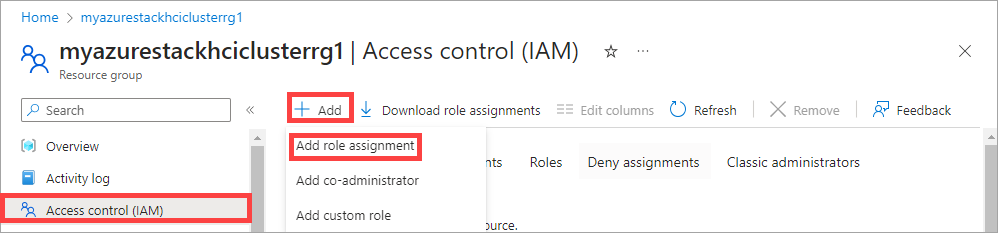
- In the left-pane, go to Access Control (IAM).
- In the right-pane, go the Role assignments. Verify that you have the Azure Connected Machine Onboarding and Azure Connected Machine Resource Administrator roles assigned.
Register servers with Azure Arc
Important
Run these steps on every Azure Stack HCI server that you intend to cluster.
Install the Arc registration script from PSGallery.
#Register PSGallery as a trusted repo Register-PSRepository -Default -InstallationPolicy Trusted #Install Arc registration script from PSGallery Install-Module AzsHCI.ARCinstaller #Install required PowerShell modules in your node for registration Install-Module Az.Accounts -Force Install-Module Az.ConnectedMachine -Force Install-Module Az.Resources -ForceSet the parameters. The script takes in the following parameters:
Parameters Description SubscriptionIDThe ID of the subscription used to register your servers with Azure Arc. TenantIDThe tenant ID used to register your servers with Azure Arc. Go to your Microsoft Entra ID and copy the tenant ID property. ResourceGroupThe resource group precreated for Arc registration of the servers. A resource group is created if one doesn't exist. RegionThe Azure region used for registration. See the Supported regions that can be used. AccountIDThe user who registers and deploys the cluster. DeviceCodeThe device code displayed in the console at https://microsoft.com/deviceloginand is used to sign in to the device.#Define the subscription where you want to register your server as Arc device $Subscription = "YourSubscriptionID" #Define the resource group where you want to register your server as Arc device $RG = "YourResourceGroupName" #Define the region you will use to register your server as Arc device $Region = "eastus" #Define the tenant you will use to register your server as Arc device $Tenant = "YourTenantID"Connect to your Azure account and set the subscription. You'll need to open browser on the client that you're using to connect to the server and open this page:
https://microsoft.com/deviceloginand enter the provided code in the Azure CLI output to authenticate. Get the access token and account ID for the registration.#Connect to your Azure account and Subscription Connect-AzAccount -SubscriptionId $Subscription -TenantId $Tenant -DeviceCode #Get the Access Token for the registration $ARMtoken = (Get-AzAccessToken).Token #Get the Account ID for the registration $id = (Get-AzContext).Account.IdFinally run the Arc registration script. The script takes a few minutes to run.
#Invoke the registration script. Use a supported region.
Invoke-AzStackHciArcInitialization -SubscriptionID $Subscription -ResourceGroup $RG -TenantID $Tenant -Region $Region -Cloud "AzureCloud" -ArmAccessToken $ARMtoken -AccountID $id
If you're accessing the internet via a proxy server, you need to pass the
-proxyparameter and provide the proxy server ashttp://<Proxy server FQDN or IP address>:Portwhen running the script.After the script completes successfully on all the servers, verify that:
Your servers are registered with Arc. Go to the Azure portal and then go to the resource group associated with the registration. The servers appear within the specified resource group as Machine - Azure Arc type resources.

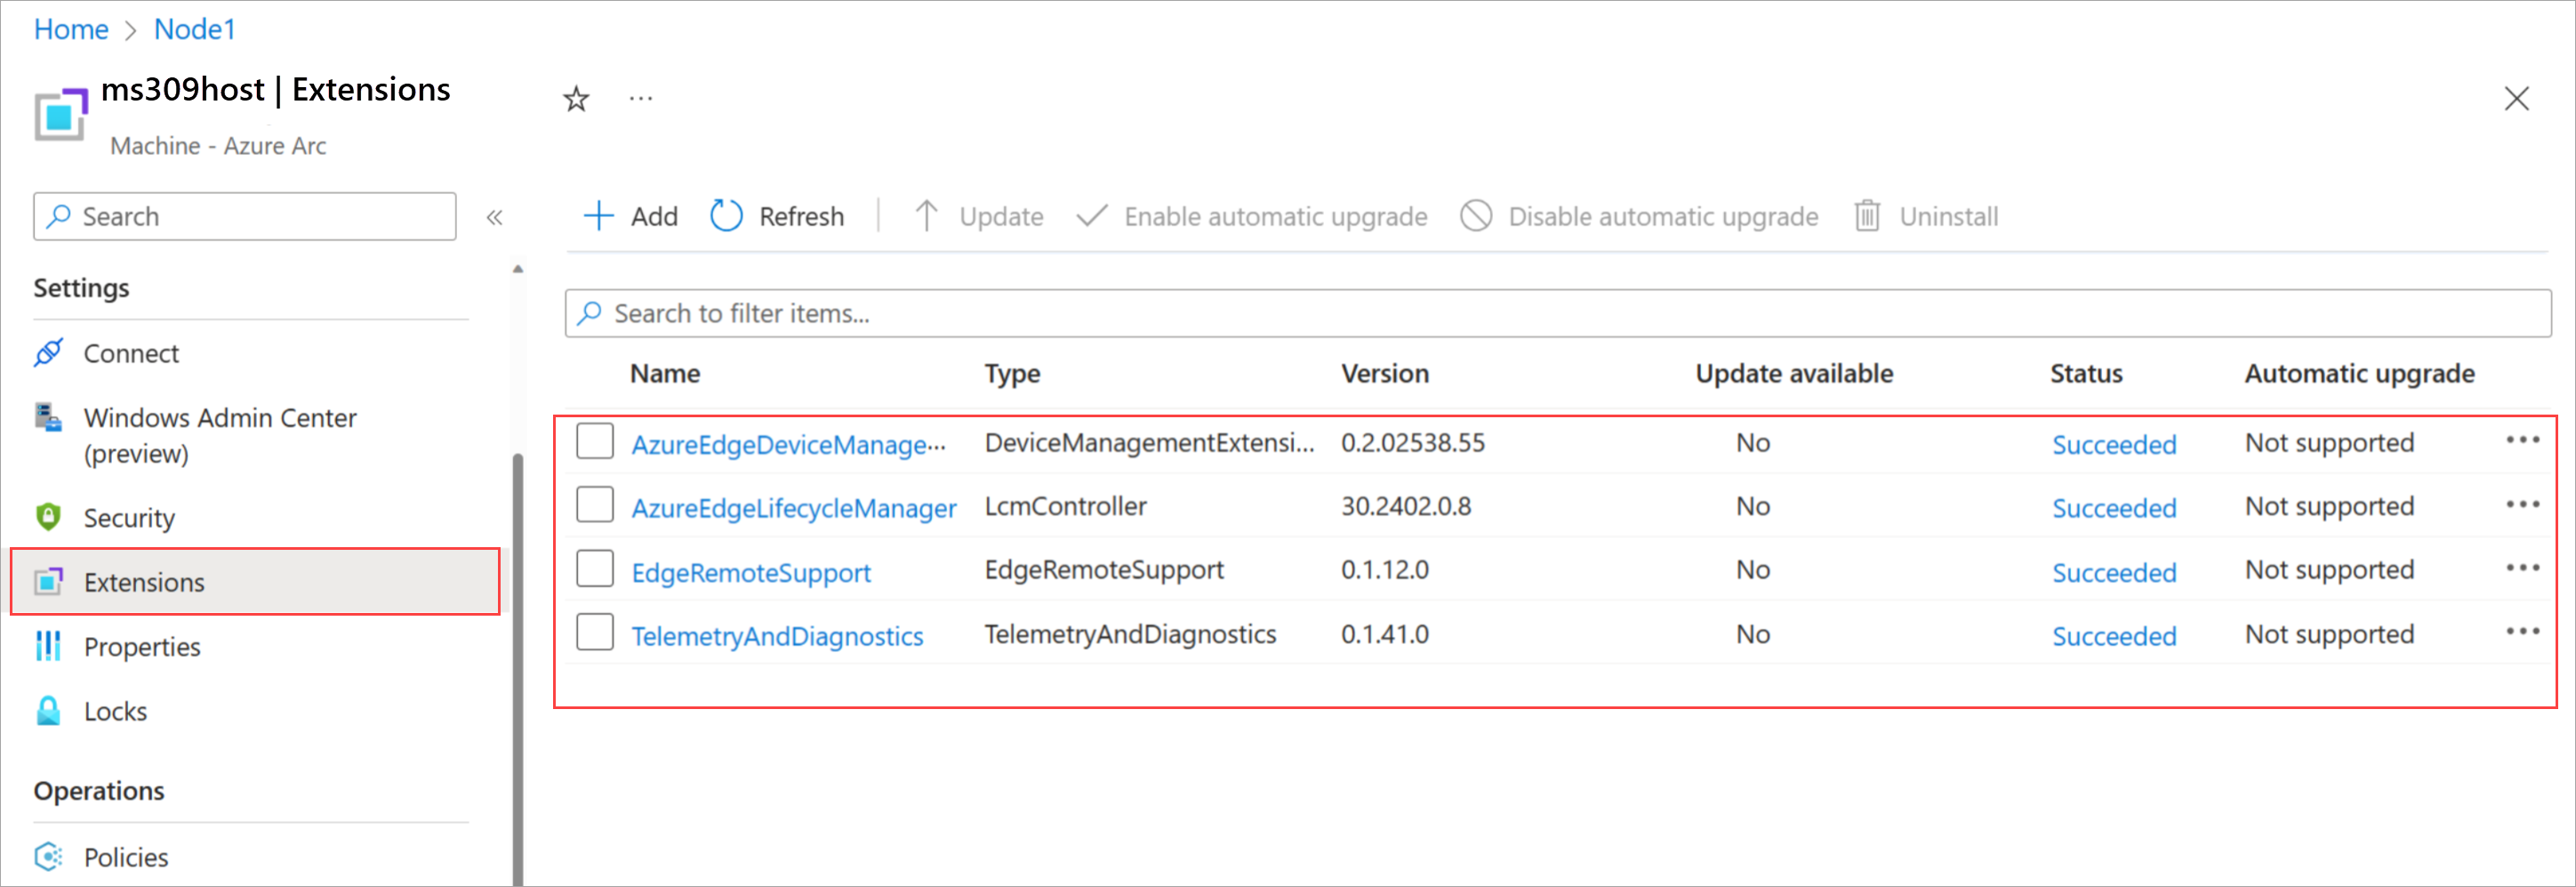
The mandatory Azure Stack HCI extensions are installed on your servers. From the resource group, select the registered server. Go to the Extensions. The mandatory extensions show up in the right pane.


Assign required permissions for deployment
This section describes how to assign Azure permissions for deployment from the Azure portal.
In the Azure portal, go to the subscription used to register the servers. In the left pane, select Access control (IAM). In the right pane, select + Add and from the dropdown list, select Add role assignment.

Go through the tabs and assign the following role permissions to the user who deploys the cluster:
- Azure Stack HCI Administrator
- Cloud Application Administrator
- Reader
Note
The Cloud Application Administrator permission is temporarily needed to create the service principal. After deployment, this permission can be removed.
In the Azure portal, go to the resource group used to register the servers on your subscription. In the left pane, select Access control (IAM). In the right pane, select + Add and from the dropdown list, select Add role assignment.
Go through the tabs and assign the following permissions to the user who deploys the cluster:
- Key Vault Data Access Administrator: This permission is required to manage data plane permissions to the key vault used for deployment.
- Key Vault Secrets Officer: This permission is required to read and write secrets in the key vault used for deployment.
- Key Vault Contributor: This permission is required to create the key vault used for deployment.
- Storage Account Contributor: This permission is required to create the storage account used for deployment.
In the right pane, go to Role assignments. Verify that the deployment user has all the configured roles.


Next steps
After setting up the first server in your cluster, you're ready to deploy using Azure portal:
Feedback
Kommer snart: I hele 2024 udfaser vi GitHub-problemer som feedbackmekanisme for indhold og erstatter det med et nyt feedbacksystem. Du kan få flere oplysninger under: https://aka.ms/ContentUserFeedback.
Indsend og få vist feedback om