Deploy private mobile network using Azure portal
In this section, let's learn:
- The prerequisites for creating a mobile network.
- The deployment procedure for creating a mobile network.
Prerequisites for creating a mobile network using Azure portal
You need to collect the following values for preparing the deployment:
Collect mobile network resource values
| Value | Field name in Azure portal |
|---|---|
| The Azure subscription to use to deploy the mobile network resource. You must use the same subscription for all resources in your private mobile network deployment. You identified this subscription in Complete the prerequisite tasks for deploying a private mobile network. | Project details: Subscription |
The Azure resource group to use to deploy the mobile network resource. You should use a new resource group for this resource. It's useful to include the purpose of this resource group in its name for future identification (for example, rg-pmn-contoso-prod-001). |
Project details: Resource group |
| The name for the private mobile network. | Instance details: Mobile network name |
| The region in which you're deploying the private mobile network. You can use the East US, West US, or West Europe region. | Instance details: Region |
| The mobile country code (MCC) for the private mobile network. Example: 999 for a private network | Network configuration: Mobile country code (MCC) |
| The mobile network code (MNC) for the private mobile network. Example: 999 for a private network | Network configuration: Mobile network code (MNC) |
Collect SIM and SIM group values
As part of creating your private mobile network, you can provision one or more SIMs that will use it.
Note
If you decide not to provision SIMs at this point, you can do so after deploying your private mobile network. Likewise, if you need more than one SIM group, you can create additional SIM groups after you've deployed your private mobile network.
Decide whether you want to create a default service and SIM policy
If you want, you can choose to create a default service and SIM policy that can be used later. They're designed to allow you to quickly deploy a private mobile network and bring SIMs into service automatically, without the need to design your own policy control configuration.
Configure custom location for AKS cluster
To configure ASE and to create AKS cluster on the ASE using Azure portal, see Azure Stack Edge documentation.
For more information on each of the prerequisites, see Prepare to deploy a private mobile network - Azure Private 5G Core Preview.
Create a mobile network using Azure portal
This section helps you to create the mobile networks resource representing your private mobile network. You can also provision one or more SIMs, and / or create the default service and SIM policy.
Sign in to the Azure portal.
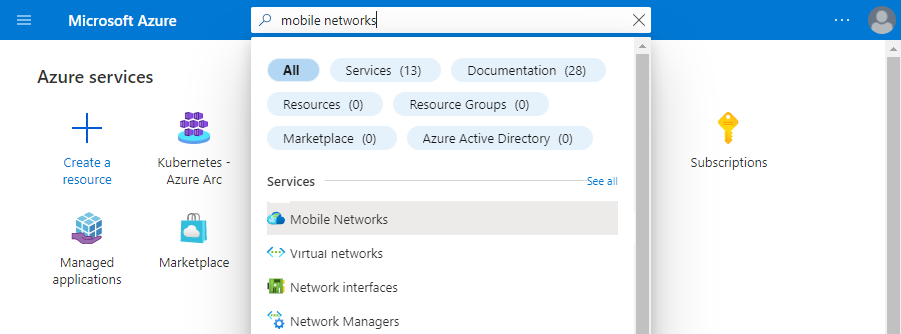
In the Search bar, type mobile networks. Select the Mobile Networks from the drop-down menu.
On the Mobile Networks page, select Create.
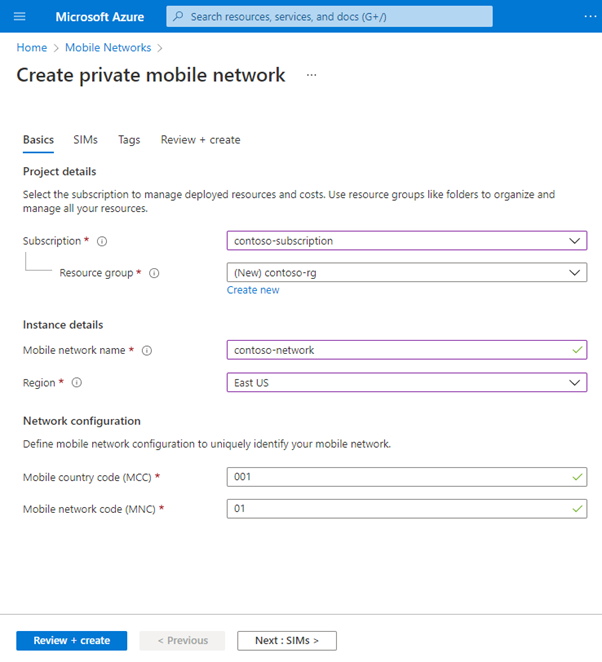
Use the information you collected in Collect private mobile network resource values to fill out the fields on the Basics configuration tab. Once you've done this, select Next : SIMs >.
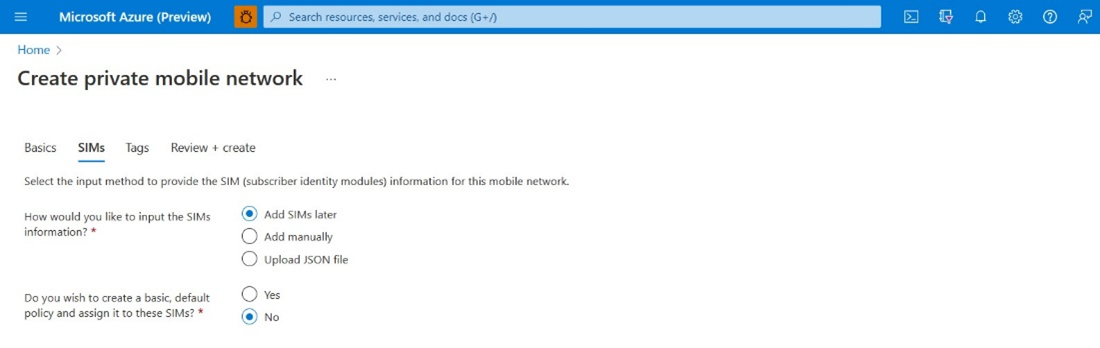
On the SIMs configuration tab, select your chosen input method by selecting the appropriate option next to How would you like to input the SIMs information? You can then input the information you collected in Collect SIM and SIM Group values.
If you decide not to provision any SIMs at this point, select Add SIMs later. By selecting this, you can add SIMS later while managing your mobile networks. For more information, see the Management module.
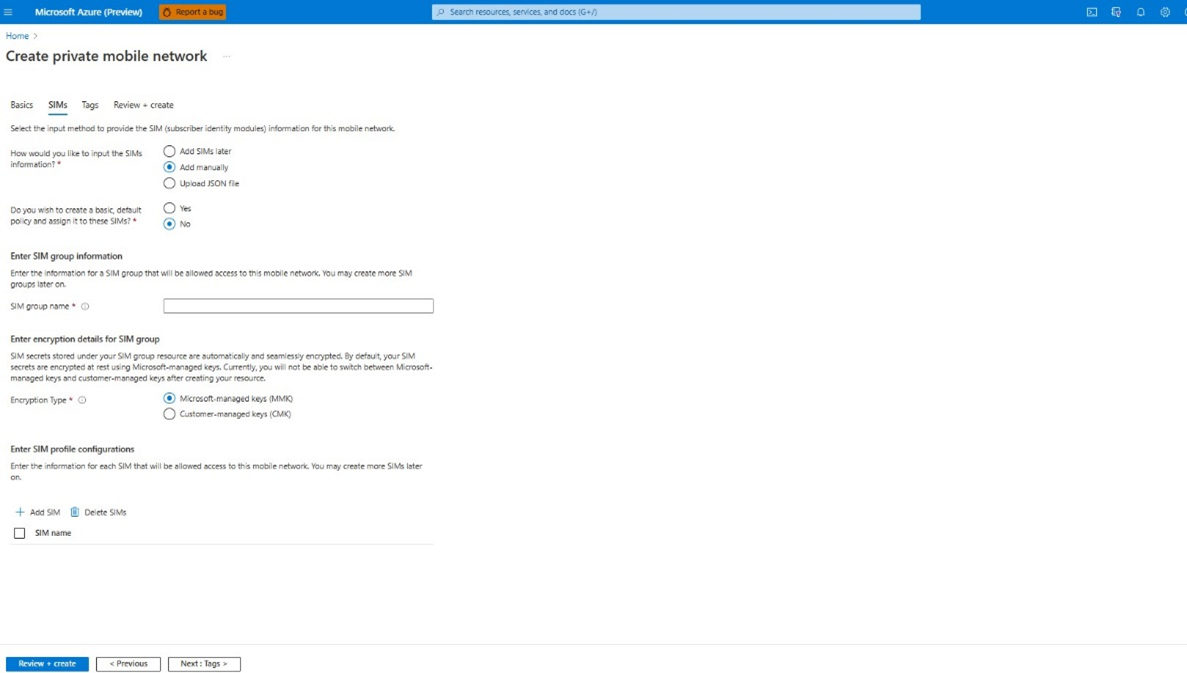
If you select Add manually, a new Add SIM button appears under Enter SIM profile configurations. Select it, fill out the fields with the correct settings for the first SIM you want to provision, and select Add SIM. Repeat this process for each additional SIM you want to provision.
If you select Upload JSON file, the Upload SIM profile configurations field appears. Use this field to upload your chosen JSON file. Here's the sample JSON file:
{
   "simName": "File_01",
   "integratedCircuitCardIdentifier": "8912345678901234801",
   "authenticationKey": "00112233445566778899AABBCCDDEEFF",
   "operatorKeyCode": "00000000000000000000000000000001",
   "internationalMobileSubscriberIdentity": "001019990000101",
   "deviceType": "Mobile"
},
{
   "simName": "File_02",
   "integratedCircuitCardIdentifier": "8912345678901234802",
   "authenticationKey": "00112233445566778899AABBCCDDEEFF",
   "operatorKeyCode": "00000000000000000000000000000001",
   "internationalMobileSubscriberIdentity": "001019990000102",
   "deviceType": "Mobile"
}
If you're provisioning SIMs at this point, perform the following additional steps:
- If you want to use the default service and SIM policy, set Do you wish to create a basic, default SIM policy and assign it to these SIMs? to Yes, and then enter the name of the data network into the Data network name field that appears.
- If you don't want to use the default service and SIM policy, set Do you wish to create a basic, default SIM policy and assign it to these SIMs? to No.
Under Enter SIM group information, set SIM group name to your chosen name for the SIM group to which your SIMs will be added.
Under Enter encryption details for SIM group, set Encryption type to your chosen encryption type. Once the SIM group is created, you can't change the encryption type:
On SIM group creation, customers can either select Customer Managed Key option and provide the identity and encryption key details or can select Microsoft Managed Key (None), which is a default one.
On selecting Microsoft Managed Key option, SIM group and SIM workflow will remain the same as existing. No additional encryption will be applied on the SIM secrets (Ki and OPC).
If you prefer to provide your own key for encryption, select Customer Managed Key option and provide the identity and encryption key details while creating the SIM group. The provided encryption key will be used to encrypt all the SIM secrets that get added to the corresponding SIM group.
If you selected Customer-managed keys (CMK), set the Key URI and User-assigned identity to those the SIM group will use for encryption. For more information on CMK requirements, see Manage SIM groups - Azure portal - Azure Private 5G Core.
Select Review + create.
Azure validates the configuration values you've entered. You should see a message indicating that your values have passed validation.
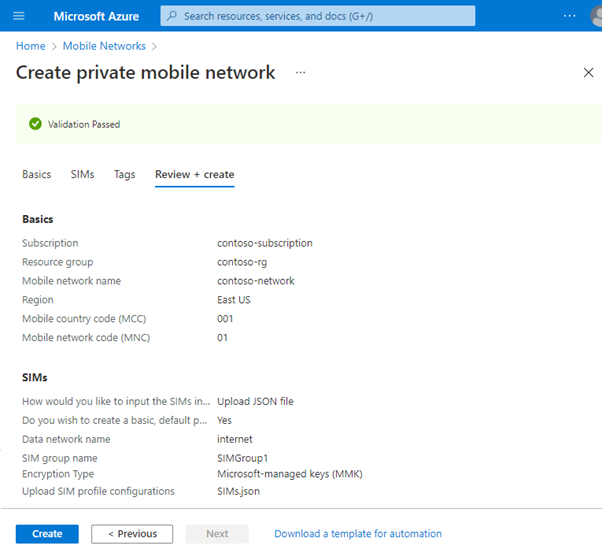
If the validation fails, you'll see an error message. Select the flagged tab(s) and use the error messages to correct any invalid configuration parameters before returning to the Review + create tab.
Once the configuration has been validated, select Create to create the mobile networks resource and any SIM resources.
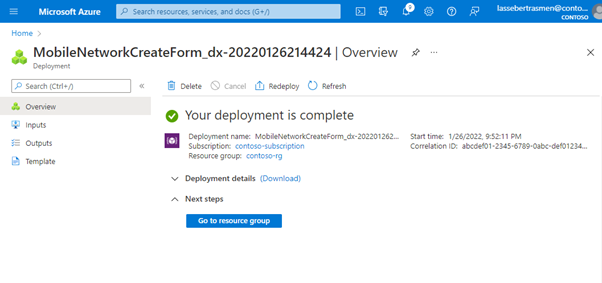
The Azure portal deploys the resources into your selected resource group. You'll see the following confirmation screen when your deployment is complete.
Note
Every deployment, success or failure, will have a correlation id. The correlation id is an id for the log which will help the support team analyze the reason for failure.
You can now validate the mobile network created:
Select Go to resource group, and then check that your new resource group contains the correct Mobile Networks resource. It may also contain the following, depending on the choices you made during the procedure.
A SIM group resource (if you provisioned SIMs).
Service, SIM Policy, Data Network, and Slice resources (if you decided to create a default service and SIM policy).
