Exercise - Create an Azure Functions project
Your shopping list web app needs an API. In this exercise, you build and run your API using an Azure Functions project. From there, you extend the API with a new function using the Azure Functions extension for Visual Studio.
In this exercise, you complete the following steps:
- Create a branch as you prepare to make changes to your web app.
- Explore the Azure Functions project.
- Create the HTTP GET function.
- Replace the function starter code with logic to get products.
- Configure the web app to proxy HTTP requests to the API.
- Run the API and the web app.
Note
Ensure you've configured Visual Studio for Azure development with .NET.
Get the function app
Now, you add an API and connect it to your front-end app. The Api project includes an incomplete Azure Functions project, so let's complete that now.
Create an API branch
Before making changes to an app, it's a good practice to create a new branch for the changes. You're about to complete the API for your app, so create a new branch in Git named api.
Complete the Azure Functions API
The Api project contains your Azure Functions project, along with three functions.
| Class | Method | Route |
|---|---|---|
| ProductsPost | POST | products |
| ProductsPut | PUT | products/:id |
| ProductsDelete | DELETE | products/:id |
Your API has routes for manipulating the products for the shopping list, but it lacks a route for getting the products. Let's add that next.
Create the HTTP GET function
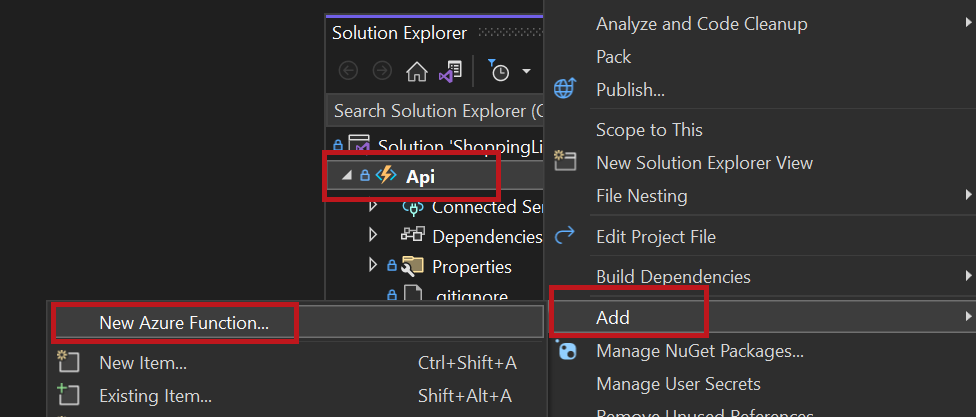
In Visual Studio, right-click the Api project, and then select Add > New Item.
In the Add New Item dialog, select Azure Function.
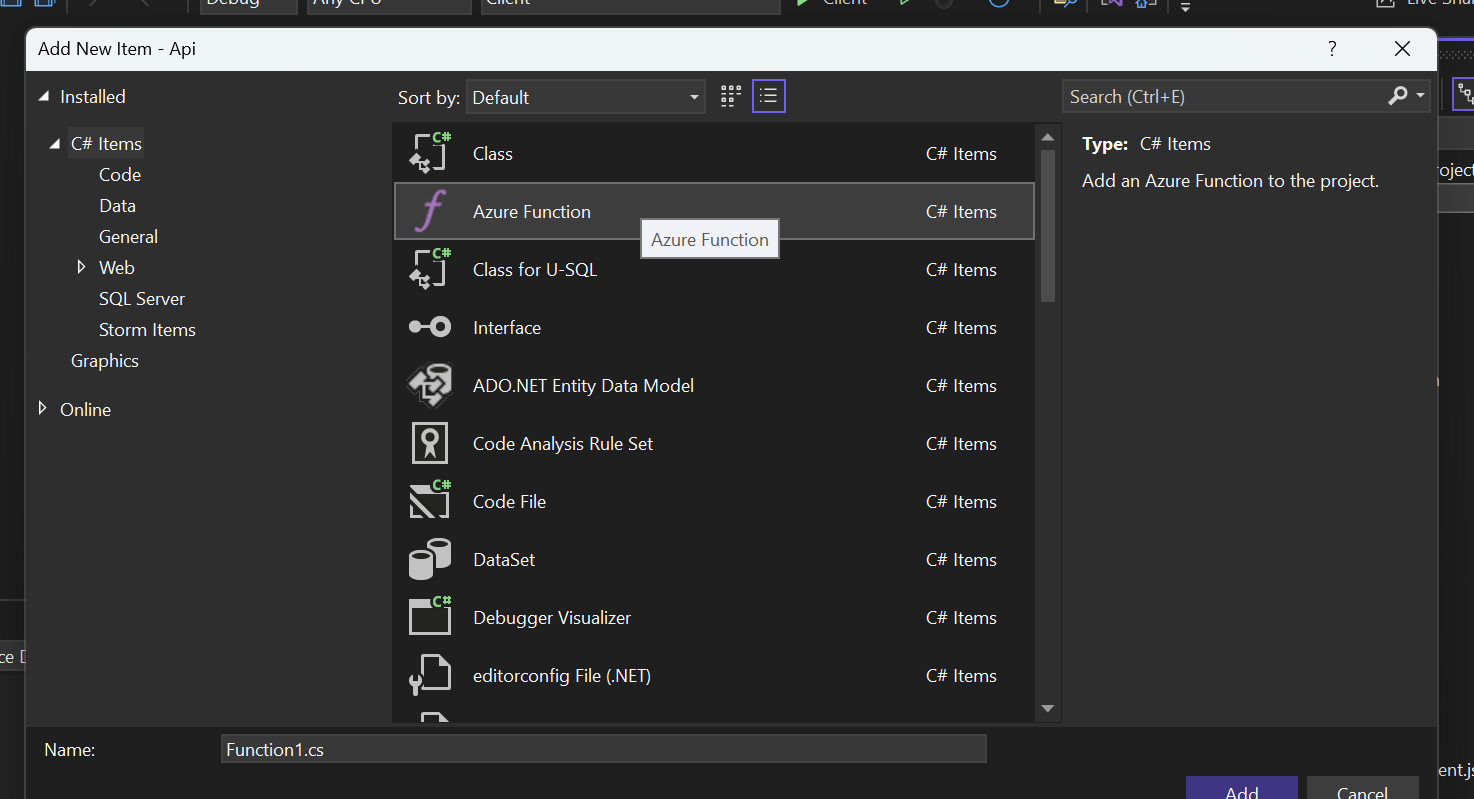
Enter ProductsGet.cs as the name of the function file.
Select Http trigger as the function type.
Select Anonymous from the dropdown list in the Authorization level field.
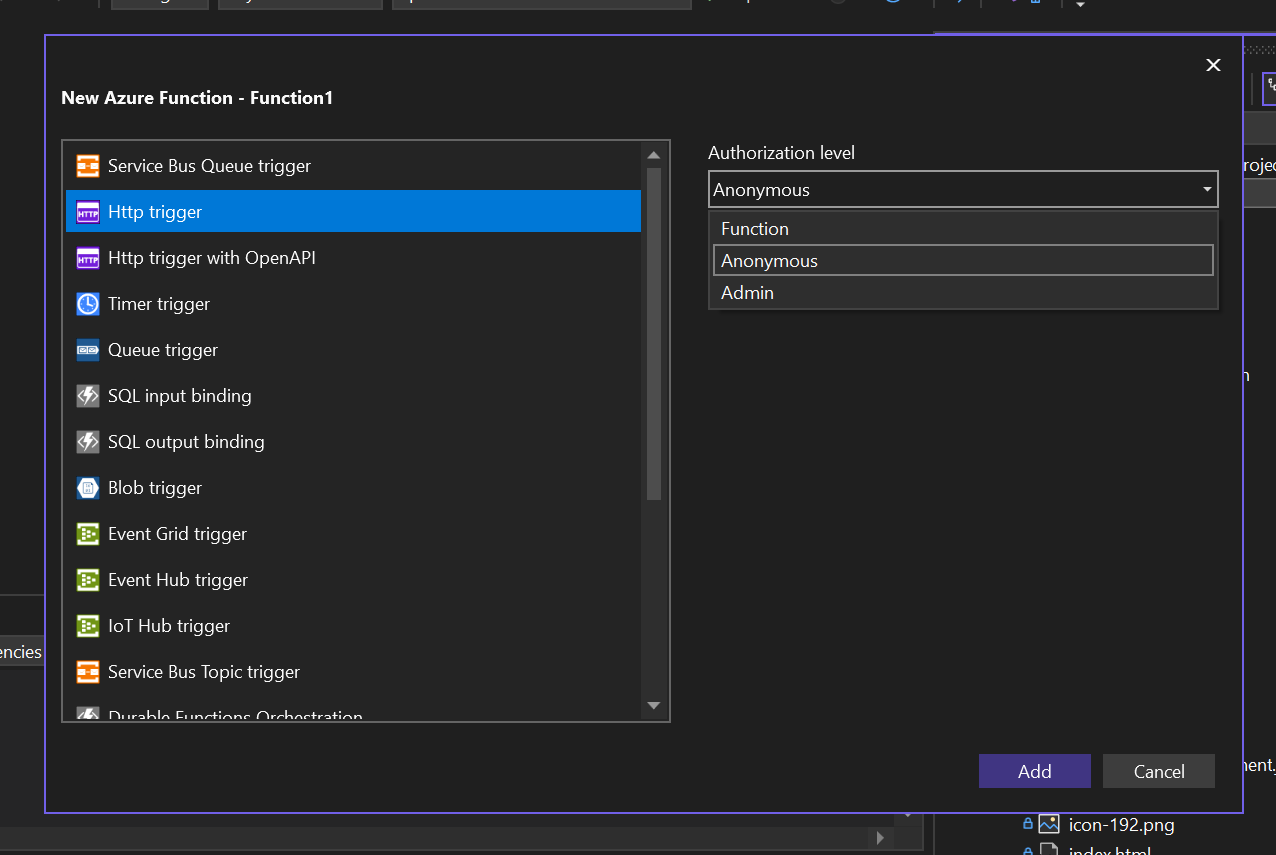
Select Add.
You just extended your Azure Functions app with a function to get your products!
Configure the HTTP Method and route endpoint
Notice the Run method of the newly created C# class has an HttpTrigger attribute on the first argument, the HttpRequest. This attribute defines the access level of the function, the HTTP method(s) to listen for, and the route endpoint.
The route endpoint is null by default, meaning that the endpoint uses the value of the FunctionName attribute, which is ProductsGet. Setting the Route property to "products" overrides the default behavior.
Currently, your function is triggered on an HTTP GET request to products. Your Run method looks like the following code:
[FunctionName("ProductsGet")]
public static async Task<IActionResult> Run(
    [HttpTrigger(AuthorizationLevel.Anonymous, "get", "post", Route = null)] HttpRequest req,
    ILogger log)
Update the route logic
The body of the Run method is executed when the function is executed.
You need to update the logic in the Run method to get your products. There's data access logic in the ProductData.cs file as a class called ProductData, which is available via Dependency Injection as the IProductData interface. The interface has a method on it called GetProducts, which returns a Task<IEnumerable<Product> that asynchronously returns a list of products.
Now, change the function endpoint to return the products:
Open ProductsGet.cs.
Replace its contents with the following code:
using Microsoft.AspNetCore.Http;
using Microsoft.AspNetCore.Mvc;
using Microsoft.Azure.WebJobs;
using Microsoft.Azure.WebJobs.Extensions.Http;
using System.Threading.Tasks;

namespace Api;

public class ProductsGet
{
    private readonly IProductData productData;

    public ProductsGet(IProductData productData)
    {
        this.productData = productData;
    }

    [FunctionName("ProductsGet")]
    public async Task<IActionResult> Run(
        [HttpTrigger(AuthorizationLevel.Anonymous, "get", Route = "products")] HttpRequest req)
    {
        var products = await productData.GetProducts();
        return new OkObjectResult(products);
    }
}
In the preceding changes, you turned the class from a static to an instance class. You added an interface to the constructor so the Dependency Injection framework can inject the ProductData class. Finally, you configured the Run function to return the product list when called.
Configure Cross-Origin Resource Sharing (CORS) locally
You don't have to worry about Cross-Origin Resource Sharing (CORS) when you publish to Azure Static Web Apps. Azure Static Web Apps automatically configures your app so it can communicate with your API on Azure using a reverse proxy. But when running locally, you need to configure CORS to allow your web app and API to communicate.
Now, prompt Azure Functions to allow your web app to make HTTP requests to the API on your computer.
Open the file named launchSettings.json in the Properties folder of the Api project.
- If the file doesn't exist, create it.
Update the contents of the file:
{
    "profiles": {
        "Api": {
            "commandName": "Project",
            "commandLineArgs": "start --cors *"
        }
    }
}
Note
This file is used to control how Visual Studio will launch the Azure Functions tooling. If you want to use the Azure Functions command line tool, you will also need a local.settings.json file described in the Azure Functions Core Tools docs. The local.settings.json file is listed in the .gitignore file, which prevents this file from being pushed to GitHub. This is because you could store secrets in this file that you would not want in GitHub. Also, this is why you had to create the file when you created your repo from the template.
Run the API and web app
Now, it's time to watch your web app and Azure Functions project work together.
In Visual Studio, right-click the ShoppingList solution.
Select Set Startup Projects.
Select the Multiple startup projects option.
Set Api and Client to have Start as their Action, and then select Ok.
Launch the debugger.
Browse to your app
It's time to see your application running locally against the Azure Functions API.
Browse to the web application (for example, https://localhost:44348/).
You built your application, and now it's running locally making HTTP GET requests to your API.
Now, stop your running app and API by disconnecting the debugger in Visual Studio.
Next steps
Your app works locally, and your next step is to publish the app with the API together.