Tutorial: Get started with Razor Pages in ASP.NET Core
Note
This isn't the latest version of this article. For the current release, see the .NET 8 version of this article.
Important
This information relates to a pre-release product that may be substantially modified before it's commercially released. Microsoft makes no warranties, express or implied, with respect to the information provided here.
For the current release, see the .NET 8 version of this article.
This is the first tutorial of a series that teaches the basics of building an ASP.NET Core Razor Pages web app.
For a more advanced introduction aimed at developers who are familiar with controllers and views, see Introduction to Razor Pages. For a video introduction, see Entity Framework Core for Beginners.
If you're new to ASP.NET Core development and are unsure of which ASP.NET Core web UI solution will best fit your needs, see Choose an ASP.NET Core UI.
At the end of this tutorial, you'll have a Razor Pages web app that manages a database of movies.
Prerequisites
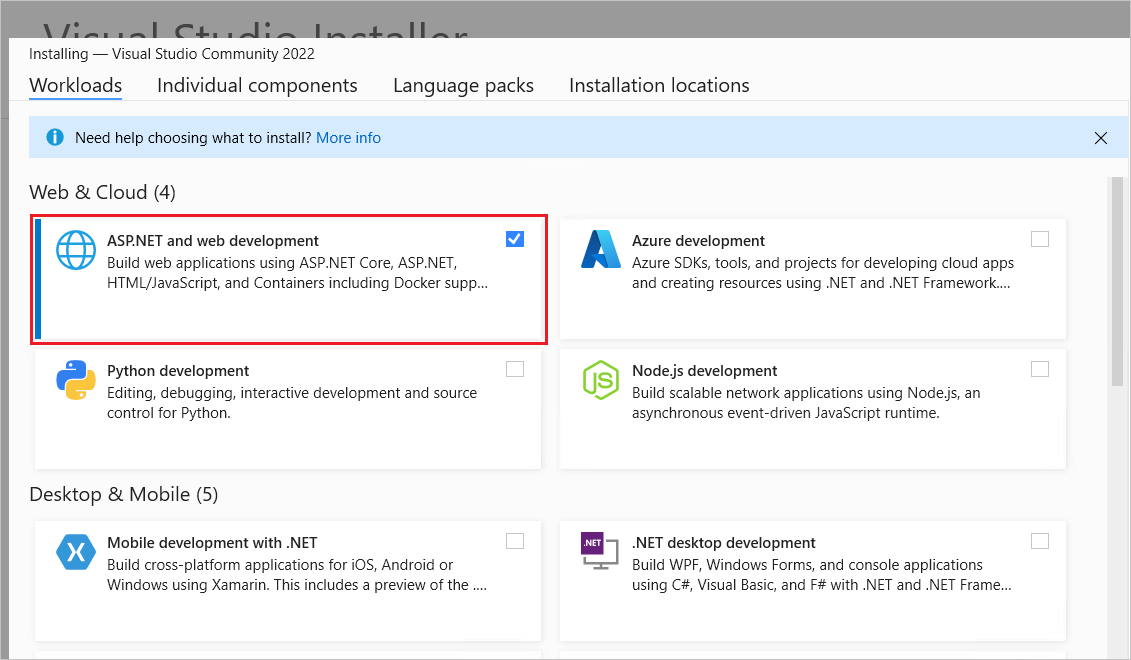
Visual Studio 2022 with the ASP.NET and web development workload.
Create a Razor Pages web app
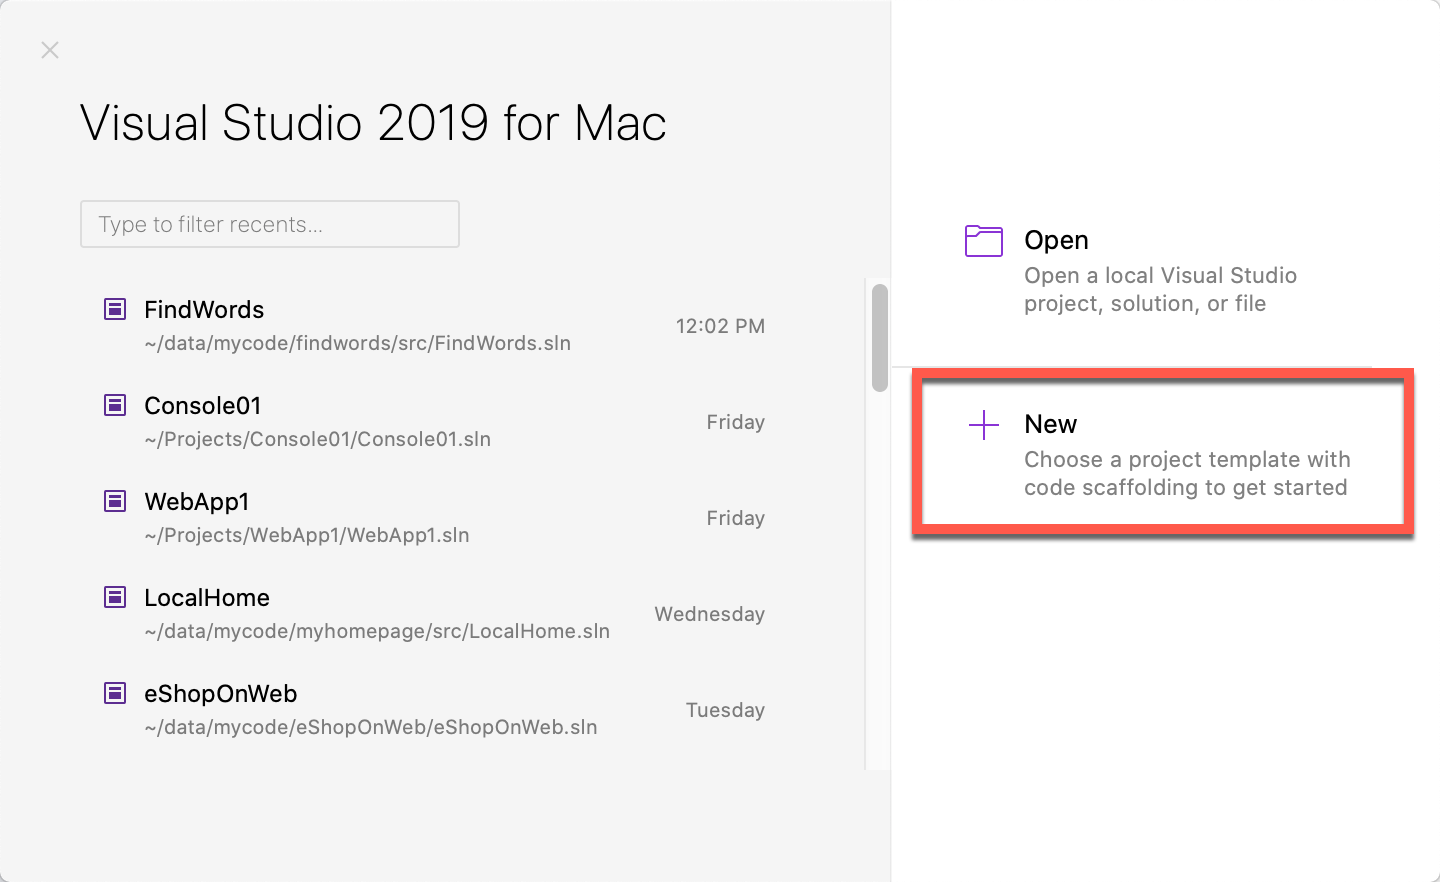
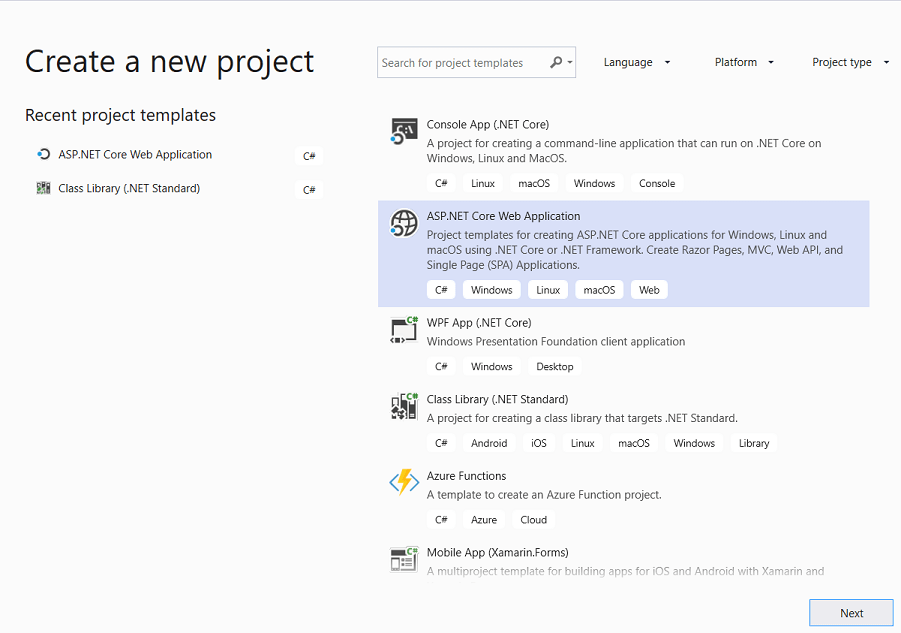
Start Visual Studio and select New project.
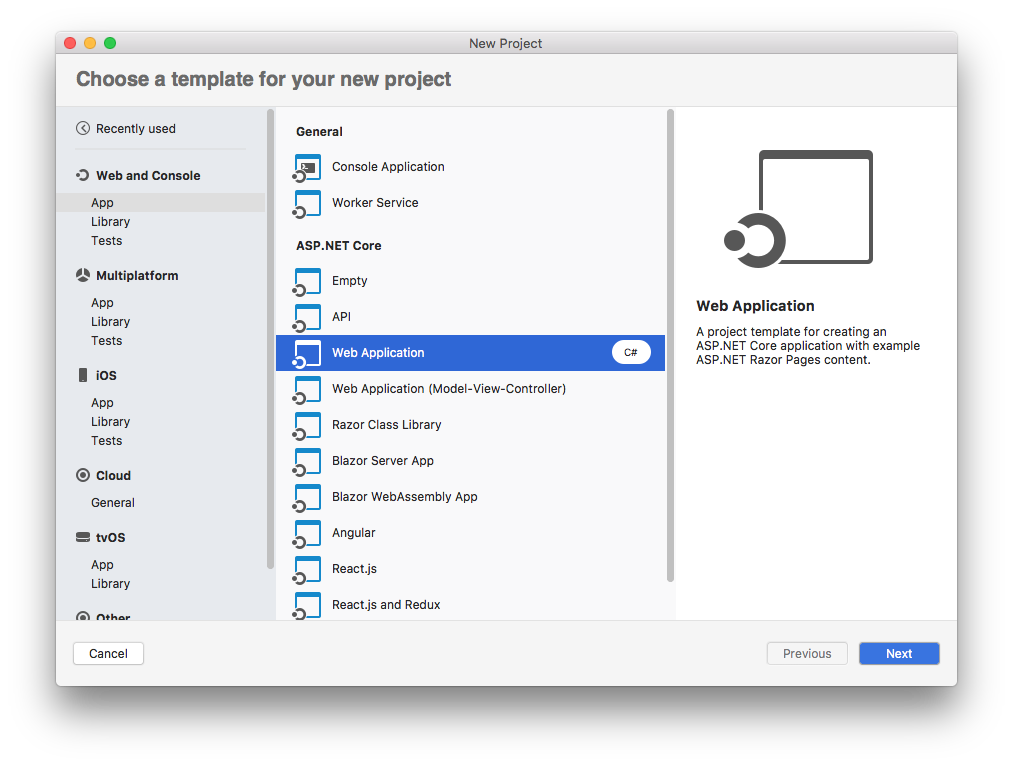
In the Create a new project dialog, select ASP.NET Core Web App (Razor Pages) > Next.
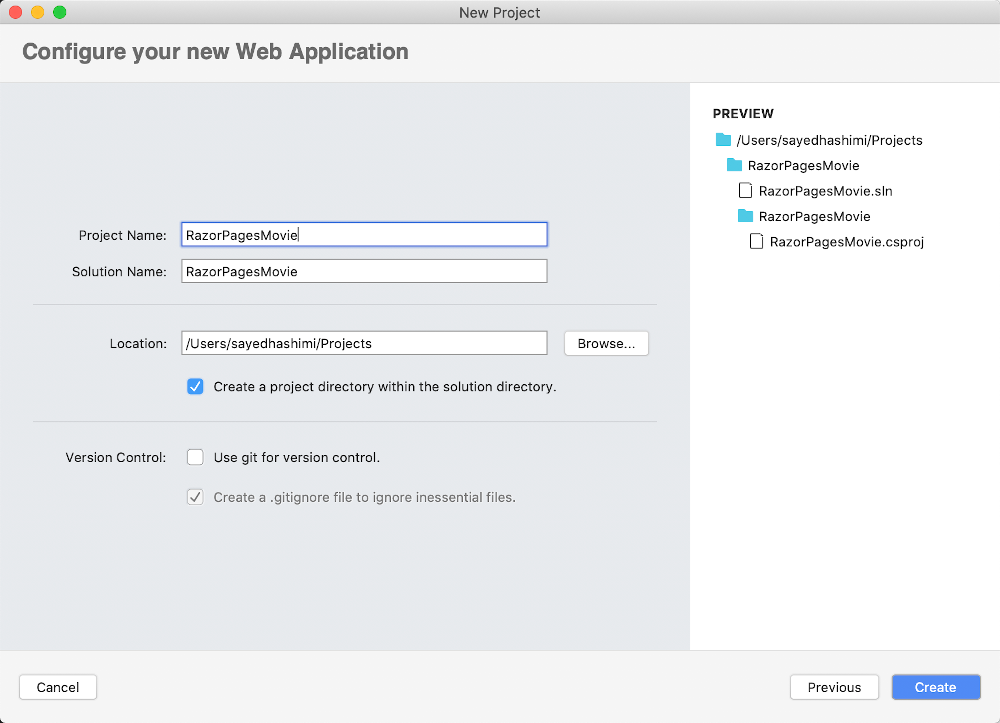
In the Configure your new project dialog, enter
RazorPagesMoviefor Project name. It's important to name the project RazorPagesMovie, including matching the capitalization, so the namespaces will match when you copy and paste example code.Select Next.
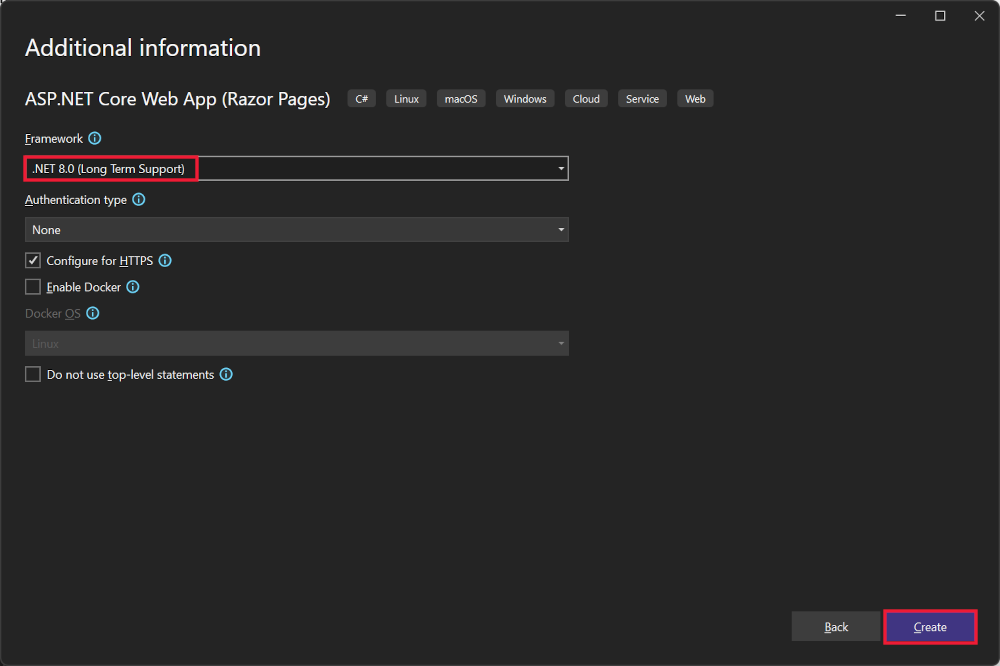
In the Additional information dialog:
- Select .NET 8.0 (Long Term Support).
- Verify: Do not use top-level statements is unchecked.
Select Create.
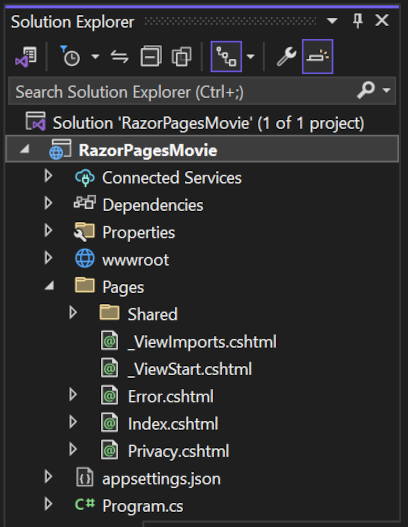
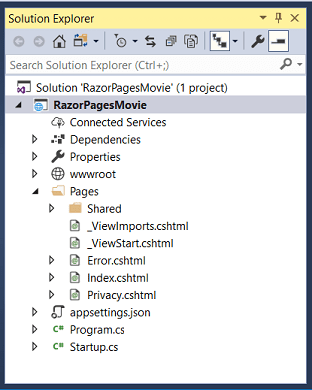
The following starter project is created:
For alternative approaches to create the project, see Create a new project in Visual Studio.
Run the app
Select RazorPagesMovie in Solution Explorer, and then press Ctrl+F5 to run the app without the debugger.
Visual Studio displays the following dialog when a project is not yet configured to use SSL:
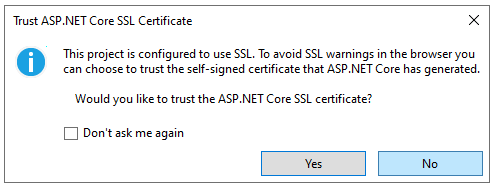
Select Yes if you trust the IIS Express SSL certificate.
The following dialog is displayed:
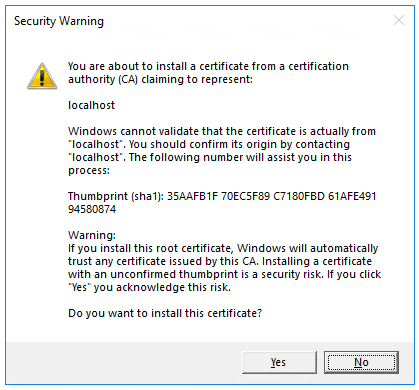
Select Yes if you agree to trust the development certificate.
For information on trusting the Firefox browser, see Firefox SEC_ERROR_INADEQUATE_KEY_USAGE certificate error.
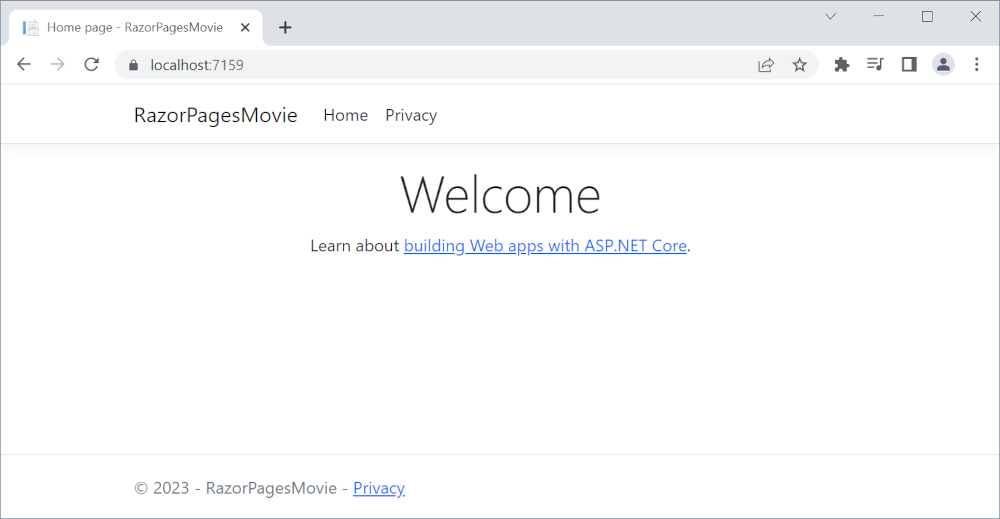
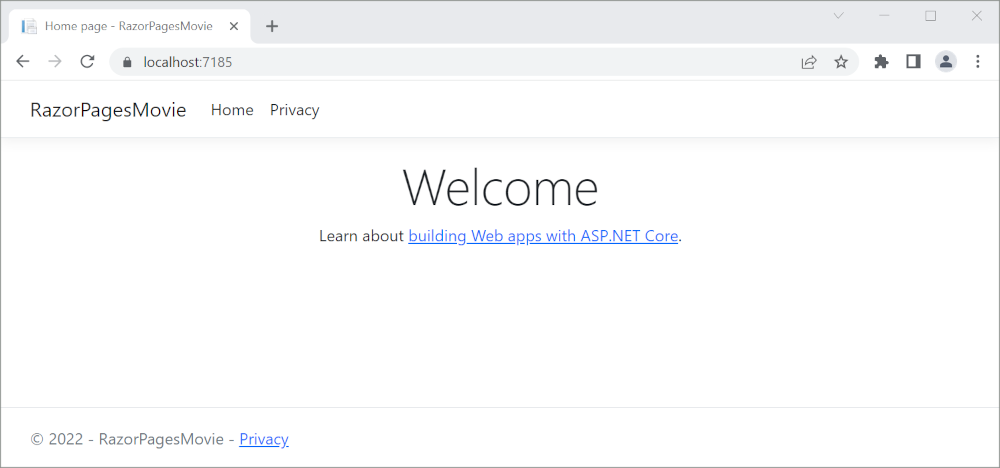
Visual Studio:
- Runs the app, which launches the Kestrel server.
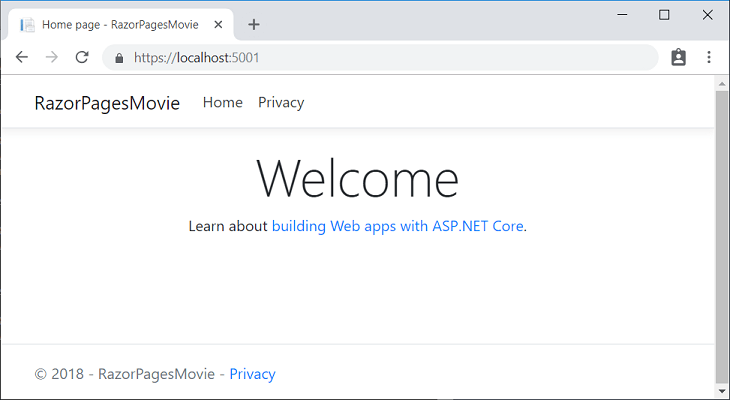
- Launches the default browser at
https://localhost:<port>, which displays the apps UI.<port>is the random port that is assigned when the app was created.
Close the browser window.
Examine the project files
The following sections contain an overview of the main project folders and files that you'll work with in later tutorials.
Pages folder
Contains Razor pages and supporting files. Each Razor page is a pair of files:
- A
.cshtmlfile that has HTML markup with C# code using Razor syntax. - A
.cshtml.csfile that has C# code that handles page events.
Supporting files have names that begin with an underscore. For example, the _Layout.cshtml file configures UI elements common to all pages. _Layout.cshtml sets up the navigation menu at the top of the page and the copyright notice at the bottom of the page. For more information, see Layout in ASP.NET Core.
wwwroot folder
Contains static assets, like HTML files, JavaScript files, and CSS files. For more information, see Static files in ASP.NET Core.
appsettings.json
Contains configuration data, like connection strings. For more information, see Configuration in ASP.NET Core.
Program.cs
Contains the following code:
var builder = WebApplication.CreateBuilder(args);

// Add services to the container.
builder.Services.AddRazorPages();

var app = builder.Build();

// Configure the HTTP request pipeline.
if (!app.Environment.IsDevelopment())
{
    app.UseExceptionHandler("/Error");
    // The default HSTS value is 30 days. You may want to change this for production scenarios, see https://aka.ms/aspnetcore-hsts.
    app.UseHsts();
}

app.UseHttpsRedirection();
app.UseStaticFiles();

app.UseRouting();

app.UseAuthorization();

app.MapRazorPages();

app.Run();
The following lines of code in this file create a WebApplicationBuilder with preconfigured defaults, add Razor Pages support to the Dependency Injection (DI) container, and builds the app:
var builder = WebApplication.CreateBuilder(args);

// Add services to the container.
builder.Services.AddRazorPages();

var app = builder.Build();
The developer exception page is enabled by default and provides helpful information on exceptions. Production apps should not be run in development mode because the developer exception page can leak sensitive information.
The following code sets the exception endpoint to /Error and enables HTTP Strict Transport Security Protocol (HSTS) when the app is not running in development mode:
// Configure the HTTP request pipeline.
if (!app.Environment.IsDevelopment())
{
    app.UseExceptionHandler("/Error");
    // The default HSTS value is 30 days. You may want to change this for production scenarios, see https://aka.ms/aspnetcore-hsts.
    app.UseHsts();
}
For example, the preceding code runs when the app is in production or test mode. For more information, see Use multiple environments in ASP.NET Core.
The following code enables various Middleware:
app.UseHttpsRedirection();: Redirects HTTP requests to HTTPS.app.UseStaticFiles();: Enables static files, such as HTML, CSS, images, and JavaScript to be served. For more information, see Static files in ASP.NET Core.app.UseRouting();: Adds route matching to the middleware pipeline. For more information, see Routing in ASP.NET Coreapp.MapRazorPages();: Configures endpoint routing for Razor Pages.app.UseAuthorization();: Authorizes a user to access secure resources. This app doesn't use authorization, therefore this line could be removed.app.Run();: Runs the app.
Troubleshooting with the completed sample
If you run into a problem you can't resolve, compare your code to the completed project. View or download completed project (how to download).
Next steps
This is the first tutorial of a series that teaches the basics of building an ASP.NET Core Razor Pages web app.
For a more advanced introduction aimed at developers who are familiar with controllers and views, see Introduction to Razor Pages. For a video introduction, see Entity Framework Core for Beginners.
If you're new to ASP.NET Core development and are unsure of which ASP.NET Core web UI solution will best fit your needs, see Choose an ASP.NET Core UI.
At the end of this tutorial, you'll have a Razor Pages web app that manages a database of movies.
Prerequisites
Visual Studio 2022 with the ASP.NET and web development workload.
Create a Razor Pages web app
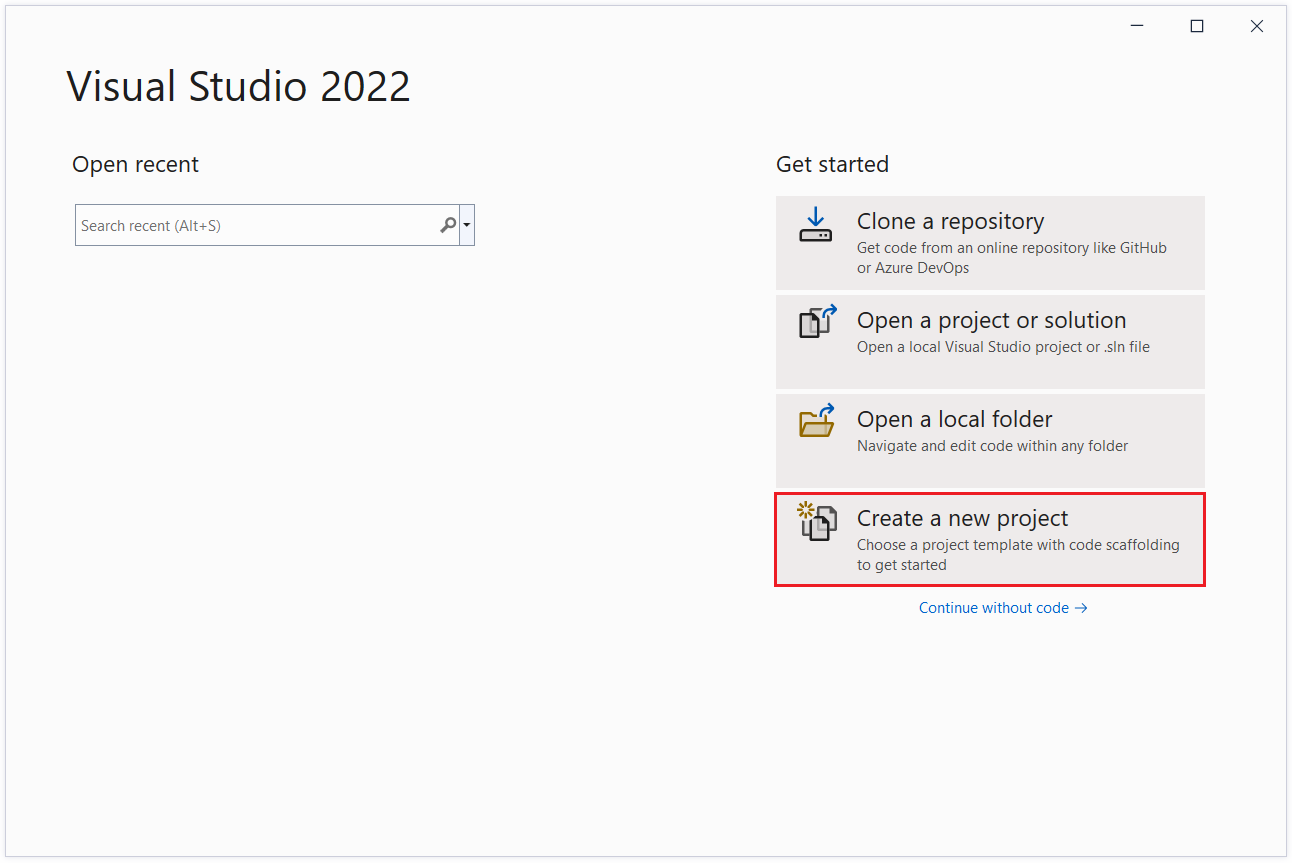
Start Visual Studio and select Create a new project.
In the Create a new project dialog, select ASP.NET Core Web App > Next.
In the Configure your new project dialog, enter
RazorPagesMoviefor Project name. It's important to name the project RazorPagesMovie, including matching the capitalization, so the namespaces will match when you copy and paste example code.Select Next.
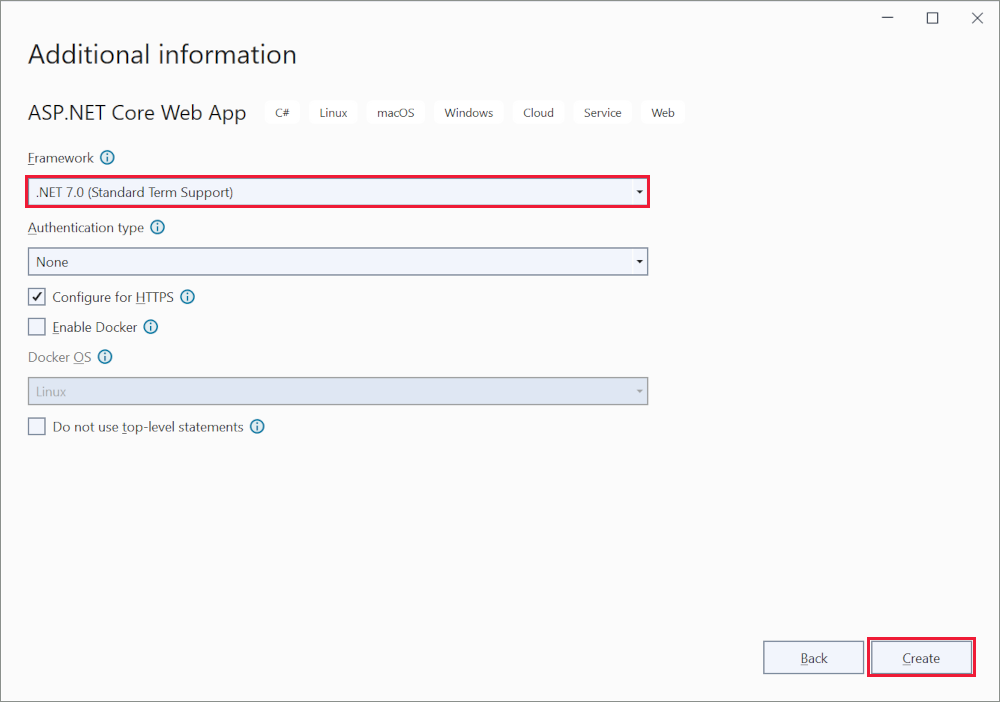
In the Additional information dialog:
- Select .NET 7.0 (Standard Term Support).
- Verify: Do not use top-level statements is unchecked.
Select Create.
The following starter project is created:
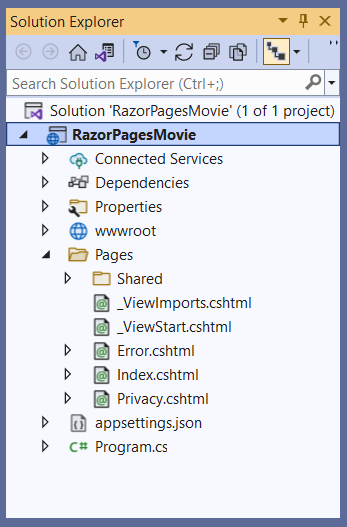
For alternative approaches to create the project, see Create a new project in Visual Studio.
Run the app
Select RazorPagesMovie in Solution Explorer, and then press Ctrl+F5 to run the app without the debugger.
Visual Studio displays the following dialog when a project is not yet configured to use SSL:
Select Yes if you trust the IIS Express SSL certificate.
The following dialog is displayed:
Select Yes if you agree to trust the development certificate.
For information on trusting the Firefox browser, see Firefox SEC_ERROR_INADEQUATE_KEY_USAGE certificate error.
Visual Studio:
- Runs the app, which launches the Kestrel server.
- Launches the default browser at
https://localhost:<port>, which displays the apps UI.<port>is the random port that is assigned when the app was created.
Close the browser window.
Examine the project files
The following sections contain an overview of the main project folders and files that you'll work with in later tutorials.
Pages folder
Contains Razor pages and supporting files. Each Razor page is a pair of files:
- A
.cshtmlfile that has HTML markup with C# code using Razor syntax. - A
.cshtml.csfile that has C# code that handles page events.
Supporting files have names that begin with an underscore. For example, the _Layout.cshtml file configures UI elements common to all pages. _Layout.cshtml sets up the navigation menu at the top of the page and the copyright notice at the bottom of the page. For more information, see Layout in ASP.NET Core.
wwwroot folder
Contains static assets, like HTML files, JavaScript files, and CSS files. For more information, see Static files in ASP.NET Core.
appsettings.json
Contains configuration data, like connection strings. For more information, see Configuration in ASP.NET Core.
Program.cs
Contains the following code:
var builder = WebApplication.CreateBuilder(args);

// Add services to the container.
builder.Services.AddRazorPages();

var app = builder.Build();

// Configure the HTTP request pipeline.
if (!app.Environment.IsDevelopment())
{
    app.UseExceptionHandler("/Error");
    // The default HSTS value is 30 days. You may want to change this for production scenarios, see https://aka.ms/aspnetcore-hsts.
    app.UseHsts();
}

app.UseHttpsRedirection();
app.UseStaticFiles();

app.UseRouting();

app.UseAuthorization();

app.MapRazorPages();

app.Run();
The following lines of code in this file create a WebApplicationBuilder with preconfigured defaults, add Razor Pages support to the Dependency Injection (DI) container, and builds the app:
var builder = WebApplication.CreateBuilder(args);

// Add services to the container.
builder.Services.AddRazorPages();

var app = builder.Build();
The developer exception page is enabled by default and provides helpful information on exceptions. Production apps should not be run in development mode because the developer exception page can leak sensitive information.
The following code sets the exception endpoint to /Error and enables HTTP Strict Transport Security Protocol (HSTS) when the app is not running in development mode:
// Configure the HTTP request pipeline.
if (!app.Environment.IsDevelopment())
{
    app.UseExceptionHandler("/Error");
    // The default HSTS value is 30 days. You may want to change this for production scenarios, see https://aka.ms/aspnetcore-hsts.
    app.UseHsts();
}
For example, the preceding code runs when the app is in production or test mode. For more information, see Use multiple environments in ASP.NET Core.
The following code enables various Middleware:
app.UseHttpsRedirection();: Redirects HTTP requests to HTTPS.app.UseStaticFiles();: Enables static files, such as HTML, CSS, images, and JavaScript to be served. For more information, see Static files in ASP.NET Core.app.UseRouting();: Adds route matching to the middleware pipeline. For more information, see Routing in ASP.NET Coreapp.MapRazorPages();: Configures endpoint routing for Razor Pages.app.UseAuthorization();: Authorizes a user to access secure resources. This app doesn't use authorization, therefore this line could be removed.app.Run();: Runs the app.
Troubleshooting with the completed sample
If you run into a problem you can't resolve, compare your code to the completed project. View or download completed project (how to download).
Next steps
This is the first tutorial of a series that teaches the basics of building an ASP.NET Core Razor Pages web app.
For a more advanced introduction aimed at developers who are familiar with controllers and views, see Introduction to Razor Pages. For a video introduction, see Entity Framework Core for Beginners.
If you're new to ASP.NET Core development and are unsure of which ASP.NET Core web UI solution will best fit your needs, see Choose an ASP.NET Core UI.
At the end of the series, you'll have an app that manages a database of movies.
In this tutorial, you:
- Create a Razor Pages web app.
- Run the app.
- Examine the project files.
At the end of this tutorial, you'll have a working Razor Pages web app that you'll enhance in later tutorials.
Prerequisites
- Visual Studio 2022 with the ASP.NET and web development workload.
- .NET 6.0 SDK
Create a Razor Pages web app
Start Visual Studio 2022 and select Create a new project.
In the Create a new project dialog, select ASP.NET Core Web App, and then select Next.

In the Configure your new project dialog, enter
RazorPagesMoviefor Project name. It's important to name the project RazorPagesMovie, including matching the capitalization, so the namespaces will match when you copy and paste example code.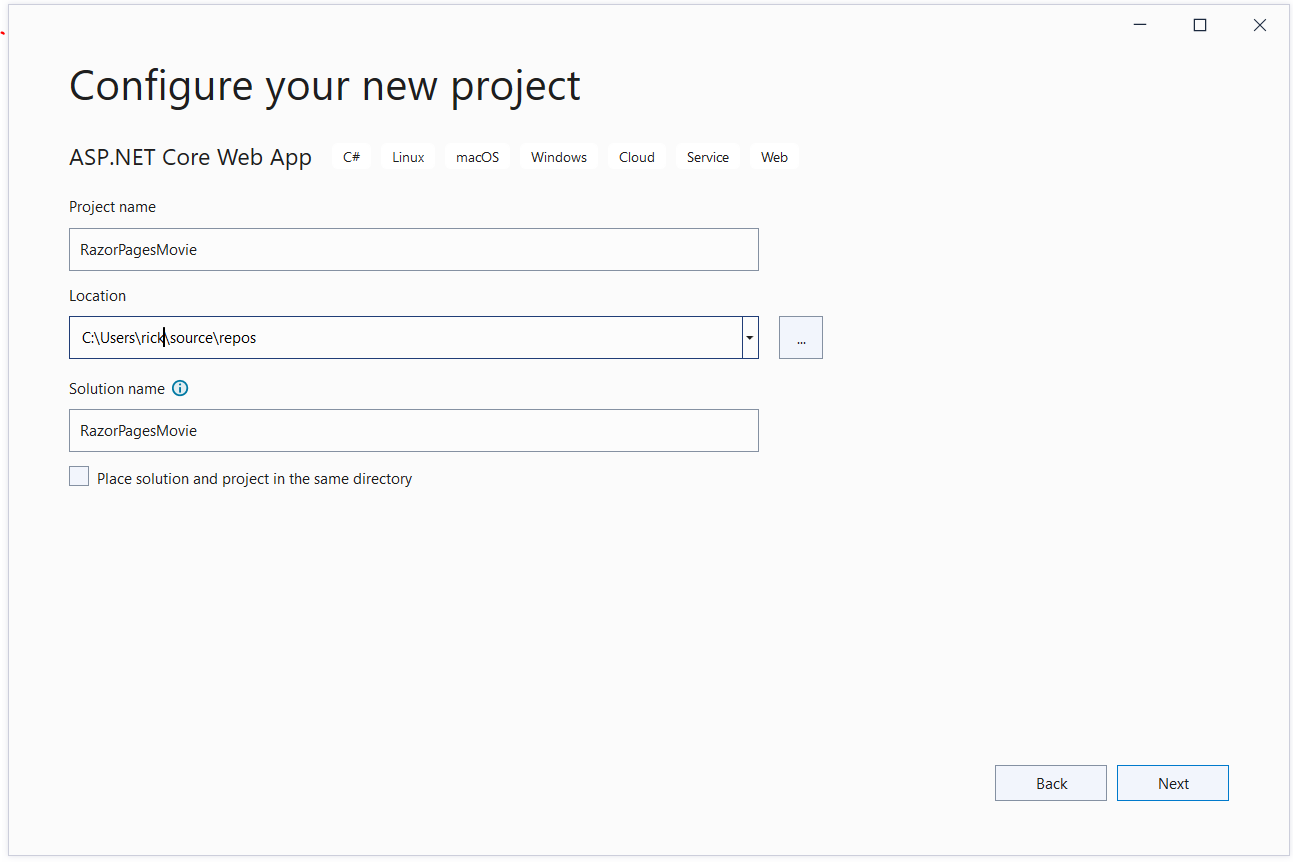
Select Next.
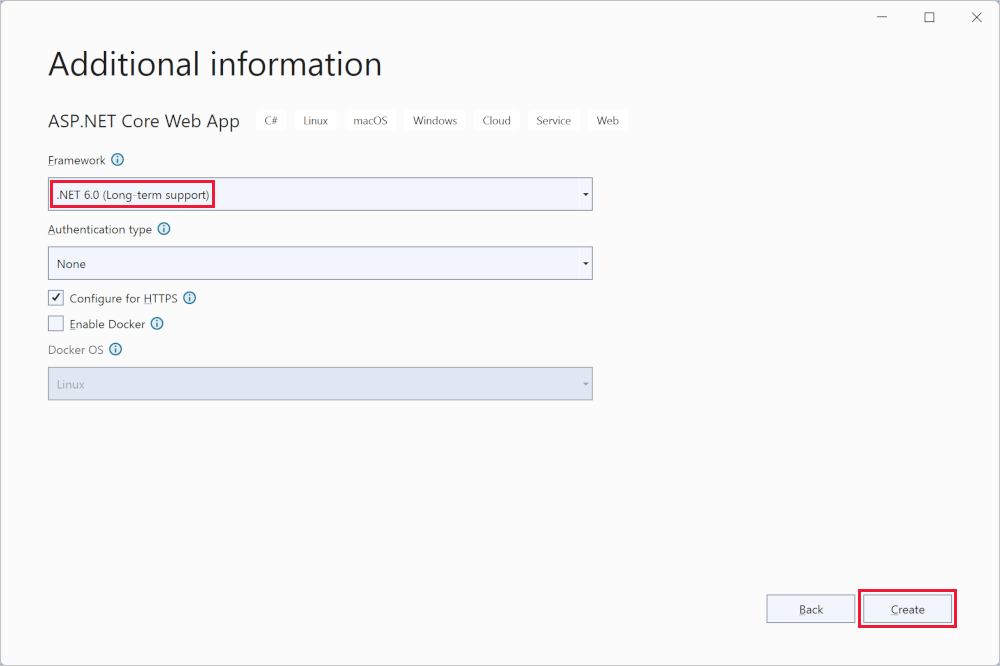
In the Additional information dialog, select .NET 6.0 (Long-term support) and then select Create.
The following starter project is created:

Run the app
Select RazorPagesMovie in Solution Explorer, and then press Ctrl+F5 to run without the debugger.
Visual Studio displays the following dialog when a project is not yet configured to use SSL:
Select Yes if you trust the IIS Express SSL certificate.
The following dialog is displayed:
Select Yes if you agree to trust the development certificate.
For information on trusting the Firefox browser, see Firefox SEC_ERROR_INADEQUATE_KEY_USAGE certificate error.
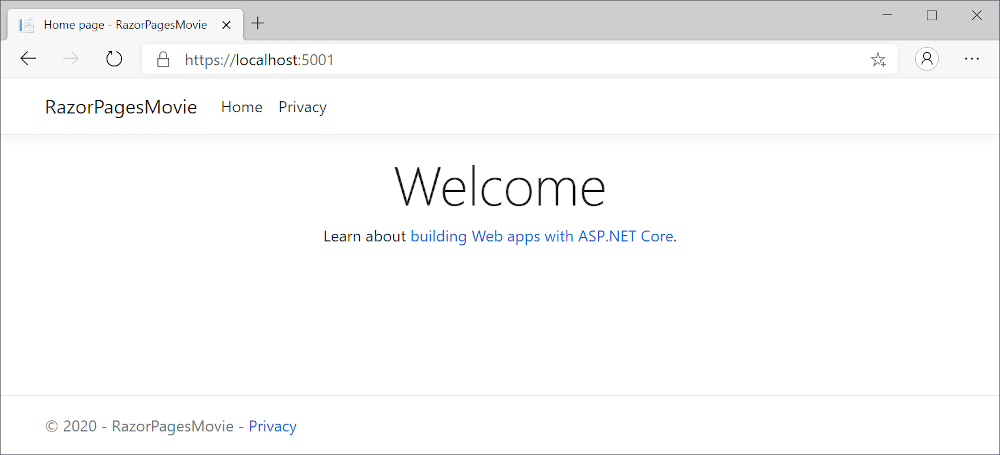
Visual Studio:
- Runs the app, which launches the Kestrel server.
- Launches the default browser at
https://localhost:5001, which displays the apps UI.
Examine the project files
The following sections contain an overview of the main project folders and files that you'll work with in later tutorials.
Pages folder
Contains Razor pages and supporting files. Each Razor page is a pair of files:
- A
.cshtmlfile that has HTML markup with C# code using Razor syntax. - A
.cshtml.csfile that has C# code that handles page events.
Supporting files have names that begin with an underscore. For example, the _Layout.cshtml file configures UI elements common to all pages. This file sets up the navigation menu at the top of the page and the copyright notice at the bottom of the page. For more information, see Layout in ASP.NET Core.
wwwroot folder
Contains static assets, like HTML files, JavaScript files, and CSS files. For more information, see Static files in ASP.NET Core.
appsettings.json
Contains configuration data, like connection strings. For more information, see Configuration in ASP.NET Core.
Program.cs
Contains the following code:
var builder = WebApplication.CreateBuilder(args);

// Add services to the container.
builder.Services.AddRazorPages();

var app = builder.Build();

// Configure the HTTP request pipeline.
if (!app.Environment.IsDevelopment())
{
    app.UseExceptionHandler("/Error");
    // The default HSTS value is 30 days. You may want to change this for production scenarios, see https://aka.ms/aspnetcore-hsts.
    app.UseHsts();
}

app.UseHttpsRedirection();
app.UseStaticFiles();

app.UseRouting();

app.UseAuthorization();

app.MapRazorPages();

app.Run();
The following lines of code in this file create a WebApplicationBuilder with preconfigured defaults, add Razor Pages support to the Dependency Injection (DI) container, and build the app:
var builder = WebApplication.CreateBuilder(args);

// Add services to the container.
builder.Services.AddRazorPages();

var app = builder.Build();
The developer exception page is enabled by default and provides helpful information on exceptions. Production apps should not be run in development mode because the developer exception page can leak sensitive information.
The following code sets the exception endpoint to /Error and enables HTTP Strict Transport Security Protocol (HSTS) when the app is not running in development mode:
// Configure the HTTP request pipeline.
if (!app.Environment.IsDevelopment())
{
    app.UseExceptionHandler("/Error");
    // The default HSTS value is 30 days. You may want to change this for production scenarios, see https://aka.ms/aspnetcore-hsts.
    app.UseHsts();
}
For example, the preceding code runs when the app is in production or test mode. For more information, see Use multiple environments in ASP.NET Core.
The following code enables various Middleware:
app.UseHttpsRedirection();: Redirects HTTP requests to HTTPS.app.UseStaticFiles();: Enables static files, such as HTML, CSS, images, and JavaScript to be served. For more information, see Static files in ASP.NET Core.app.UseRouting();: Adds route matching to the middleware pipeline. For more information, see Routing in ASP.NET Coreapp.MapRazorPages();: Configures endpoint routing for Razor Pages.app.UseAuthorization();: Authorizes a user to access secure resources. This app doesn't use authorization, therefore this line could be removed.app.Run();: Runs the app.
Troubleshooting with the completed sample
If you run into a problem you can't resolve, compare your code to the completed project. View or download completed project (how to download).
Next steps
This is the first tutorial of a series that teaches the basics of building an ASP.NET Core Razor Pages web app.
For a more advanced introduction aimed at developers who are familiar with controllers and views, see Introduction to Razor Pages.
If you're new to ASP.NET Core development and are unsure of which ASP.NET Core web UI solution will best fit your needs, see Choose an ASP.NET Core UI.
At the end of the series, you'll have an app that manages a database of movies.
In this tutorial, you:
- Create a Razor Pages web app.
- Run the app.
- Examine the project files.
At the end of this tutorial, you'll have a working Razor Pages web app that you'll enhance in later tutorials.
Prerequisites
- Visual Studio 2019 16.8 or later with the ASP.NET and web development workload
- .NET 5.0 SDK
Create a Razor Pages web app
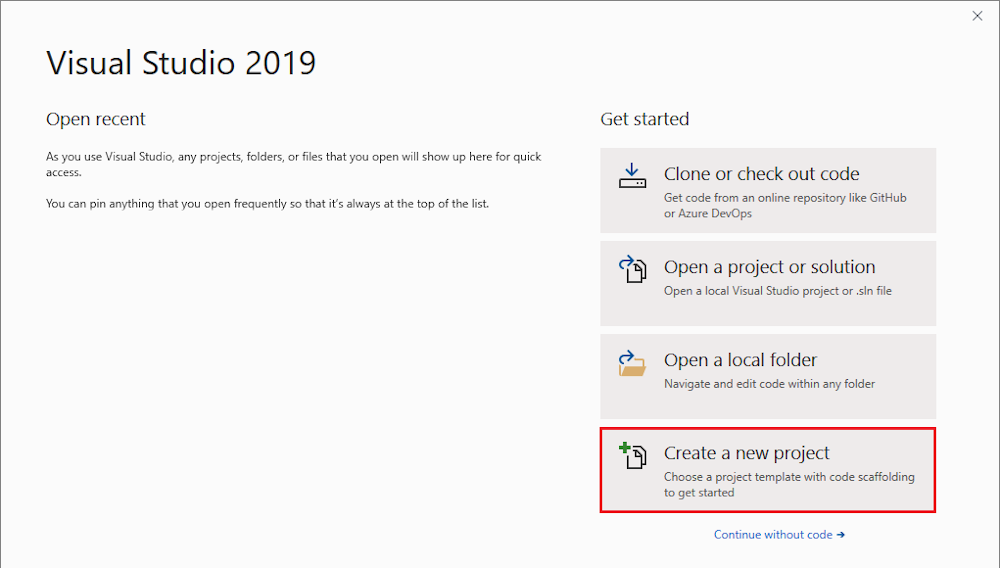
Start Visual Studio and select Create a new project. For more information, see Create a new project in Visual Studio.
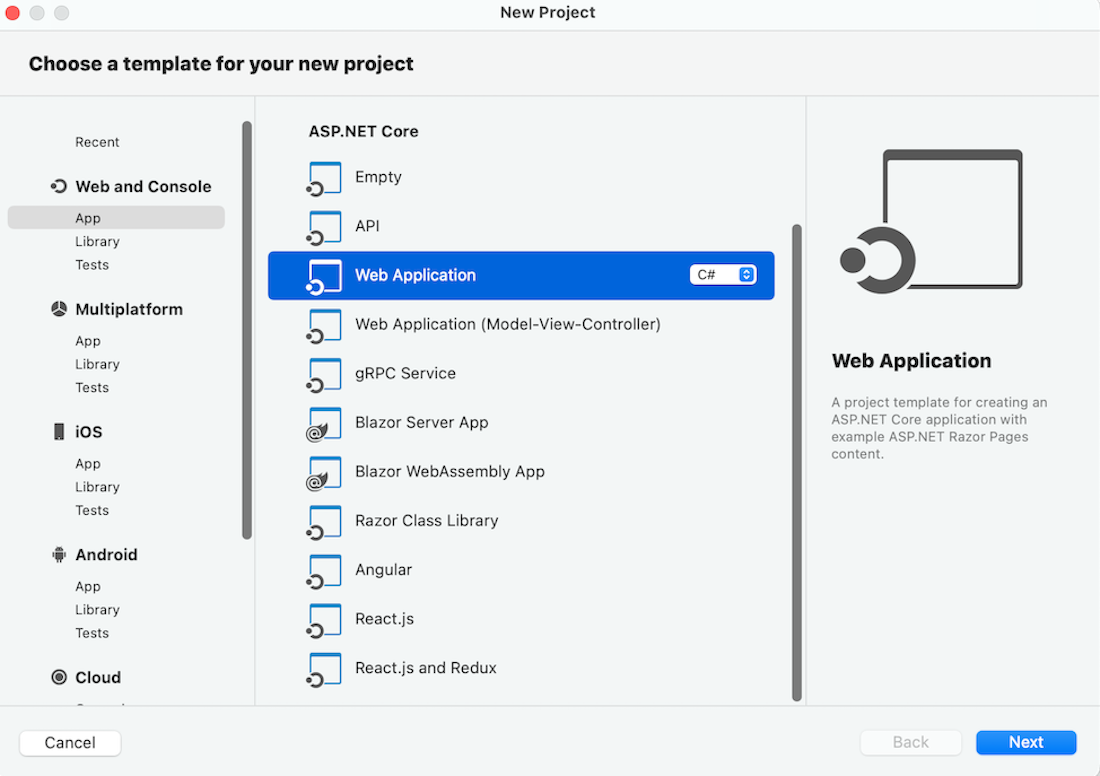
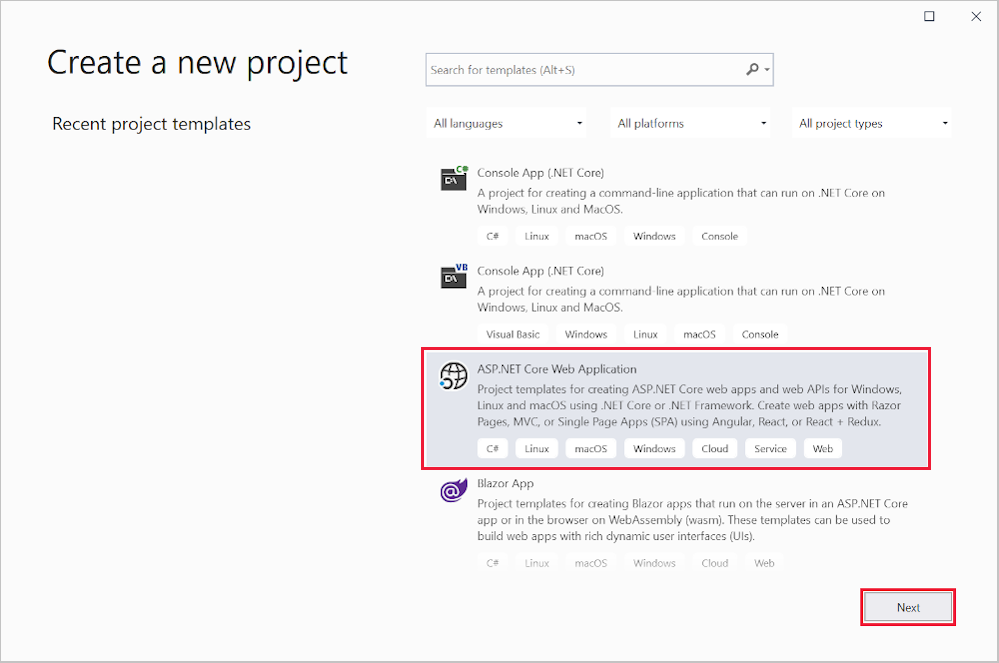
In the Create a new project dialog, select ASP.NET Core Web Application, and then select Next.
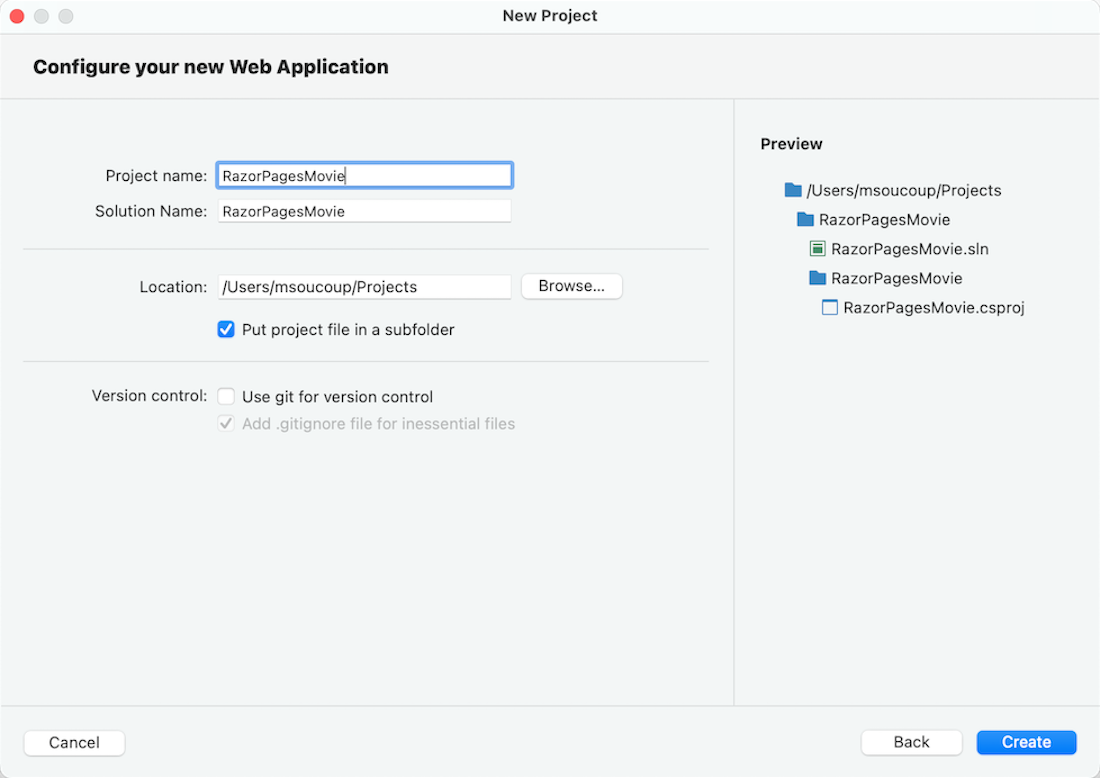
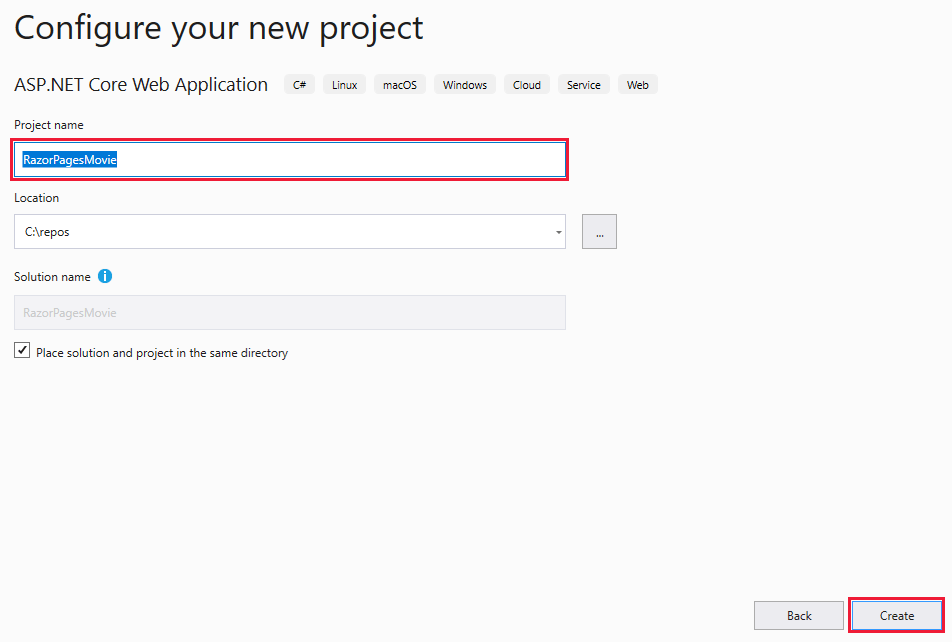
In the Configure your new project dialog, enter
RazorPagesMoviefor Project name. It's important to name the project RazorPagesMovie, including matching the capitalization, so the namespaces will match when you copy and paste example code.Select Create.
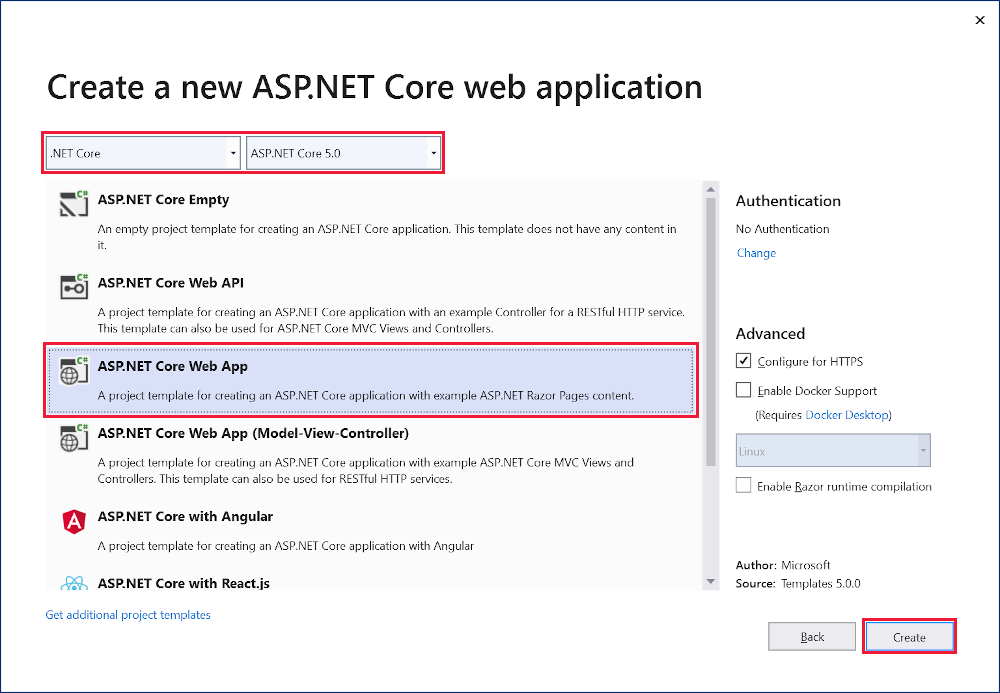
In the Create a new ASP.NET Core web application dialog, select:
- .NET Core and ASP.NET Core 5.0 in the dropdowns.
- Web Application.
- Create.
The following starter project is created:
Run the app
Press Ctrl+F5 to run without the debugger.
Visual Studio displays the following dialog when a project is not yet configured to use SSL:

Select Yes if you trust the IIS Express SSL certificate.
The following dialog is displayed:
Select Yes if you agree to trust the development certificate.
For information on trusting the Firefox browser, see Firefox SEC_ERROR_INADEQUATE_KEY_USAGE certificate error.
Visual Studio starts IIS Express and runs the app. The address bar shows
localhost:port#and not something likeexample.com. That's becauselocalhostis the standard hostname for the local computer. Localhost only serves web requests from the local computer. When Visual Studio creates a web project, a random port is used for the web server.


Examine the project files
Here's an overview of the main project folders and files that you'll work with in later tutorials.
Pages folder
Contains Razor pages and supporting files. Each Razor page is a pair of files:
- A
.cshtmlfile that has HTML markup with C# code using Razor syntax. - A
.cshtml.csfile that has C# code that handles page events.
Supporting files have names that begin with an underscore. For example, the _Layout.cshtml file configures UI elements common to all pages. This file sets up the navigation menu at the top of the page and the copyright notice at the bottom of the page. For more information, see Layout in ASP.NET Core.
wwwroot folder
Contains static assets, like HTML files, JavaScript files, and CSS files. For more information, see Static files in ASP.NET Core.
appsettings.json
Contains configuration data, like connection strings. For more information, see Configuration in ASP.NET Core.
Program.cs
Contains the entry point for the app. For more information, see .NET Generic Host in ASP.NET Core.
Startup.cs
Contains code that configures app behavior. For more information, see App startup in ASP.NET Core.
Troubleshooting with the completed sample
If you run into a problem you can't resolve, compare your code to the completed project. View or download completed project (how to download).
Next steps
This is the first tutorial of a series that teaches the basics of building an ASP.NET Core Razor Pages web app.
For a more advanced introduction aimed at developers who are familiar with controllers and views, see Introduction to Razor Pages.
At the end of the series, you'll have an app that manages a database of movies.
View or download sample code (how to download).
In this tutorial, you:
- Create a Razor Pages web app.
- Run the app.
- Examine the project files.
At the end of this tutorial, you'll have a working Razor Pages web app that you'll build on in later tutorials.
Prerequisites
- Visual Studio 2019 16.4 or later with the ASP.NET and web development workload
- .NET Core 3.1 SDK
Create a Razor Pages web app
From the Visual Studio File menu, select New > Project.
Create a new ASP.NET Core Web Application and select Next.
Name the project RazorPagesMovie. It's important to name the project RazorPagesMovie so the namespaces will match when you copy and paste code.
Select ASP.NET Core 3.1 in the dropdown, Web Application, and then select Create.

The following starter project is created:
Run the app
Press Ctrl+F5 to run without the debugger.
Visual Studio displays the following dialog when a project is not yet configured to use SSL:
Select Yes if you trust the IIS Express SSL certificate.
The following dialog is displayed:
Select Yes if you agree to trust the development certificate.
For information on trusting the Firefox browser, see Firefox SEC_ERROR_INADEQUATE_KEY_USAGE certificate error.
Visual Studio starts IIS Express and runs the app. The address bar shows
localhost:port#and not something likeexample.com. That's becauselocalhostis the standard hostname for the local computer. Localhost only serves web requests from the local computer. When Visual Studio creates a web project, a random port is used for the web server.
Examine the project files
Here's an overview of the main project folders and files that you'll work with in later tutorials.
Pages folder
Contains Razor pages and supporting files. Each Razor page is a pair of files:
- A
.cshtmlfile that has HTML markup with C# code using Razor syntax. - A
.cshtml.csfile that has C# code that handles page events.
Supporting files have names that begin with an underscore. For example, the _Layout.cshtml file configures UI elements common to all pages. This file sets up the navigation menu at the top of the page and the copyright notice at the bottom of the page. For more information, see Layout in ASP.NET Core.
wwwroot folder
Contains static files, like HTML files, JavaScript files, and CSS files. For more information, see Static files in ASP.NET Core.
appSettings.json
Contains configuration data, like connection strings. For more information, see Configuration in ASP.NET Core.
Program.cs
Contains the entry point for the program. For more information, see .NET Generic Host in ASP.NET Core.
Startup.cs
Contains code that configures app behavior. For more information, see App startup in ASP.NET Core.
Next steps
ASP.NET Core
Feedback
Coming soon: Throughout 2024 we will be phasing out GitHub Issues as the feedback mechanism for content and replacing it with a new feedback system. For more information see: https://aka.ms/ContentUserFeedback.
Submit and view feedback for