Configure authentication in an Azure Web App by using Azure AD B2C
This article explains how to add Azure Active Directory B2C (Azure AD B2C) authentication functionality to an Azure Web App. For more information, check out the configure your App Service or Azure Functions app to login using an OpenID Connect provider article.
Overview
OpenID Connect (OIDC) is an authentication protocol that's built on OAuth 2.0. Use the OIDC to securely sign users in to an Azure Web App. The sign-in flow involves the following steps:
- Users go to the Azure Web App and select Sign-in.
- The Azure Web App initiates an authentication request and redirects users to Azure AD B2C.
- Users sign up or sign in and reset the password. Alternatively, they can sign in with a social account.
- After users sign in successfully, Azure AD B2C returns an ID token to the Azure Web App.
- Azure Web App validates the ID token, reads the claims, and returns a secure page to users.
When the ID token expires or the app session is invalidated, Azure Web App initiates a new authentication request and redirects users to Azure AD B2C. If the Azure AD B2C SSO session is active, Azure AD B2C issues an access token without prompting users to sign in again. If the Azure AD B2C session expires or becomes invalid, users are prompted to sign in again.
Prerequisites
- If you haven't created an app yet, follow the guidance how to create an Azure Web App.
Step 1: Configure your user flow
When users try to sign in to your app, the app starts an authentication request to the authorization endpoint via a user flow. The user flow defines and controls the user experience. After users complete the user flow, Azure AD B2C generates a token and then redirects users back to your application.
If you haven't done so already, create a user flow or a custom policy. Repeat the steps to create three separate user flows as follows:
- A combined Sign in and sign up user flow, such as
susi. This user flow also supports the Forgot your password experience. - A Profile editing user flow, such as
edit_profile. - A Password reset user flow, such as
reset_password.
Azure AD B2C prepends B2C_1_ to the user flow name. For example, susi becomes B2C_1_susi.
Step 2: Register a web application
To enable your application to sign in with Azure AD B2C, register your app in the Azure AD B2C directory. Registering your app establishes a trust relationship between the app and Azure AD B2C.
During app registration, you'll specify the redirect URI. The redirect URI is the endpoint to which users are redirected by Azure AD B2C after they authenticate with Azure AD B2C. The app registration process generates an application ID, also known as the client ID, that uniquely identifies your app. After your app is registered, Azure AD B2C uses both the application ID and the redirect URI to create authentication requests. You also create a client secret, which your app uses to securely acquire the tokens.
Step 2.1: Register the app
To register your application, follow these steps:
Sign in to the Azure portal.
If you have access to multiple tenants, select the Settings icon in the top menu to switch to your Azure AD B2C tenant from the Directories + subscriptions menu.
In the Azure portal, search for and select Azure AD B2C.
Select App registrations, and then select New registration.
Under Name, enter a name for the application (for example, My Azure web app).
Under Supported account types, select Accounts in any identity provider or organizational directory (for authenticating users with user flows).
Under Redirect URI, select Web and then, in the URL box, enter
https://<YOUR_SITE>/.auth/login/aadb2c/callback. Replace the<YOUR_SITE>with your Azure Web App name. For example:https://contoso.azurewebsites.net/.auth/login/aadb2c/callback. If you configured an Azure Web App's custom domains, user the custom domain in the redirect URI. For example,https://www.contoso.com/.auth/login/aadb2c/callbackUnder Permissions, select the Grant admin consent to openid and offline access permissions checkbox.
Select Register.
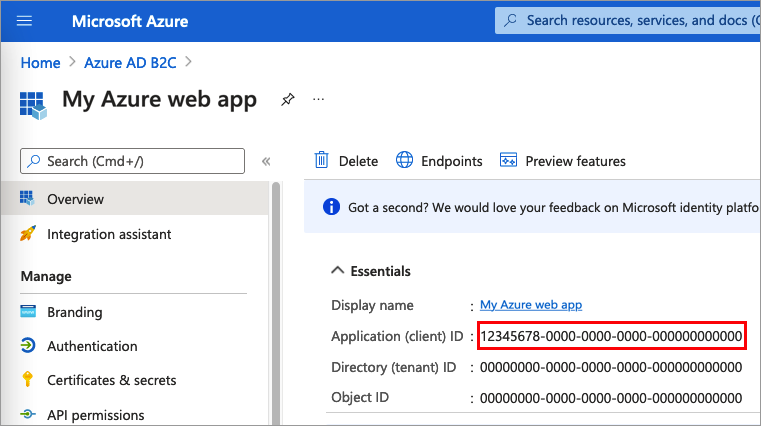
Select Overview.
Record the Application (client) ID for later use, when you configure the web application.
Step 2.2: Create a client secret
- In the Azure AD B2C - App registrations page, select the application you created, for example My Azure web app.
- In the left menu, under Manage, select Certificates & secrets.
- Select New client secret.
- Enter a description for the client secret in the Description box. For example, clientsecret1.
- Under Expires, select a duration for which the secret is valid, and then select Add.
- Record the secret's Value for use in your client application code. This secret value is never displayed again after you leave this page. You use this value as the application secret in your application's code.
Step 3: Configure the Azure App
Sign in to the Azure portal.
If you have access to multiple tenants, select the Settings icon in the top menu to switch to your Microsoft Entra ID tenant from the Directories + subscriptions menu.
Navigate to your Azure web app.
Select Authentication in the menu on the left. Select Add identity provider.
Select OpenID Connect in the identity provider dropdown.
For OpenID provider name type
aadb2c.For Metadata entry, select Document URL. Then for the Document URL provide the following URL:
https://<TENANT_NAME>.b2clogin.com/<TENANT_NAME>.onmicrosoft.com/<POLICY_NAME>/v2.0/.well-known/openid-configurationReplace
<TENANT_NAME>with the first part of your Azure AD B2C tenant name (for example,https://contoso.b2clogin.com/contoso.onmicrosoft.com). If you have a custom domains configure, you can use that custom domain. Replace your B2C tenant name, contoso.onmicrosoft.com, in the authentication request URL with your tenant ID GUID. For example, you can changehttps://fabrikamb2c.b2clogin.com/contoso.onmicrosoft.com/tohttps://account.contosobank.co.uk/<tenant ID GUID>/.Replace the
<POLICY_NAME>with the user flows or custom policy you created in step 1.
For the Client ID provide the Web App (client) ID from step 2.1.
For the Client Secret provide the Web App (client) secret from step 2.2.
Tip
Your client secret will be stored as an app setting to ensure secrets are stored in a secure fashion. You can update that setting later to use Key Vault references if you wish to manage the secret in Azure Key Vault.
Keep the rest of the settings with the default values.
Press the Add button to finish setting up the identity provider.
Step 4: Check the Azure Web app
- In your browser, navigate to your Azure Web App using
https://<app-name>.azurewebsites.net. Replace the<app-name>with your Azure Web App. - Complete the sign up or sign in process.
- In your browser, navigate you the following URL
https://<app-name>.azurewebsites.net/.auth/meto see the information about the signed in user. Replace the<app-name>with your Azure Web App.
Retrieve tokens in app code
From your server code, the provider-specific tokens are injected into the request header, so you can easily access them. The following table shows possible token header names:
| Header name | Description |
|---|---|
| X-MS-CLIENT-PRINCIPAL-NAME | The user's display name. |
| X-MS-CLIENT-PRINCIPAL-ID | The ID token sub claim. |
| X-MS-CLIENT-PRINCIPAL-IDP | The identity provider name, aadb2c. |
| X-MS-TOKEN-AADB2C-ID-TOKEN | The ID token issued by Azure AD B2C |
Next steps
- After successful authentication, you can show display name on the navigation bar. To view the claims that the Azure AD B2C token returns to your app, check out the Work with user identities in Azure App Service authentication.
- Learn how to Work with OAuth tokens in Azure App Service authentication.
Feedback
Coming soon: Throughout 2024 we will be phasing out GitHub Issues as the feedback mechanism for content and replacing it with a new feedback system. For more information see: https://aka.ms/ContentUserFeedback.
Submit and view feedback for