FortiGate Azure Virtual Machine Deployment Guide
Using this deployment guide, you will learn how to set up and work with the Fortinet FortiGate next-generation firewall product deployed as an Azure Virtual Machine. Additionally, you will configure the FortiGate SSL VPN Microsoft Entra Gallery App to provide VPN authentication through Microsoft Entra ID.
Redeem the FortiGate License
The Fortinet FortiGate next-generation firewall product is available as a virtual machine in Azure infrastructure as a service (IaaS). There are two licensing modes for this virtual machine: pay-as-you-go and bring-your-own-license (BYOL).
If you have purchased a FortiGate license from Fortinet to use with the BYOL virtual machine deployment option, redeem it from Fortinet's product activation page – https://support.fortinet.com. The resulting license file will have a .lic file extension.
Download Firmware
At the time of writing, the Fortinet FortiGate Azure VM does not ship with the firmware version needed for SAML authentication. The latest version must be obtained from Fortinet.
- Sign in at https://support.fortinet.com/.
- Go to Download > Firmware Images.
- To the right of Release Notes, select Download.
- Select v6.00 > 6.4 > 6.4.2.
- Download FGT_VM64_AZURE-v6-build1723-FORTINET.out by selecting the HTTPS link on the same row.
- Save the file for later.
Deploy the FortiGate VM
Go to the Azure portal, and sign in to the subscription into which you will deploy the FortiGate virtual machine.
Create a new resource group, or open the resource group into which you will deploy the FortiGate virtual machine.
Select Add.
In Search the Marketplace, enter Forti. Select Fortinet FortiGate Next-Generation Firewall.
Select the software plan (bring-your-own-license if you have a license, or pay-as-you-go if not). Select Create.
Populate the VM configuration.
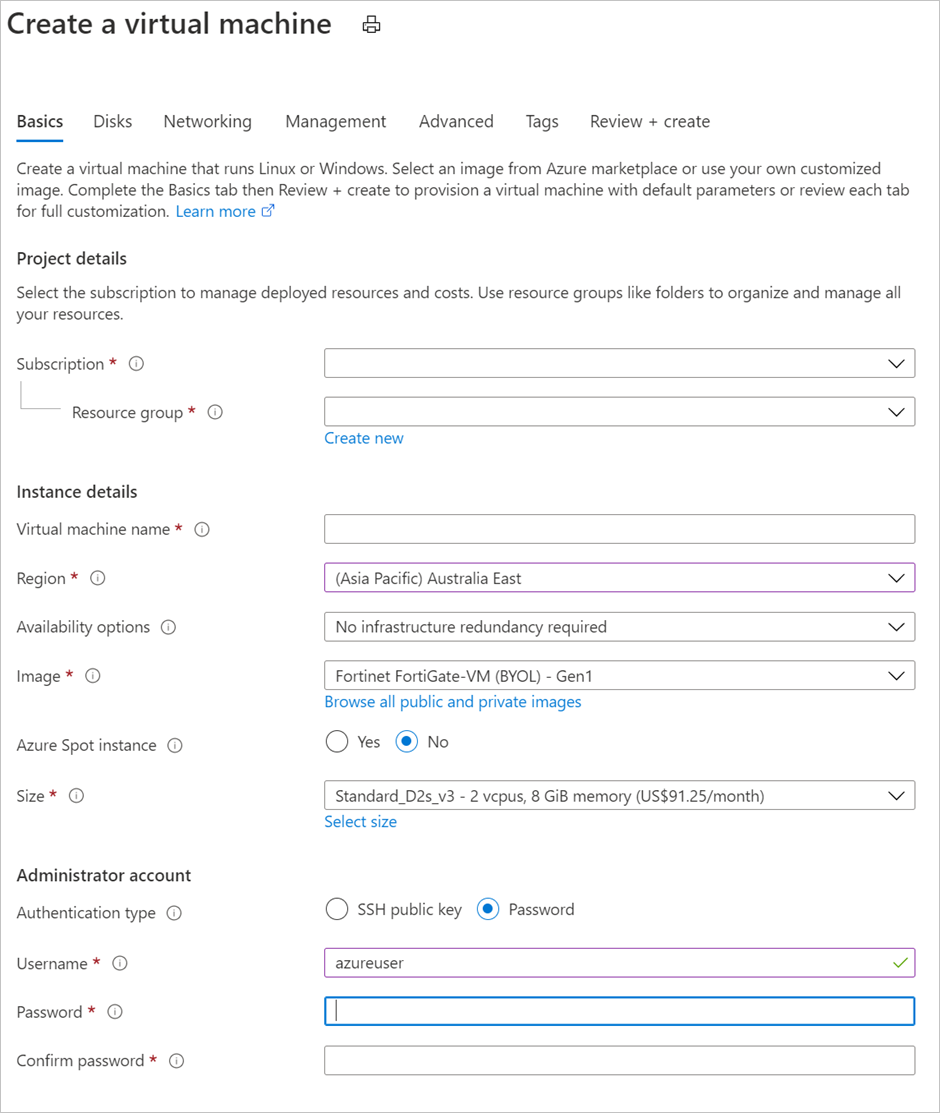
Set Authentication type to Password, and provide administrative credentials for the VM.
Select Review + Create > Create.
Wait for the VM deployment to complete.
Set a Static Public IP address and Assign a Fully Qualified Domain Name
For a consistent user experience, set the public IP address assigned to the FortiGate VM to be statically assigned. In addition, map it to a fully qualified domain name (FQDN).
Go to the Azure portal, and open the settings for the FortiGate VM.
On the Overview screen, select the public IP address.
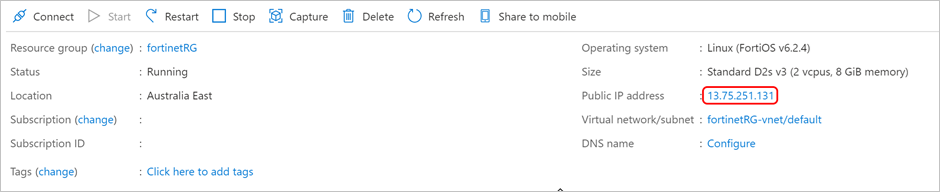
Select Static > Save.
If you own a publicly routable domain name for the environment into which the FortiGate VM is being deployed, create a Host (A) record for the VM. This record maps to the preceding public IP address that is statically assigned.
Create a New Inbound Network Security Group Rule for TCP Port 8443
Go to the Azure portal, and open the settings for the FortiGate VM.
In the menu on the left, select Networking. The network interface is listed, and the inbound port rules are shown.
Select Add inbound port rule.
Create a new inbound port rule for TCP 8443.
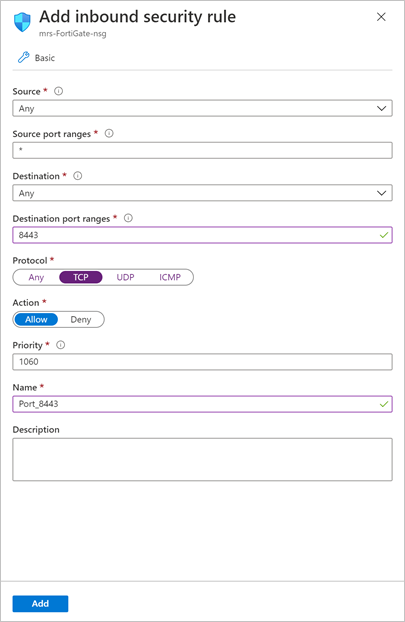
Select Add.
Create a Second Virtual NIC for the VM
For internal resources to be made available to users, a second Virtual NIC must be added to the FortiGate VM. The Virtual Network in Azure on which the Virtual NIC resides must have a routable connection to those internal resources.
Go to the Azure portal, and open the settings for the FortiGate VM.
If the FortiGate VM is not already stopped, select Stop and wait for the VM to shut down.
In the menu on the left, select Networking.
Select Attach network interface.
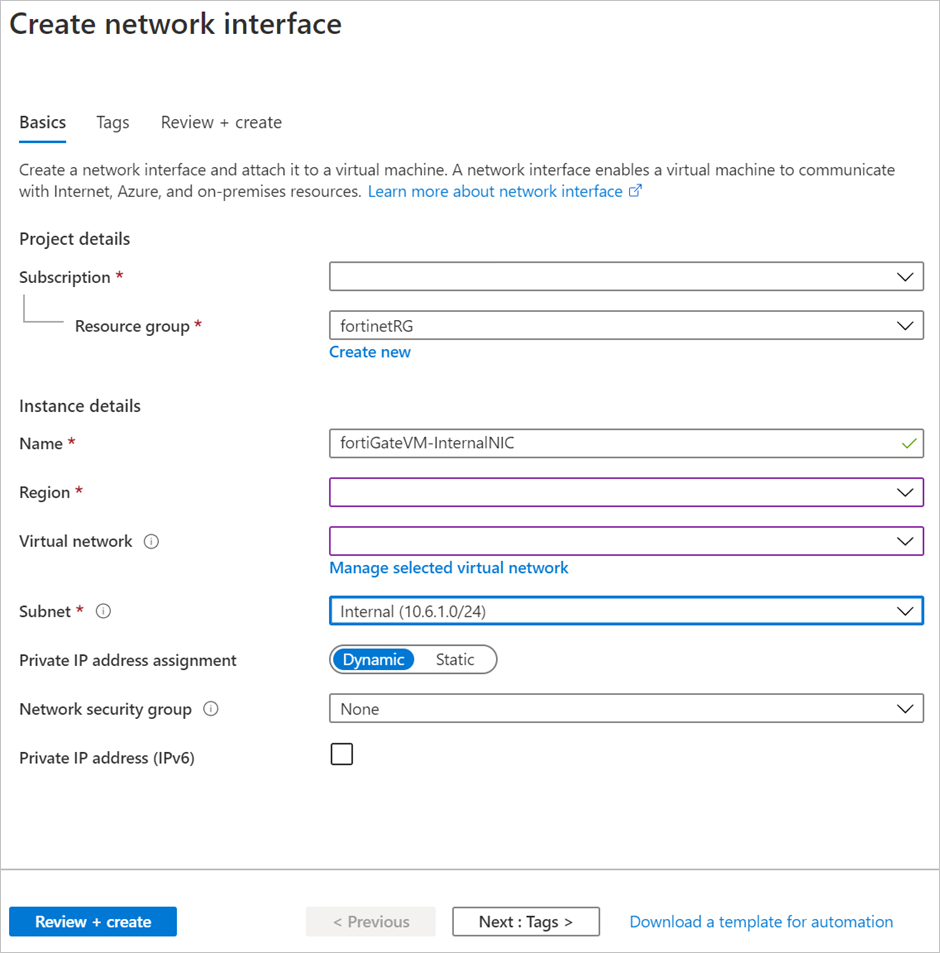
Select Create and attach network interface.
Configure properties for the new network interface and then select Create.
Start the FortiGate VM.
Configure the FortiGate VM
The following sections walk you through how to set up the FortiGate VM.
Install the License
Go to
https://<address>. Here,<address>is the FQDN or the public IP address assigned to the FortiGate VM.Continue past any certificate errors.
Sign in by using the administrator credentials provided during the FortiGate VM deployment.
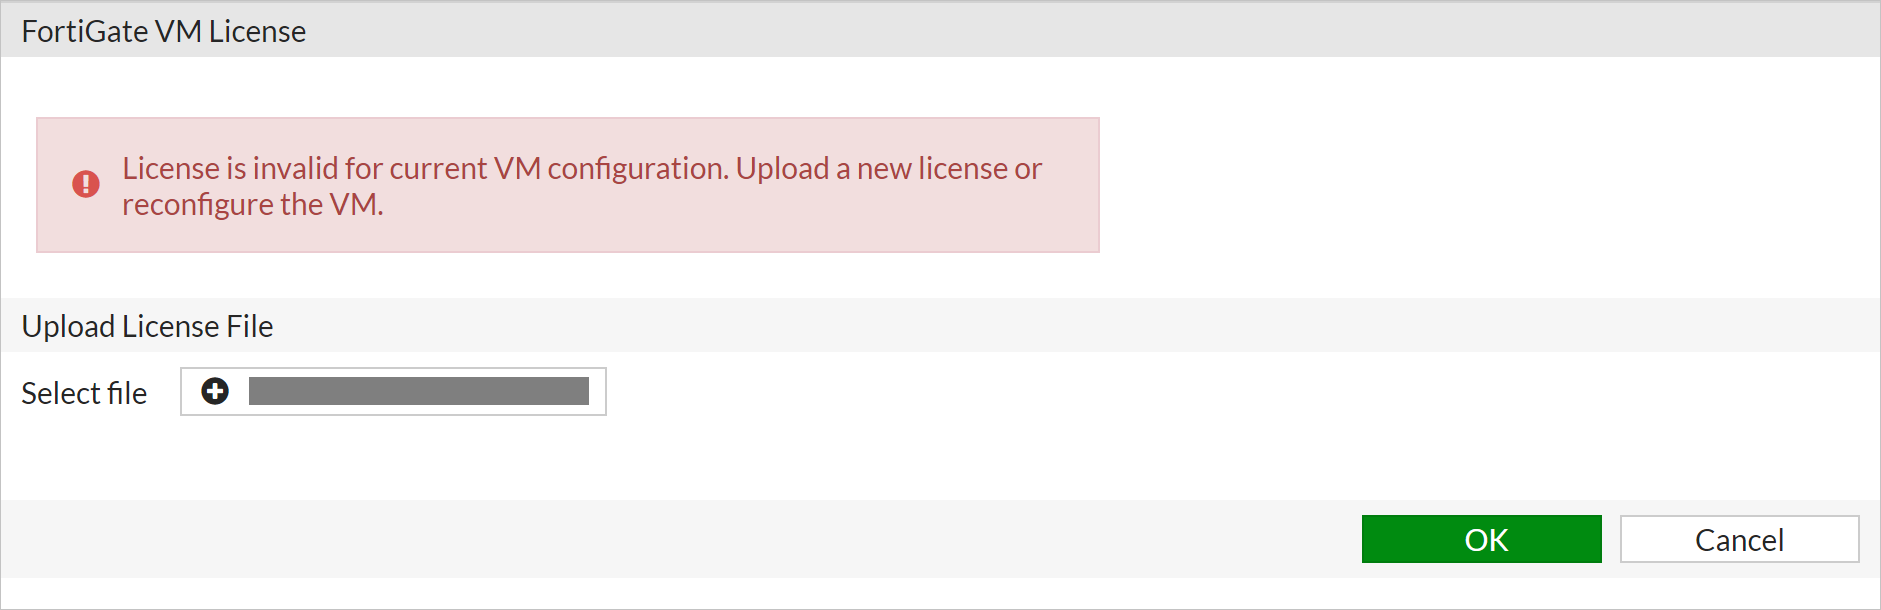
If the deployment uses the bring-your-own-license model, you'll see a prompt to upload a license. Select the license file created earlier, and upload it. Select OK and restart the FortiGate VM.
After the reboot, sign in again with the administrator credentials to validate the license.
Update Firmware
Go to
https://<address>. Here,<address>is the FQDN or the public IP address assigned to the FortiGate VM.Continue past any certificate errors.
Sign in by using the administrator credentials provided during the FortiGate VM deployment.
In the left menu, select System > Firmware.
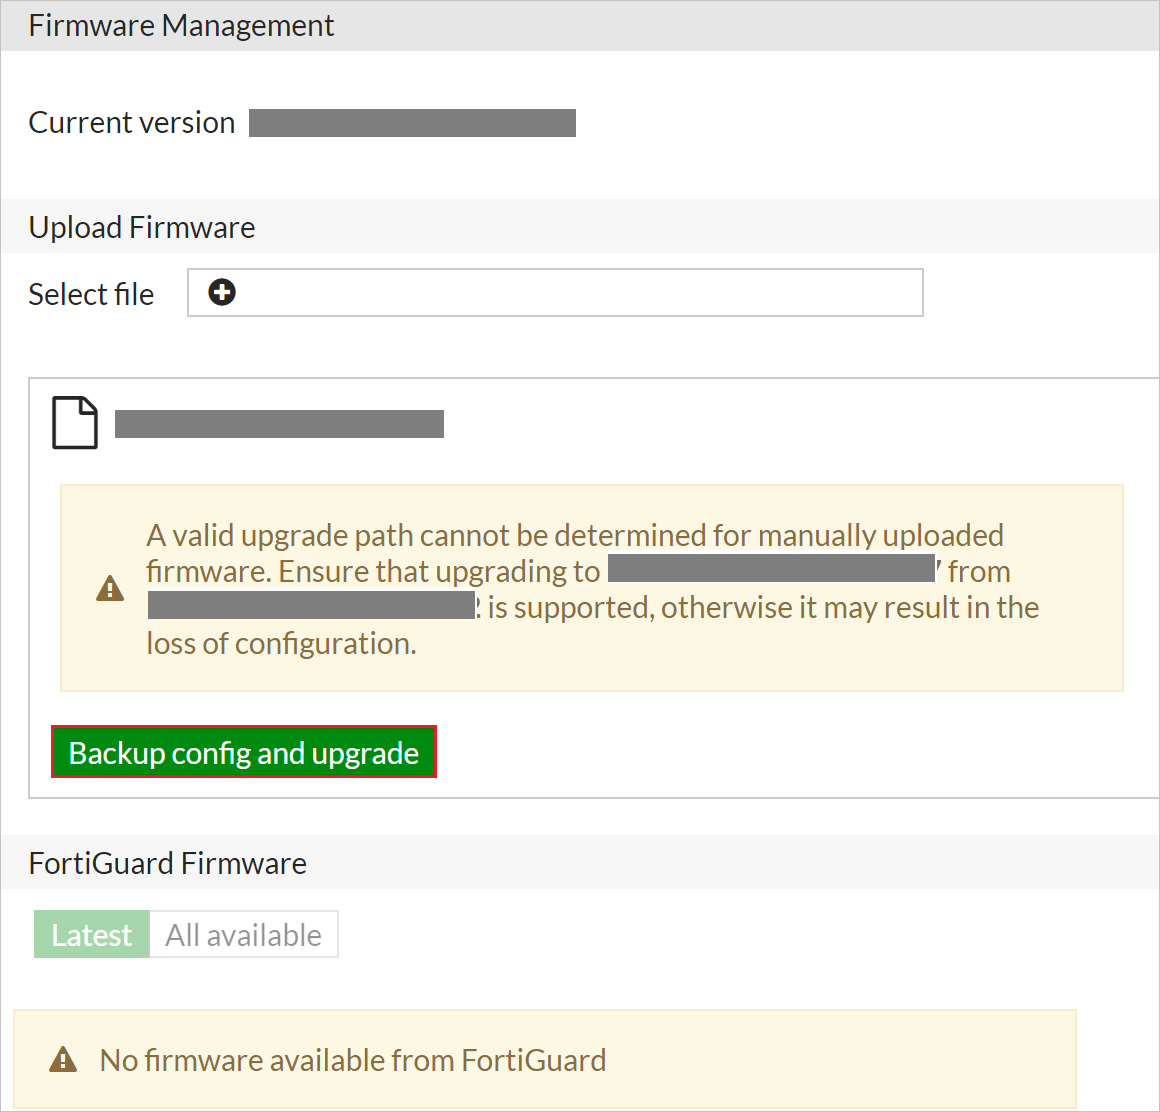
In Firmware Management, select Browse, and select the firmware file downloaded earlier.
Ignore the warning and select Backup config and upgrade.
Select Continue.
When you're prompted to save the FortiGate configuration (as a .conf file), select Save.
Wait for the firmware to upload and to be applied. Wait for the FortiGate VM to reboot.
After the FortiGate VM reboots, sign in again with the administrator credentials.
When you're prompted to set up the dashboard, select Later.
When the tutorial video begins, select OK.
Change the Management Port to TCP 8443
Go to
https://<address>. Here,<address>is the FQDN or the public IP address assigned to the FortiGate VM.Continue past any certificate errors.
Sign in by using the administrator credentials provided during the FortiGate VM deployment.
In the left menu, select System.
Under Administration Settings, change the HTTPS port to 8443, and select Apply.
After the change applies, the browser attempts to reload the administration page, but it fails. From now on, the administration page address is
https://<address>:8443.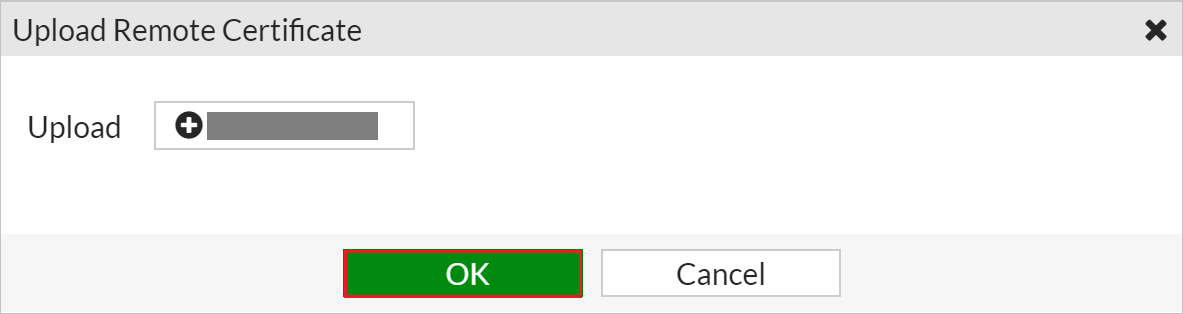
Upload the Microsoft Entra SAML Signing Certificate
Go to
https://<address>:8443. Here,<address>is the FQDN or the public IP address assigned to the FortiGate VM.Continue past any certificate errors.
Sign in by using the administrator credentials provided during the FortiGate VM deployment.
In the left menu, select System > Certificates.
Select Import > Remote Certificate.
Browse to the certificate downloaded from the FortiGate custom app deployment in the Azure tenant. Select it, and select OK.
Upload and configure a custom SSL certificate
You might want to configure the FortiGate VM with your own SSL certificate that supports the FQDN you're using. If you have access to an SSL certificate packaged with the private key in PFX format, it can be used for this purpose.
Go to
https://<address>:8443. Here,<address>is the FQDN or the public IP address assigned to the FortiGate VM.Continue past any certificate errors.
Sign in by using the administrator credentials provided during the FortiGate VM deployment.
In the left menu, select System > Certificates.
Select Import > Local Certificate > PKCS #12 Certificate.
Browse to the .PFX file that contains the SSL certificate and the private key.
Provide the .PFX password, and a meaningful name for the certificate. Then select OK.
In the left menu, select System > Settings.
Under Administration Settings, expand the list next to HTTPS server certificate, and select the SSL certificate imported earlier.
Select Apply.
Close the browser window and go to
https://<address>:8443.Sign in with the FortiGate administrator credentials. You should now see the correct SSL certificate in use.
Configure authentication timeout
Go to the Azure portal, and open the settings for the FortiGate VM.
In the left menu, select Serial Console.
Sign in at the Serial Console with the FortiGate VM administrator credentials.
At the Serial Console, run the following commands:
config system global
set remoteauthtimeout 60
end
Ensure Network Interfaces are Obtaining IP Addresses
Go to
https://<address>:8443. Here,<address>is the FQDN or the public IP address assigned to the FortiGate VM.Sign in by using the administrator credentials provided during the FortiGate VM deployment.
In the menu on the left, select Networking.
Under Network, select Interfaces.
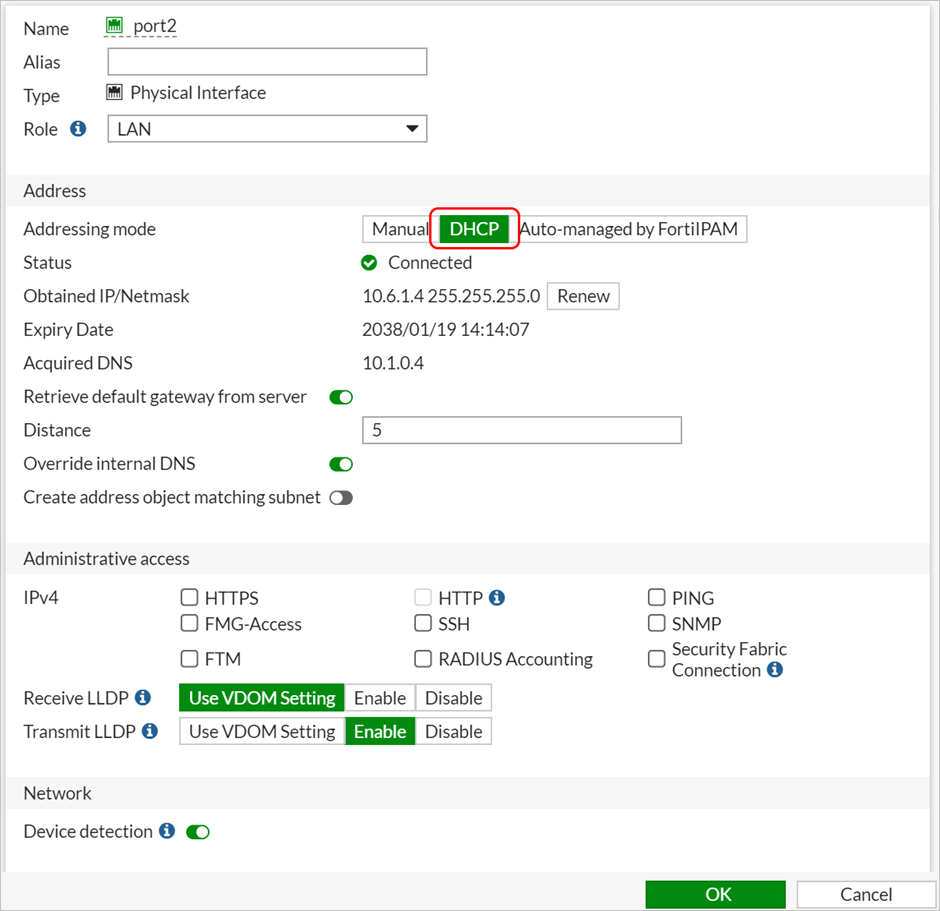
Examine port1 (external interface) and port2 (internal interface) to ensure they are obtaining an IP address from the correct Azure subnet. a. If either port is not obtaining an IP address from the subnet (via DHCP), right-click the port and select Edit. b. Next to Addressing Mode, ensure that DHCP is selected. c. Seelct OK.
Ensure FortiGate VM has Correct Route to On-Premises Corporate Resources
Multi-homed Azure VMs have all network interfaces on the same virtual network (but perhaps separate subnets). This often means that both network interfaces have a connection to the on-premises corporate resources being published via FortiGate. For this reason, it is necessary to create custom route entries that ensure traffic exits from the correct interface when requests for on-premises corporate resources are made.
Go to
https://<address>:8443. Here,<address>is the FQDN or the public IP address assigned to the FortiGate VM.Sign-in using the administrator credentials provided during the FortiGate VM deployment.
In the menu on the left, select Networking.
Under Network, select Static Routes.
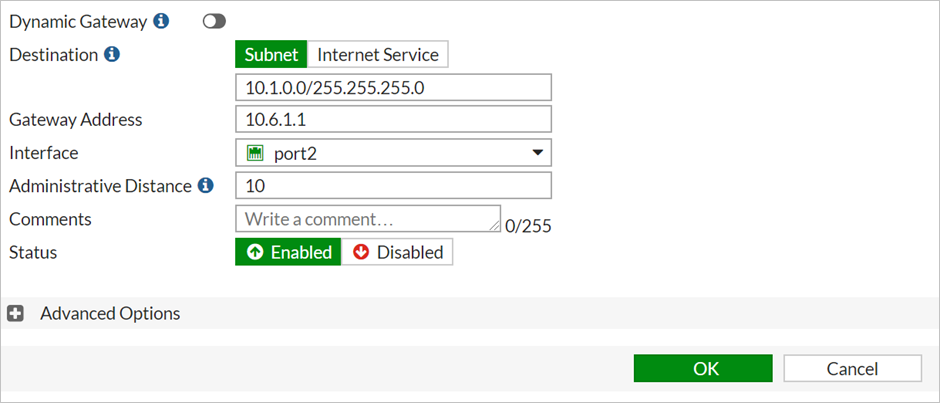
Select Create New.
Next to Destination select Subnet.
Under Subnet, specify the subnet information where the on-premises corporate resources reside (e.g. 10.1.0.0/255.255.255.0)
Next to Gateway Address specify the gateway on the Azure subnet where port2 is connected (e.g. this usually ends in 1 like 10.6.1.1)
Next to Interface select the internal network interface, port2
Select OK.
Configure FortiGate SSL VPN
Follow the steps outlined in Tutorial: Microsoft Entra single sign-on (SSO) integration with FortiGate SSL VPN
Feedback
Coming soon: Throughout 2024 we will be phasing out GitHub Issues as the feedback mechanism for content and replacing it with a new feedback system. For more information see: https://aka.ms/ContentUserFeedback.
Submit and view feedback for