Authorize request to Web PubSub resources with Microsoft Entra ID from managed identities
Azure Web PubSub Service supports Microsoft Entra ID for authorizing requests from managed identities.
This article shows how to configure your Web PubSub resource and codes to authorize the request to a Web PubSub resource from a managed identity.
Configure managed identities
The first step is to configure managed identities.
This is an example for configuring System-assigned managed identity on a Virtual Machine using the Azure portal.
- Open Azure portal, Search for and select a Virtual Machine.
- Under Settings section, select Identity.
- On the System assigned tab, toggle the Status to On.
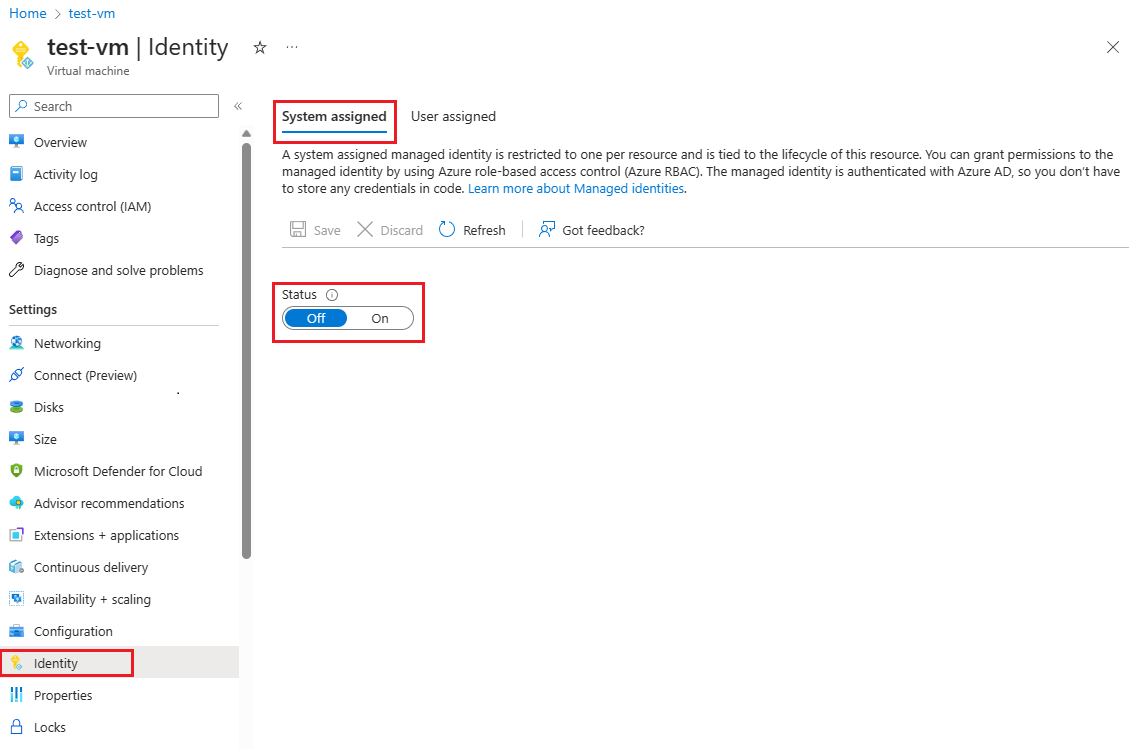
- Click the Save button to confirm the change.
How to create user-assigned managed identities
How to configure managed identities on other platforms
- Configure managed identities for Azure resources on a VM using the Azure portal
- Configure managed identities for Azure resources on an Azure VM using PowerShell
- Configure managed identities for Azure resources on an Azure VM using Azure CLI
- Configure managed identities for Azure resources on an Azure VM using templates
- Configure a VM with managed identities for Azure resources using an Azure SDK
How to configure managed identities for App service and Azure Functions
Add role assignments on Azure portal
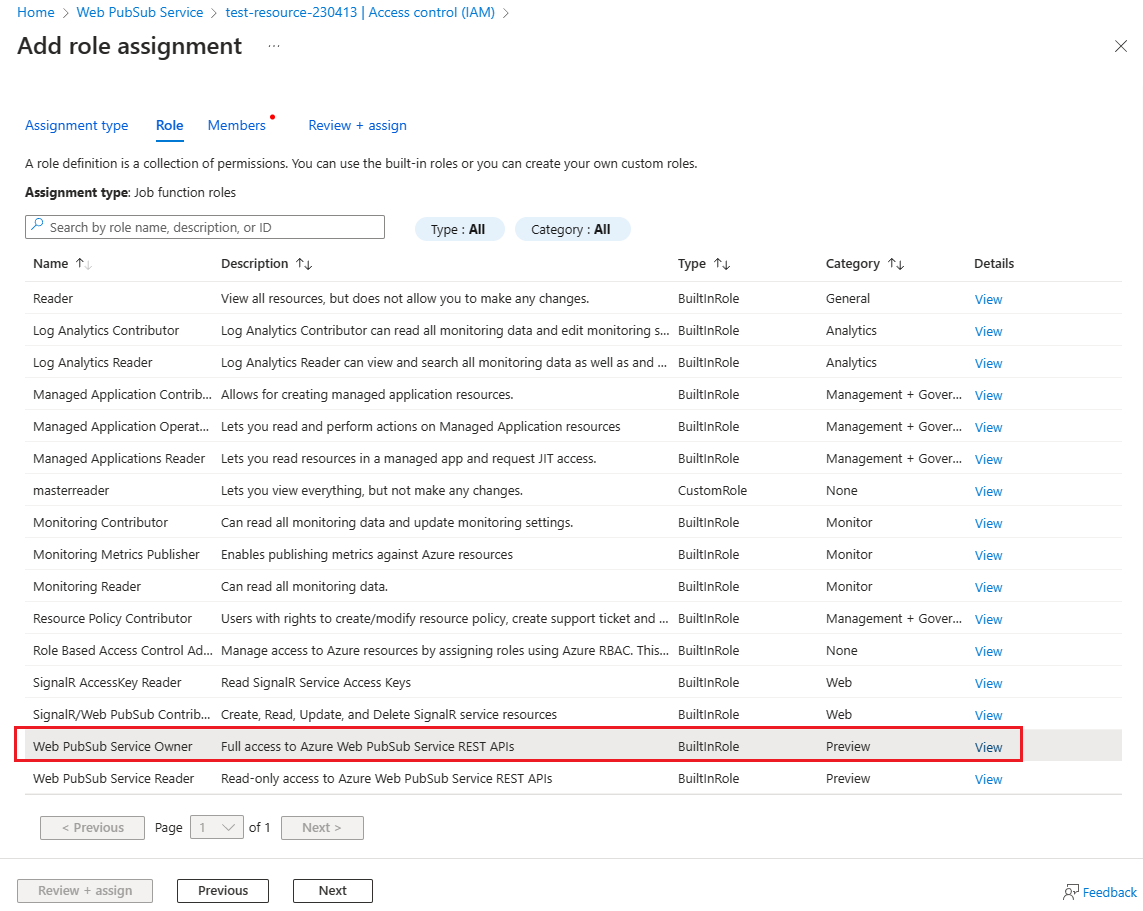
This sample shows how to assign a Web PubSub Service Owner role to a system-assigned identity over a Web PubSub resource.
Note
A role can be assigned to any scope, including management group, subscription, resource group or a single resource. To learn more about scope, see Understand scope for Azure RBAC
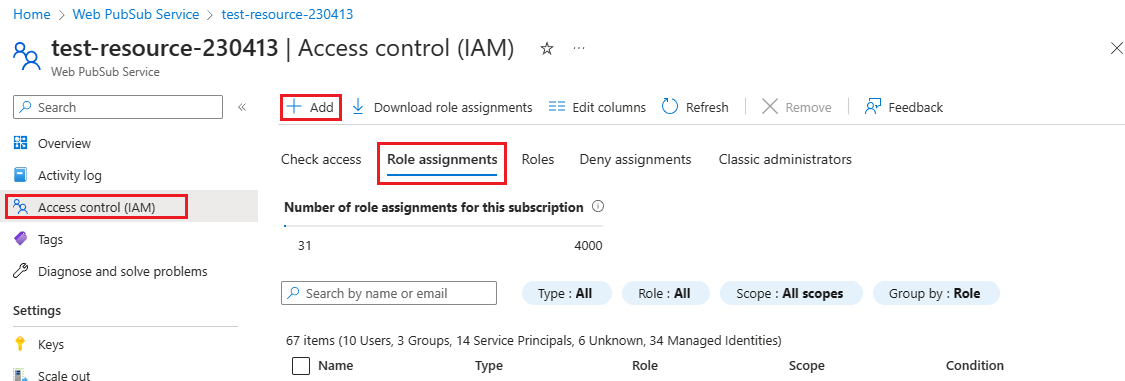
Open Azure portal, navigate to your Web PubSub resource.
Click Access Control (IAM) to display access control settings for the Azure Web PubSub.
The following shows an example of the Access control (IAM) page for a resource group.
Click the Role assignments tab to view the role assignments at this scope.
The following screenshot shows an example of the Access control (IAM) page for a Web PubSub resource.
Click Add > Add role assignment.
On the Roles tab, select
Web PubSub Service Owner.Click Next.
On the Members tab, under Assign access to section, select Managed identity.
Click Select Members.
In the Select managed identities pane, select System-assigned managed identity > Virtual machine
Search for and select the virtual machine that you would like to assign the role to.
Click Select to confirm the selection.
Click Next.
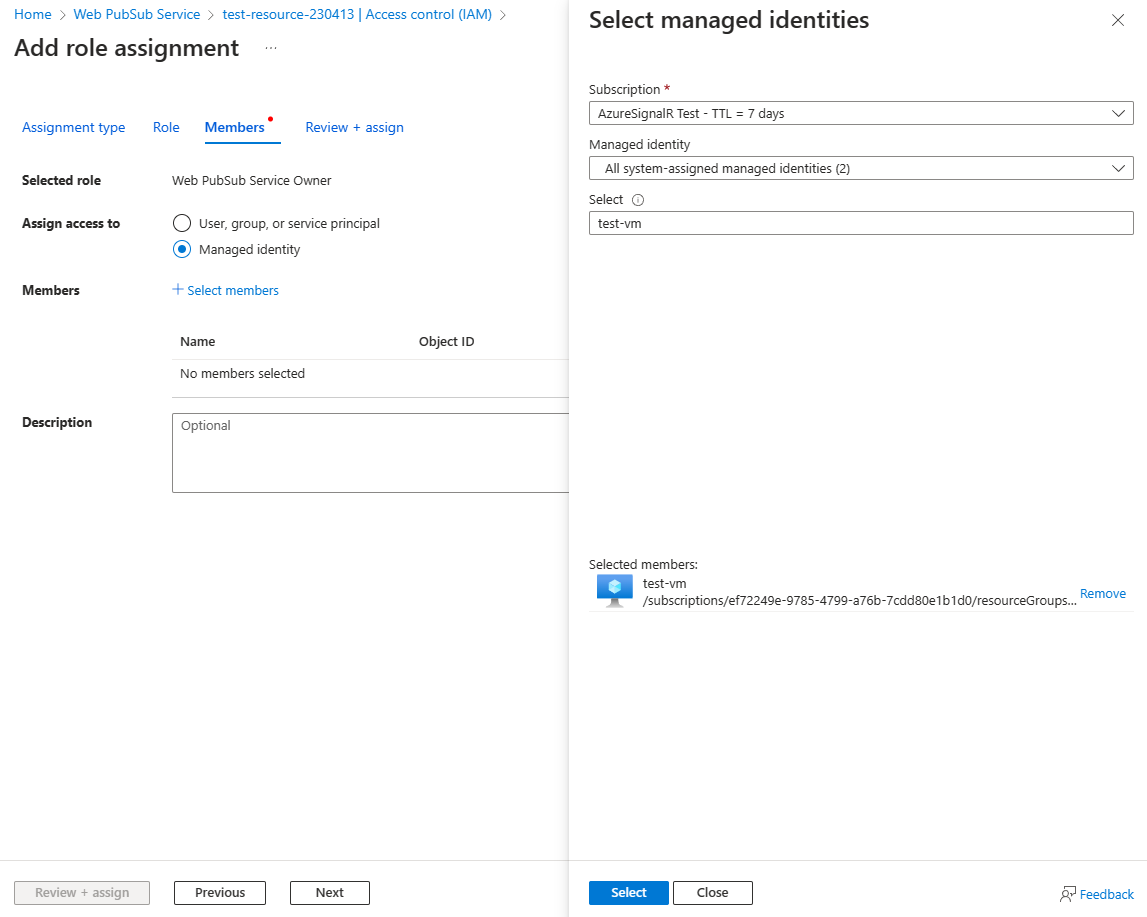
Click Review + assign to confirm the change.
Important
Azure role assignments may take up to 30 minutes to propagate. To learn more about how to assign and manage Azure role assignments, see these articles:
- Assign Azure roles using the Azure portal
- Assign Azure roles using the REST API
- Assign Azure roles using Azure PowerShell
- Assign Azure roles using Azure CLI
- Assign Azure roles using Azure Resource Manager templates
Sample codes
We officially support 4 programming languages:
Next steps
See the following related articles:
Feedback
Coming soon: Throughout 2024 we will be phasing out GitHub Issues as the feedback mechanism for content and replacing it with a new feedback system. For more information see: https://aka.ms/ContentUserFeedback.
Submit and view feedback for