Create and manage Backup vaults
This article describes how to create Backup vaults and manage them.
A Backup vault is a storage entity in Azure that houses backup data for certain newer workloads that Azure Backup supports. You can use Backup vaults to hold backup data for various Azure services, such Azure Database for PostgreSQL servers and newer workloads that Azure Backup will support. Backup vaults make it easy to organize your backup data, while minimizing management overhead. Backup vaults are based on the Azure Resource Manager model of Azure, which provides features such as:
Enhanced capabilities to help secure backup data: With Backup vaults, Azure Backup provides security capabilities to protect cloud backups. The security features ensure you can secure your backups, and safely recover data, even if production and backup servers are compromised. Learn more
Azure role-based access control (Azure RBAC): Azure RBAC provides fine-grained access management control in Azure. Azure provides various built-in roles, and Azure Backup has three built-in roles to manage recovery points. Backup vaults are compatible with Azure RBAC, which restricts backup and restore access to the defined set of user roles. Learn more
Create a Backup vault
A Backup vault is a management entity that stores recovery points created over time and provides an interface to perform backup related operations. These include taking on-demand backups, performing restores, and creating backup policies.
To create a Backup vault, follow these steps.
Sign in to Azure
Sign in to the Azure portal.
Create Backup vault
Type Backup vaults in the search box.
Under Services, select Backup vaults.
On the Backup vaults page, select Add.
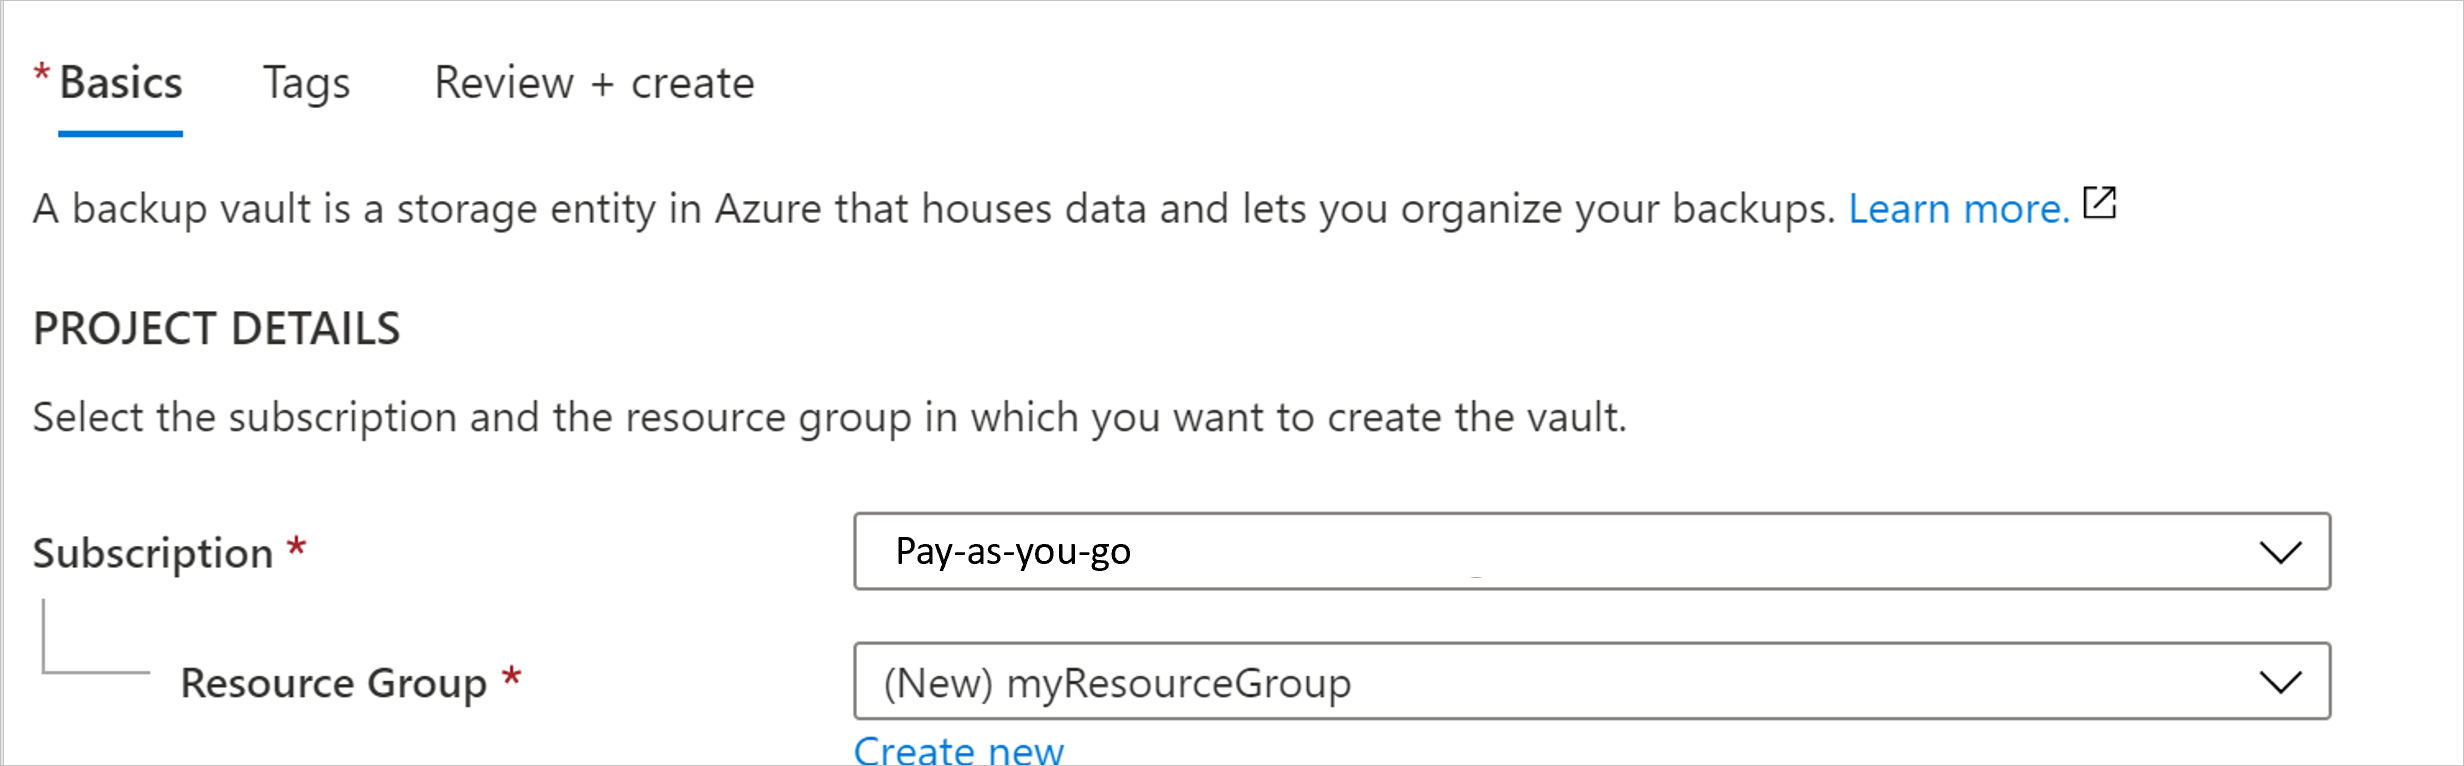
On the Basics tab, under Project details, make sure the correct subscription is selected and then choose Create new resource group. Type myResourceGroup for the name.
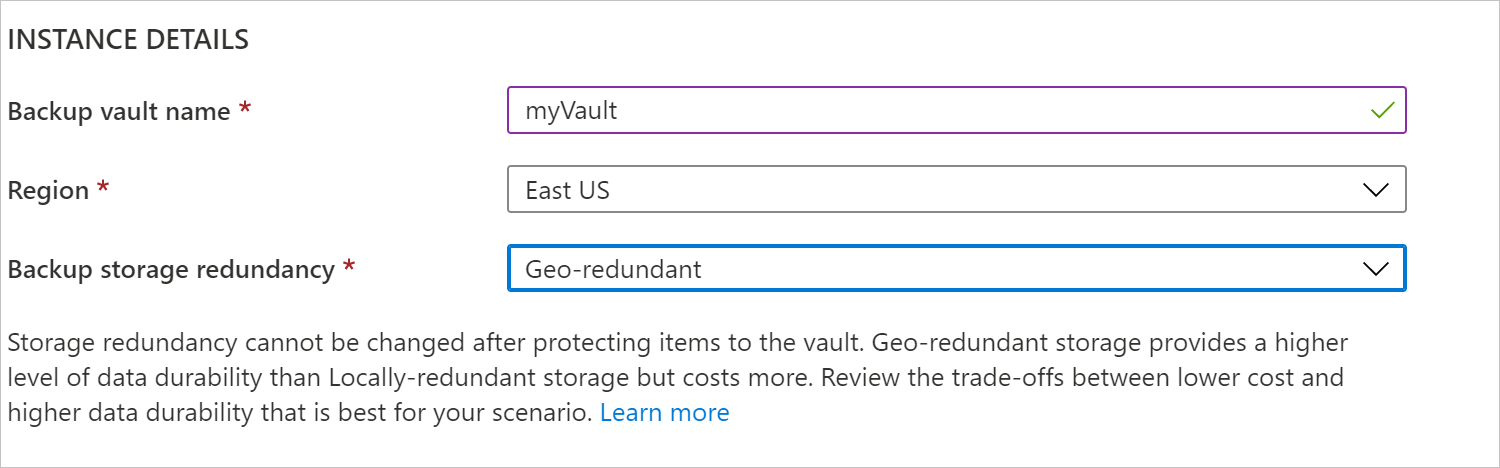
Under Instance details, type myVault for the Backup vault name and choose your region of choice, in this case East US for your Region.
Now choose your Storage redundancy. Storage redundancy cannot be changed after protecting items to the vault.
We recommend that if you're using Azure as a primary backup storage endpoint, continue to use the default Geo-redundant setting.
If you don't use Azure as a primary backup storage endpoint, choose Locally redundant, which reduces the Azure storage costs. Learn more about geo and local redundancy.
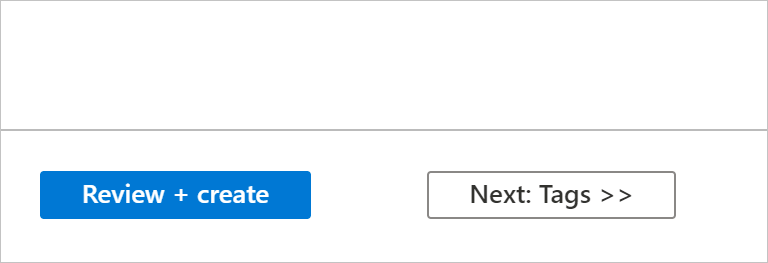
Select the Review + create button at the bottom of the page.
Delete a Backup vault
This section describes how to delete a Backup vault. It contains instructions for removing dependencies and then deleting a vault.
Before you start
You can't delete a Backup vault with any of the following dependencies:
- You can't delete a vault that contains protected data sources (for example, Azure database for PostgreSQL servers).
- You can't delete a vault that contains backup data.
If you try to delete the vault without removing the dependencies, you'll encounter the following error messages:
Cannot delete the Backup vault as there are existing backup instances or backup policies in the vault. Delete all backup instances and backup policies that are present in the vault and then try deleting the vault.
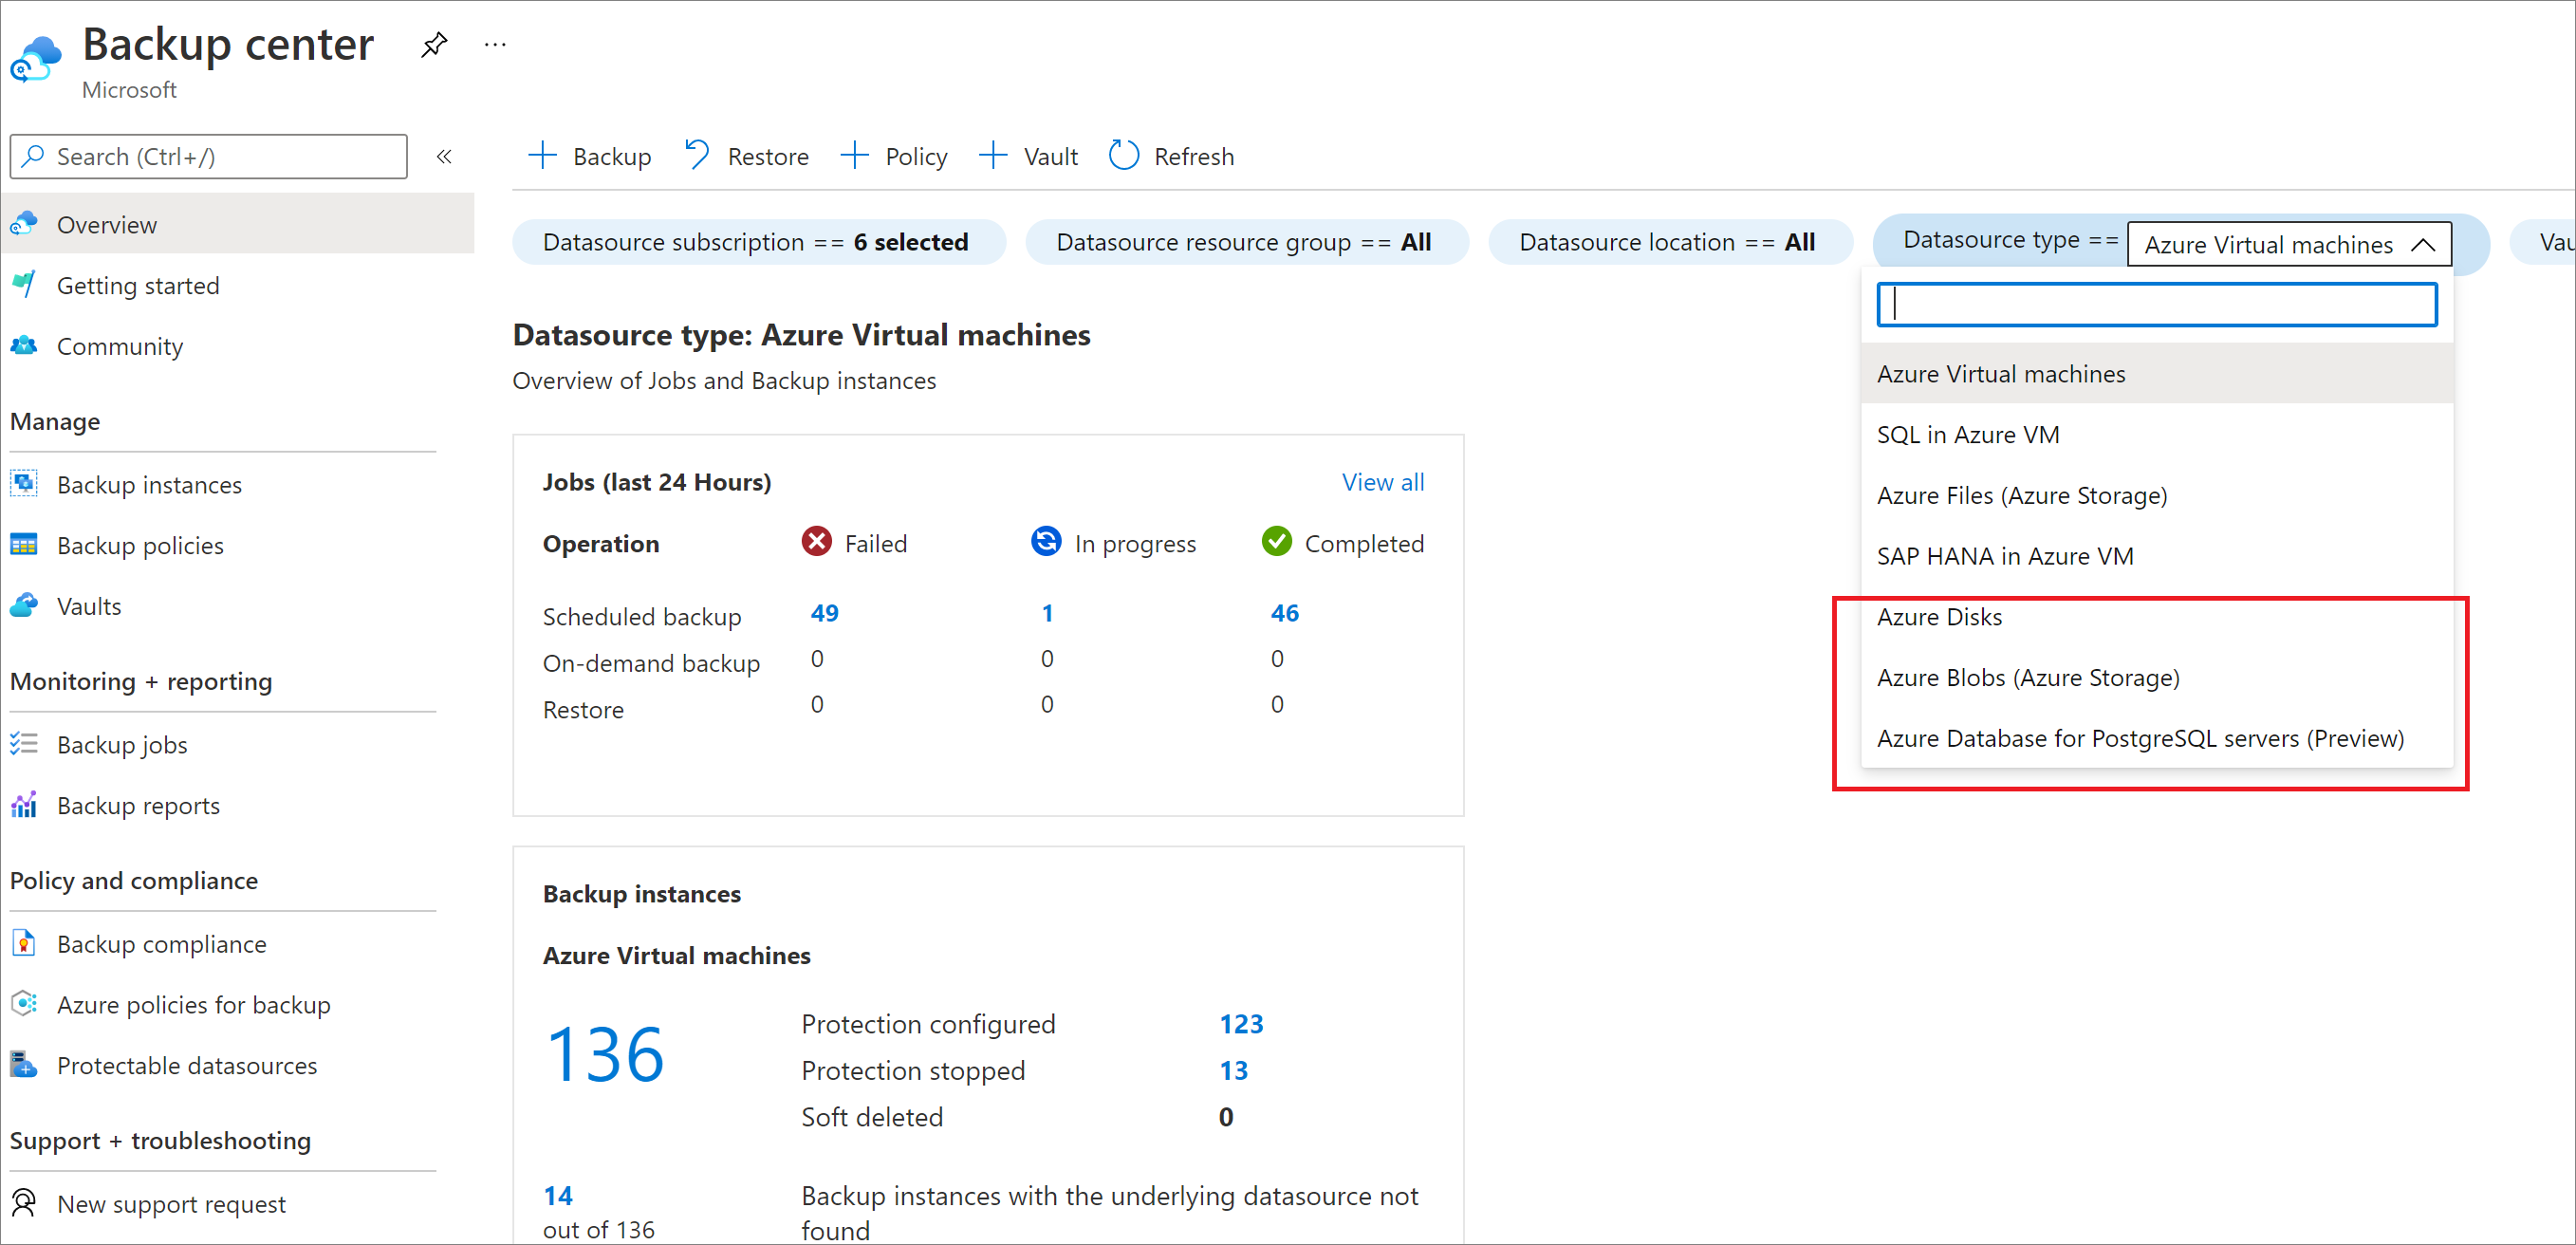
Ensure that you cycle through the Datasource type filter options in Backup center to not miss any existing Backup Instance or policy that needs to be removed, before being able to delete the Backup Vault.
Proper way to delete a vault
Warning
The following operation is destructive and can't be undone. All backup data and backup items associated with the protected server will be permanently deleted. Proceed with caution.
To properly delete a vault, you must follow the steps in this order:
- Verify if there are any protected items:
- Go to Backup Instances in the left navigation bar. All items listed here must be deleted first.
After you've completed these steps, you can continue to delete the vault.
Delete the Backup vault
When there are no more items in the vault, select Delete on the vault dashboard. You'll see a confirmation text asking if you want to delete the vault.

- Select Yes to verify that you want to delete the vault. The vault is deleted. The portal returns to the New service menu.
Monitor and manage the Backup vault
This section explains how to use the Backup vault Overview dashboard to monitor and manage your Backup vaults. The overview pane contains two tiles: Jobs and Instances.
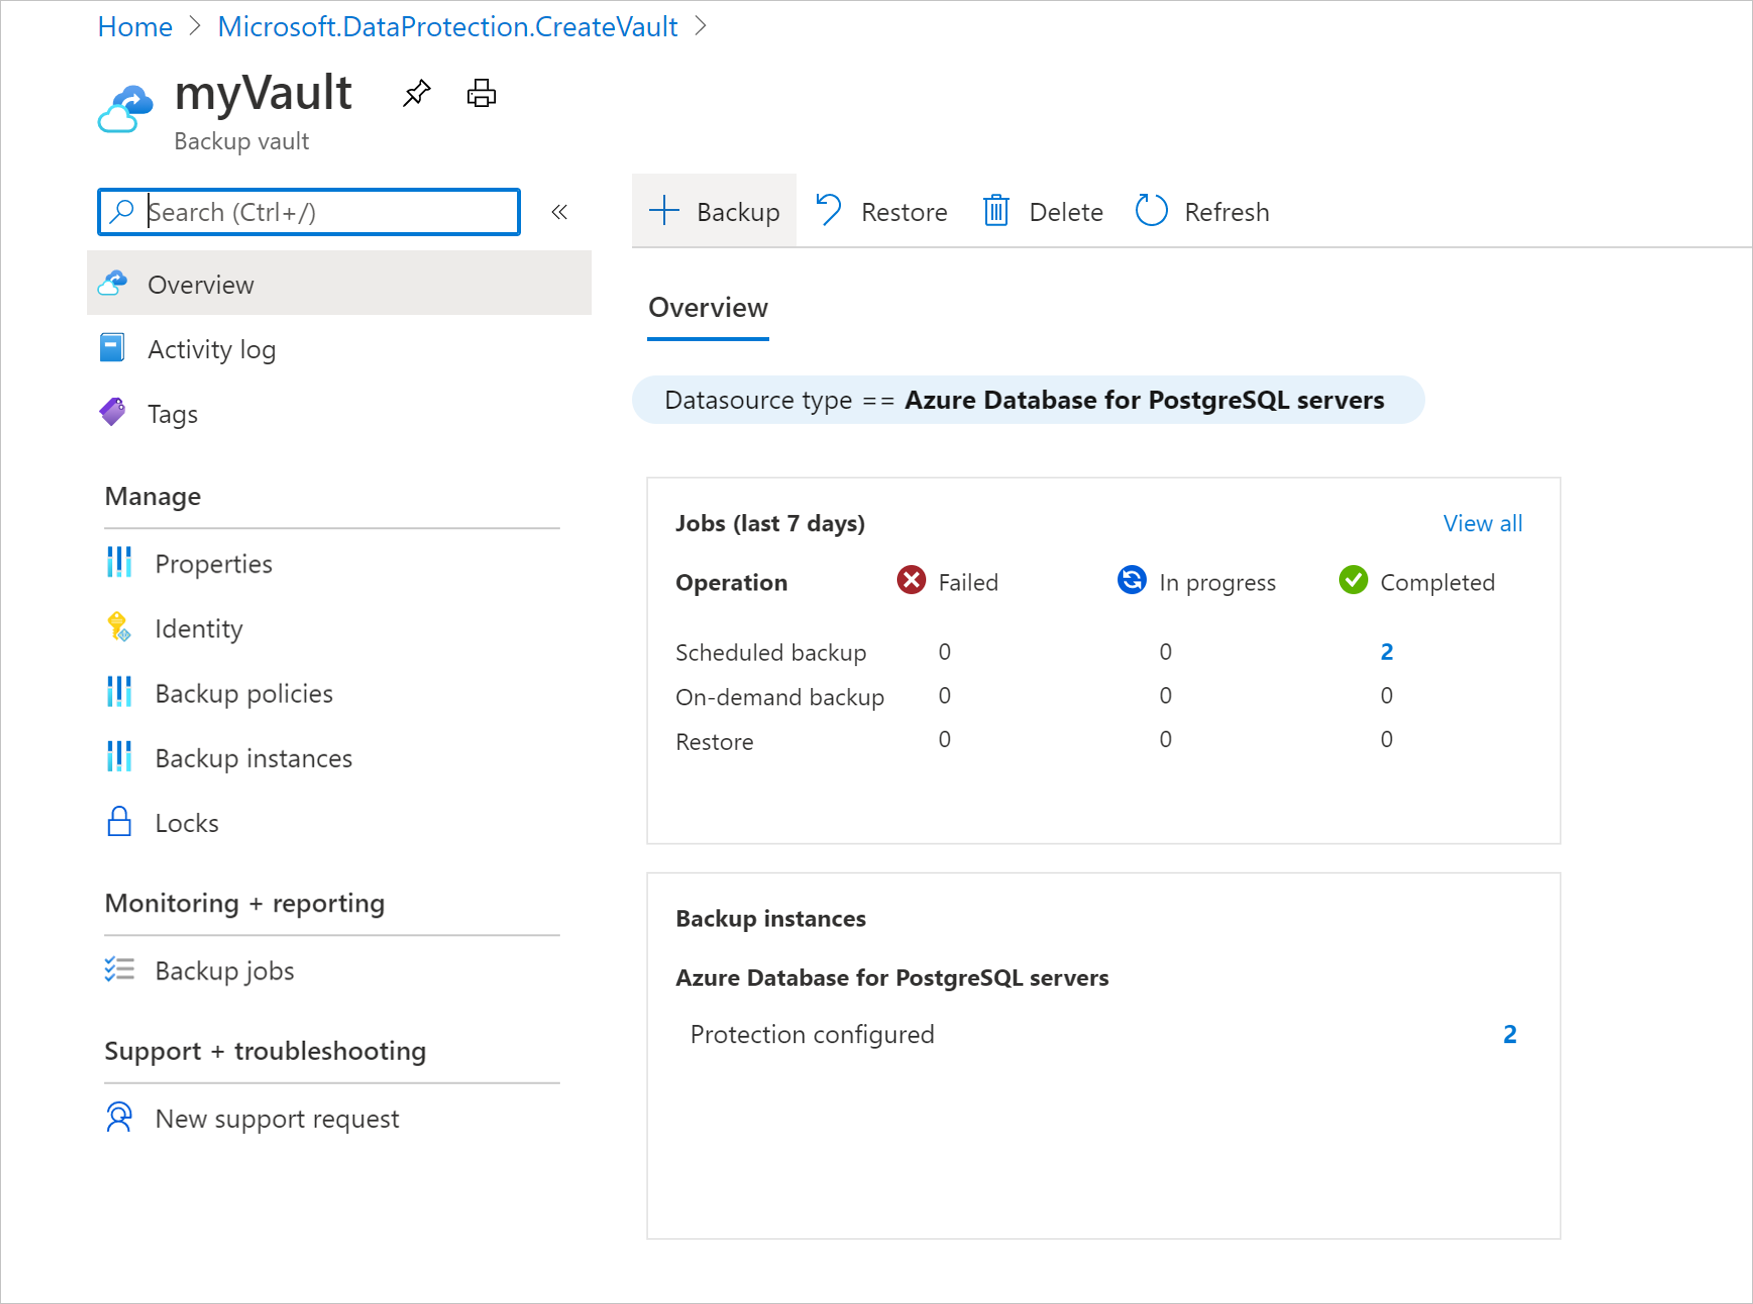
Manage Backup instances
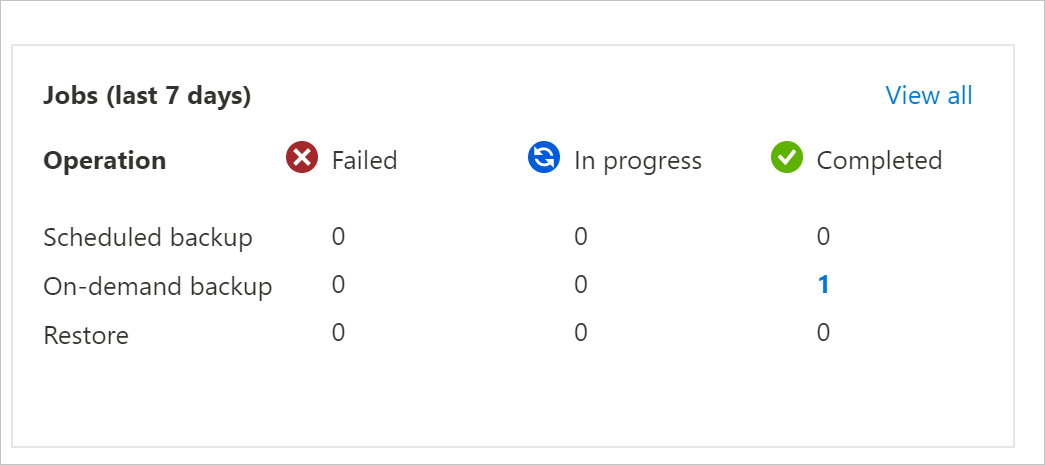
In the Jobs tile, you get a summarized view of all backup and restore related jobs in your Backup vault. Selecting any of the numbers in this tile allows you to view more information on jobs for a particular datasource type, operation type, and status.

Manage Backup jobs
In the Backup Instances tile, you get a summarized view of all backup instances in your Backup vault. Selecting any of the numbers in this tile allows you to view more information on backup instances for a particular datasource type and protection status.
Move a Backup vault across Azure subscriptions/resource groups
This section explains how to move a Backup vault (configured for Azure Backup) across Azure subscriptions and resource groups using the Azure portal.
Note
You can also move Backup vaults to a different resource group or subscription using PowerShell and CLI.
Supported regions
The vault move across subscriptions and resource groups is supported in all public and national regions.
Use Azure portal to move Backup vault to a different resource group
Sign in to the Azure portal.
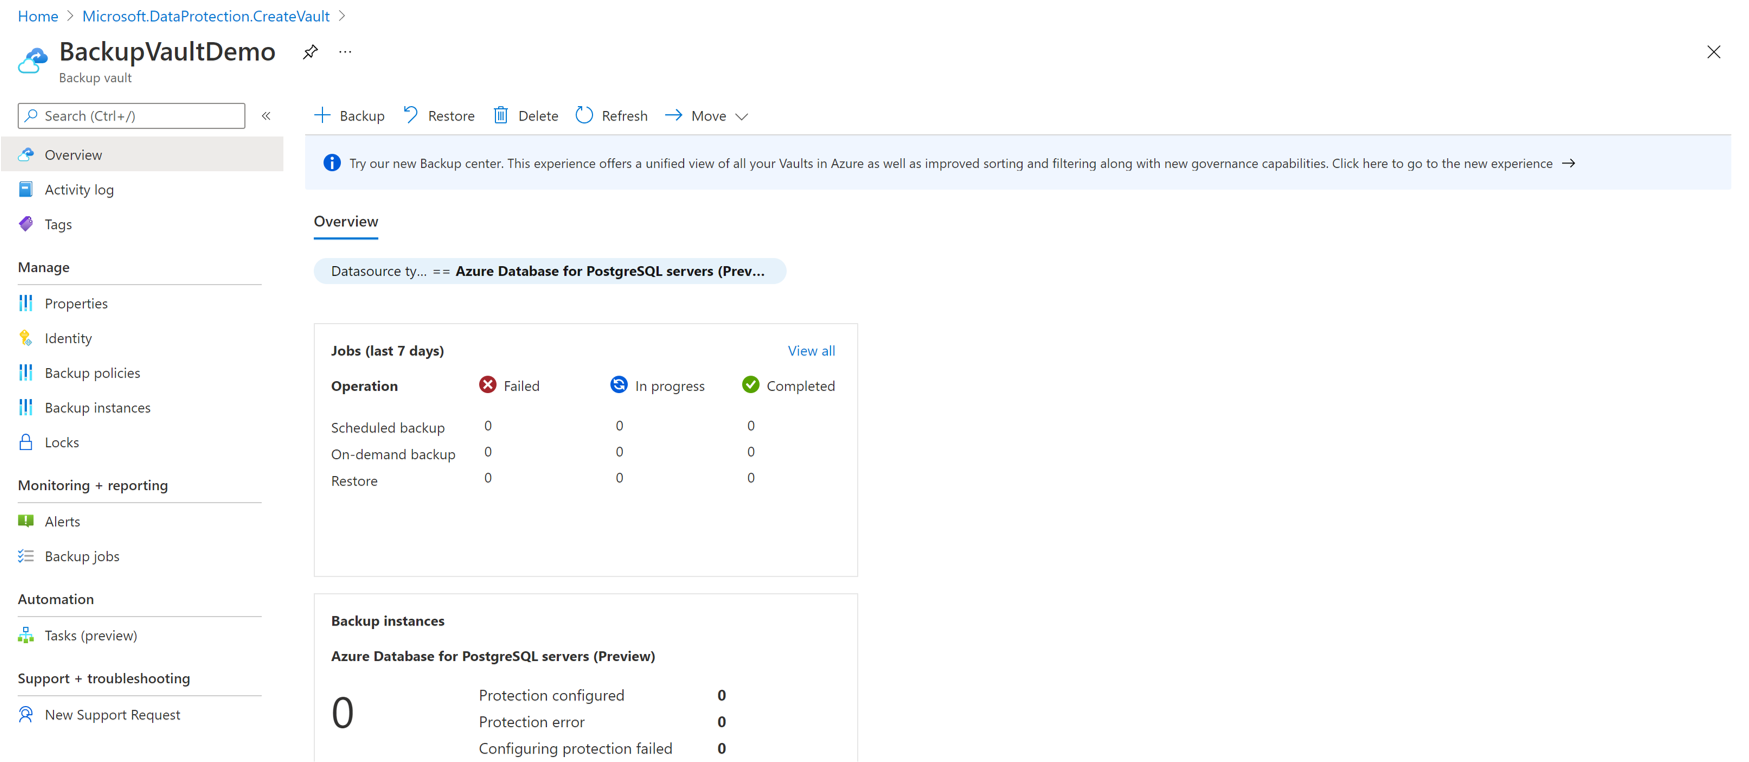
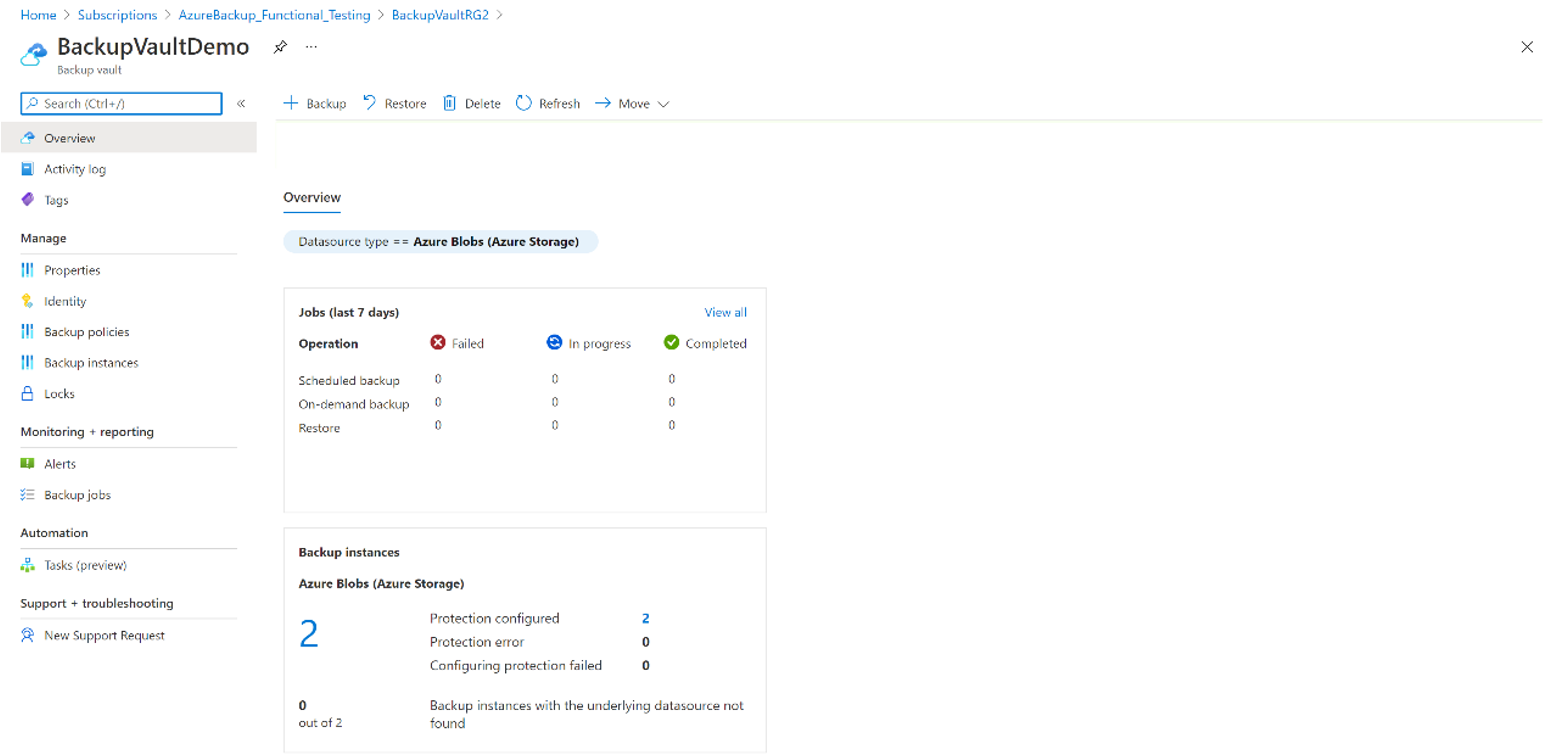
Open the list of Backup vaults and select the vault you want to move.
The vault dashboard displays the vault details.
In the vault Overview menu, click Move, and then select Move to another resource group.
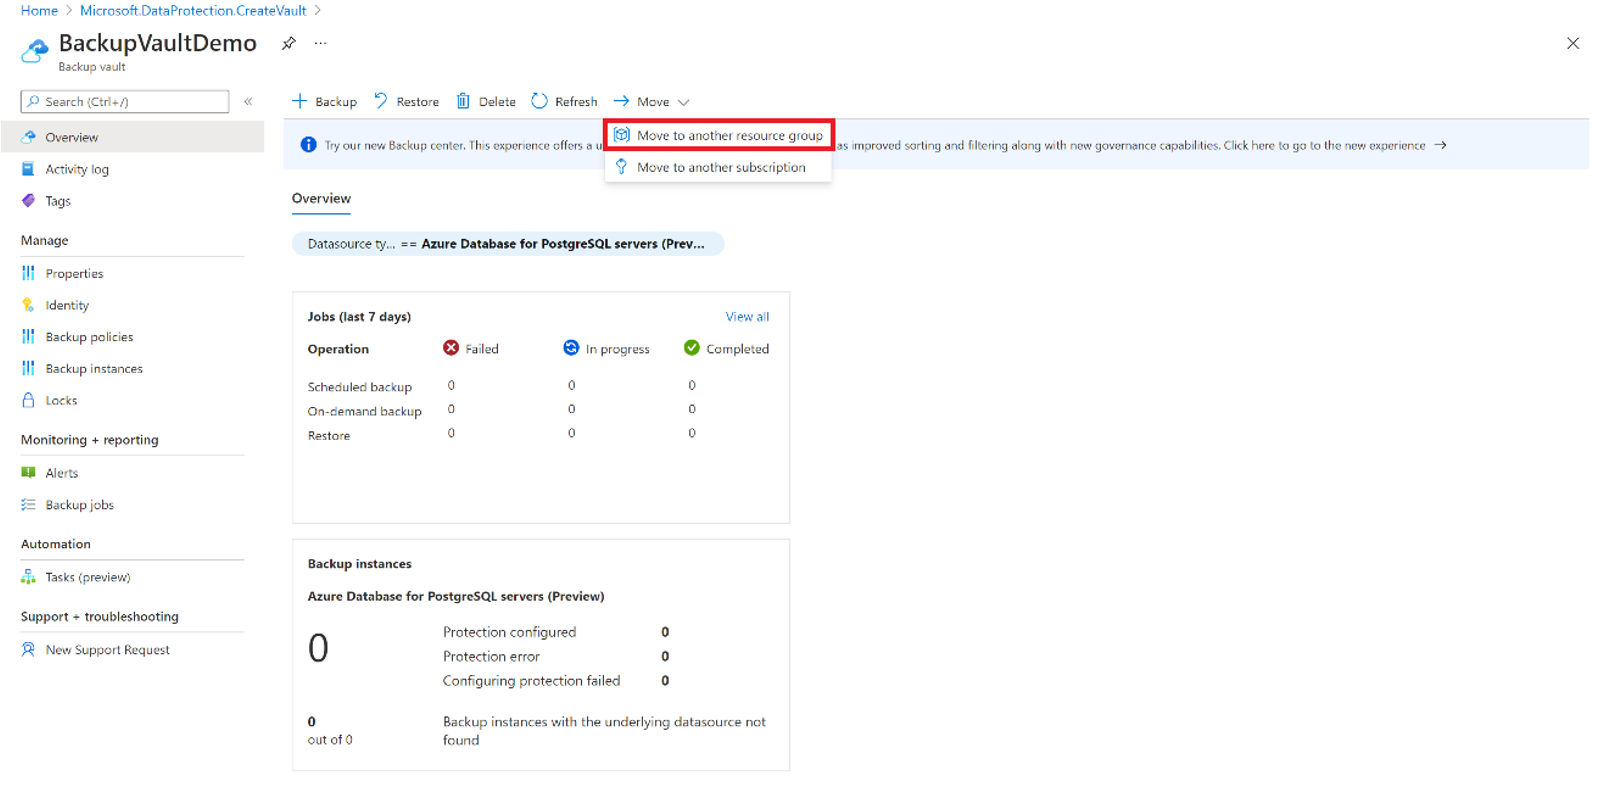
Note
Only the admin subscription has the required permissions to move a vault.
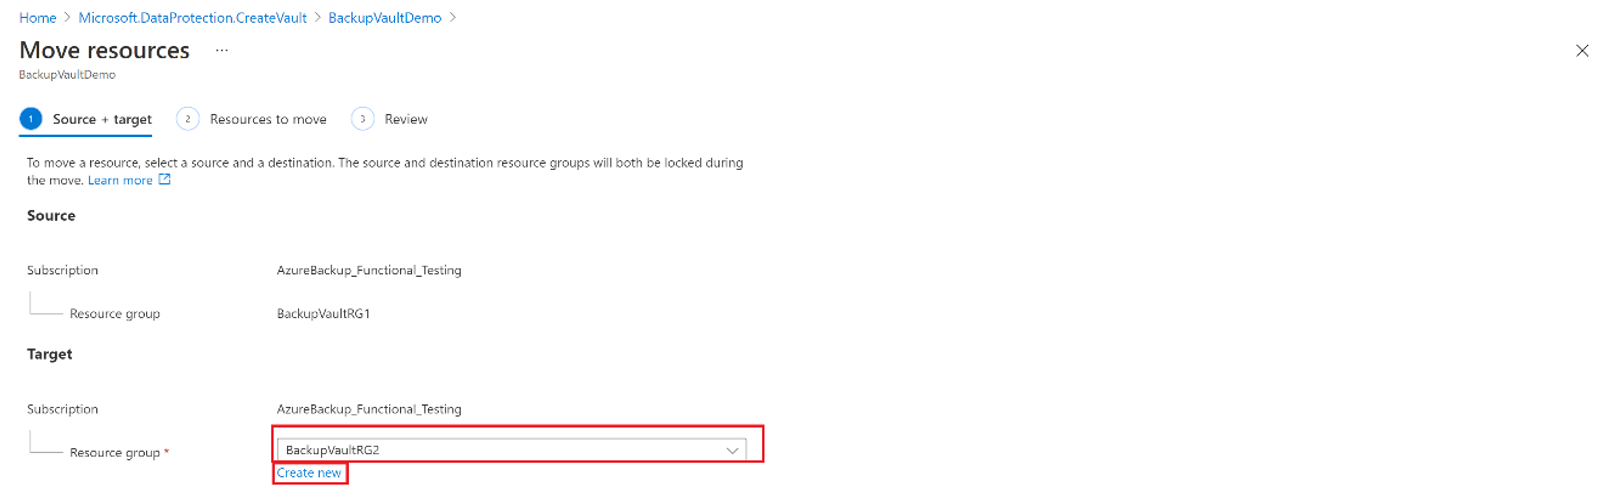
In the Resource group drop-down list, select an existing resource group or select Create new to create a new resource group.
The subscription remains the same and gets auto populated.
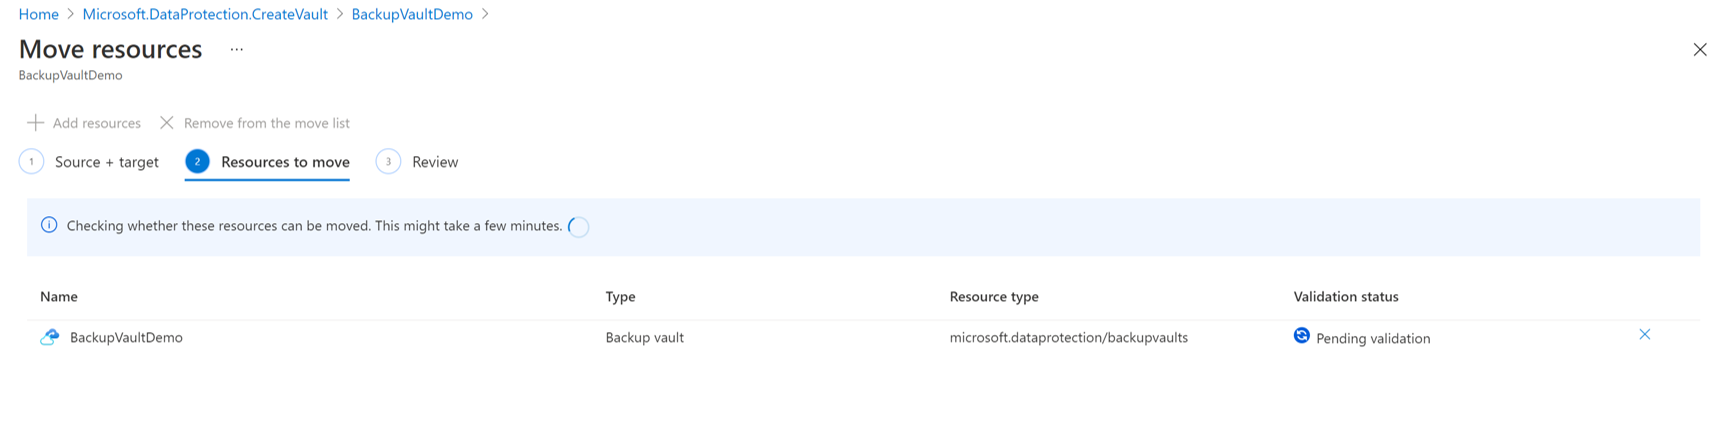
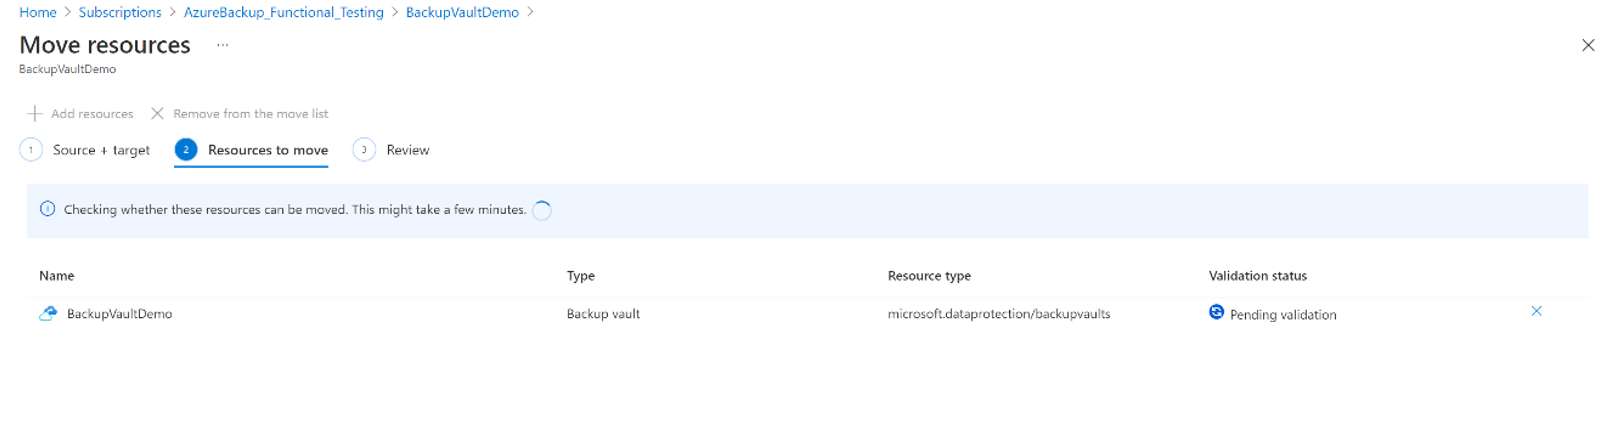
On the Resources to move tab, the Backup vault that needs to be moved will undergo validation. This process may take a few minutes. Wait till the validation is complete.
Select the checkbox I understand that tools and scripts associated with moved resources will not work until I update them to use new resource IDs to confirm, and then select Move.
Note
The resource path changes after moving vault across resource groups or subscriptions. Ensure that you update the tools and scripts with the new resource path after the move operation completes.


Wait till the move operation is complete to perform any other operations on the vault. Any operations performed on the Backup vault will fail if performed while move is in progress. When the process is complete, the Backup vault should appear in the target resource group.
Important
If you encounter any error while moving the vault, refer to the Error codes and troubleshooting section.
Use Azure portal to move Backup vault to a different subscription
Sign in to the Azure portal.
Open the list of Backup vaults and select the vault you want to move.
The vault dashboard displays the vault details.
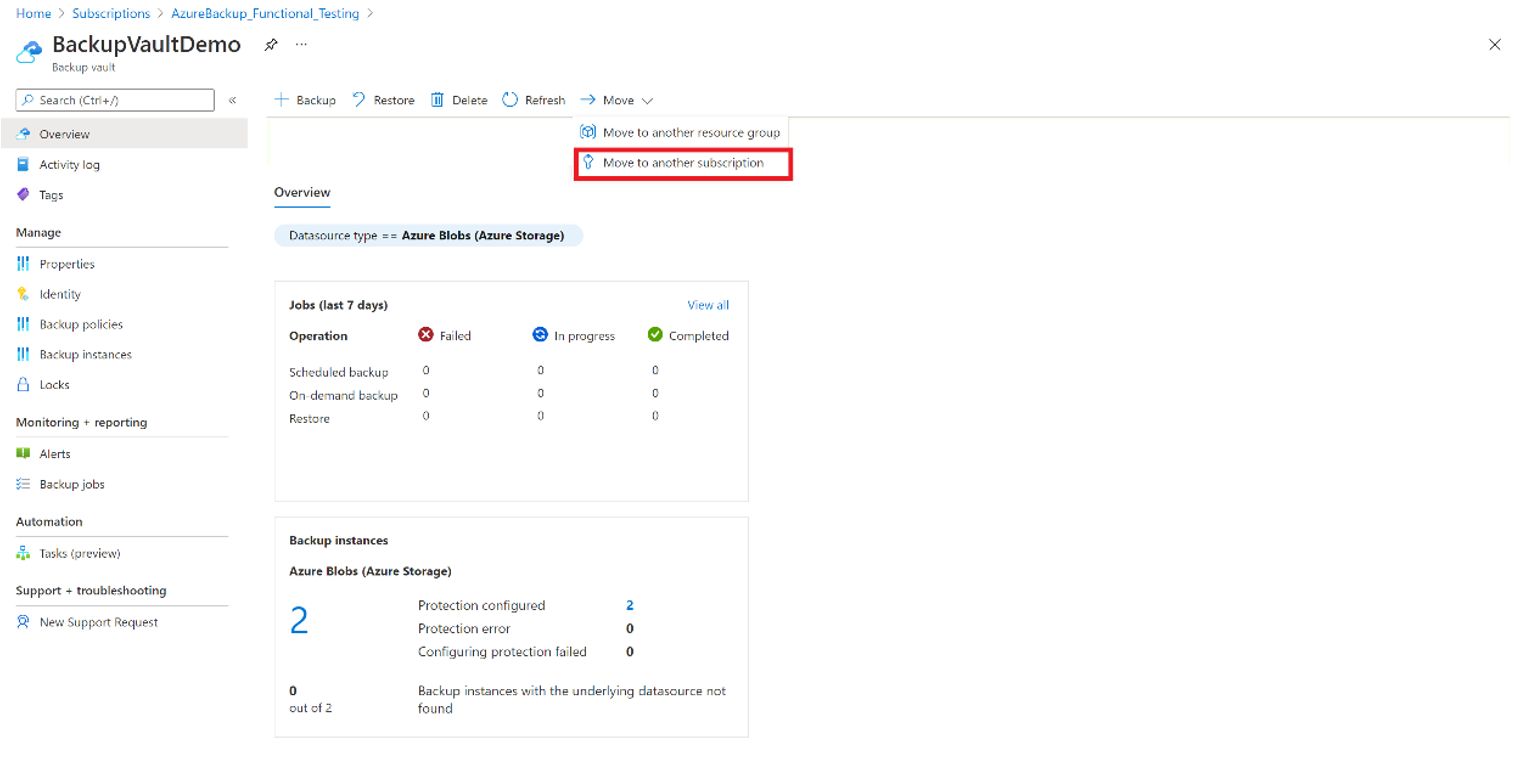
In the vault Overview menu, click Move, and then select Move to another subscription.
Note
Only the admin subscription has the required permissions to move a vault.
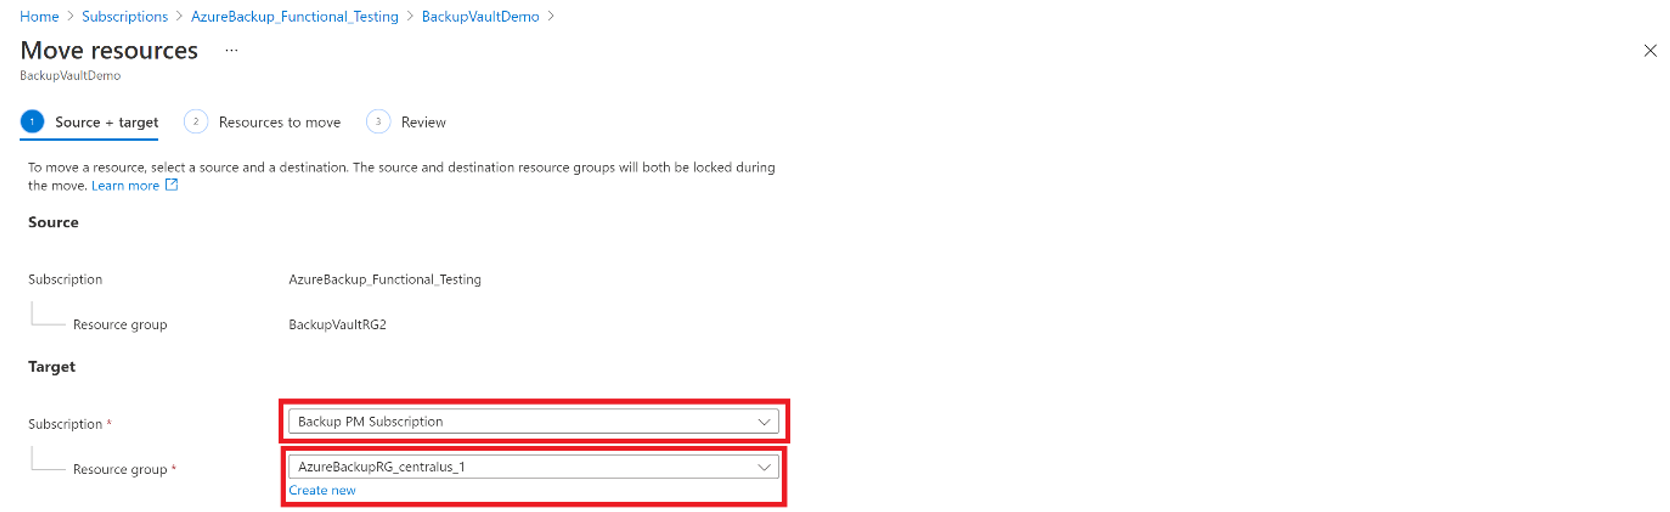
In the Subscription drop-down list, select an existing subscription.
For moving vaults across subscriptions, the target subscription must reside in the same tenant as the source subscription. To move a vault to a different tenant, see Transfer subscription to a different directory.
In the Resource group drop-down list, select an existing resource group or select Create new to create a new resource group.
On the Resources to move tab, the Backup vault that needs to be moved will undergo validation. This process may take a few minutes. Wait till the validation is complete.
Select the checkbox I understand that tools and scripts associated with moved resources will not work until I update them to use new resource IDs to confirm, and then select Move.
Note
The resource path changes after moving vault across resource groups or subscriptions. Ensure that you update the tools and scripts with the new resource path after the move operation completes.


Wait till the move operation is complete to perform any other operations on the vault. Any operations performed on the Backup vault will fail if performed while move is in progress. When the process completes, the Backup vault should appear in the target Subscription and Resource group.
Important
If you encounter any error while moving the vault, refer to the Error codes and troubleshooting section.
Error codes and troubleshooting
Troubleshoot the following common issues you might encounter during Backup vault move:
BackupVaultMoveResourcesPartiallySucceeded
Cause: You may face this error when Backup vault move succeeds only partially.
Recommendation: The issue should get resolved automatically within 36 hours. If it persists, contact Microsoft Support.
BackupVaultMoveResourcesCriticalFailure
Cause: You may face this error when Backup vault move fails critically.
Recommendation: The issue should get resolved automatically within 36 hours. If it persists, contact Microsoft Support.
UserErrorBackupVaultResourceMoveInProgress
Cause: You may face this error if you try to perform any operations on the Backup vault while it’s being moved.
Recommendation: Wait till the move operation is complete, and then retry.
UserErrorBackupVaultResourceMoveNotAllowedForMultipleResources
Cause: You may face this error if you try to move multiple Backup vaults in a single attempt.
Recommendation: Ensure that only one Backup vault is selected for every move operation.
UserErrorBackupVaultResourceMoveNotAllowedUntilResourceProvisioned
Cause: You may face this error if the vault is not yet provisioned.
Recommendation: Retry the operation after some time.
BackupVaultResourceMoveIsNotEnabled
Cause: Resource move for Backup vault is currently not supported in the selected Azure region.
Recommendation: Ensure that you've selected one of the supported regions to move Backup vaults. See Supported regions.
UserErrorCrossTenantMSIMoveNotSupported
Cause: This error occurs if the subscription with which resource is associated has moved to a different Tenant, but the Managed Identity is still associated with the old Tenant.
Recommendation: Remove the Managed Identity from the existing Tenant; move the resource and add it again to the new one.
Perform Cross Region Restore using Azure portal
The Cross Region Restore option allows you to restore data in a secondary Azure paired region. To configure Cross Region Restore for the backup vault:
Sign in to Azure portal.
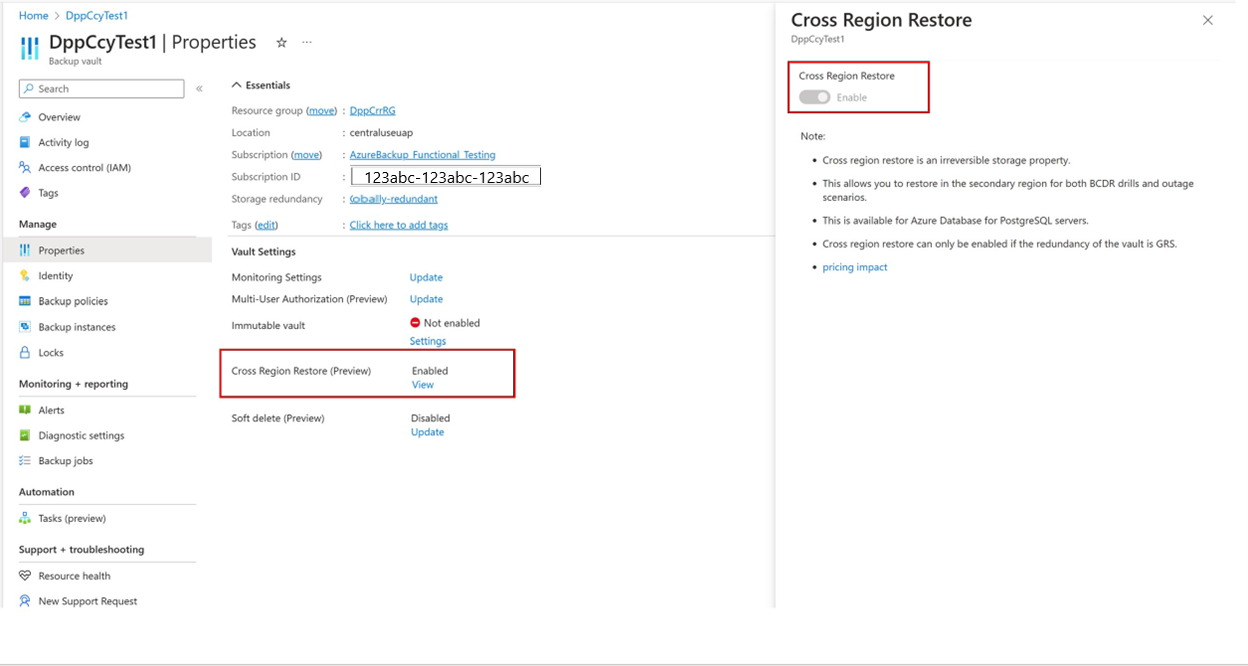
Create a new Backup vault or choose an existing Backup vault, and then enable Cross Region Restore by going to Properties > Cross Region Restore, and choose Enable.
Go to the Backup vault’s Overview pane, and then configure a backup for PostgreSQL database.
Once the backup is complete in the primary region, it can take up to 12 hours for the recovery point in the primary region to get replicated to the secondary region.
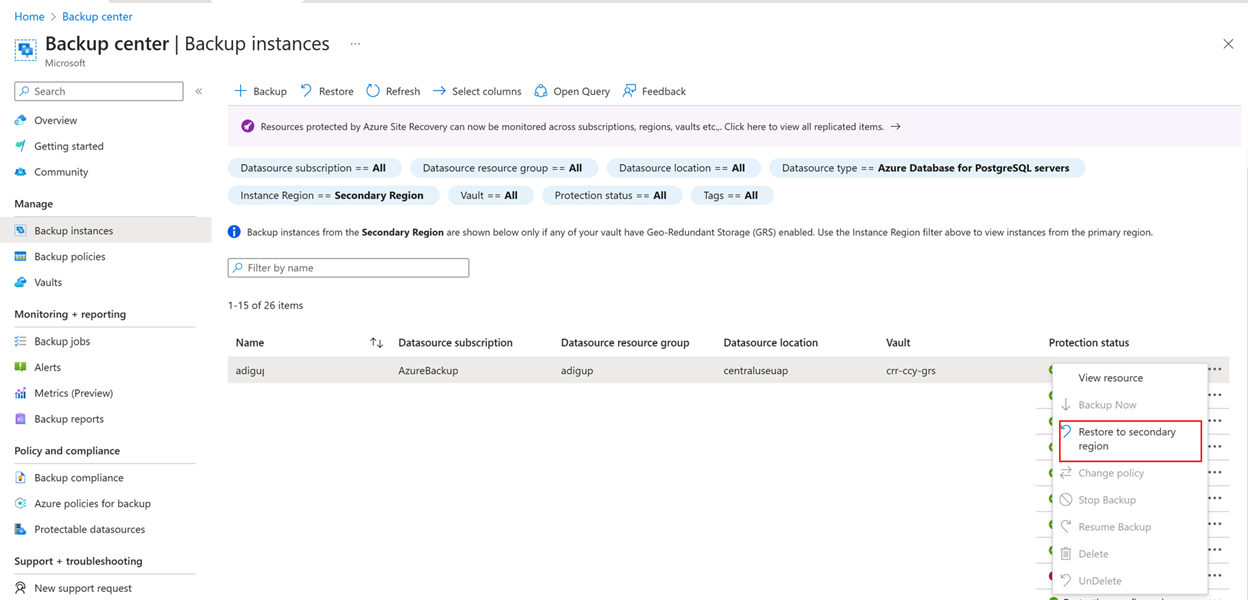
To check the availability of recovery point in the secondary region, go to the Backup center > Backup Instances > Filter to Azure Database for PostgreSQL servers, filter Instance Region as Secondary Region, and then select the required Backup Instance.
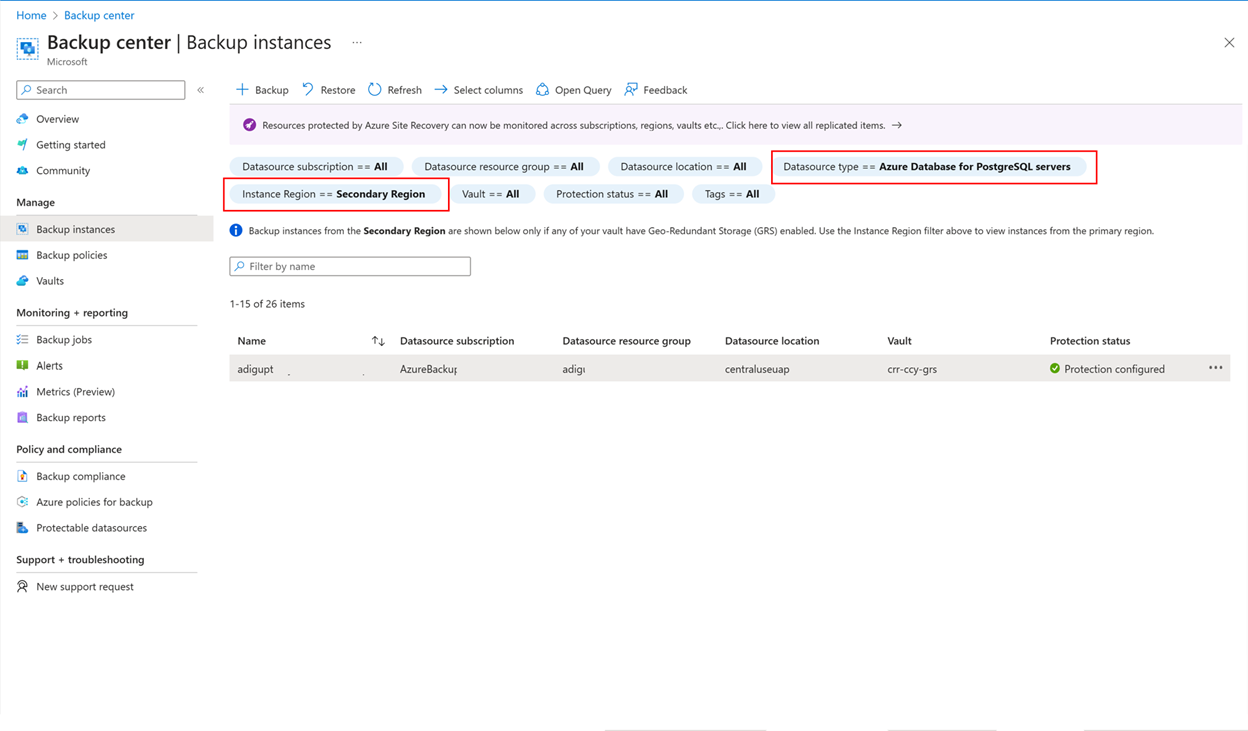
The recovery points available in the secondary region are now listed.
Select Restore to secondary region.
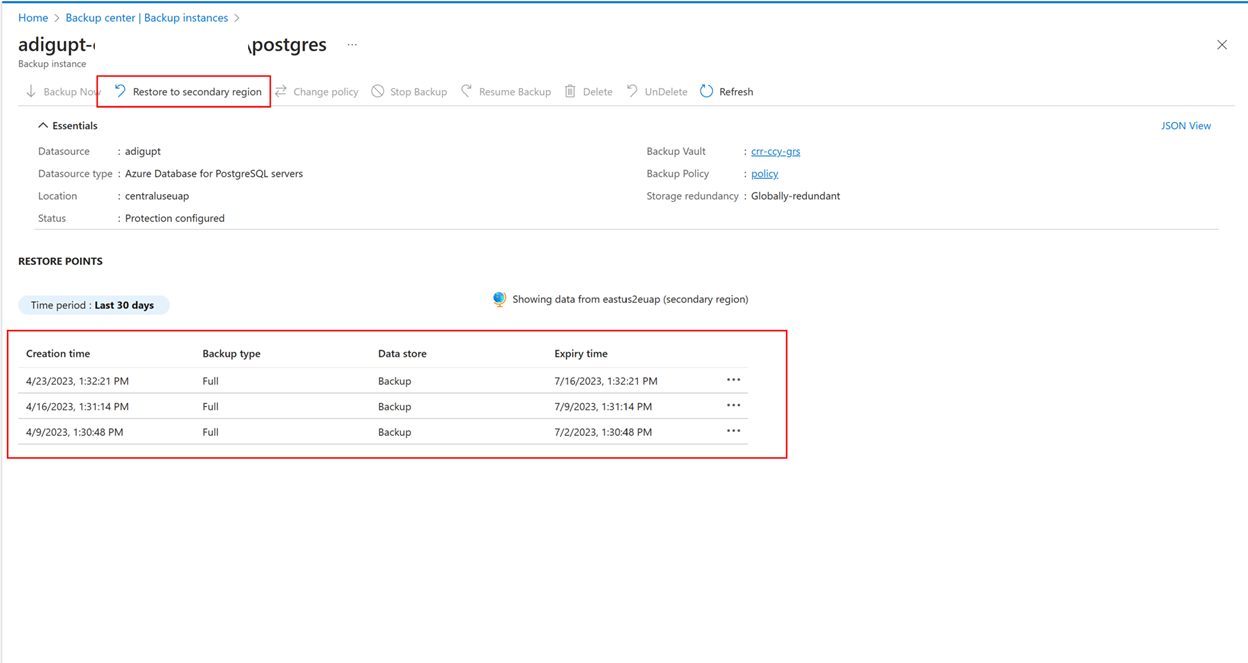
You can also trigger restores from the respective backup instance.
Select Restore to secondary region to review the target region selected, and then select the appropriate recovery point and restore parameters.
Once the restore starts, you can monitor the completion of the restore operation under Backup Jobs of the Backup vault by filtering Jobs workload type to Azure Database for PostgreSQL servers and Instance Region to Secondary Region.


Note
Cross Region Restore is currently only available for PostGreSQL servers.
Cross Subscription Restore using Azure portal
Some datasources of Backup vault support restore to a subscription different from that of the source machine. Cross Subscription Restore (CSR) is enabled for existing vaults by default, and you can use it if supported for the intended datasource.
Note
The feature is currently not supported for Azure Kubernetes Service (AKS) and Azure VMWare Service (AVS) backup.
To do Cross Subscription Restore, follow these steps:
- In the Backup vault, go to Backup Instance > Restore.
- Choose the Subscription to which you want to restore, and then select Restore.
There may be instances when you need to disable Cross Subscription Restore based on your cloud infrastructure. You can enable, disable, or permanently disable Cross Subscription Restore for existing vaults by selecting Backup vault > Properties > Cross Subscription Restore.

You can also select the state of CSR during the creation of Backup vault.

Note
- CSR once permanently disabled on a vault can't be re-enabled because it's an irreversible operation.
- If CSR is disabled but not permanently disabled, then you can reverse the operation by selecting Vault > Properties > Cross Subscription Restore > Enable.
- If a Backup vault is moved to a different subscription when CSR is disabled or permanently disabled, restore to the original subscription will fail.
Next steps
Feedback
Coming soon: Throughout 2024 we will be phasing out GitHub Issues as the feedback mechanism for content and replacing it with a new feedback system. For more information see: https://aka.ms/ContentUserFeedback.
Submit and view feedback for