Connect to Microsoft Dataverse from workflows in Azure Logic Apps
Applies to: Azure Logic Apps (Consumption + Standard)
Important
On August 30, 2022, the connector operations for Common Data Service 2.0, also known as Microsoft Dataverse (Legacy), migrated to the current Microsoft Dataverse connector. Legacy operations bear the "legacy" label, while current operations bear the "preview" label. You can use the current Dataverse connector in any existing or new logic app workflows. For backward compatibility, existing workflows continue to work with the legacy Dataverse connector. However, make sure to review these workflows, and update them promptly.
Since October 2023, the legacy version became unavailable for new workflows. Existing workflows continue to work, but you must use the current Dataverse connector operations for new workflows. A timeline for the shutdown date for the legacy actions and triggers will be announced. For more information, see Microsoft Dataverse (legacy) connector for Azure Logic Apps will be deprecated and replaced with another connector.
To create and run automated workflows that create and manage rows in your Microsoft Dataverse database, you can use Azure Logic Apps and the Microsoft Dataverse connector. These workflows can create rows, update rows, and perform other operations. You can also get information from your Dataverse database and make the output available for other actions to use in your workflows. For example, when a row is added, updated, or deleted in your Dataverse database, you can send an email by using the Office 365 Outlook connector.
This guide shows how to create a workflow that creates a task row whenever a new lead row is created.
Connector reference
For technical information based on the connector's Swagger description, such as operations, limits, and other details, see the managed connector reference page.
Prerequisites
An Azure account and subscription. If you don't have an Azure subscription, sign up for a free Azure account.
A Dataverse Data Service environment and database, which is a space where your organization stores, manages, and shares business data in a Dataverse database. For more information, see the following resources:
Basic knowledge about how to create either Consumption or Standard logic app workflows and the logic app from where you want to access the rows in your Dataverse database. To use a Dataverse trigger, you need to start with a blank workflow. For more information, see the following resources:
Add a Dataverse trigger
When you add a trigger or action that connects to a service or system, and you don't have an existing or active connection, Azure Logic Apps prompts you to provide the connection information, which varies based on the connection type, for example:
- Your account credentials
- A name to use for the connection
- The name for the server or system
- The authentication type to use
- A connection string
This example uses the Dataverse trigger that starts your workflow when a row is added, updated, or deleted.
Note
The Dataverse connector has operation-specific parameters and database-specific parameters. For example, when you select a table, the parameters available for that table vary and differ from other tables.
In the Azure portal, open your Standard logic app resource and blank workflow in the designer.
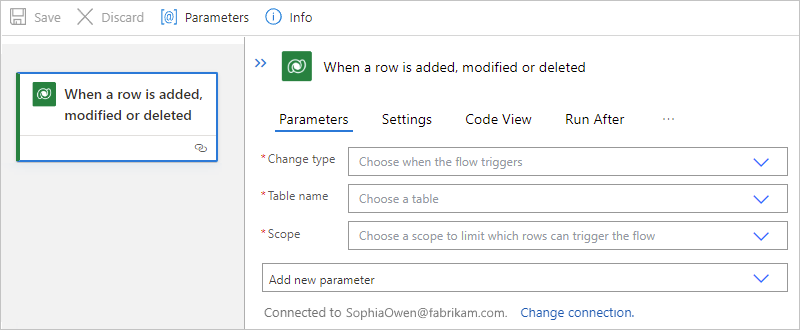
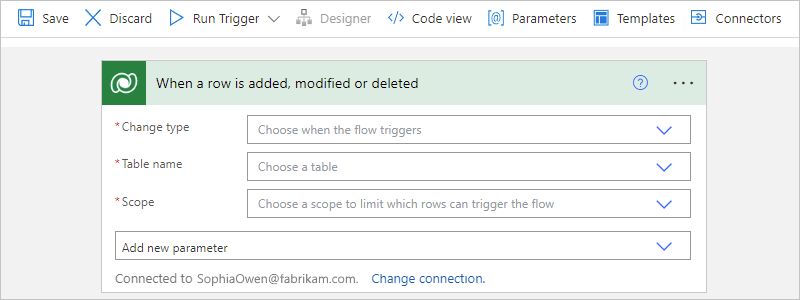
On the designer, follow these general steps to add the Microsoft Dataverse trigger named When a row is added, modified or deleted.
If prompted, sign in to your Dataverse environment or database.
In the trigger information box, provide the necessary values.
For the example trigger, see When a row is added, modified or deleted.
When you're done, save your logic app workflow. On the designer toolbar, select Save.
Now add at least one action for your workflow to perform when the trigger fires. For example, you can add a Dataverse action or an action that sends email based on the outputs from the trigger.
Add a Dataverse action
When you add a trigger or action that connects to a service or system, and you don't have an existing or active connection, Azure Logic Apps prompts you to provide the connection information, which varies based on the connection type, for example:
- Your account credentials
- A name to use for the connection
- The name for the server or system
- The authentication type to use
- A connection string
This example uses the Dataverse action that adds a new row to your database.
Note
The Dataverse connector has operation-specific parameters and database-specific parameters. For example, when you select a table, the parameters available for that table vary and differ from other tables.
In the Azure portal, open your Standard logic app resource and workflow in the designer.
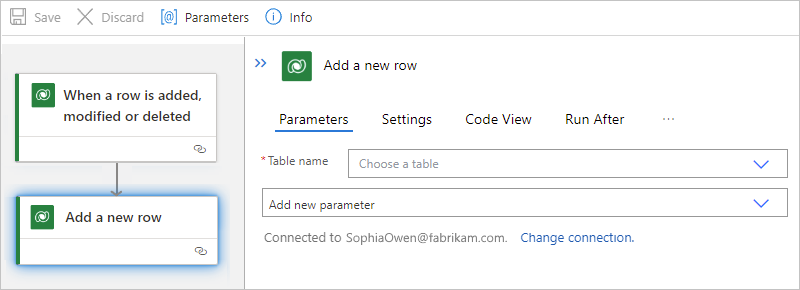
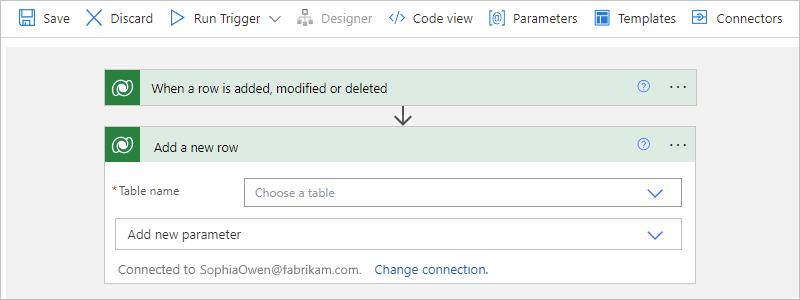
On the designer, follow these general steps to add the Microsoft Dataverse action named Add a new row.
If prompted, sign in to your Dataverse environment or database.
In the action information box, provide the necessary values.
For the example action, see Add a new row.
When you're done, save your logic app workflow. On the designer toolbar, select Save.
Continue adding more actions, if you want.
Test your workflow
To test and trigger the workflow, follow these steps:
On the workflow menu, select Overview.
On the Overview toolbar, select Run > Run.
Reproduce the conditions that the trigger requires for your workflow to run.
Return rows based on a filter
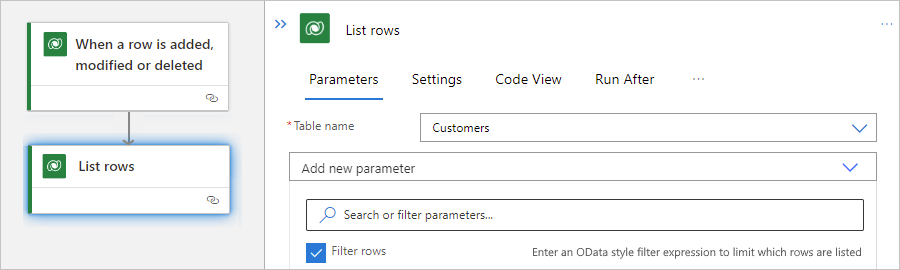
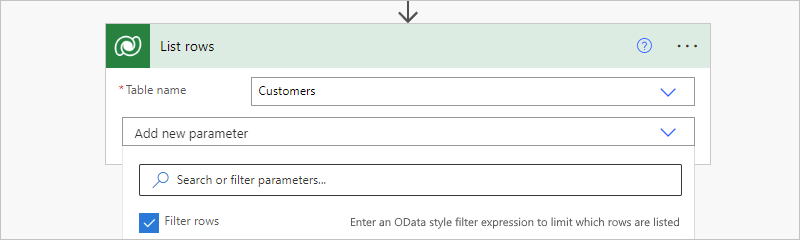
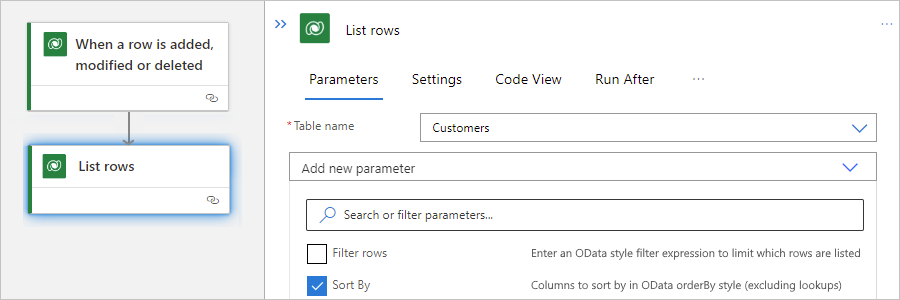
For actions that return rows, such as the List rows action, you can use an ODATA query that returns rows based on the specified filter. For example, you can set up the action to return only rows for active accounts. For more information about the example action, see List rows.
On the designer, in the action, open the Advanced parameters list, and select the Filter rows property.
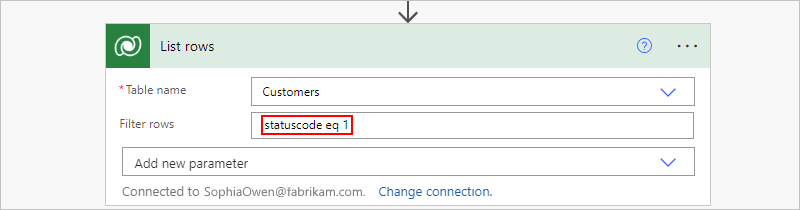
In the Filter rows property that now appears in the action, enter an ODATA query expression, for example:
statuscode eq 1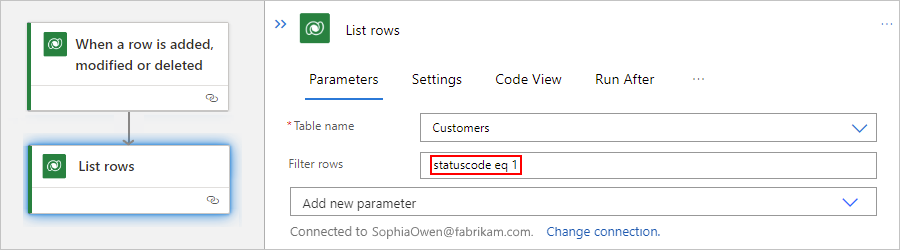
For more information about $filter system query options, see Query data using the Web API - Filter results.
Return rows based on a sort order
For actions that return rows, such as the List rows action, you can use an ODATA query that returns rows in a specific sequence, which varies based on the rows that the action returns. For example, you can set up the action to return rows organized by the account name. For more information about the example action, see List rows.
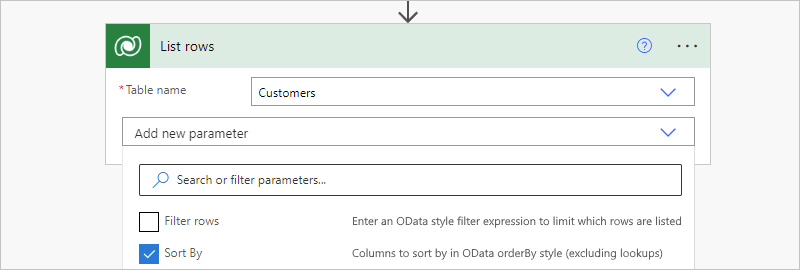
On the designer, in the action, open the Advanced parameters list, and select the Sort By property.
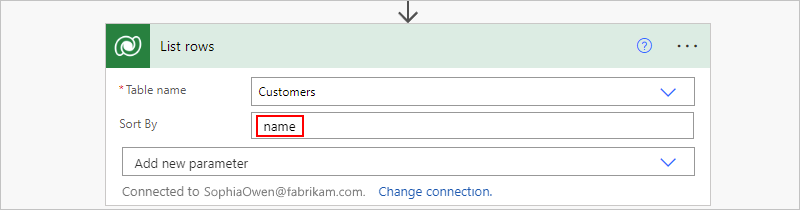
In the Sort By property that now appears in the action, enter the column name to use for sorting, for example, name:

For more information about $orderby system query options, see Query data using the Web API - Sort By.
Field data types
In a trigger or action, a field value's data type must match the field's required data type. This requirement applies whether you manually enter the value or select the value from the dynamic content list.
Note
The Dataverse connector has operation-specific parameters and database-specific parameters. For example, when you select a table, the parameters available for that table vary and differ from other tables.
For example, suppose that you have a table named Tasks. This table has fields that apply only to that table, while other tables have their own fields. For the example Tasks table, the following table describes some sample field types and the data types that those fields require for their values.
| Field | Data type | Description |
|---|---|---|
| Text field | Single line of text | Requires either a single line of text or dynamic content that has the text data type, for example, these properties: - Description - Category |
| Integer field | Whole number | Requires either an integer or dynamic content that has the integer data type, for example, these properties: - Percent Complete - Duration |
| Date field | Date and Time | Requires either a date in MM/DD/YYY format or dynamic content that has the date data type, for example, these properties: - Created On - Start Date - Actual Start - Actual End - Due Date |
| Field that references another entity row | Primary key | Requires both a row ID, such as a GUID, and a lookup type, which means that values from the dynamic content list won't work, for example, these properties: - Owner: Must be a valid user ID or a team row ID. - Owner Type: Must be a lookup type such as systemusers or teams, respectively. - Regarding: Must be a valid row ID such as an account ID or a contact row ID. - Regarding Type: Must be a lookup type such as accounts or contacts, respectively. - Customer: Must be a valid row ID such as an account ID or contact row ID. - Customer Type: Must be the lookup type, such as accounts or contacts, respectively. |
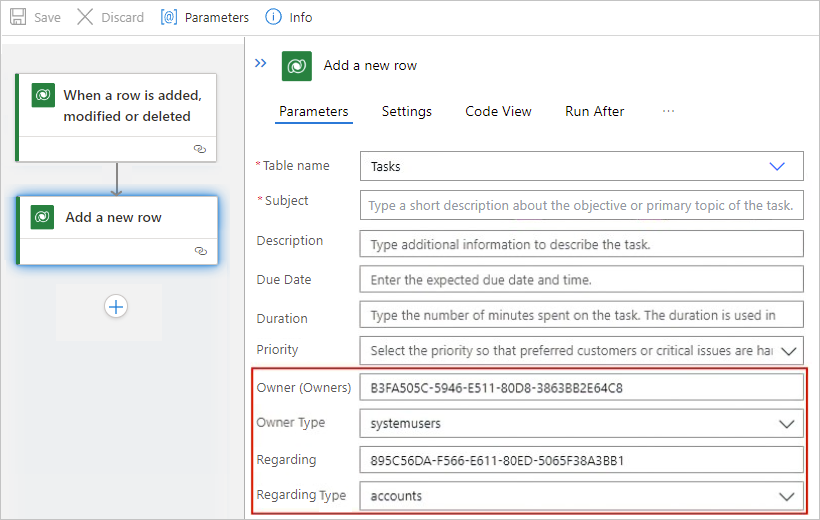
For the example Tasks table, suppose you use the Add a new row action to create a new row that's associated with other entity rows, specifically a user row and an account row. So, in this action, you must specify the IDs and lookup types for those entity rows by using values that match the expected data types for the relevant properties.
Based on the Owner property, which specifies a user ID, and the Owner Type property, which specifies the
systemuserslookup type, the action associates the new row with a specific user.Based on the Regarding property, which specifies a row ID, and the Regarding Type property, which specifies the
accountslookup type, the action associates the new row with a specific account.

Troubleshooting problems
Calls from multiple environments
The Dataverse connector stores information about the logic app workflows that get and require notifications about database entity changes by using the callbackregistrations entity in your Dataverse database. If you copy a Dataverse organization, any webhooks are copied too. If you copy your organization before you disable workflows that are mapped to your organization, any copied webhooks also point at the same logic app workflows, which then get notifications from multiple organizations.
To stop unwanted notifications, delete the callbackregistrations entity from the organization that sends those notifications by following these steps:
Identify and sign in to the Dataverse organization from where you want to remove notifications.
In the Chrome browser, find the callback registration that you want to delete.
Review the generic list for all the callback registrations at the following OData URI so that you can view the data inside the
callbackregistrationsentity:https://{organization-name}.crm{instance-number}.dynamics.com/api/data/v9.0/callbackregistrations:Note
If no values are returned, you might not have permissions to view this entity type, or you might not have signed in to the correct organization.
Filter on the triggering entity's logical name
entitynameand the notification event that matches your logic app workflow (message). Each event type is mapped to the message integer as follows:Event type Message integer Create 1 Delete 2 Update 3 CreateOrUpdate 4 CreateOrDelete 5 UpdateOrDelete 6 CreateOrUpdateOrDelete 7 The following example shows how you can filter for
Createnotifications on an entity namednov_validationby using the following OData URI for a sample organization:https://fabrikam-preprod.crm1.dynamics.com/api/data/v9.0/callbackregistrations?$filter=entityname eq 'nov_validation' and message eq 1
Note
If multiple triggers exist for the same entity or event, you can filter the list by using additional filters such as the
createdonand_owninguser_valueattributes. The owner user's name appears under/api/data/v9.0/systemusers({id}).After you find the ID for the callback registration that you want to delete, follow these steps:
In your Chrome browser, open the Chrome Developer Tools (Keyboard: F12).
In the window, at the top, select the Console tab.
On the command-line prompt, enter this command, which sends a request to delete the specified callback registration:
fetch('http://{organization-name}.crm{instance-number}.dynamics.com/api/data/v9.0/callbackregistrations({ID-to-delete})', { method: 'DELETE'})Important
Make sure that you make the request from a non-Unified Client Interface (UCI) page, for example, from the OData or API response page itself. Otherwise, logic in the app.js file might interfere with this operation.
To confirm that the callback registration no longer exists, check the callback registrations list.
Duplicate 'callbackregistrations' entity
In Standard logic app workflows, under specific conditions such as instance reallocation or application restart, the Microsoft Dataverse trigger starts a duplicate run, which creates a duplicate callbackregistrations entity in your Dataverse database. If you edit a Standard workflow that starts with a Dataverse trigger, check whether this callbackregistrations entity is duplicated. If the duplicate exists, manually delete the duplicate callbackregistrations entity.
Next steps
Feedback
Coming soon: Throughout 2024 we will be phasing out GitHub Issues as the feedback mechanism for content and replacing it with a new feedback system. For more information see: https://aka.ms/ContentUserFeedback.
Submit and view feedback for