(DEPRECATED) Deploy Kubernetes cluster for Linux containers
Tip
For the updated version this quickstart that uses Azure Kubernetes Service, see Quickstart: Deploy an Azure Kubernetes Service (AKS) cluster.
Warning
The Azure Container Service (ACS) is being deprecated. No new features or functionality are being added to ACS. All of the APIs, portal experience, CLI commands and documentation are marked as deprecated.
In 2017, we introduced Azure Kubernetes Service (AKS) for simplifying Kubernetes management, deployment, and operations. If you use the Kubernetes orchestrator, please migrate to AKS by January 31, 2020. To get started, see migrate to Azure Kubernetes Service.
For more information, see the Azure Container Service deprecation announcement on Azure.com.
In this quickstart, a Kubernetes cluster is deployed using the Azure CLI. A multi-container application consisting of web front end and a Redis instance is then deployed and run on the cluster. Once completed, the application is accessible over the internet.
The example application used in this document is written in Python. The concepts and steps detailed here can be used to deploy any container image into a Kubernetes cluster. The code, Dockerfile, and pre-created Kubernetes manifest files related to this project are available on GitHub.
This quickstart assumes a basic understanding of Kubernetes concepts, for detailed information on Kubernetes see the Kubernetes documentation.
If you don't have an Azure subscription, create a free account before you begin.
Use Azure Cloud Shell
Azure hosts Azure Cloud Shell, an interactive shell environment that you can use through your browser. You can use either Bash or PowerShell with Cloud Shell to work with Azure services. You can use the Cloud Shell preinstalled commands to run the code in this article without having to install anything on your local environment.
To start Azure Cloud Shell:
| Option | Example/Link |
|---|---|
| Select Try It in the upper-right corner of a code block. Selecting Try It doesn't automatically copy the code to Cloud Shell. |  |
| Go to https://shell.azure.com, or select the Launch Cloud Shell button to open Cloud Shell in your browser. |  |
| Select the Cloud Shell button on the menu bar at the upper right in the Azure portal. |  |
To run the code in this article in Azure Cloud Shell:
Start Cloud Shell.
Select the Copy button on a code block to copy the code.
Paste the code into the Cloud Shell session by selecting Ctrl+Shift+V on Windows and Linux or by selecting Cmd+Shift+V on macOS.
Select Enter to run the code.
If you choose to install and use the CLI locally, this quickstart requires that you are running the Azure CLI version 2.0.4 or later. Run az --version to find the version. If you need to install or upgrade, see Install the Azure CLI.
Create a resource group
Create a resource group with the az group create command. An Azure resource group is a logical group in which Azure resources are deployed and managed.
The following example creates a resource group named myResourceGroup in the westeurope location.
az group create --name myResourceGroup --location westeurope
Output:
{
  "id": "/subscriptions/00000000-0000-0000-0000-000000000000/resourceGroups/myResourceGroup",
  "location": "westeurope",
  "managedBy": null,
  "name": "myResourceGroup",
  "properties": {
    "provisioningState": "Succeeded"
  },
  "tags": null
}
Create Kubernetes cluster
Create a Kubernetes cluster in Azure Container Service with the az acs create command. The following example creates a cluster named myK8sCluster with one Linux master node and three Linux agent nodes.
az acs create --orchestrator-type kubernetes --resource-group myResourceGroup --name myK8sCluster --generate-ssh-keys
In some cases, such as with a limited trial, an Azure subscription has limited access to Azure resources. If the deployment fails due to limited available cores, reduce the default agent count by adding --agent-count 1 to the az acs create command.
After several minutes, the command completes and returns json formatted information about the cluster.
Connect to the cluster
To manage a Kubernetes cluster, use kubectl, the Kubernetes command-line client.
If you're using Azure Cloud Shell, kubectl is already installed. If you want to install it locally, you can use the az acs kubernetes install-cli command.
To configure kubectl to connect to your Kubernetes cluster, run the az acs kubernetes get-credentials command. This step downloads credentials and configures the Kubernetes CLI to use them.
az acs kubernetes get-credentials --resource-group=myResourceGroup --name=myK8sCluster
To verify the connection to your cluster, use the kubectl get command to return a list of the cluster nodes.
kubectl get nodes
Output:
NAME                    STATUS                     AGE       VERSION
k8s-agent-14ad53a1-0    Ready                      10m       v1.6.6
k8s-agent-14ad53a1-1    Ready                      10m       v1.6.6
k8s-agent-14ad53a1-2    Ready                      10m       v1.6.6
k8s-master-14ad53a1-0   Ready,SchedulingDisabled   10m       v1.6.6
Run the application
A Kubernetes manifest file defines a desired state for the cluster, including what container images should be running. For this example, a manifest is used to create all objects needed to run the Azure Vote application.
Create a file named azure-vote.yml and copy into it the following YAML. If you are working in Azure Cloud Shell, this file can be created using vi or Nano as if working on a virtual or physical system.
apiVersion: apps/v1beta1
kind: Deployment
metadata:
  name: azure-vote-back
spec:
  replicas: 1
  template:
    metadata:
      labels:
        app: azure-vote-back
    spec:
      containers:
      - name: azure-vote-back
        image: redis
        ports:
        - containerPort: 6379
          name: redis
---
apiVersion: v1
kind: Service
metadata:
  name: azure-vote-back
spec:
  ports:
  - port: 6379
  selector:
    app: azure-vote-back
---
apiVersion: apps/v1beta1
kind: Deployment
metadata:
  name: azure-vote-front
spec:
  replicas: 1
  template:
    metadata:
      labels:
        app: azure-vote-front
    spec:
      containers:
      - name: azure-vote-front
        image: microsoft/azure-vote-front:v1
        ports:
        - containerPort: 80
        env:
        - name: REDIS
          value: "azure-vote-back"
---
apiVersion: v1
kind: Service
metadata:
  name: azure-vote-front
spec:
  type: LoadBalancer
  ports:
  - port: 80
  selector:
    app: azure-vote-front
Use the kubectl create command to run the application.
kubectl create -f azure-vote.yml
Output:
deployment "azure-vote-back" created
service "azure-vote-back" created
deployment "azure-vote-front" created
service "azure-vote-front" created
Test the application
As the application is run, a Kubernetes service is created that exposes the application front end to the internet. This process can take a few minutes to complete.
To monitor progress, use the kubectl get service command with the --watch argument.
kubectl get service azure-vote-front --watch
Initially the EXTERNAL-IP for the azure-vote-front service appears as pending. Once the EXTERNAL-IP address has changed from pending to an IP address, use CTRL-C to stop the kubectl watch process.
azure-vote-front 10.0.34.242 <pending> 80:30676/TCP 7s
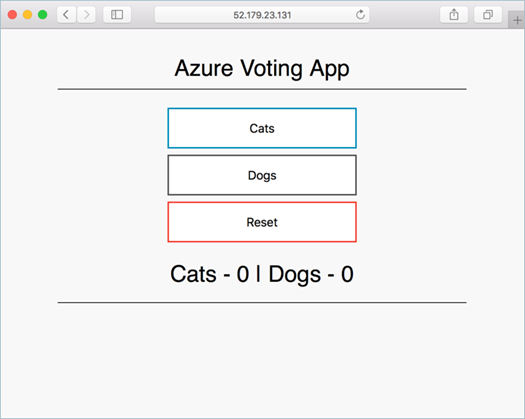
azure-vote-front 10.0.34.242 52.179.23.131 80:30676/TCP 2m
You can now browse to the external IP address to see the Azure Vote App.
Delete cluster
When the cluster is no longer needed, you can use the az group delete command to remove the resource group, container service, and all related resources.
az group delete --name myResourceGroup --yes --no-wait
Get the code
In this quickstart, pre-created container images have been used to create a Kubernetes deployment. The related application code, Dockerfile, and Kubernetes manifest file are available on GitHub.
https://github.com/Azure-Samples/azure-voting-app-redis
Next steps
In this quickstart, you deployed a Kubernetes cluster and deployed a multi-container application to it.
To learn more about Azure Container Service, and walk through a complete code to deployment example, continue to the Kubernetes cluster tutorial.