Tutorial: Create and manage exported data
If you read the Cost Analysis tutorial, then you're familiar with manually downloading your Cost Management data. However, you can create a recurring task that automatically exports your Cost Management data to Azure storage on a daily, weekly, or monthly basis. Exported data is in CSV format and it contains all the information that Cost Management collects. You can then use the exported data in Azure storage with external systems and combine it with your own custom data. And you can use your exported data in an external system like a dashboard or other financial system.
Watch the How to schedule exports to storage with Cost Management video about creating a scheduled export of your Azure cost data to Azure Storage. To watch other videos, visit the Cost Management YouTube channel.
The examples in this tutorial walk you through exporting your cost management data and then verify that the data was successfully exported.
In this tutorial, you learn how to:
- Create a daily export
- Verify that data is collected
Prerequisites
Data export is available for various Azure account types, including Enterprise Agreement (EA) and Microsoft Customer Agreement customers. To view the full list of supported account types, see Understand Cost Management data. The following Azure permissions, or scopes, are supported per subscription for data export by user and group. For more information about scopes, see Understand and work with scopes.
- Owner - Can create, modify, or delete scheduled exports for a subscription.
- Contributor - Can create, modify, or delete their own scheduled exports. Can modify the name of scheduled exports created by others.
- Reader - Can schedule exports that they have permission to.
- For more information about scopes, including access needed to configure exports for Enterprise Agreement and Microsoft Customer agreement scopes, see Understand and work with scopes.
For Azure Storage accounts:
- Write permissions are required to change the configured storage account, independent of permissions on the export.
- Your Azure storage account must be configured for blob or file storage.
- Don't configure exports to a storage container when configured as a destination in an object replication rule.
- To export to storage accounts with configured firewalls, you need other privileges on the storage account. The other privileges are only required during export creation or modification. They are:
- Owner role on the storage account. Or
- Any custom role with
Microsoft.Authorization/roleAssignments/writeandMicrosoft.Authorization/permissions/readpermissions. Additionally, ensure that you enable Allow trusted Azure service access to the storage account when you configure the firewall. If you want to use the Exports REST API to generate exports to a storage account located behind a firewall, use the API version 2023-08-01 or later version. All newer API versions continue to support exports behind the firewall.
- The storage account configuration must have the Permitted scope for copy operations (preview) option set to From any storage account.


If you have a new subscription, you can't immediately use Cost Management features. It might take up to 48 hours before you can use all Cost Management features.
Sign in to Azure
Sign in to the Azure portal at https://portal.azure.com.
Create a daily export
To create or view a data export or to schedule an export, choose a scope in the Azure portal and select Cost analysis in the menu. For example, navigate to Subscriptions, select a subscription from the list, and then select Cost analysis in the menu. At the top of the Cost analysis page, select Configure subscription, then Exports.
Note
- Besides subscriptions, you can create exports on resource groups, management groups, departments, and enrollments. For more information about scopes, see Understand and work with scopes.
- When you're signed in as a partner at the billing account scope or on a customer's tenant, you can export data to an Azure Storage account that's linked to your partner storage account. However, you must have an active subscription in your CSP tenant.
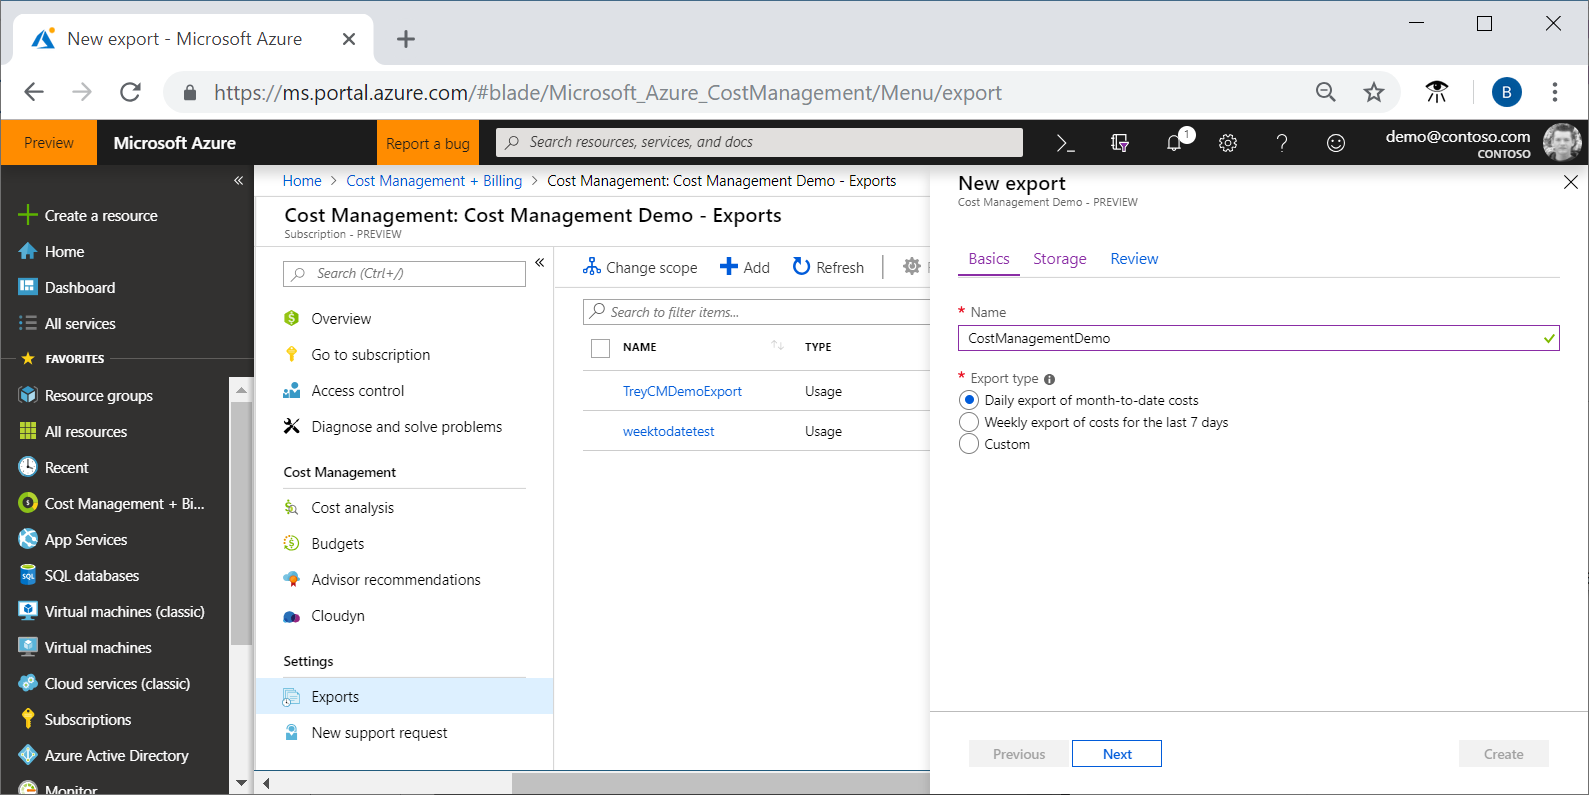
- Select Create
- For Export details, make a selection:
- Type a name for export
- Daily export of month-to-date costs - Provides a new export file daily for your month-to-date costs. The latest data is aggregated from previous daily exports.
- Weekly export of cost for the last seven days - Creates a weekly export of your costs for the past seven days from the selected start date of your export.
- Monthly export of last month's costs - Provides you with an export of your last month's costs compared to the current month that you create the export. Afterward, the schedule runs an export on the fifth day of every new month with your previous months costs.
- One-time export - Allows you to choose a date range for historical data to export to Azure blob storage. You can export a maximum of 90 days of historical costs from the day you choose. This export runs immediately and is available in your storage account within two hours. Depending on your export type, either choose a start date, or choose a From and To date.
- Specify the subscription for your Azure storage account, then select a resource group or create a new one.
- Select the storage account name or create a new one.
- Select the location (Azure region).
- Specify the storage container and the directory path that you'd like the export file to go to.
- Review your export details and select Create.

Your new export appears in the list of exports. By default, new exports are enabled. If you want to disable or delete a scheduled export, select any item in the list, and then select either Disable or Delete.
Initially, it can take 12-24 hours before the export runs. However, it can take up longer before data is shown in exported files.

Configure exports for storage accounts with a firewall
If you need to export to a storage account behind the firewall for security and compliance requirements, ensure that you have all prerequisites met.
Note
If you have an existing scheduled export and your change your storage network configuration, you must update the export and save it to reflect the changes.
Enable Allow trusted Azure services access on the storage account. You can turn that on while configuring the firewall of the storage account, from the Networking page. Here's a screenshot showing the page.

If you missed enabling that setting, you can easily do so from the Exports page when creating a new export.

A system-assigned managed identity is created for a new job export when created or modified. You must have permissions because Cost Management uses the privilege to assign the StorageBlobDataContributor role to the managed identity. The permission is restricted to the storage account container scope. After the export job is created or updated, the user doesn't require Owner permissions for regular runtime operations.
Note
- When a user updates destination details or deletes an export, the StorageBlobDataContributor role assigned to the managed identity is automatically removed. To enable the system to remove the role assignment, the user must have
microsoft.Authorization/roleAssignments/deletepermissions. If the permissions aren't available, the user needs to manually remove the role assignment on the managed identity. - Currently, firewalls are supported for storage accounts in the same tenant. However, firewalls on storage accounts aren't supported for cross-tenant exports.
Add exports to the list of trusted services. For more information, see Trusted access based on a managed identity.
Export schedule
Scheduled exports get affected by the time and day of week of when you initially create the export. When you create a scheduled export, the export runs at the same frequency for each export that runs later. For example, the export runs during once each UTC day for a daily export of month-to-date costs export set at a daily frequency. Similarly for a weekly export, the export runs every week on the same UTC day as it is scheduled. Individual export runs can occur at different times throughout the day. So, avoid taking a firm dependency on the exact time of the export runs. Run timing depends on the active load present in Azure during a given UTC day. When an export run begins, your data should be available within 4 hours.
Exports are scheduled using Coordinated Universal Time (UTC). The Exports API always uses and displays UTC.
- When you create an export using the Exports API, specify the
recurrencePeriodin UTC time. The API doesn’t convert your local time to UTC.- Example - A weekly export is scheduled on Friday, August 19 with
recurrencePeriodset to 2:00 PM. The API receives the input as 2:00 PM UTC, Friday, August 19. The weekly export is scheduled to run every Friday.
- Example - A weekly export is scheduled on Friday, August 19 with
- When you create an export in the Azure portal, its start date time is automatically converted to the equivalent UTC time.
- Example - A weekly export is scheduled on Friday, August 19 with the local time of 2:00 AM IST (UTC+5:30) from the Azure portal. The API receives the input as 8:30 PM, Thursday, August 18. The weekly export is scheduled to run every Thursday.
Each export creates a new file, so older exports aren't overwritten.
Create an export for multiple subscriptions
You can use a management group to aggregate subscription cost information in a single container. Exports support management group scope for Enterprise Agreement but not for Microsoft Customer Agreement or other subscription types. Multiple currencies are also not supported in management group exports.
Exports at the management group scope support only usage charges. Purchases, including reservations and savings plans aren't supported. Amortized cost reports are also not supported. When you create an export from the Azure portal for a management group scope, the metric field isn't shown because it defaults to the usage type. When you create a management group scope export using the REST API, choose ExportType as Usage.
- Create one management group and assign subscriptions to it, if you haven't already.
- In cost analysis, set the scope to your management group and select Select this management group.

- Create an export at the scope to get cost management data for the subscriptions in the management group.


File partitioning for large datasets
If you have a Microsoft Customer Agreement, Microsoft Partner Agreement, or Enterprise Agreement, you can enable Exports to chunk your file into multiple smaller file partitions to help with data ingestion. When you initially configure your export, set the File Partitioning setting to On. The setting is Off by default.

If you don't have a Microsoft Customer Agreement, Microsoft Partner Agreement, or Enterprise Agreement, then you don't see the File Partitioning option.
Partitioning isn't currently supported for resource groups or management group scopes.
Update existing exports to use file partitioning
If you have existing exports and you want to set up file partitioning, create a new export. File partitioning is only available with the latest Exports version. There might be minor changes to some of the fields in the usage files that get created.
If you enable file partitioning on an existing export, you might see minor changes to the fields in file output. Any changes are due to updates that were made to Exports after you initially set yours up.
Partitioning output
When file partitioning is enabled, you get a file for each partition of data in the export along with a _manifest.json file. The manifest contains a summary of the full dataset and information for each file partition in it. Each file partition has headers and contains only a subset of the full dataset. To handle the full dataset, you must ingest each partition of the export.
Here's a _manifest.json example manifest file.
{
  "manifestVersion": "2021-01-01",
  "dataFormat": "csv",
  "blobCount": 1,
  "byteCount": 160769,
  "dataRowCount": 136,
  "blobs": [
    {
      "blobName": "blobName.csv",
      "byteCount": 160769,
      "dataRowCount": 136,
      "headerRowCount": 1,
      "contentMD5": "md5Hash"
    }
  ]
}
Export versions
When you create a scheduled export in the Azure portal or with the API, it always runs on the exports version used at creation time. Azure keeps your previously created exports on the same version, unless you update it. Doing so prevents changes in the charges and to CSV fields if the export version is changed. As the export functionality changes over time, field names are sometimes changed and new fields are added.
If you want to use the latest data and fields available, we recommend that you create a new export in the Azure portal. To update an existing export to the latest version, update it in the Azure portal or with the latest Export API version. Updating an existing export might cause you to see minor differences in the fields and charges in files that are produced afterward.
Verify that data is collected
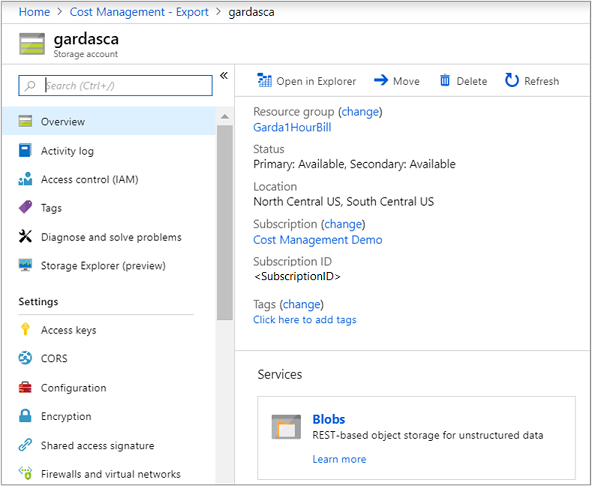
You can easily verify that your Cost Management data is being collected and view the exported CSV file using Azure Storage Explorer.
In the export list, select the storage account name. On the storage account page, select Open in Explorer. If you see a confirmation box, select Yes to open the file in Azure Storage Explorer.
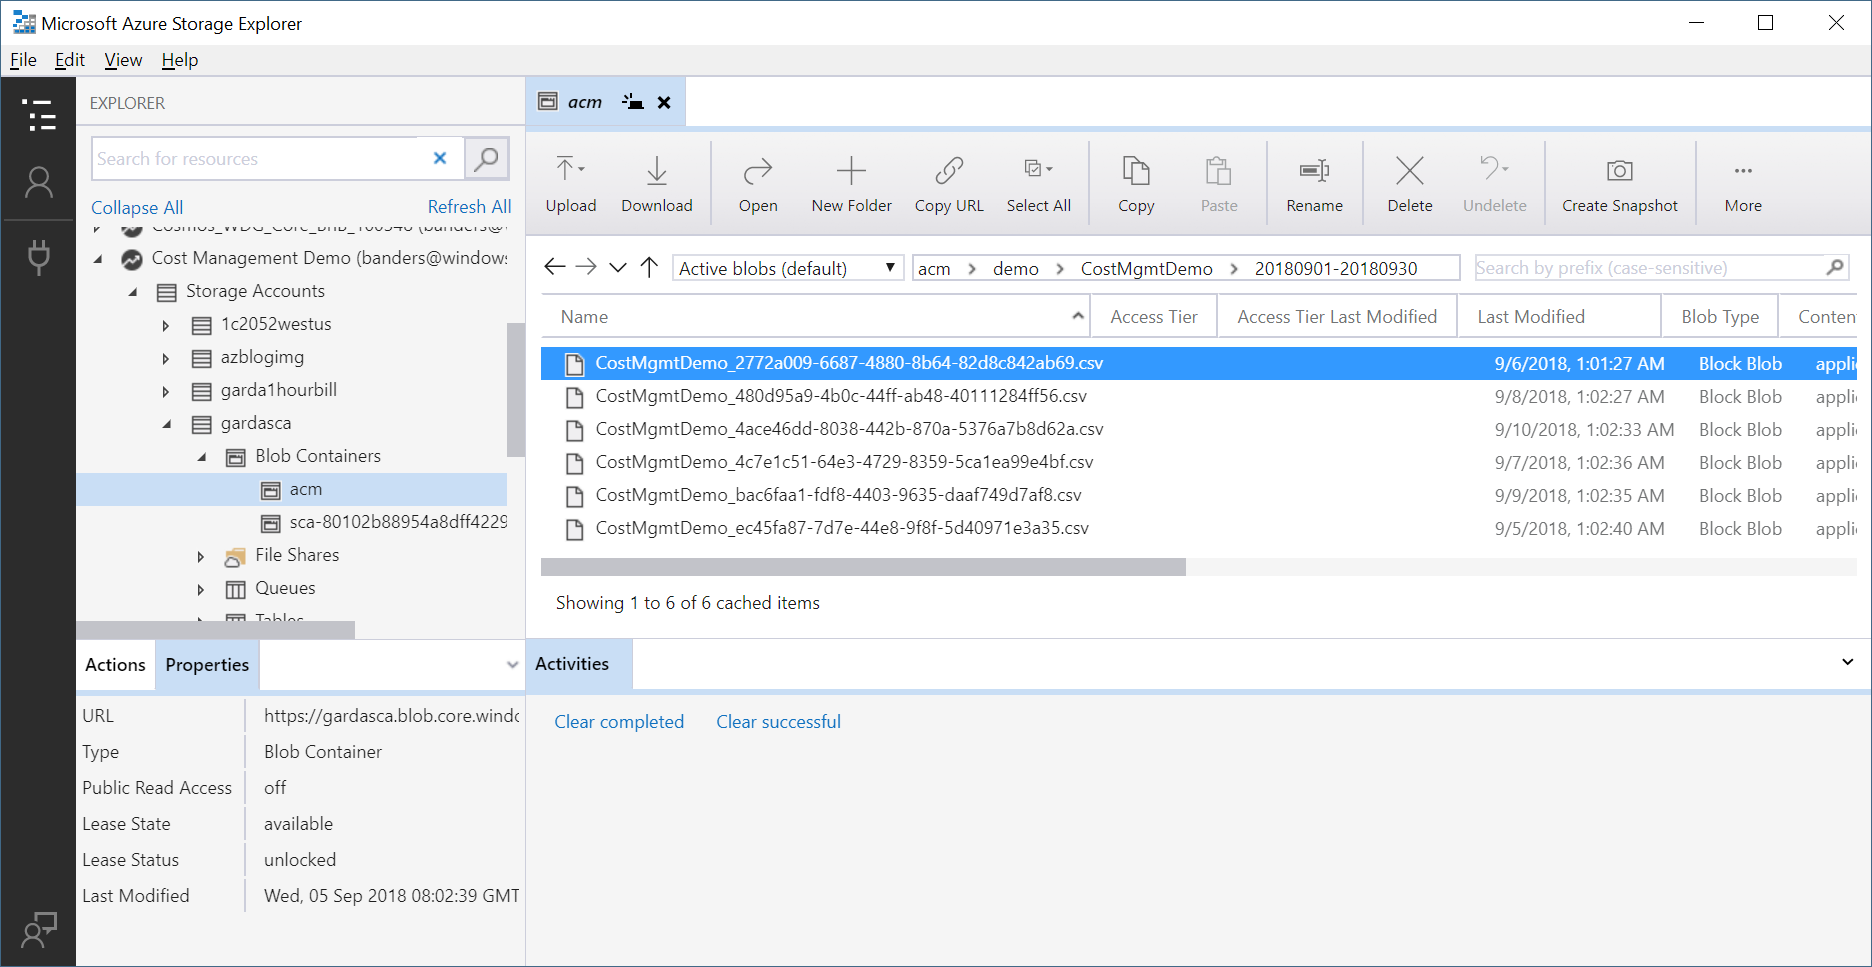
In Storage Explorer, navigate to the container that you want to open and select the folder corresponding to the current month. A list of CSV files is shown. Select one and then select Open.
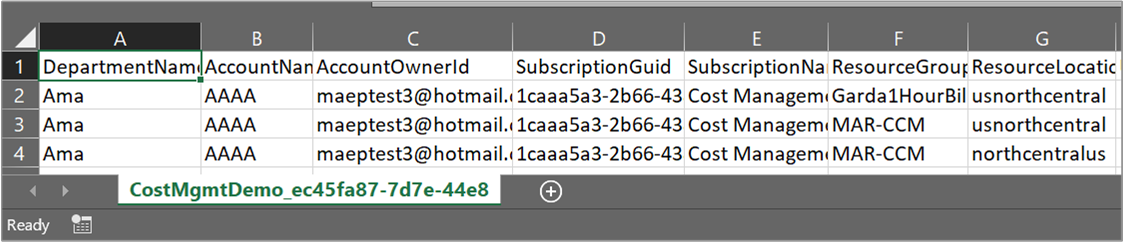
The file opens with the program or application set to open CSV file extensions. Here's an example in Excel.
Download an exported CSV data file
To download the CSV file, browse to the file in Microsoft Azure Storage Explorer and download it.
View export run history
You can view the run history of your scheduled export by selecting an individual export in the exports list page. The exports list page also provides you with quick access to view the run time of your previous exports and the next time and export will run. Here's an example showing the run history.

Select an export to view the run history.

Export runs twice a day for the first five days of the month
There are two runs per day for the first five days of each month after you create a daily export. One run executes and creates a file with the current month’s cost data. It's the run that's available for you to see in the run history. A second run also executes to create a file with all the costs from the prior month. The second run isn't currently visible in the run history. Azure executes the second run to ensure that your latest file for the past month contains all charges exactly as seen on your invoice. It runs because there are cases where latent usage and charges are included in the invoice up to 72 hours after the calendar month is closed. To learn more about Cost Management usage data updates, see Cost and usage data updates and retention.
Note
Daily export created between 1st to 5th of the current month would not generate data for the previous month as the export schedule starts from the date of creation.
Access exported data from other systems
One of the purposes of exporting your Cost Management data is to access the data from external systems. You might use a dashboard system or other financial system. Such systems vary widely so showing an example wouldn't be practical. However, you can get started with accessing your data from your applications at Introduction to Azure Storage.
Exports FAQ
Here are some frequently asked questions and answers about exports.
Why do I see garbled characters when I open exported cost files with Microsoft Excel?
If you see garbled characters in Excel and you use an Asian-based language, such as Japanese or Chinese, you can resolve this issue with the following steps:
For new versions of Excel:
- Open Excel.
- Select the Data tab at the top.
- Select the From Text/CSV option.

- Select the CSV file that you want to import.
- In the next box, set File origin to 65001: Unicode (UTF-8).

- Select Load.


For older versions of MS Excel:
- Open Excel.
- Select the Data tab at the top.
- Select the From Text option and then select the CSV file that you want to import.
- Excel shows the Text Import Wizard.
- In the wizard, select the Delimited option.
- In the File origin field, select 65001 : Unicode (UTF-8).
- Select Next.
- Next, select the Comma option and then select Finish.
- In the dialog window that appears, select OK.
Why does the aggregated cost from the exported file differ from the cost displayed in Cost Analysis?
You might have discrepancies between the aggregated cost from the exported file and the cost displayed in Cost Analysis. Determine if the tool you use to read and aggregate the total cost is truncating decimal values. This issue can happen in tools like Power BI and Microsoft Excel. Determine if decimal places are getting dropped when cost values are converted into integers. Losing decimal values can result in a loss of precision and misrepresentation of the aggregated cost.
To manually transform a column to a decimal number in Power BI, follow these steps:
- Go to the Table view.
- Select Transform data.
- Right-click the required column.
- Change the type to a decimal number.
Next steps
In this tutorial, you learned how to:
- Create a daily export
- Verify that data is collected
Advance to the next tutorial to optimize and improve efficiency by identifying idle and underutilized resources.
Feedback
Coming soon: Throughout 2024 we will be phasing out GitHub Issues as the feedback mechanism for content and replacing it with a new feedback system. For more information see: https://aka.ms/ContentUserFeedback.
Submit and view feedback for