Configure a contact profile
Learn how to create a contact profile with Azure Orbital Ground Station to save and reuse contact configurations. To schedule a contact, you must have a contact profile resource and spacecraft resource.
Prerequisites
- An Azure account with an active subscription. Create an account for free.
- Contributor permissions at the subscription level.
- A delegated subnet that is created in the relevant VNET and resource group. See prepare network for Azure Orbital Ground Station integration.
- An IP address (private or public) for data retrieval/delivery. Learn how to create a VM and use its private IP.
- To collect telemetry during the contact, create an event hub. Learn more about Azure Event Hubs.
Azure portal method
Sign in to the Azure portal - Orbital.
In the Azure portal search box, enter Contact Profiles. Select Contact Profiles in the search results. Alternatively, navigate to the Azure Orbital service and click Contact profiles in the left column.
In the Contact Profiles page, click Create.
In Create Contact Profile Resource, enter or select the following information in the Basics tab:
Field Value Subscription Select a subscription. Resource group Select a resource group. Name Enter a contact profile name. Specify the antenna provider and mission information here, e.g. Microsoft_Aqua_Uplink_Downlink_1. Region Select a region. Minimum viable contact duration Define the minimum duration of the contact as a prerequisite to show available time slots to communicate with your spacecraft. If an available time window is less than this time, it won't be in the list of available options. Provide minimum contact duration in ISO 8601 format, e.g. PT1M. Minimum elevation Define minimum elevation of the contact, after acquisition of signal (AOS), as a prerequisite to show available time slots to communicate with your spacecraft. Using a higher value might reduce the duration of the contact. Provide minimum viable elevation in decimal degrees. Auto track configuration Select the frequency band to be used for autotracking during the contact: X band, S band, or Disabled. Event Hubs Namespace Select an Event Hubs Namespace to which you'll send telemetry data of your contacts. Learn how to configure Event Hubs. You must select a subscription before you can select an Event Hubs Namespace. Event Hubs Instance Select an Event Hubs Instance that belongs to the previously selected Namespace. This field only appears if an Event Hubs Namespace is selected first. Virtual Network Select a virtual network. This VNET must be in the same region as the contact profile. Subnet Select a subnet. The subnet must be within the previously chosen VNET, delegated to the Microsoft.Orbital service, and have a minimum address prefix of size /24. 
Click Next. In the Links pane, click Add new Link.
In the Add Link page, enter or select the following information per link direction:
Field Value Name Provide a name for the link. Direction Select the link direction. Gain/Temperature (downlink only) Enter the gain to noise temperature in dB/K. EIRP in dBW (uplink only) Enter the effective isotropic radiated power in dBW. Polarization Select RHCP, LHCP, Dual, or Linear Vertical. 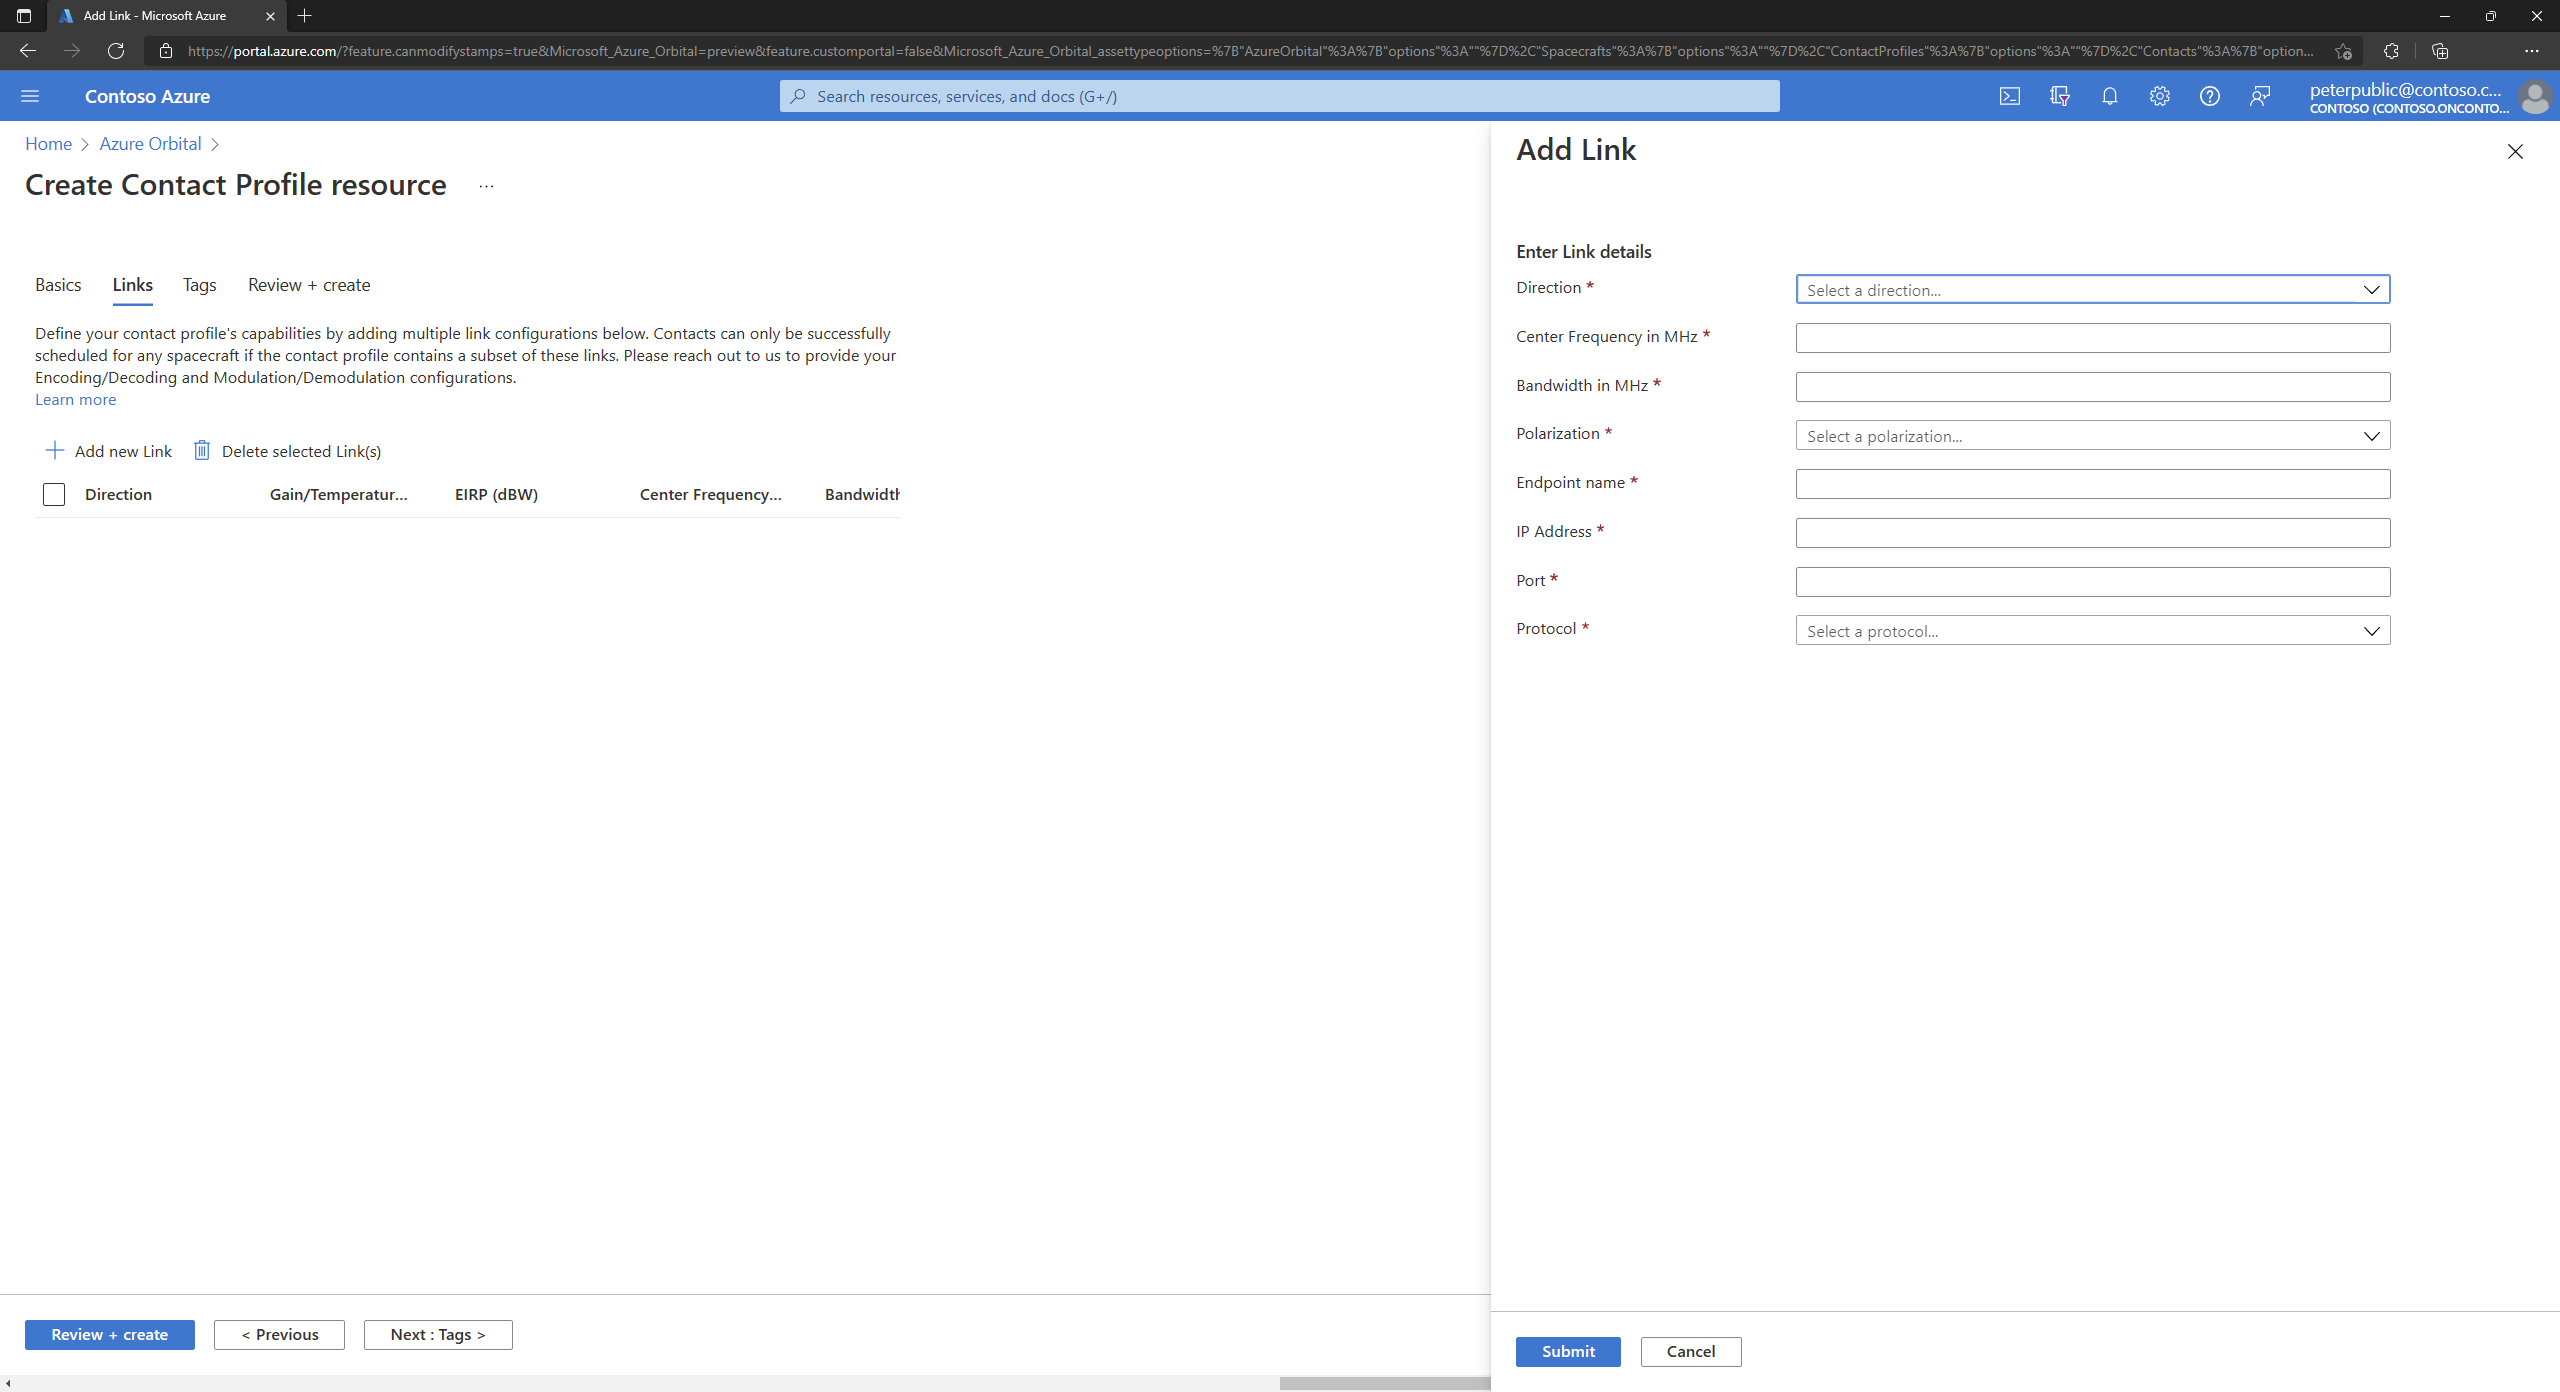
Click Add Channel. In the Add Channel pane, enter or select the following information per channel:
Field Value Name Enter a name for the channel. Center Frequency (MHz) Enter the center frequency in MHz. Bandwidth (MHz) Enter the bandwidth in MHz. Endpoint name Enter the name of the data delivery endpoint, e.g. the name of a virtual machine in your resource group. IP Address Specify the IP Address for data retrieval/delivery in TCP/UDP server mode. Leave the IP Address field blank for TCP/UDP client mode. If referencing a public IP address, a NAT gateway must be configured on the delegated subnet. Port Specify the port for data retrieval/delivery. The port must be within 49152 and 65535 and must be unique across all links in the contact profile. Protocol Select TCP or UDP protocol for data retrieval/delivery. Demodulation Configuration Type (downlink only) Select Preset Named Modem Configuration or Raw XML. Demodulation Configuration (downlink only) Refer to configure the RF chain for options. Decoding Configuration (downlink only) If applicable, paste your decoding configuration. Modulation Configuration (uplink only) Refer to configure the RF chain for options. Encoding Configuration (uplink only) If applicable, paste your encoding configuration. Click Submit to add the channel. After adding all channels, click Submit to add the link.
If a mission requires third-party providers, click the Third-Party Configuration tab.
Note
Mission configurations are agreed upon with partner network providers. Contacts can only be successfully scheduled with the partners if the contact profile contains the appropriate mission configuration.
In the Third-Party Configurations tab, click Add new Configuration.
In the Mission Configuration page, enter the following information:
Field Value Provider Name Enter the name of the provider. Mission Configuration Enter the mission configuration from the provider. Click Submit to add the mission configuration.
Click Review + create. After the validation is complete, click Create.


After a successful deployment, the contact profile is added to your resource group.
API method
Use the Contact Profiles REST Operation Group to create a contact profile in the Azure Orbital Ground Station API.
Next steps
Feedback
Coming soon: Throughout 2024 we will be phasing out GitHub Issues as the feedback mechanism for content and replacing it with a new feedback system. For more information see: https://aka.ms/ContentUserFeedback.
Submit and view feedback for