Quickstart: Get started with Azure Native New Relic Service
In this quickstart, you create an instance of Azure Native New Relic Service. You can either create a New Relic account or link to an existing New Relic account.
When you use the integrated New Relic experience in the Azure portal by using Azure Native New Relic Service, the service creates and maps the following entities for monitoring and billing purposes.
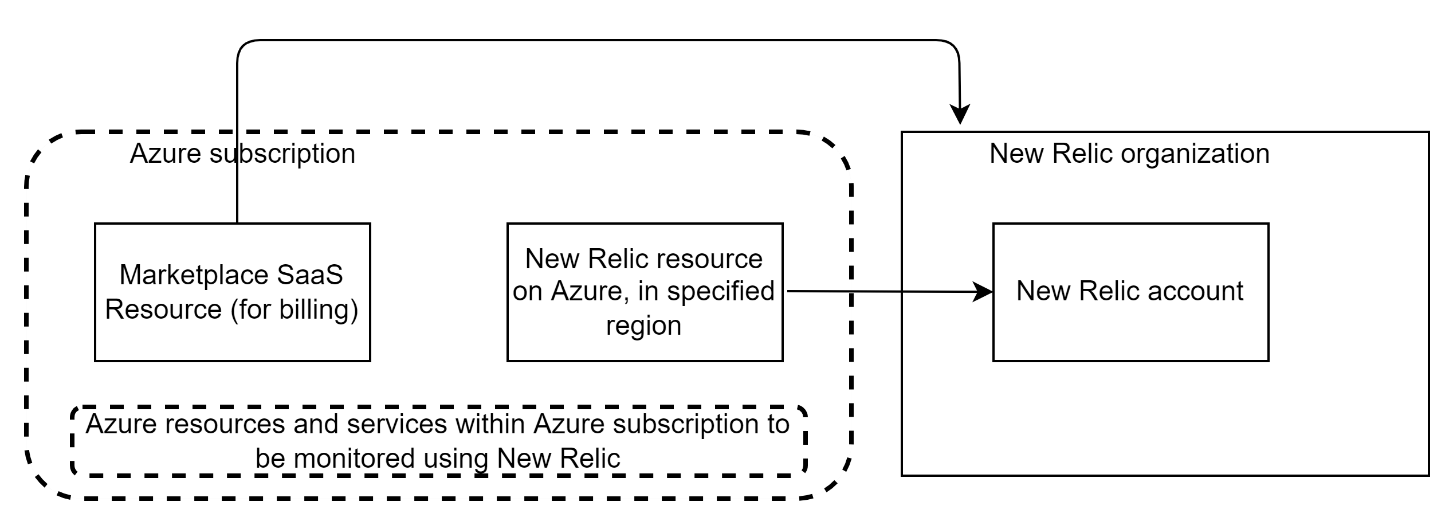
- New Relic resource in Azure: By using the New Relic resource, you can manage the New Relic account on Azure. The resource is created in the Azure subscription and resource group that you select during the creation process or linking process.
- New Relic organization: The New Relic organization on New Relic software as a service (SaaS) is used for user management and billing.
- New Relic account: The New Relic account on New Relic SaaS is used to store and process telemetry data.
- Azure Marketplace SaaS resource: When you set up a new account and organization on New Relic by using Azure Native New Relic Service, the SaaS resource is created automatically, based on the plan that you select from the Azure New Relic offer in Azure Marketplace. This resource is used for billing.
Prerequisites
Before you link the subscription to New Relic, complete the predeployment configuration. For more information, see Configure predeployment for Azure Native New Relic Service.
Find an offer
Use the Azure portal to find the Azure Native New Relic Service application:
Go to the Azure portal and sign in.
If you visited Azure Marketplace in a recent session, select the icon from the available options. Otherwise, search for marketplace and then select the Marketplace result under Services.
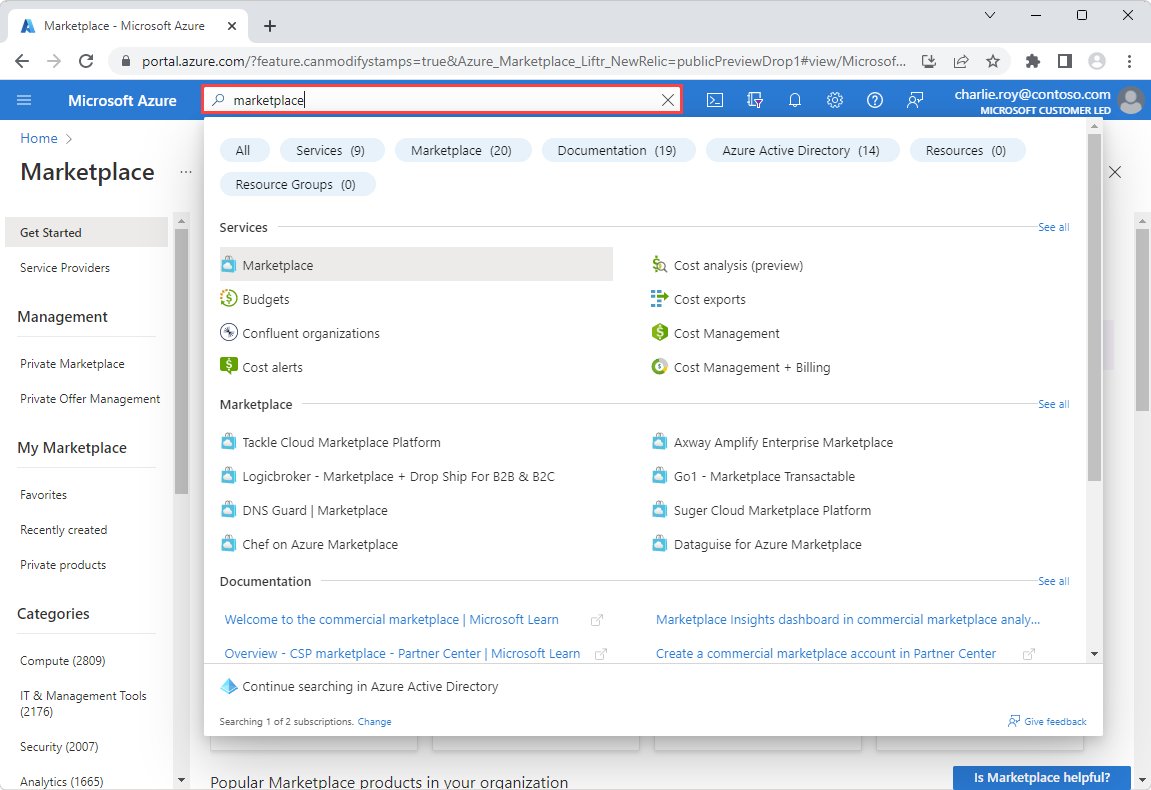
In Azure Marketplace, search for new relic and select the Azure Native New Relic Service result. The page for the service opens.
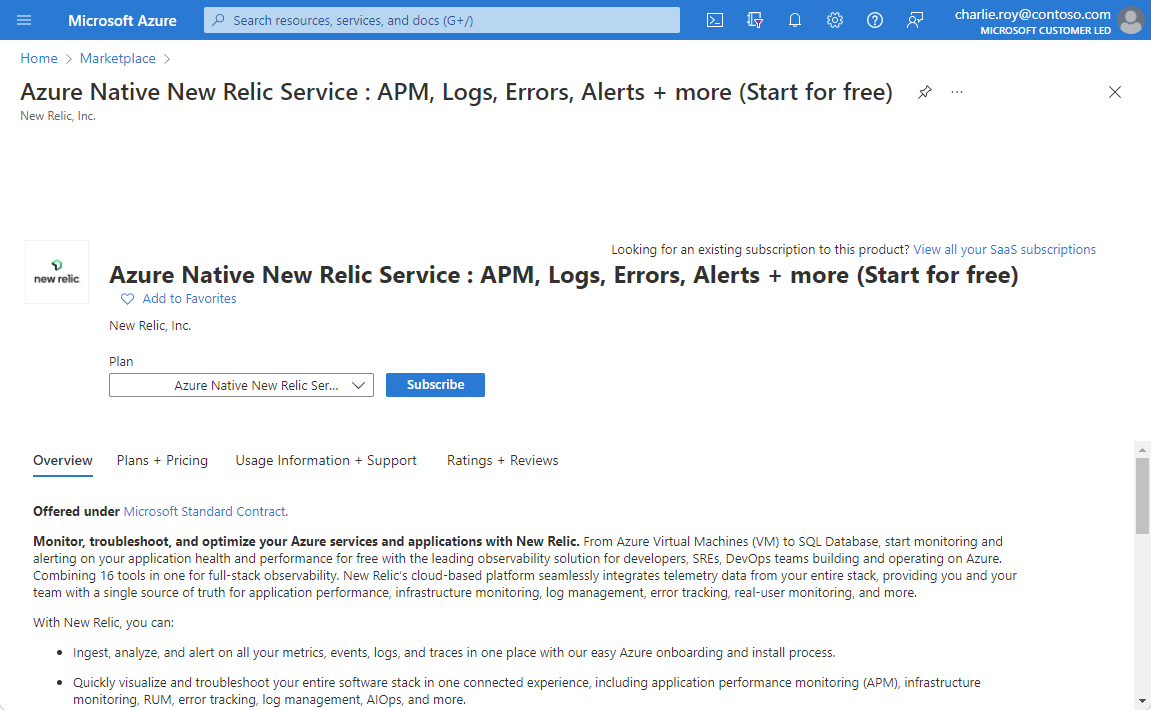
Select Subscribe.
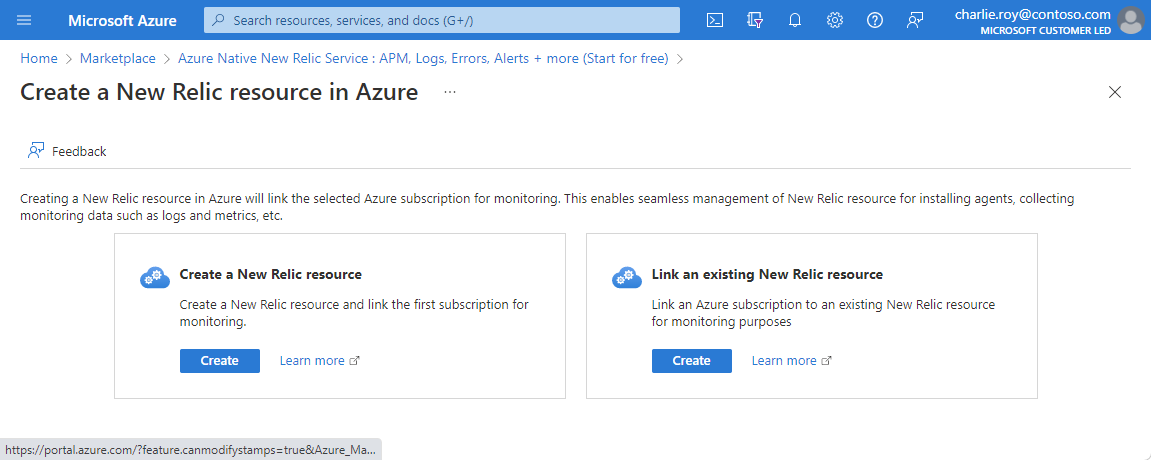
Create a New Relic resource on Azure
When you're creating a New Relic resource, you have two options. One creates a New Relic account, and the other links an Azure subscription to an existing New Relic account. For this example, select Create under the Create a New Relic resource option.
A form to create a New Relic resource appears on the Basics tab.
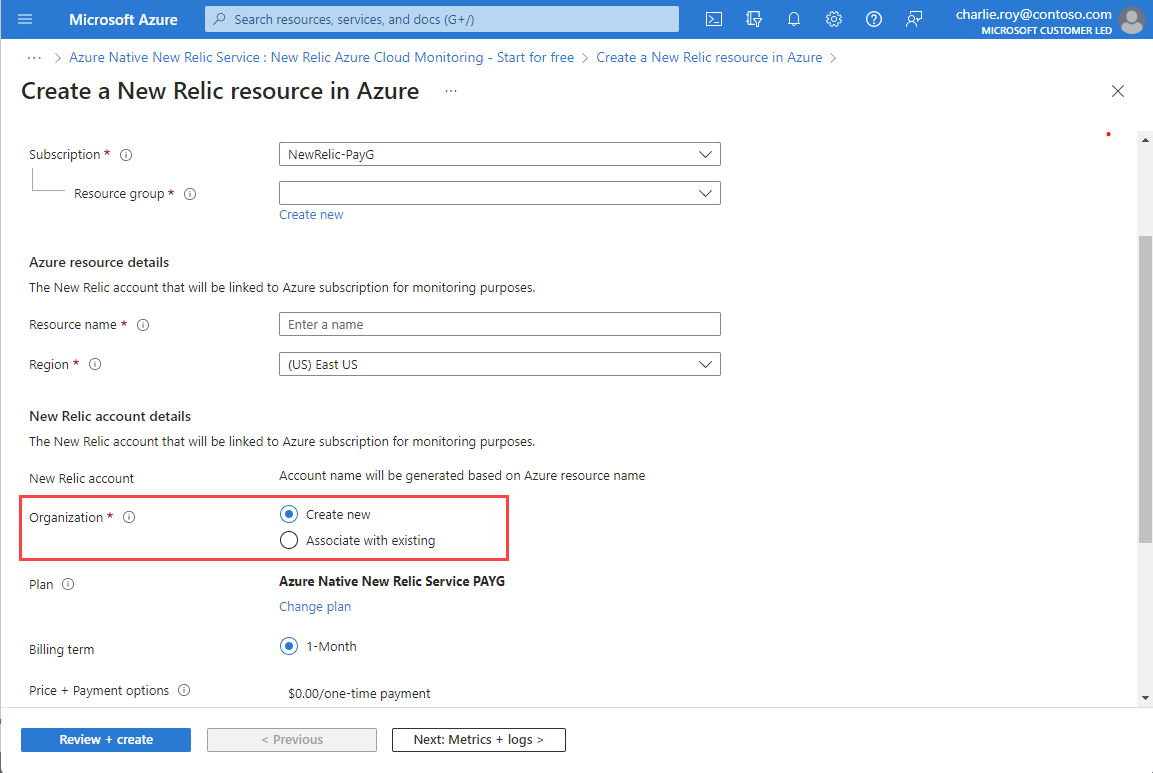
Provide the following values:
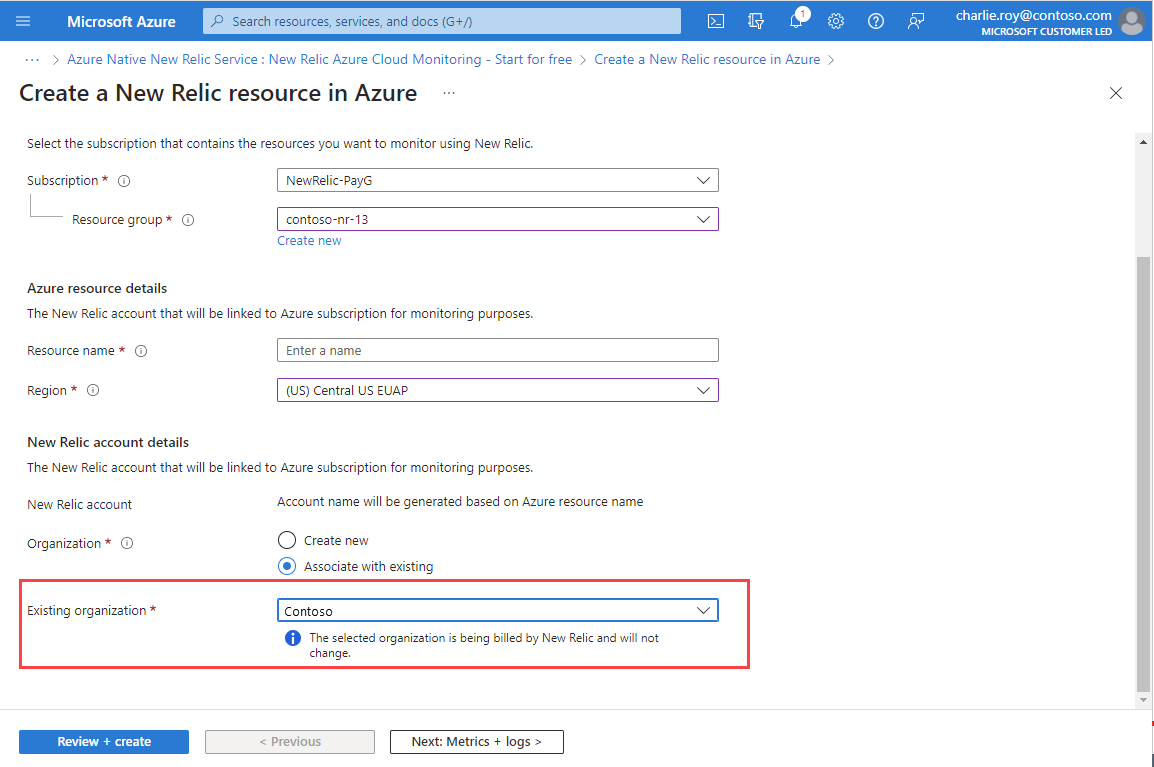
Property Description Subscription Select the Azure subscription that you want to use for creating the New Relic resource. You must have owner access. Resource group Specify whether you want to create a new resource group or use an existing one. A resource group is a container that holds related resources for an Azure solution. Resource name Specify a name for the New Relic resource. This name is the friendly name of the New Relic account. Region Select the region where the New Relic resource on Azure and the New Relic account gets created. When you're choosing the organization under which to create the New Relic account, you have two options: Create new organization, or Associate with existing organization to link the newly created account.
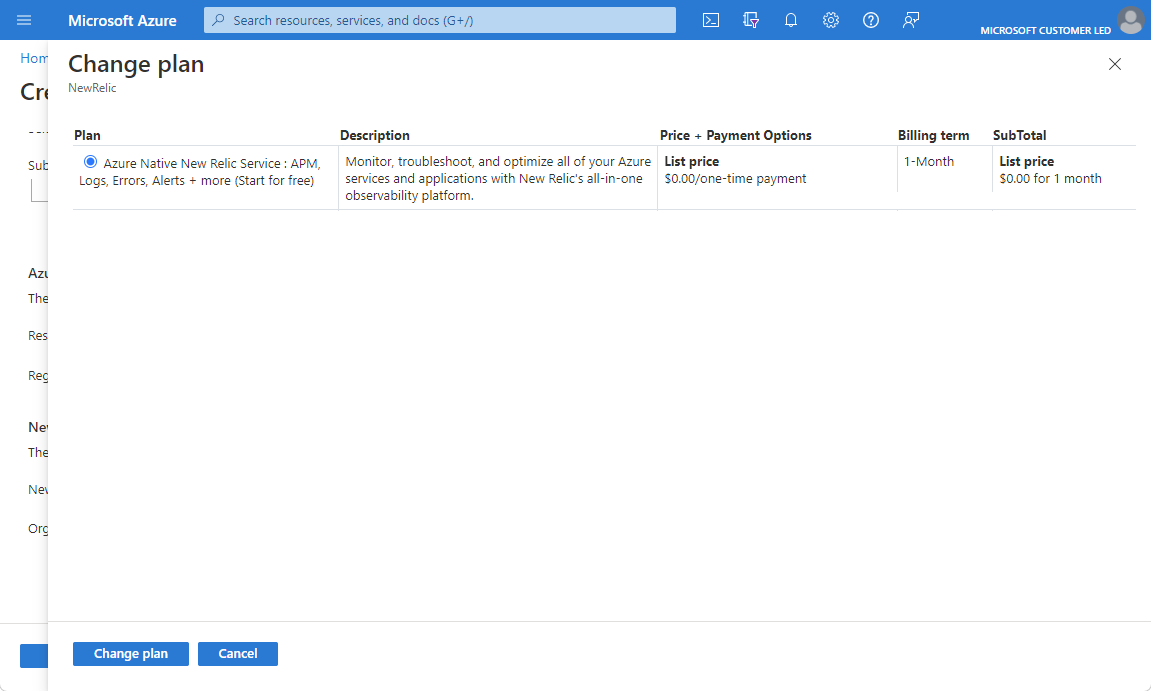
If you select Create new organization, you can choose a plan from the list of available plans by selecting Change Plan in the working pane.
If you select Associate with existing to associate the New Relic resource with an existing organization, the corresponding billing information is the same as when you created the organization.
If New Relic is currently managing billing for the organization you selected, it remains so.
Configure metrics and logs
Your next step is to configure metrics and logs on the Metrics and Logs tab. When you're creating the New Relic resource, you can set up metrics monitoring and automatic log forwarding:
To set up monitoring of platform metrics for Azure resources by New Relic, select Enable metrics collection. If you leave this option cleared, New Relic doesn't pull metrics.
To send subscription-level logs to New Relic, select Subscription activity logs. If you leave this option cleared, no subscription-level logs are sent to New Relic.
These logs provide insight into the operations on your resources at the control plane. These logs also include updates on service-health events.
Use the activity log to determine what, who, and when for any write operations (
PUT,POST,DELETE). There's a single activity log for each Azure subscription.To send Azure resource logs to New Relic, select Azure resource logs for all supported resource types. The types of Azure resource logs are listed in Azure Monitor Resource Log categories.
These logs provide insight into operations that were taken on an Azure resource at the data plane. For example, getting a secret from a key vault is a data plane operation. Making a request to a database is also a data plane operation. The content of resource logs varies by the Azure service and resource type.
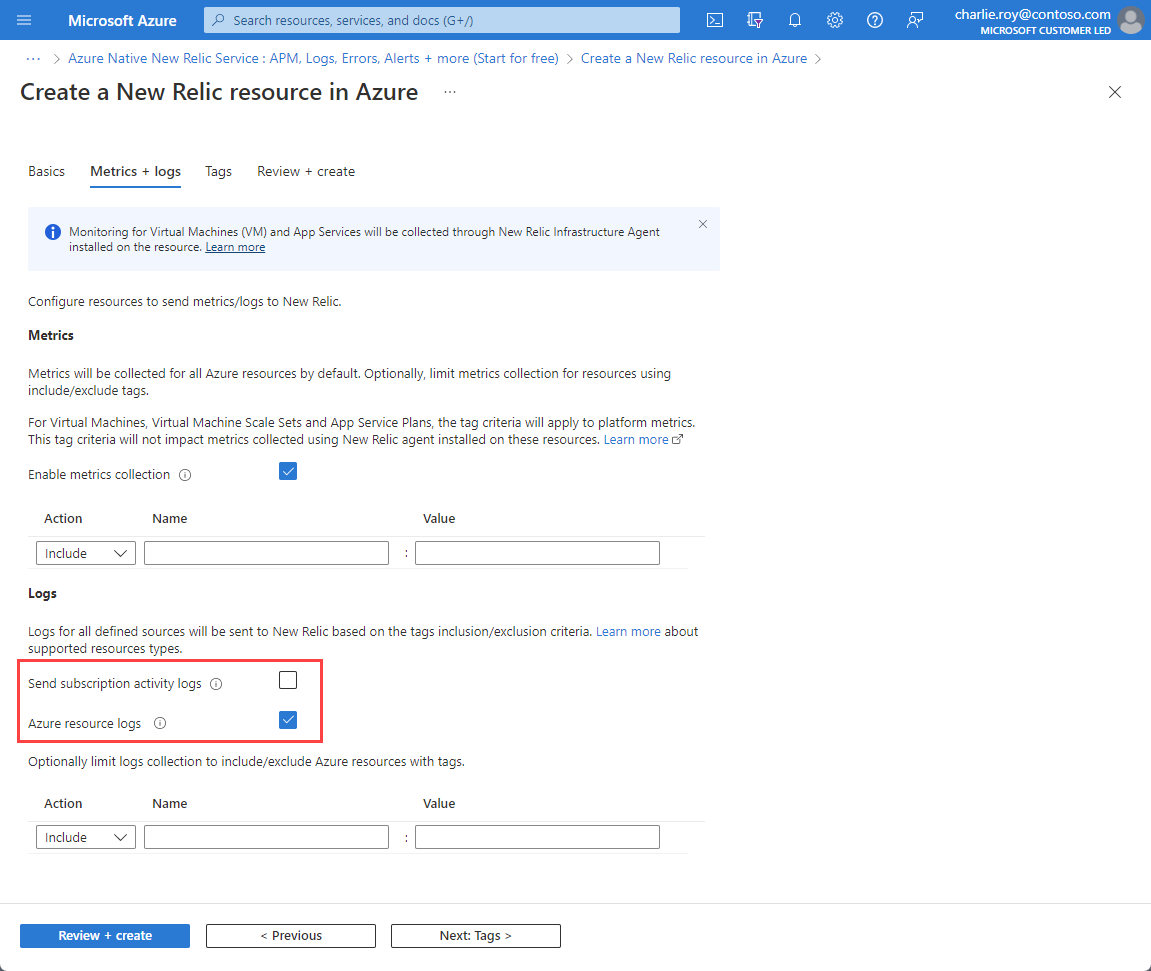
When the checkbox for Azure resource logs is selected, logs are forwarded for all resources by default. To filter the set of Azure resources that send logs to New Relic, use inclusion and exclusion rules and set Azure resource tags:
- All Azure resources with tags defined in include rules send logs to New Relic.
- All Azure resources with tags defined in exclude rules don't send logs to New Relic.
- If there's a conflict between inclusion and exclusion rules, the exclusion rule applies.
Azure charges for logs sent to New Relic. For more information, see the pricing of platform logs sent to Azure Marketplace partners.
Note
You can collect metrics for virtual machines and app services by installing the New Relic agent after you create the New Relic resource.
After you finish configuring metrics and logs, select Next.
Set up resource tags
On the Tags tab, you can choose to set up tags for the New Relic resource.

You can also skip this step and go directly to the Review and Create tab.
Review and create the resource
On the Review and Create tab, review the resource setup information.

Ensure that you've passed validation, and then select Create to begin the resource deployment.
After creating resource, you must set up your account config to monitor other resources with Azure Native New Relic Service. For more information, see Setting up your New Relic account config.
Next steps
Get started with Azure Native New Relic Service on
Feedback
Coming soon: Throughout 2024 we will be phasing out GitHub Issues as the feedback mechanism for content and replacing it with a new feedback system. For more information see: https://aka.ms/ContentUserFeedback.
Submit and view feedback for