Build a containerized Python web app in the cloud
This article is part of a tutorial about how to containerize and deploy a Python web app to Azure App Service. App Service enables you to run containerized web apps and deploy through continuous integration/continuous deployment (CI/CD) capabilities with Docker Hub, Azure Container Registry, and Visual Studio Team Services. In this part of the tutorial, you learn how to build the containerized Python web app in the cloud.
In the previous optional part of this tutorial, a container image was build and run locally. In contrast, in this part of the tutorial, you build (containerize) a Python web app into a Docker image directly in Azure Container Registry. Building the image in Azure is typically faster and easier than building locally and then pushing the image to a registry. Also, building in the cloud doesn't require Docker to be running in your dev environment.
Once the Docker image is in Azure Container Registry, it can be deployed to Azure App service.
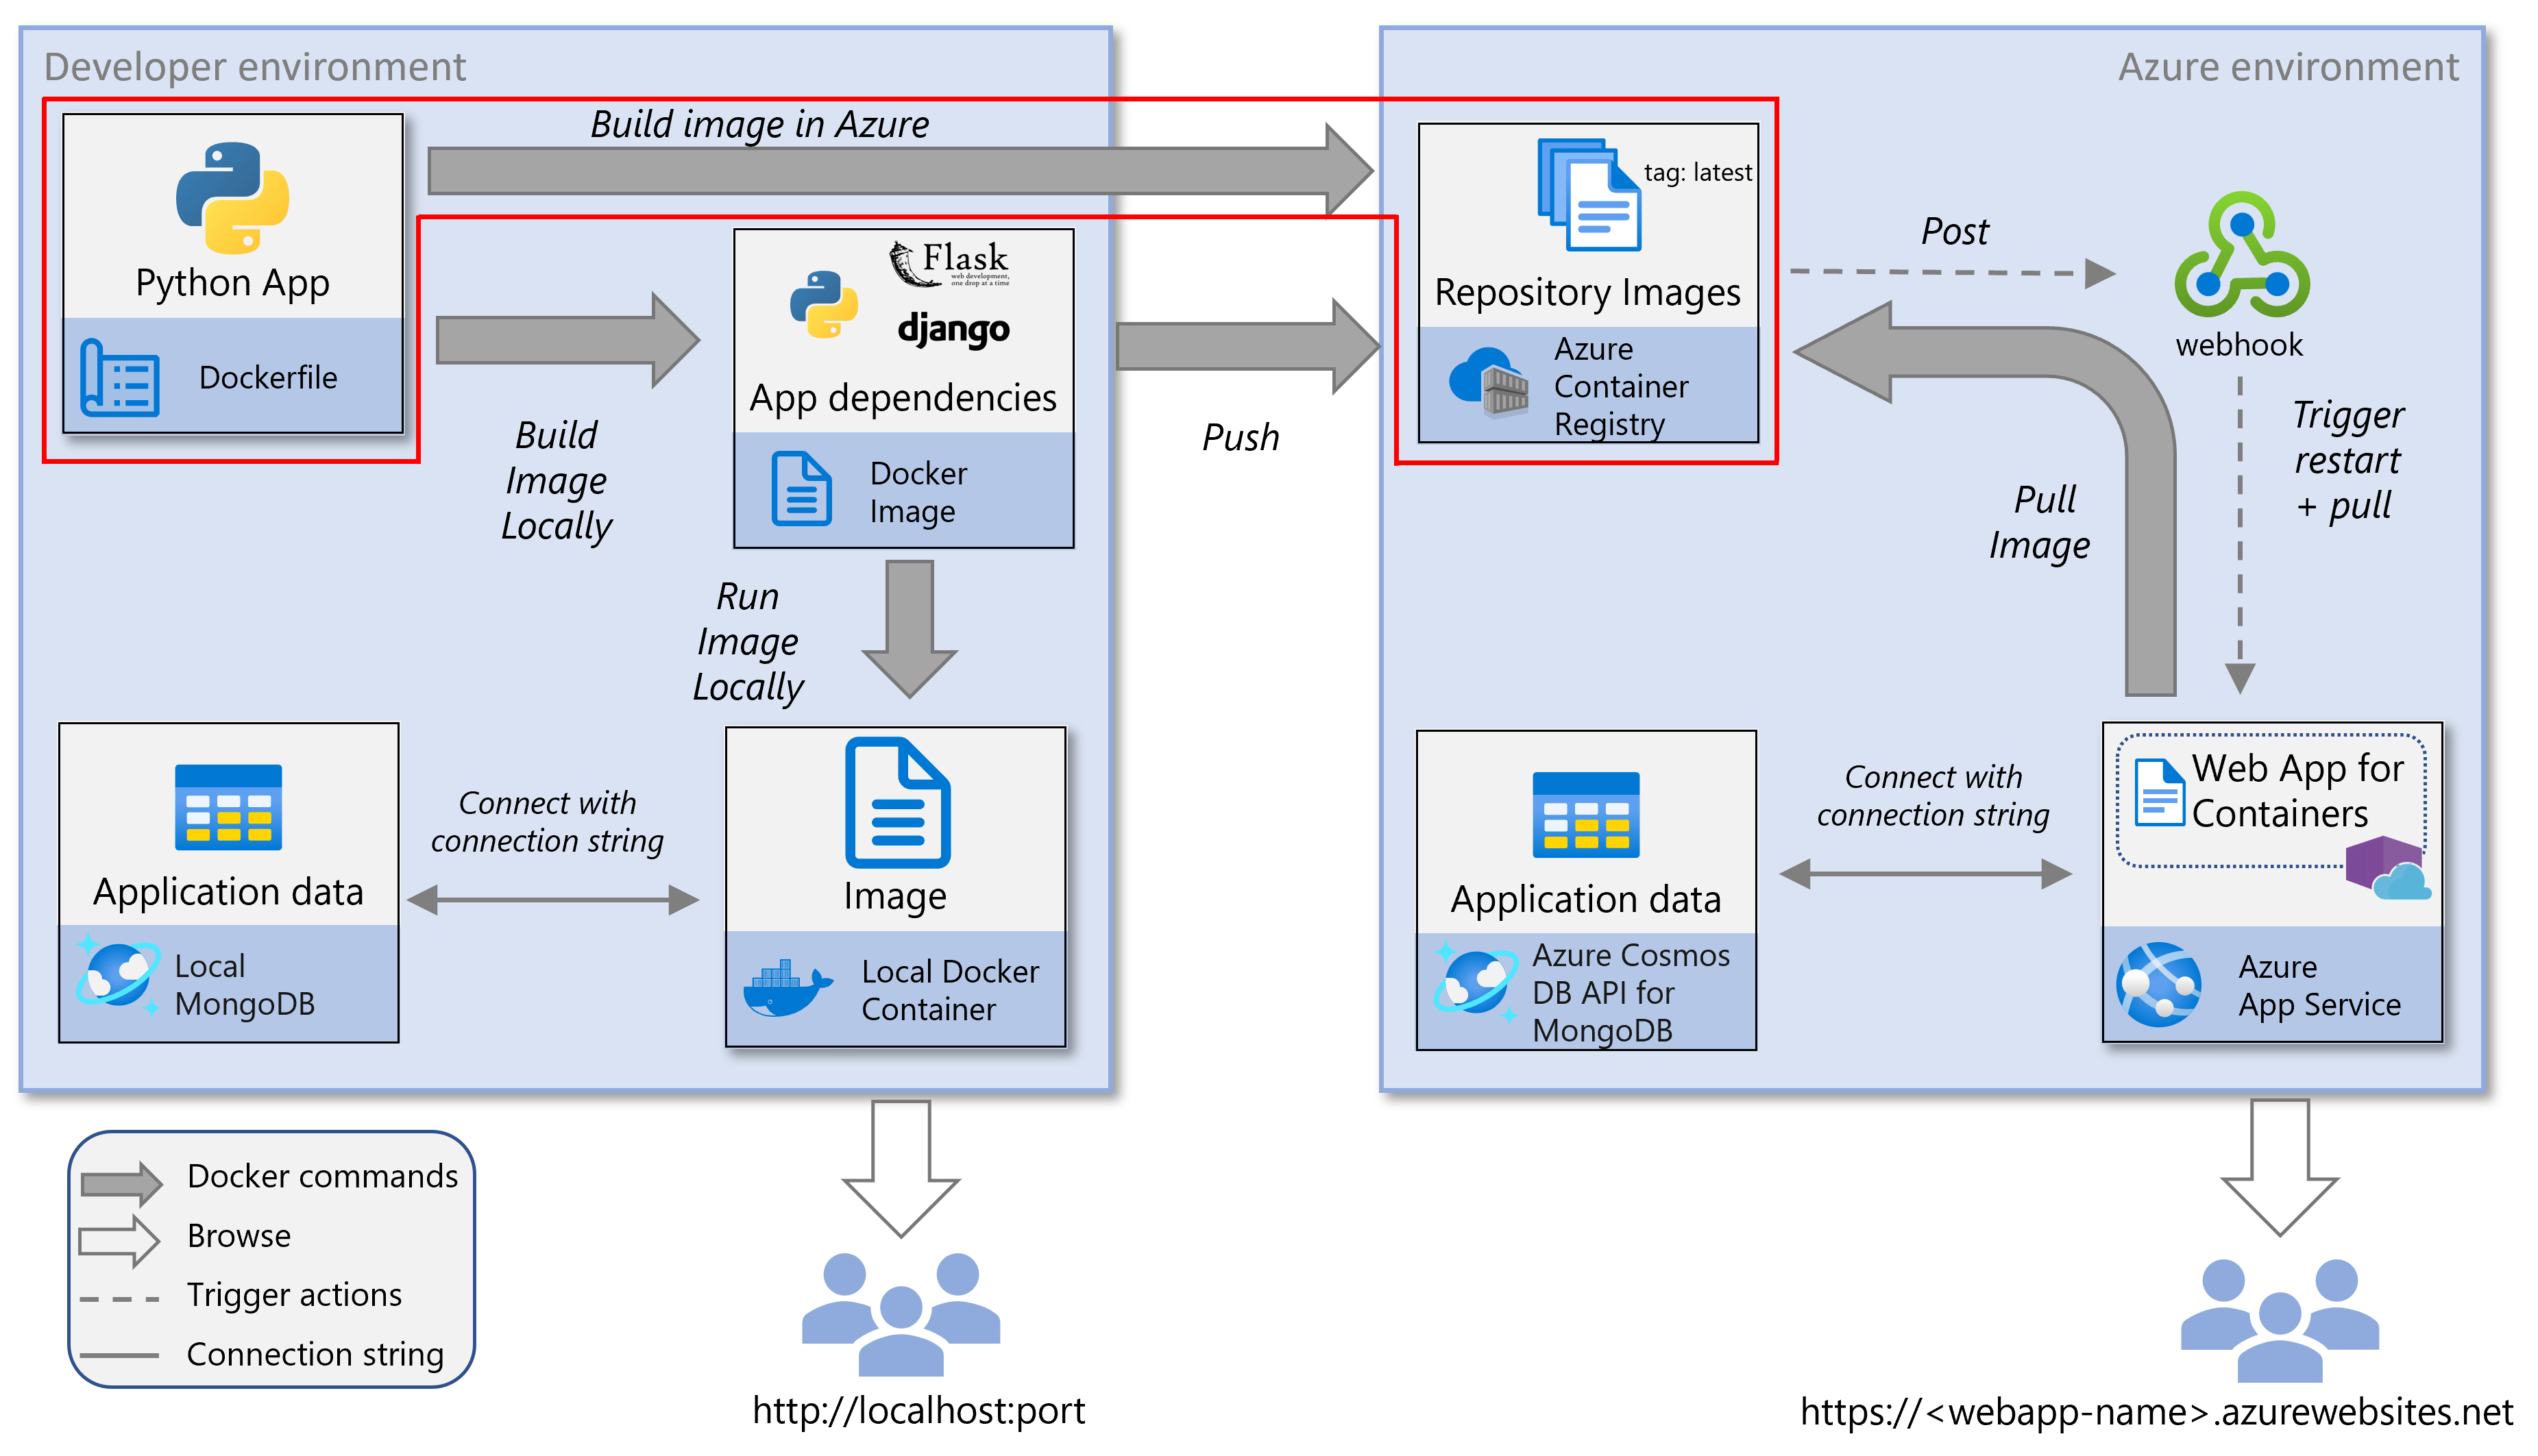
The service diagram shown below highlights the components covered in this article.
1. Create an Azure Container Registry
If you already have an Azure Container Registry you can use, go to the next step. If you don't, create one.
Azure CLI commands can be run in the Azure Cloud Shell or on a workstation with the Azure CLI installed. When running in Cloud Shell, skip Step 3.
Step 1. Create a resource group if needed with the az group create command. If you've already set up an Azure Cosmos DB for MongoDB account in part 2. Build and test container locally of this tutorial, set RESOURCE_GROUP_NAME to the name of the resource group you used for that account and move on to Step 2.
RESOURCE_GROUP_NAME='msdocs-web-app-rg'
LOCATION='eastus'

az group create -n $RESOURCE_GROUP_NAME -l $LOCATION
LOCATION should be an Azure location value. Choose a location near you. You can list Azure location values with the following command: az account list-locations -o table.
Step 2. Create a container registry with the az acr create command.
REGISTRY_NAME='<your Azure Container Registry name>'

az acr create -g $RESOURCE_GROUP_NAME -n $REGISTRY_NAME --sku Basic
REGISTRY_NAME must be unique within Azure and contain 5-50 alphanumeric characters.
In the JSON output of the command look for the loginServer value, which is the fully qualified registry name (all lowercase) and which should include the registry name you specified.
Step 3. If you're running the Azure CLI locally, log in to the registry using the az acr login command.
az acr login -n $REGISTRY_NAME
The command adds "azurecr.io" to the name to create the fully qualified registry name. If successful, you'll see the message "Login Succeeded".
Note
The az acr login command isn't needed or supported in Cloud Shell.
2. Build an image in Azure Container Registry
You can build the container image directly in Azure in a few ways. First, you can use the Azure Cloud Shell, which builds the image without using your local environment at all. You can also build the container image in Azure from your local environment using VS Code or the Azure CLI. Building the image in the cloud doesn't require Docker to be running in your local environment. If you need to, you can follow the instructions in Clone or download the sample app in part 2 of this tutorial to get the sample Flask or Django web app.
Azure CLI commands can be run on a workstation with the Azure CLI installed or in Azure Cloud Shell. When running in Cloud Shell, skip Step 1.
Step 1. If you're running the Azure CLI locally, log into registry if you haven't done so already with the az acr login command.
az acr login -n $REGISTRY_NAME
If you're accessing the registry from a subscription different from the one in which the registry was created, use the --suffix switch.
Note
The az acr login command isn't needed or supported in Cloud Shell.
Step 2. Build the image with the az acr build command.
az acr build -r $REGISTRY_NAME -g $RESOURCE_GROUP_NAME -t msdocspythoncontainerwebapp:latest .
In this command:
The dot (".") at the end of the command indicates the location of the source code to build. If you aren't running this command in the sample app root directory, specify the path to the code.
Rather than a path to the code in your environment, you can, optionally, specify a path to the sample GitHub repo: https://github.com/Azure-Samples/msdocs-python-django-container-web-app or https://github.com/Azure-Samples/msdocs-python-flask-container-web-app.
If you leave out the
-t(same as--image) option, the command queues a local context build without pushing it to the registry. Building without pushing can be useful to check that the image builds.
Step 3. Confirm the container image was created with the az acr repository list command.
az acr repository list -n $REGISTRY_NAME
Next step
Feedback
Coming soon: Throughout 2024 we will be phasing out GitHub Issues as the feedback mechanism for content and replacing it with a new feedback system. For more information see: https://aka.ms/ContentUserFeedback.
Submit and view feedback for


