Restore archived logs from search
Restore data from an archived log to use in high performing queries and analytics.
Before you restore data in an archived log, see Start an investigation by searching large datasets (preview) and Restore in Azure Monitor.
Important
Microsoft Sentinel is available as part of the public preview for the unified security operations platform in the Microsoft Defender portal. For more information, see Microsoft Sentinel in the Microsoft Defender portal.
Restore archived log data
To restore archived log data in Microsoft Sentinel, specify the table and time range for the data you want to restore. Within a few minutes, the log data is available within the Log Analytics workspace. Then you can use the data in high-performance queries that support full Kusto Query Language (KQL).
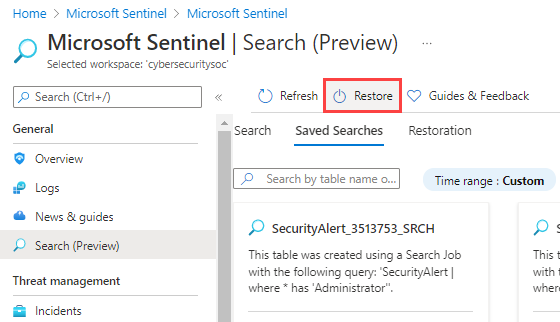
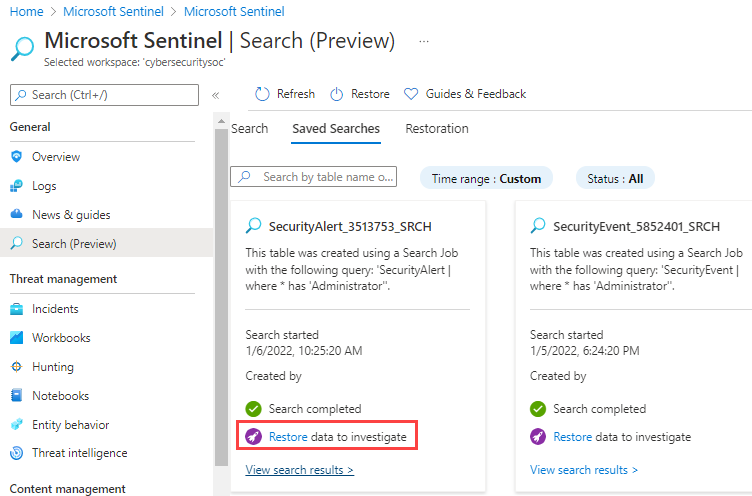
You can restore archived data directly from the Search page or from a saved search.
For Microsoft Sentinel in the Azure portal, under General, select Search.
For Microsoft Sentinel in the Defender portal, select Microsoft Sentinel > Search.Restore log data in one of two ways:
- At the top of Search page, select Restore.
- Select the Saved Searches tab and Restore on the appropriate search.
- At the top of Search page, select Restore.
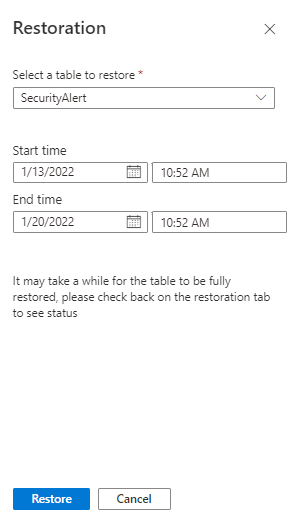
Select the table you want to restore.
Select the time range of the data that you want restore.
Select Restore.
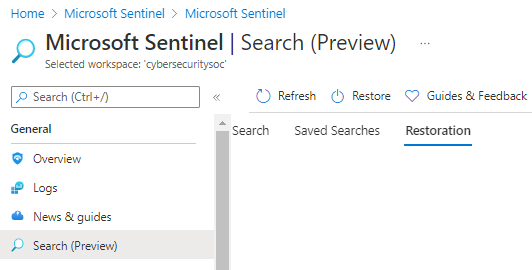
Wait for the log data to be restored. View the status of your restoration job by selecting on the Restoration tab.
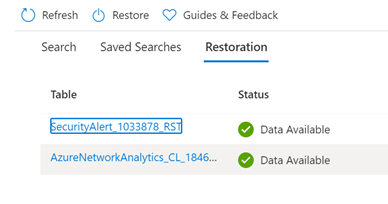
View restored log data
View the status and results of the log data restore by going to the Restoration tab. You can view the restored data when the status of the restore job shows Data Available.
In Microsoft Sentinel, select Search > Restoration.
When your restore job is complete, select the table name.
Review the results.
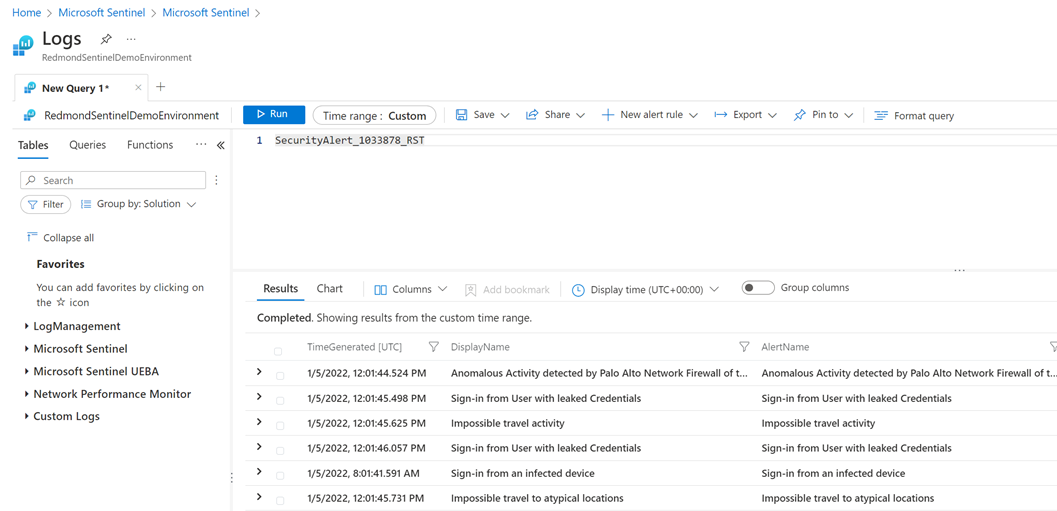
The Logs query pane shows the name of table containing the restored data. The Time range is set to a custom time range that uses the start and end times of the restored data.
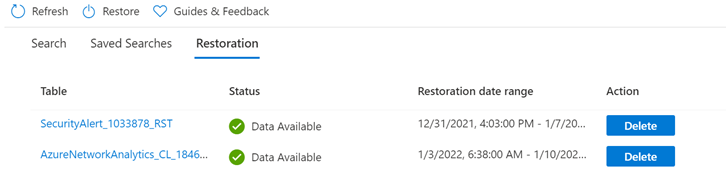
Delete restored data tables
To save costs, we recommend you delete the restored table when you no longer need it. When you delete a restored table, Azure doesn't delete the underlying source data.
In Microsoft Sentinel, select Search > Restoration.
Identify the table you want to delete.
Select Delete for that table row.
Next steps
Feedback
Coming soon: Throughout 2024 we will be phasing out GitHub Issues as the feedback mechanism for content and replacing it with a new feedback system. For more information see: https://aka.ms/ContentUserFeedback.
Submit and view feedback for