Prepare Azure for on-premises disaster recovery to Azure
This article describes how to prepare Azure resources and components so that you can set up disaster recovery of on-premises VMware VMs, Hyper-V VMs, or Windows/Linux physical servers to Azure, using the Azure Site Recovery service.
This article is the first tutorial in a series that shows you how to set up disaster recovery for on-premises VMs.
In this tutorial, you learn how to:
- Verify that the Azure account has replication permissions.
- Create a Recovery Services vault. A vault holds metadata and configuration information for VMs, and other replication components.
- Set up an Azure virtual network (VNet). When Azure VMs are created after failover, they're joined to this network.
Note
Tutorials show you the simplest deployment path for a scenario. They use default options where possible, and don't show all possible settings and paths. For detailed instructions, review the article in the How To section of the Site Recovery Table of Contents.
Sign in to Azure
If you don't have an Azure subscription, create a free account before you begin. Then sign in to the Azure portal.
Prerequisites
Before you start, do the following:
- Review the architecture for VMware, Hyper-V, and physical server disaster recovery.
- Read common questions for VMware and Hyper-V
Verify account permissions
If you just created your free Azure account, you're the administrator of your subscription and you have the permissions you need. If you're not the subscription administrator, work with the administrator to assign the permissions you need. To enable replication for a new virtual machine, you must have permission to:
- Create a VM in the selected resource group.
- Create a VM in the selected virtual network.
- Write to an Azure storage account.
- Write to an Azure managed disk.
To complete these tasks your account should be assigned the Virtual Machine Contributor built-in role. In addition, to manage Site Recovery operations in a vault, your account should be assigned the Site Recovery Contributor built-in role.
Create a recovery services vault
In the Azure portal, select Create a resource.
Search the Azure Marketplace for Recovery Services.
Select Backup and Site Recovery from the search results, and in the Backup and Site Recovery page, click Create.
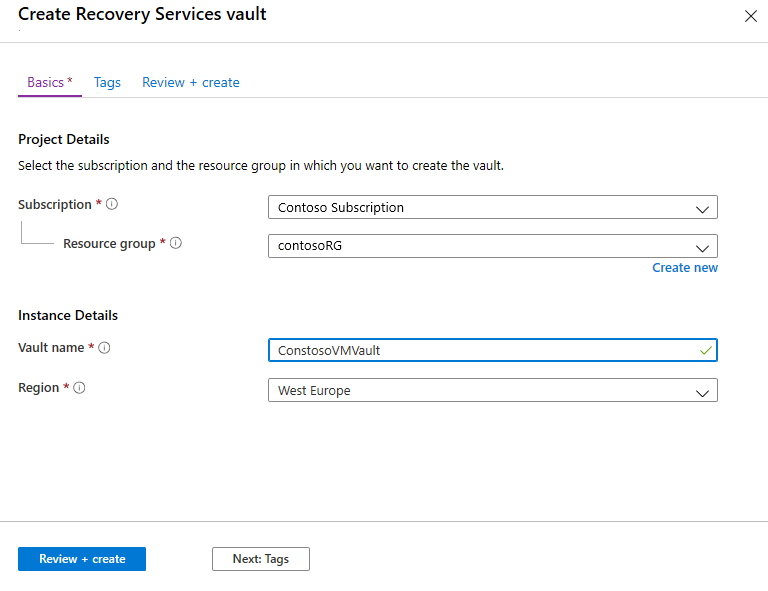
In the Create Recovery Services vault page, under the Basics > Project details section, do the following:
- Under Subscription. We're using Contoso Subscription.
- In Resource group, select an existing resource group or create a new one. For example, contosoRG.
In the Create Recovery Services vault page, under Basics > Instance details section, do the following:
- In Vault name, enter a friendly name to identify the vault. For example, ContosoVMVault.
- In Region, select the region where the vault should be located. For example, (Europe) West Europe.
- Select Review + create > Create to create the recovery vault.
The new vault will now be listed in Dashboard > All resources, and on the main Recovery Services vaults page.
Set up an Azure network
On-premises machines are replicated to Azure managed disks. When failover occurs, Azure VMs are created from these managed disks, and joined to the Azure network you specify in this procedure.
In the Azure portal, select Create a resource.
Under Categories, select Networking > Virtual network.
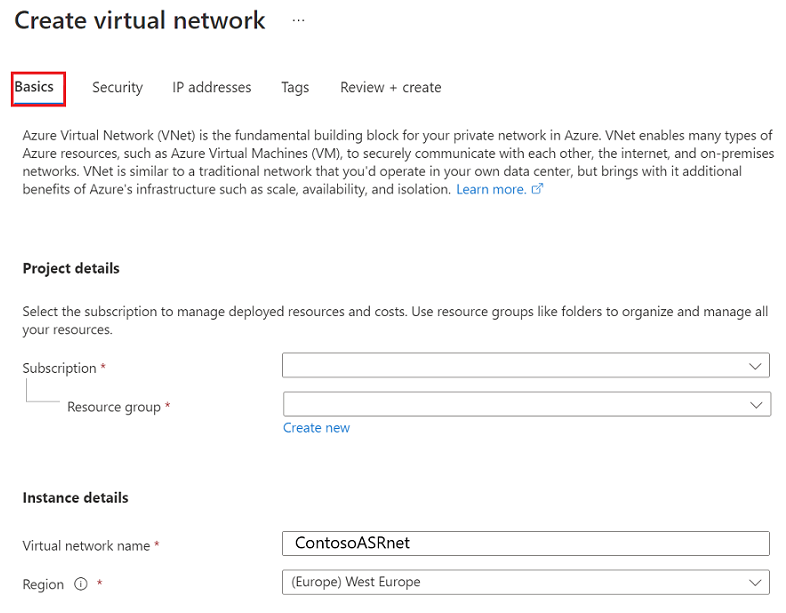
In Create virtual network page, under the Basics tab, do the following:
- In Subscription, select the subscription in which to create the network.
- In Resource group, select the resource group in which to create the network. For this tutorial, use the existing resource group contosoRG.
- In Virtual network name, enter a network name. The name must be unique within the Azure resource group. For example, ContosoASRnet.
- In Region, choose (Europe) West Europe. The network must be in the same region as the Recovery Services vault.
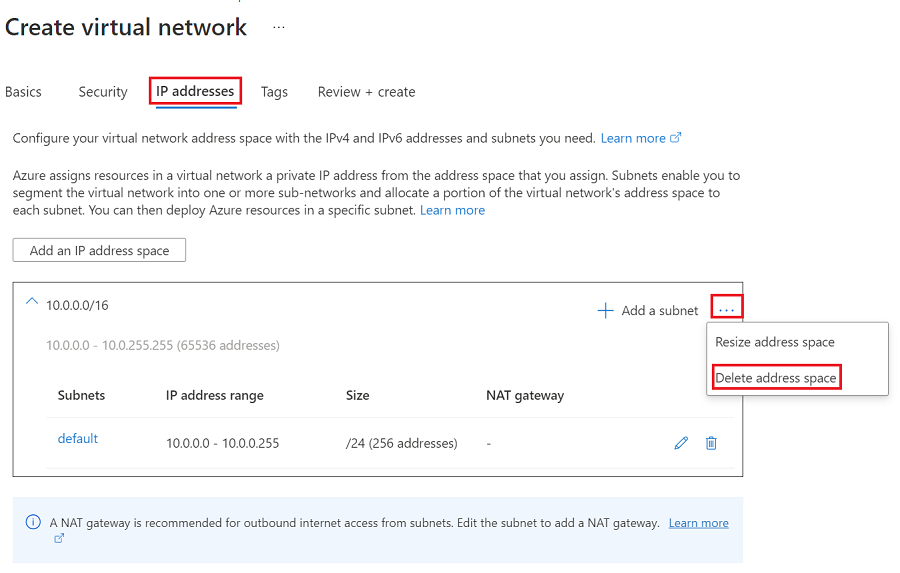
In Create virtual network > IP addresses tab, do the following:
As there's no subnet for this network, you will first delete the pre-existing address range. To do so, select the ellipsis (...), under available IP address range, then select Delete address space.
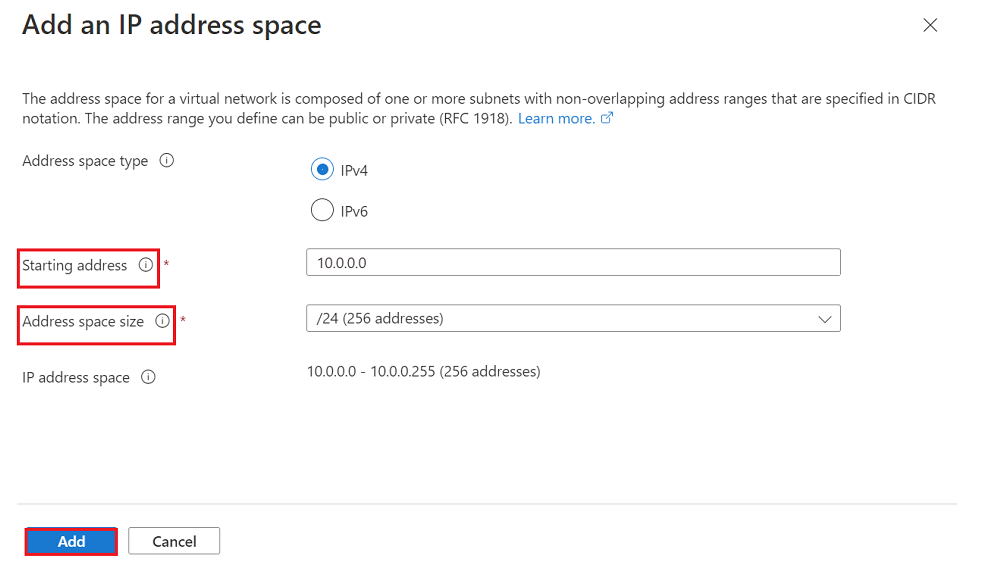
After deleting the pre-existing address range, select Add an IP address space.
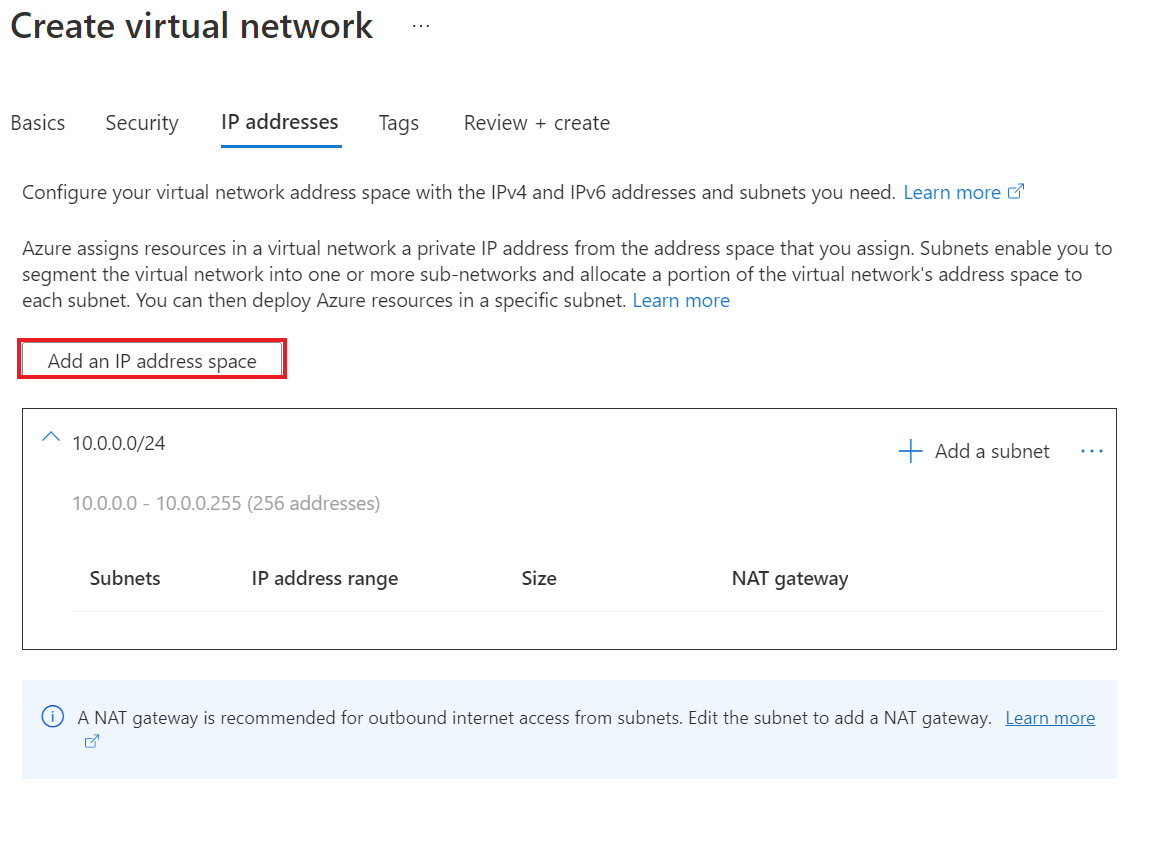
In Starting address enter 10.0.0.
Under Address space size, select /24 (256 addresses).
Select Add.
Select Review + create > Create to create a new virtual network.
The virtual network takes a few seconds to create. After it's created, you'll see it in the Azure portal dashboard.
Next steps
- For VMware disaster recovery, prepare the on-premises VMware infrastructure.
- For Hyper-V disaster recovery, prepare the on-premises Hyper-V servers.
- For physical server disaster recovery, set up the configuration server and source environment
- Learn about Azure networks.
- Learn about managed disks.
Feedback
Coming soon: Throughout 2024 we will be phasing out GitHub Issues as the feedback mechanism for content and replacing it with a new feedback system. For more information see: https://aka.ms/ContentUserFeedback.
Submit and view feedback for