Write to Azure SQL Database table from your Azure Stream Analytics jobs
Azure Stream Analytics supports Azure SQL Database as an output for your streaming query. This article explains how to use SQL Database as an output for your Stream Analytics job in the Azure portal.
Prerequisites
Create a Stream Analytics job.
Create an Azure SQL Database to which your Stream Analytics job will write output.
Write to a new table in SQL Database
This section describes how you can configure your job to write to a table in your Azure SQL Database that hasn't yet been created.
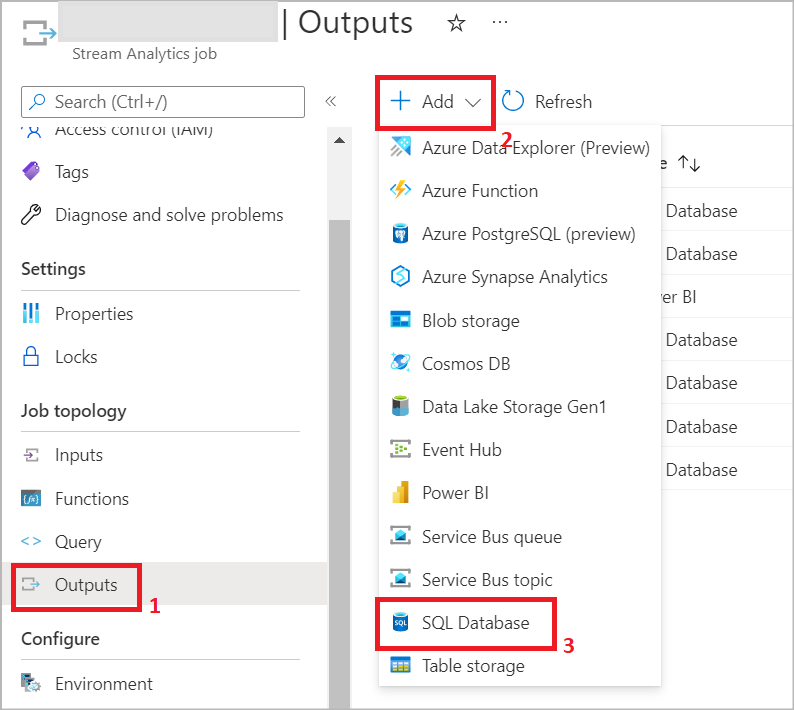
In your Stream Analytics job, select Outputs under Job topology. Click Add and choose SQL Database.
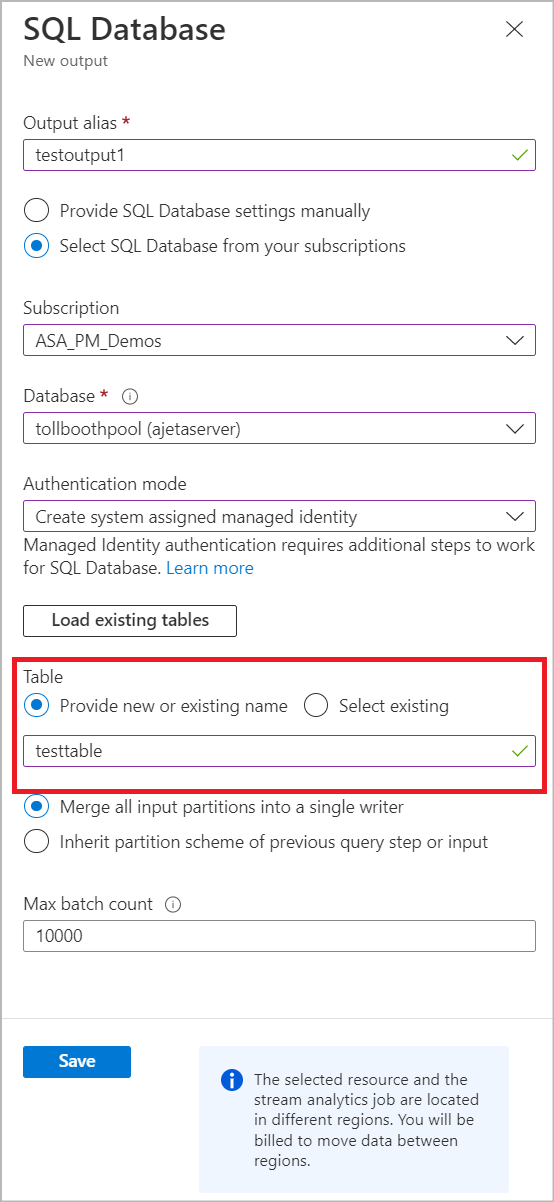
Select an output alias that will be used in your job’s query. Provide your database name and authentication mode. You can learn more about SQL output configuration options.
Enter a table name that you want to create in your Azure SQL Database. Click Save. Note: Saving this output doesn’t create the table in your SQL Database. Next steps provide more details on when the table gets created.
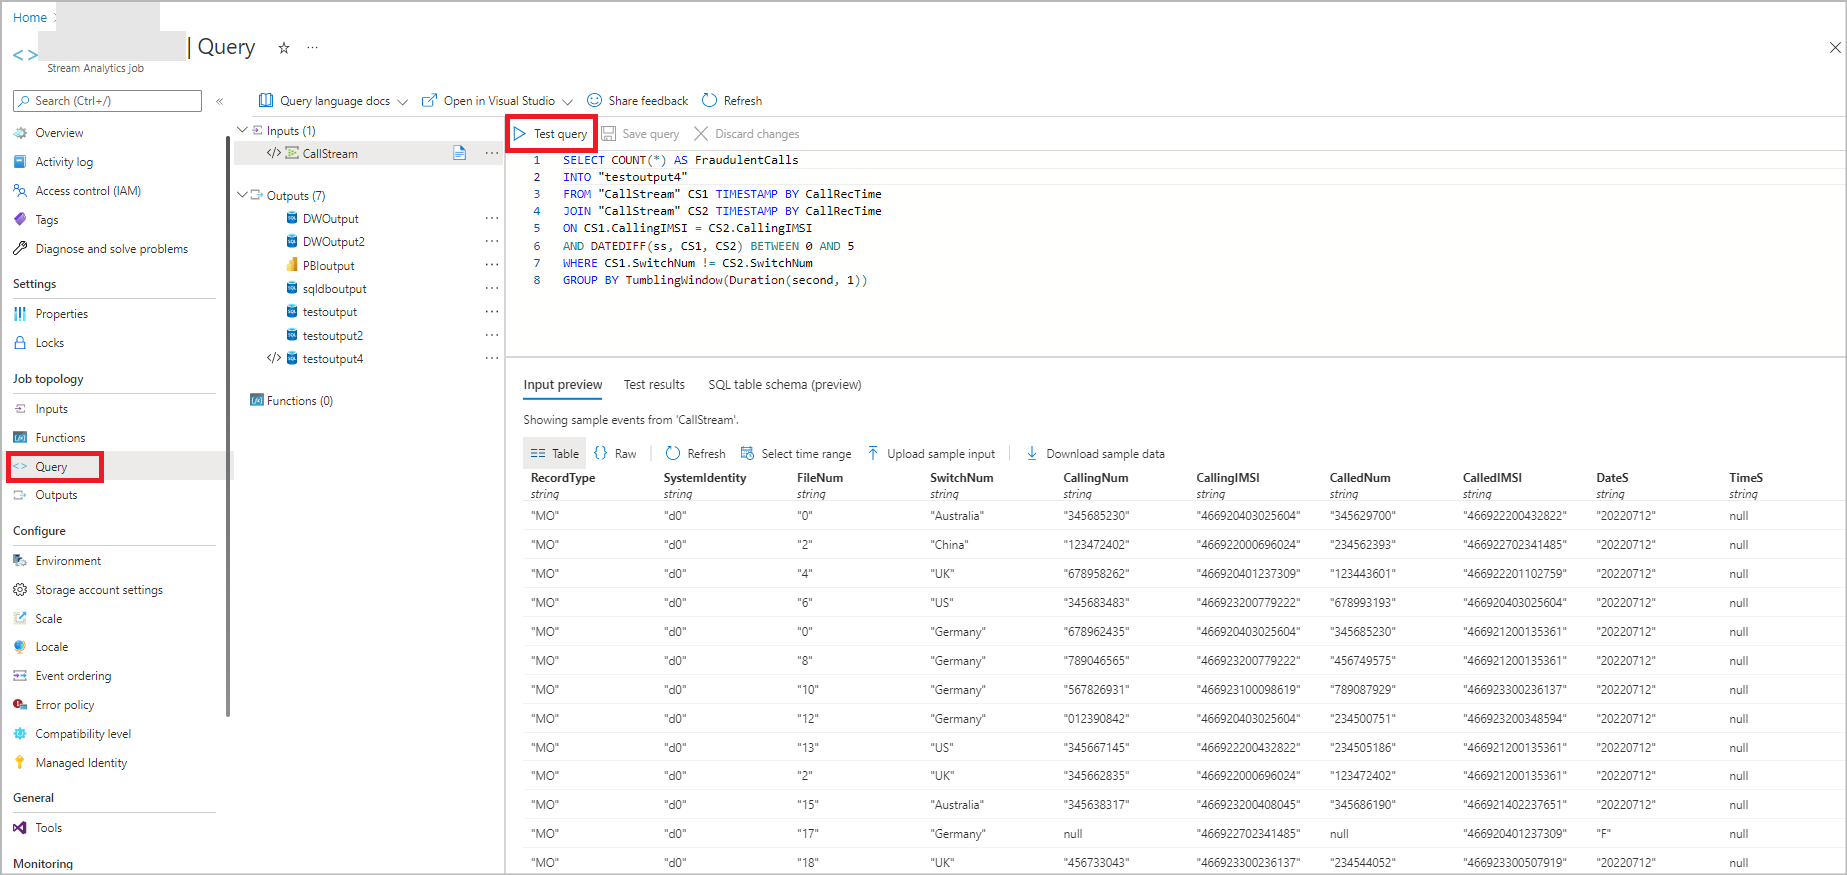
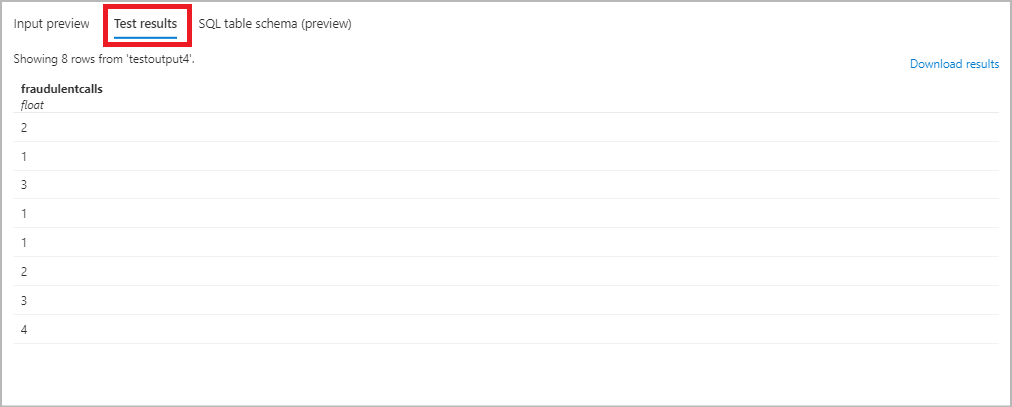
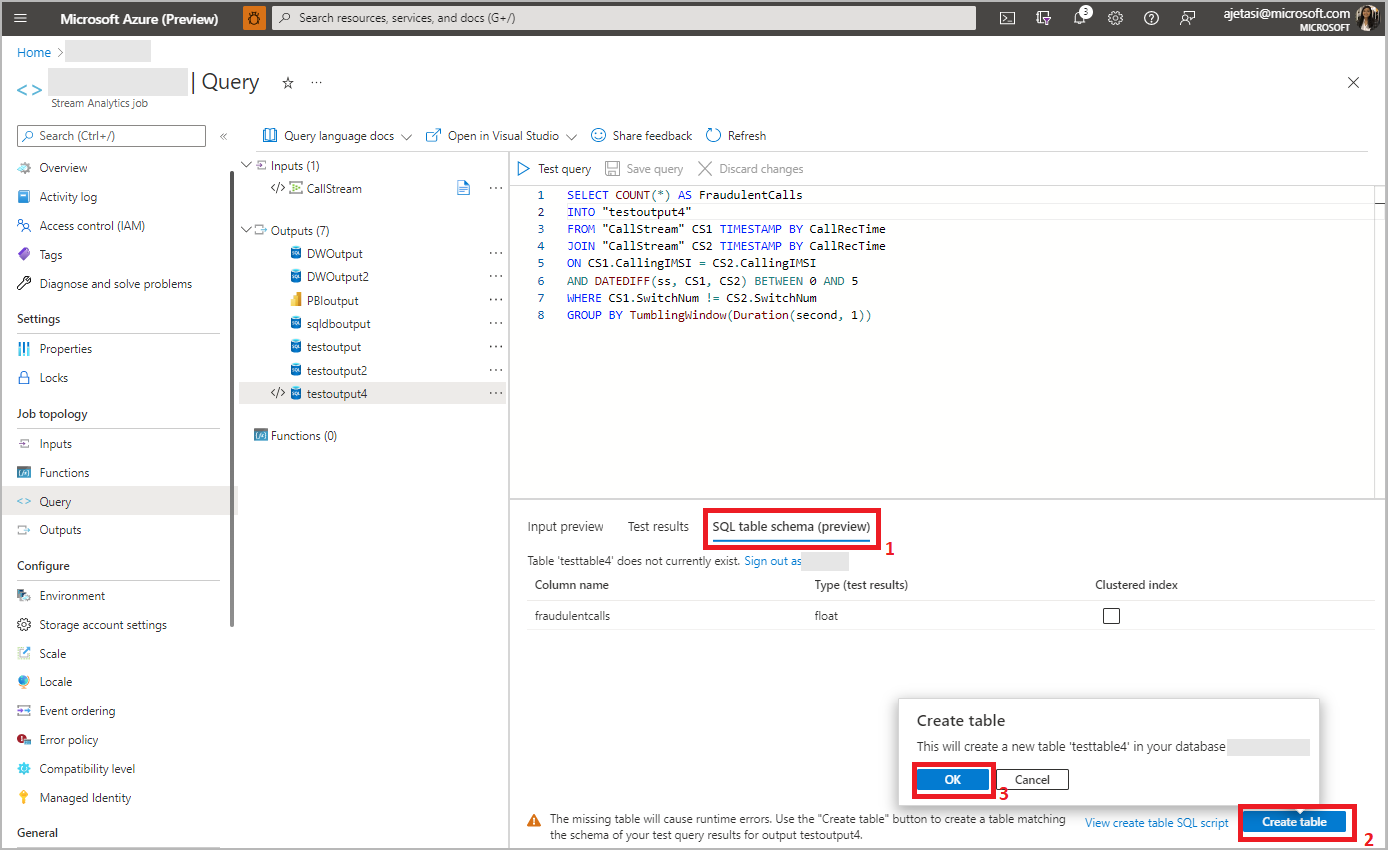
Select Query under Job Topology and use the alias in your query to write the output in the table name you provided in previous step. Click Test query to test the query logic and view Test results which shows schema of the output that will be produced by the job. Note: To test your query, you need to have either incoming streaming data in your input source, or you can upload sample data to test query. You can learn more about Test Stream Analytics query.
Click SQL table schema to view the column name and type. Click Create table and your table will be created in the SQL database.
If your Stream Analytics query is modified to produce different schema, you'll need to alter your table definition in your SQL Database. This ensures that the Stream Analytics job doesn’t encounter data conversion errors while trying to write to the sink.
Once your query is final, select Overview and Start the job. You can then navigate to the SQL Database table to see your streaming query output.


Select an existing table from SQL Database
This section describes how you can configure your job to write to a table that already exists in your Azure SQL Database.
In your Stream Analytics job, select Outputs under Job topology. Click Add and choose SQL Database.
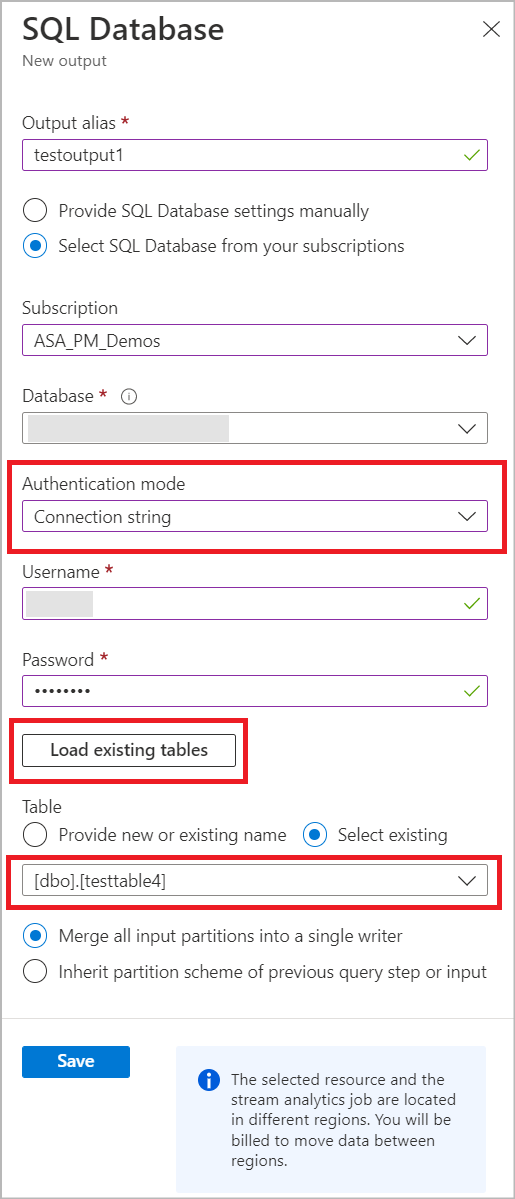
Select an output alias that will be used in your job’s query. Provide your database name and authentication mode. You can learn more about SQL output configuration options.
You can pick an existing table from the selected SQL Database by entering your SQL Authentication details. This will load a list of table names from your Database. Select the table name from the list or manually enter table name and Save.
Select Query under Job Topology and use the alias name in your query to write the output in the selected table. Click Test query to test the query logic and view Test results. Note: To test your query, you need to have either incoming streaming data in Event Hub/IoT Hub, or you can upload sample data to test query. You can learn more about Test Stream Analytics query.
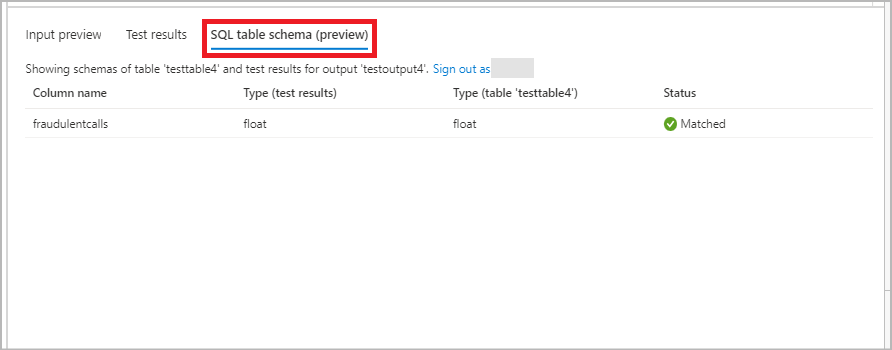
In SQL table schema tab, you can see a column name and its type from incoming data and in the selected table. You can see the status whether the incoming data type and selected SQL table match or not. If it's not a match, you'll be prompted to update your query to match table schema.
Once your query is final, select Overview and Start the job. You can then navigate to the SQL Database table to see your streaming query output.


Common data type mismatch reasons
It's important to ensure that the output of your Stream Analytics job matches the column names and data types expected by your SQL Database table. If there's a mismatch, your job will run into data conversion errors, and continuously retry until the SQL table definition is changed. You can change your job’s behavior to drop such output that cause data conversion errors and proceed to the next one. The most common schema mismatch reasons are described below.
- Type mismatch: The query and target types aren't compatible. Rows won't be inserted in the destination. Use a conversion function such as TRY_CAST() to align types in the query. The alternate option is to alter the destination table in your SQL database.
- Range: The target type range is considerably smaller than the one used in the query. Rows with out-of-range values may not be inserted in the destination table, or truncated. Consider altering the destination column to a larger type range.
- Implicit: The query and target types are different but compatible. The data will be implicitly converted, but this could result in data loss or failures. Use a conversion function such as TRY_CAST() to align types in the query, or alter the destination table.
- Record: This type isn't yet supported for this output. The value will be replaced by the string ‘record’. Consider parsing the data, or using an UDF to convert to string.
- Array: This type isn't yet supported natively in Azure SQL Database. The value will be replaced by the string ‘record’. Consider parsing the data, or using an UDF to convert to string.
- Column missing from destination table: This column is missing from the destination table. The data won't be inserted. Add this column to your destination table if needed.
Next steps
Feedback
Coming soon: Throughout 2024 we will be phasing out GitHub Issues as the feedback mechanism for content and replacing it with a new feedback system. For more information see: https://aka.ms/ContentUserFeedback.
Submit and view feedback for