Configure print management record-specific ER destinations
This article explains how a user in the System Administrator or Accounts Receivable Clerk role can perform the following tasks:
- Configure named Electronic reporting (ER) destinations for an ER solution that generates free text invoices.
- Assign an ER destination to a single print management record.
The procedures can be completed in the USMF company. No coding is required.
Introduction
You can configure destinations for each folder in the file output component of an ER format configuration that is used to generate an outbound document. When you run an ER format of this type, if you have the appropriate access rights, you can also change the configured destination settings at runtime.
In Microsoft Dynamics 365 Finance version 10.0.17 and later, an action code can be set up for an ER format to specify the action that users perform by running that ER format. For example, in the Accounts receivable module, in the print management settings, you can select an ER format that generates a specific business document, such as a free text invoice. You can then select View to preview the invoice or Print to send it to a printer. If an action is passed for the running ER format at runtime, you can configure different ER destinations for different user actions.
In Finance version 10.0.21 and later, a named destination can be set up for an ER format and assigned to the print management record that is processed when that ER format is run. For example, in the Accounts receivable module, in the print management settings, you want to configure the Original record to perform the following actions:
- Run an ER format.
- Email the generated invoice to a customer.
- Configure the Copy record to run the same format.
- Print a copy of the invoice to a network printer.
In this case, you must configure different ER destinations for the ER format that is running, and you must select the destinations for different print management records.
Prerequisites
Before you begin, the Allow to set up ER destinations per print management item feature must be turned on in the Feature management workspace. The source code must also be changed to allow for the configuration of named ER destinations in the current Finance instance and to enable the new ER API.
Additionally, the Free text invoice (Excel) ER configuration must be imported into your Finance instance.
Configure a new ER destination
Go to Accounts receivable > Invoices > All free text invoices.
Select an invoice for customer account US-001.
On the Free text invoice page, on the Invoice tab, in the Print management group, select Print management.
On the Print management setup page, expand Module - accounts receivable > Documents > Free text invoice, select the Original record, and then follow these steps:
- Observe the current settings of the selected record:
- The default SSRS report FreeTextInvoice.Report is selected in the Report format field.
- The <Default> name is shown in the Destination field informing that there is no custom destination selected for the assigned SSRS report.
- In the Report format field, select the Free text invoice (Excel) ER format configuration.
- The name of the Destination field is changed to Destination name.
- The <No named destination> name is shown in the Destination name field informing that there is no named destination selected for the assigned ER format.
- Select the arrow button to the right of the Destination name field.
- On the Electronic reporting named destination page, in the Name field, enter Main destination.
- Select Save.
- On the File destination FastTab, configure the Email destination for the Report component.
- Close the Electronic reporting named destination page.
- On the Print management setup page, in the Destination name field, select the Main destination named destination.

You've now configured the named ER destination Main destination for the Free text invoice (Excel) format and assigned it to the Original print management record under Module - accounts receivable > Documents > Free text invoice.
- Observe the current settings of the selected record:
Expand Module - accounts receivable > Account - US-001 > Free text invoice, select the Original record, and then follow these steps:
- Select and hold (or right-click) the record, and then select Override.
- Select the arrow button to the right of the Destination name field.
- On the Electronic reporting named destination page, on the Action Pane, select New.
- In the Name field, enter US-001 destination.
- On the File destination FastTab, configure the Printer destination for the Report component.
- Close the Electronic reporting named destination page.
- On the Print management setup page, in the Destination name field, select the US-001 destination named destination.
You've now configured the named ER destination US-001 destination for the Free text invoice (Excel) format and assigned it to the Original print management record under Module - accounts receivable > Account - US-001 > Free text invoice.
Now, when a free text invoice is processed, the Free text invoice (Excel) ER format is run, and one of the following events occurs:
- If the free text invoice is for a customer other than US-001, the generated document is sent by email.
- If the free text invoice is for customer US-001, the generated document is printed.
Note
When a named destination hasn't been defined for a print management record that is processed at runtime, the default ER destinations are used if they are available for the ER format that is running.
Important
On the Electronic reporting destination page (Organization administration > Electronic reporting > Electronic reporting destination), if you select an ER format that at least one named destination was configured for, you're notified about the presence of named destinations.
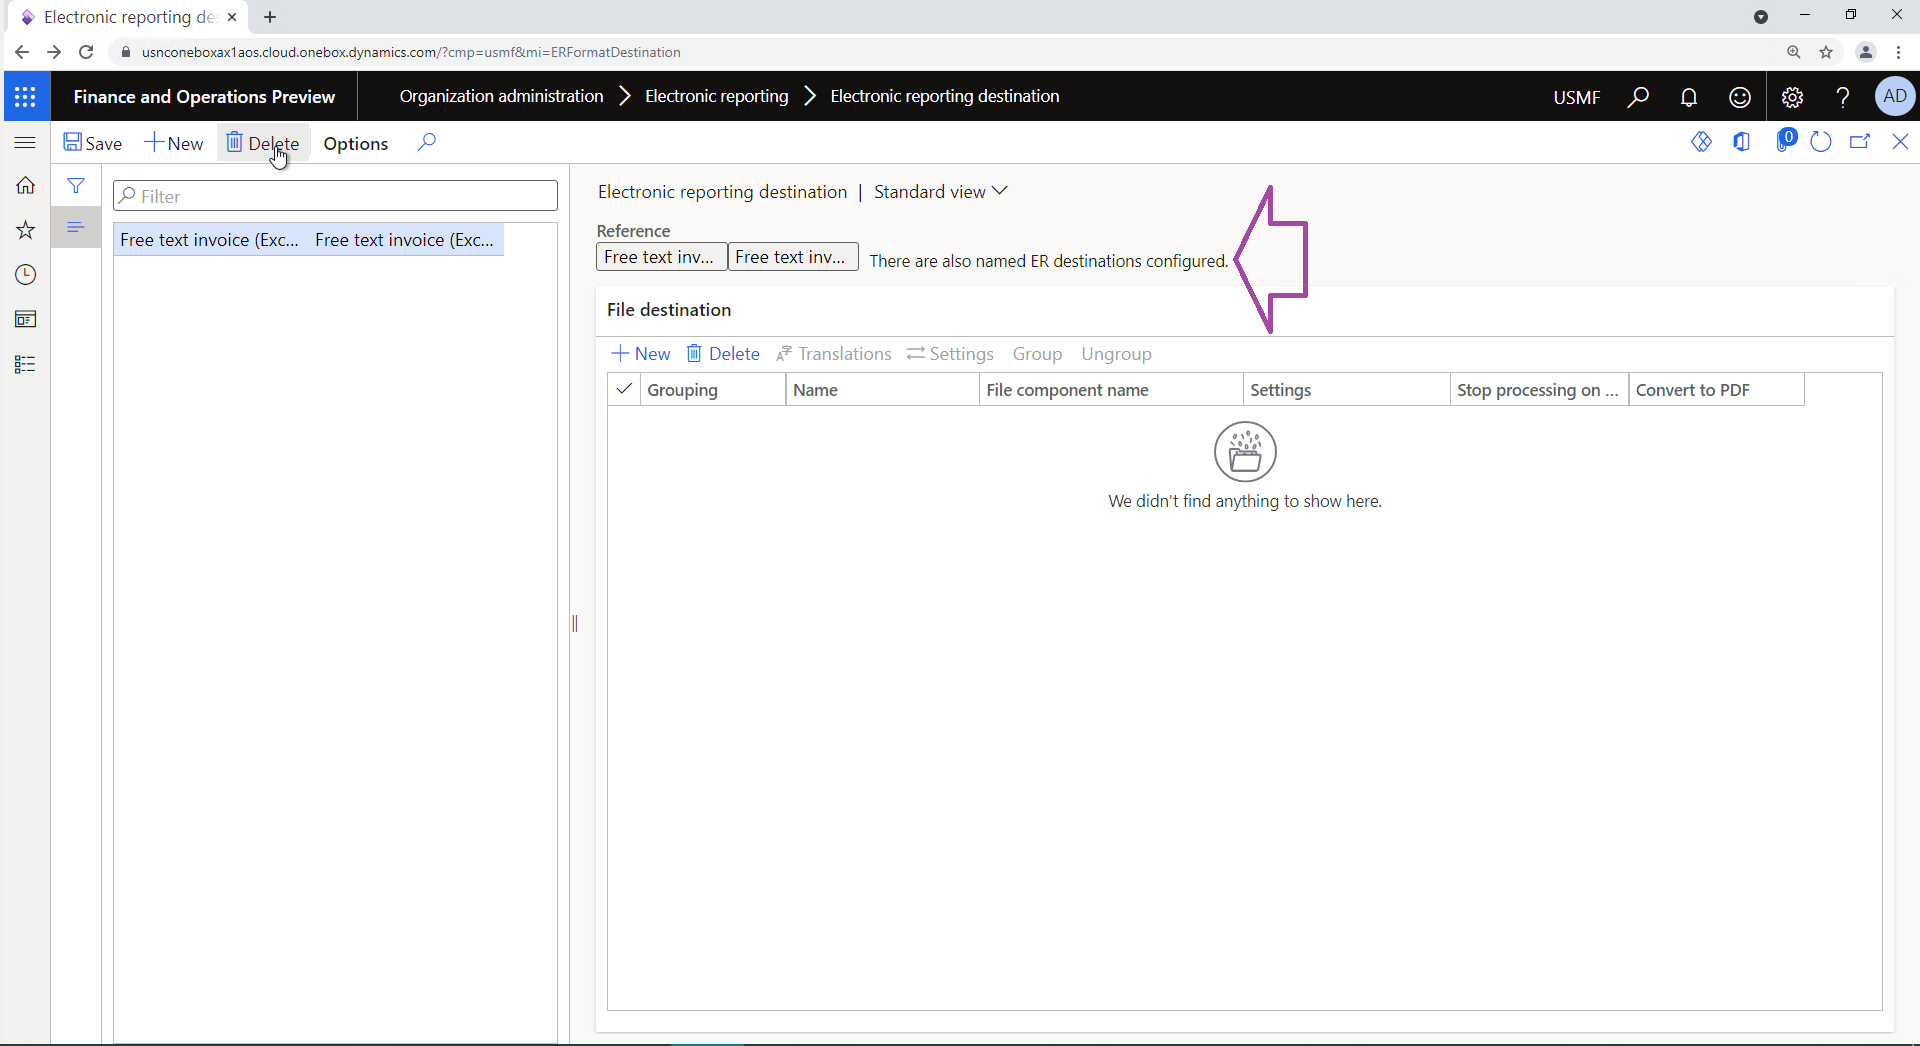
If you delete the default destination, all named destinations are also deleted. If those named destinations were selected for print management records, the selection of those named destinations is canceled.
Copy an existing ER destination as a new named destination
When the default named ER destination is available for an ER format, it can be used as a template for new ER destinations. To create a new ER destination that is based on the default destination, select Copy from default on the Electronic reporting named destination page. The new destination is named Default. You can repeat this step as many times as required.
You can select any existing named destination as a template for a new named destination. To create a new named ER destination that is based on a selected named destination, select Copy on the Electronic reporting named destination page. The new destination has the same name as the selected named destination, but the suffix "Copy" is added. You can repeat this step as many times as required.
Security considerations
You can set up named ER destinations on the Print management setup page only if you have permission to perform this task. Permission can be granted to you if the Configure electronic reporting format destination duty is assigned to one of your security roles. For more information, see Security considerations.
Additional resources
Electronic reporting (ER) overview
Electronic reporting (ER) destinations
Electronic reporting framework API changes for Application update 10.0.17
Electronic reporting framework API changes for Application update 10.0.21
Change code to enable users to configure and use named ER destinations
Feedback
Coming soon: Throughout 2024 we will be phasing out GitHub Issues as the feedback mechanism for content and replacing it with a new feedback system. For more information see: https://aka.ms/ContentUserFeedback.
Submit and view feedback for