Use the Sales Hub or Sales Professional app on your phones and tablets
The Dynamics 365 for phones and Dynamics 365 for tablets apps are model-driven apps that you can use to open any customer engagement app such as Sales Hub or Sales Professional on your phones and tablets. The apps work the same whether you're using it on your mobile device or on a web browser on your computer.
Important
For a seamless mobile experience, we recommend that you switch to the Dynamics 365 Sales mobile app instead of using the Dynamics 365 for phones and tablets apps. For more information, go to Overview of the Dynamics 365 Sales mobile app.
License and role requirements
| Requirement type | You must have |
|---|---|
| License | Dynamics 365 Sales Premium, Dynamics 365 Sales Enterprise, or Dynamics 365 Sales Professional More information: Dynamics 365 Sales pricing |
| Security roles | Any primary sales role, such as salesperson or sales manager More information: Primary sales roles |
Prerequisites
Before you can start using the app, you need to install the Dynamics 365 for phones or tablets app on your device.
More information: Install Dynamics 365 for phones and tablets
Open the app and navigate to records
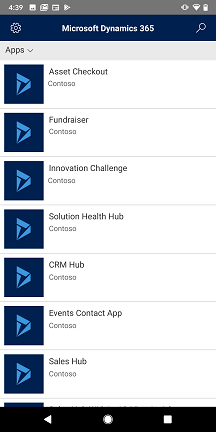
When you sign in, you'll see the MyApps page with all your apps listed.
Select Sales Hub or Sales Professional based on your license.
Use the site map to get to your work area, create a new record, search, or do other tasks. To access the site map, tap Menu (
 ) at the top-left of the screen.
Use the Pinned and Recent sections to get quick access to your records, views, and dashboards.
To access these sections, tap Menu
 at the top-left of the screen, and then tap either Recent
  or Pinned
  .
.To pin an item, go to Recent list, and then tap the pin.
How to use the Sales Hub or Sales Professional app on the go
The Sales Hub or Sales Professional app on the Dynamics 365 for phones mobile app is designed to be your work assistant. The app helps you to engage with customers, close more deals, and acts as your office assistant.
Here are a few tasks that you can perform during your day-to-day activities by using the Sales Hub or Sales Professional app on the Dynamics 365 for phones mobile app:
Plan for your day
As you start your day, go to My Appointments to find out how busy you're going to be. The My Appointments feature provides insights into your meetings, travel, and free time. With this information, you can plan for the day by reviewing who you'll be meeting, where you'll need to travel, and how much free time you'll have left.
To view your appointments
- On the site map, tap Activities, and then select the My Appointments view.
Attend meetings with information at your fingertips
While you're traveling, you can open any appointment to view more details such as start time, duration, and description of the meeting. The following image shows an example.
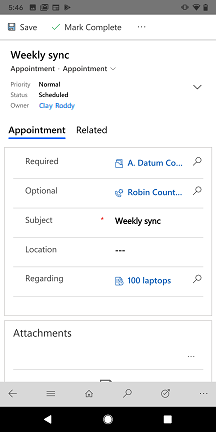
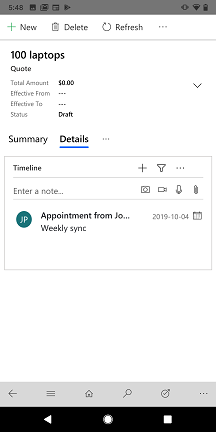
In addition, you can select the Regarding record to view which opportunity or account the meeting is about. As you view the opportunity or account, you can review the timeline of notes and past activities to ramp up on context before the meeting begins.
Send email
Use the Dynamics 365 for phones and tablets app to compose an email within the app with the following capabilities:
- Full email editor formatting supported as available in Unified Interface apps.
- Add attachments to an email.
- Search for and apply a predefined template to an email.
Note
This feature isn't available in the offline mode.
You can create emails from home page grid or by using quick create.
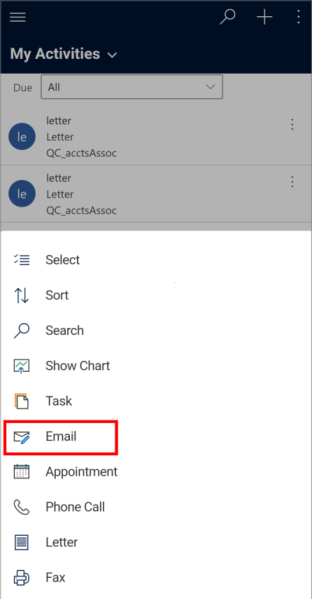
Home page grid: On the home page, tap the site map button
 at the the top-left corner, tap Activities, tap More at the bottom command bar, and then tap Email.
Quick create: On the command bar at the top, tap + > Activities > Email.

Draft the email and tap Save at the top-right to save your changes.
The email is saved, a command bar is displayed at the bottom of the screen.
To add an attachment to the email, tap More at the bottom command bar, and then tap Attach File. Choose the file you want to attach to the email.

To use a template for the email body, tap More at the bottom command bar, and then tap Insert Template. Select or search for a template from the available templates, and tap Select.
When you're ready to send the email, tap Send at the bottom command bar.
Take notes in a meeting
It's no longer necessary for you to open a laptop to add notes to an opportunity. You can use the app to quickly add notes to an opportunity by using your mobile device.
To add notes to an opportunity
On the site map, tap Opportunities > My Open Opportunities.
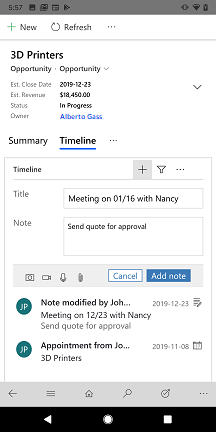
On the opportunity, go to Timeline section and add a note.
(Optional) If the customer shows interest in additional products, go to the Products tab, tap More options (...), and then tap Add Product.
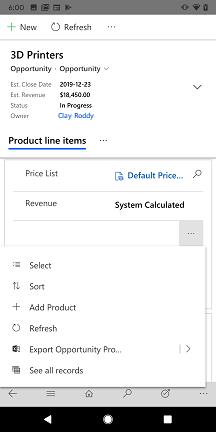
Select an existing product from the catalog, or create a new product.

(Optional) If you've met a new stakeholder at the customer's office, on the Summary tab, go to the Stakeholders section, tap More options (...), and then tap New Connection. Then add the stakeholder. You can also add the contact from an account record.
Update deals and customer information after a meeting
After you step out of a meeting, you can quickly update information about the deal or the opportunity.
To update information after a meeting
Open the opportunity from the relevant appointment.
Or
On the site map, tap Opportunities, and then select the My Open Opportunities view.
On the opportunity, you can update the estimated revenue or move to the next stage.

To create a follow-up appointment for the opportunity, go to the Timeline section, tap Create a timeline record (
 ), and then tap Appointment.
On the Quick Create: Appointment form, enter the necessary information, and then save the appointment.
After you're done, you can open the appointment and mark it as complete.
Search for a record
You can search for records such as contacts, accounts, leads, and opportunities in the mobile app.
To search for a record
On the command bar at the top, tap the search icon.
On the Search page, enter text in the search box to find related information.
In the search results, tap and open the record to view more information.
Add and qualify leads
When you meet a new lead at an event, you can immediately add and qualify the lead with the app to make sure your team has visibility right away of the progress you've made.
To add and qualify a lead
On the site map, tap Leads.
On the leads page, tap New at the bottom command bar.
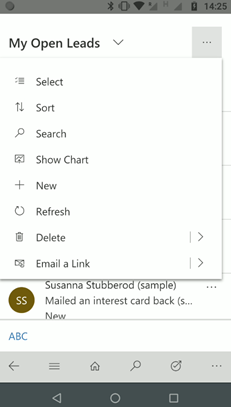
Enter the necessary information, and then save the lead.
To qualify a lead, open the lead, tap More at the bottom command bar, and then tap Qualify.
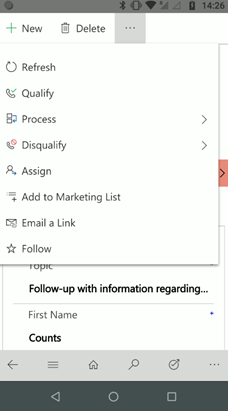
Generate and share a quote or order
After a successful meeting, you can quickly generate a PDF of the quote from an opportunity or a PDF of the order related to an account and share it with the customer who requests it.
To generate and share a quote or order
On the site map, tap Opportunities, and then select the My Open Opportunities view.
Open the opportunity for which you want to generate a PDF of the quote, and then go to the Quotes tab.
In the quote section, tap More option (...), and then tap New Quote.
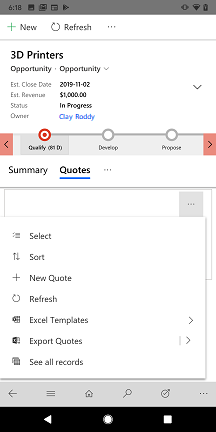
A quote is generated.
From the quote page, tap More at the bottom command bar, tap Email as PDF, and then tap Print quote for customer.
An email opens with the quote as an attachment. Verify the existing information and then save the email.
When you're ready to send the email, tap Send at the bottom command bar.
Manage your to-do list
Before you wrap up the day, make sure your opportunity status is reflected correctly in the dashboards.
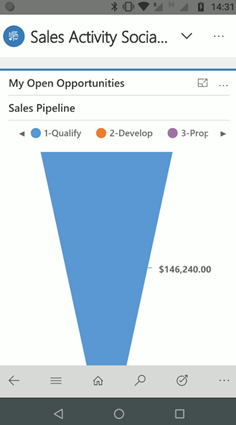
Quickly review pending tasks and close the ones you got to during the day.
To manage your to-do list
On the site map, tap Activities.
On the activities page, select the My Tasks view.
Review your tasks, and close any tasks that you've completed.
Can't find the options in your app?
There are three possibilities:
- You don't have the necessary license or role.
- Your administrator hasn't turned on the feature.
- Your organization is using a custom app. Check with your administrator for exact steps. The steps described in this article are specific to the out-of-the-box Sales Hub and Sales Professional apps.
See also
Feedback
Coming soon: Throughout 2024 we will be phasing out GitHub Issues as the feedback mechanism for content and replacing it with a new feedback system. For more information see: https://aka.ms/ContentUserFeedback.
Submit and view feedback for