Create parallel approval workflows with Power Automate
In a parallel approval workflow, multiple persons are required to approve items such as invoices, purchase orders, vacation requests, etc. Each person's approval is independent of all other approvers.
In this walkthrough, we use Power Automate to create a cloud flow that automates a parallel approval workflow. This flow automates an employee vacation request process that requires approval from all persons (or teams) that the employee supports regularly. Employees use a SharePoint list to request vacation. Vacation approvals are required from the employee's direct manager, the Sales team, and the Human Resources team. Each vacation request is routed to each approver for a decision. The flow sends email with status changes and then updates SharePoint with the decisions.
Tip
For detailed information about using SharePoint with Power Automate, go to the SharePoint documentation.
Prerequisites
- Power Automate.
- A SharePoint Online list.
- Office 365 Outlook and Office 365 Users account.
Note
While we use SharePoint Online and Office 365 Outlook in this walk-through, you can use other services such as Zendesk, Salesforce, or Gmail. If you are using SharePoint 2010, see SharePoint 2010 workflow retirement
Before you create the flow, create a SharePoint Online list. Later, we'll use this list to request approval for vacations.
The SharePoint Online list you create must include the following columns:
| Title | Single line of text |
|---|---|
| Employee comments | Single line Of text |
| Direct manager comments | Multiple lines Of text |
| Sales team comments | Multiple lines of text |
| HR team comments | Multiple lines of text |
| Direct manager approved | Yes/No |
| Sales team approved | Yes/No |
| HR team approved | Yes/No |
| Vacation start date | Date and time |
| Vacation end date | Date and time |
Make note of the name and URL of the SharePoint Online list. We use these items later to configure the SharePoint - When an item is created trigger.
Create your flow from the blank template
Sign in to Power Automate.
Select My flows in the left-side navigation pane.
On the top-left menu, select New flow > Automated cloud flow.
Add a trigger
Give your flow a name.
Under Choose your flow's trigger, select When an item is created - SharePoint, and then select Create.
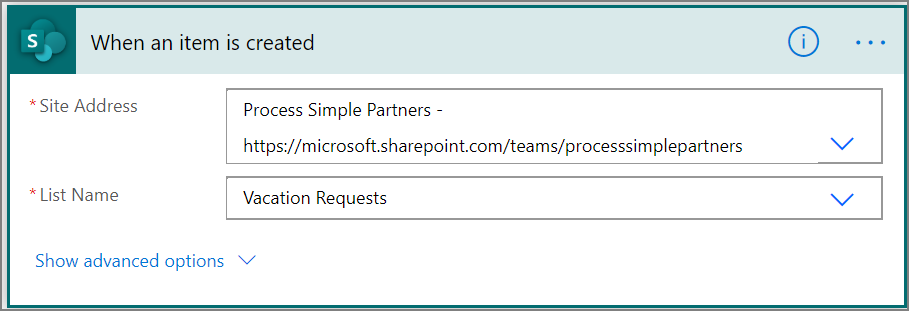
On the When an item is created card, select the Site Address and the List Name for the SharePoint list that you created earlier.
Get the manager for the person who created the vacation request
Select +New step, and then type get manager into the Choose an action search box.
Find, and then select the Get manager (V2) - Office 365 Users action.
Insert the Created By Email token into the User (UPN) box on the Get manager card.
This action gets the manager for the person who created the vacation request in SharePoint.
Name and save your flow
Provide a name for your flow, and then select Save to save the work we've done so far.
Note
Select the Save icon periodically to save the changes to your flow.
Add an approval action for immediate manager
Select New step.
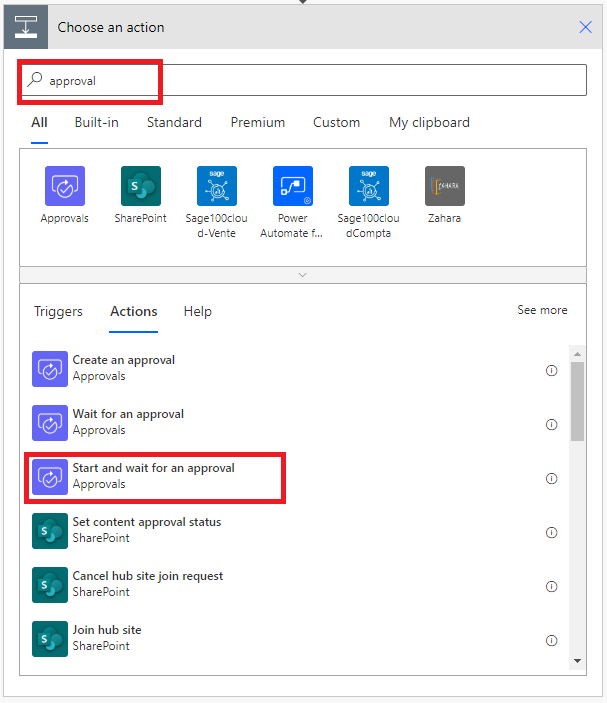
Type approval into the Choose an action search box.
Select the Start and wait for an approval action.
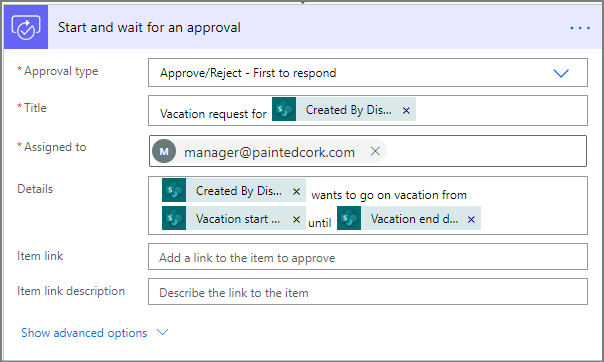
Configure the Start and wait for an approval card to suit your needs.
Note
The Approval type, Title and Assigned To fields are required. You can use Markdown to format the Details field.
Important
This action sends the vacation request to the email address in the Assigned To box, so insert the Email token from the Get manager (v2) list.
Insert a parallel branch approval action for the sales team
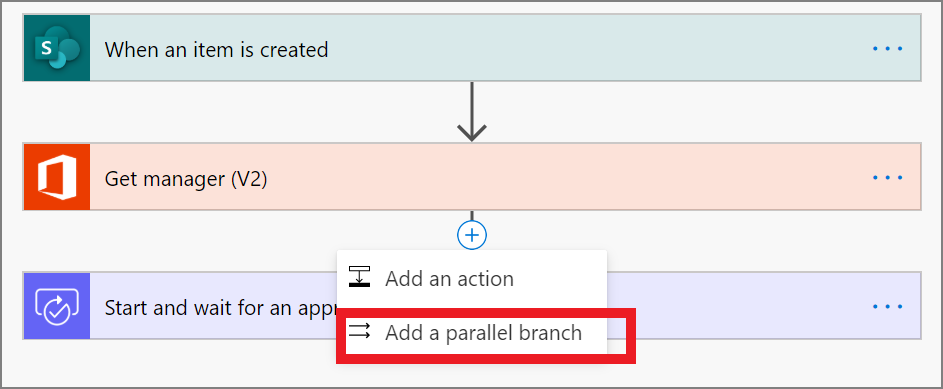
Select the down arrow that's located between the Get manager (v2) and the Start and wait for an approval cards.
Select the plus sign that shows up on the down arrow after you select it.
Select Add a parallel branch.
Search for, select, and then configure a Start and wait for an approval action that sends the vacation request to the sales team. See the steps used to Add an approval action for immediate manager if you're not sure how to add the Start and wait for an approval action.
Important
Use the sales team's email address in the Assigned To box of the Start an approval 2 action.
Insert a parallel branch approval action for the human resources team
Repeat the steps to insert a parallel branch for the sales team to add, and then configure a Start an approval action to send vacation requests to human resources.
Important
Use the human resources team's email address in the Assigned To box of the Start an approval 3 action.
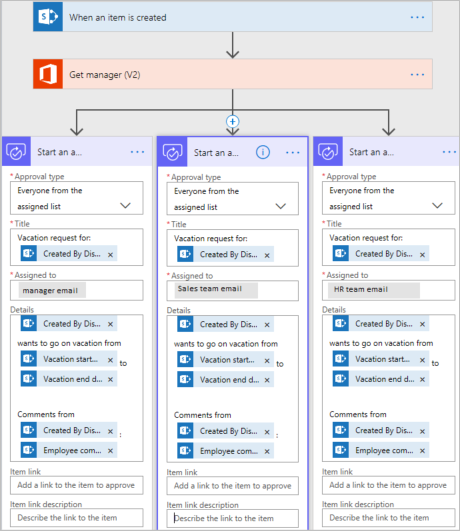
If you've followed along, your flow should resemble this example:
Options after adding parallel branches
After you've added actions to parallel branches, there are two ways to add steps to your flow:
Insert a step within a branch: Use the Insert a new step (+) button above or below the card. This button that appears when you select a branch or hover over the connector arrow). This button adds a step to that specific branch. This button is shown here:

Add a step to the flow: Use the larger +New step button at the bottom of the entire workflow. Steps you add with this button run after all previous branches complete. This button is shown here:

In the following sections, we add steps within each branch:
- Add a condition that checks if the vacation request was approved or rejected.
- Send an email that informs the employee of the decision.
- Update the vacation request in SharePoint with the approval decision.
Then, we use the +New step button to send an email that summarizes all decisions made on the vacation request.
Let's continue:
Add a condition to each branch
Select the first Start and wait for an approval branch.
Select the small Insert a new step (+) button below the card (the circular plus button that appears when you hover over the connector arrow).
Select Add an action from the menu that appears, and then select Condition in the list of actions.
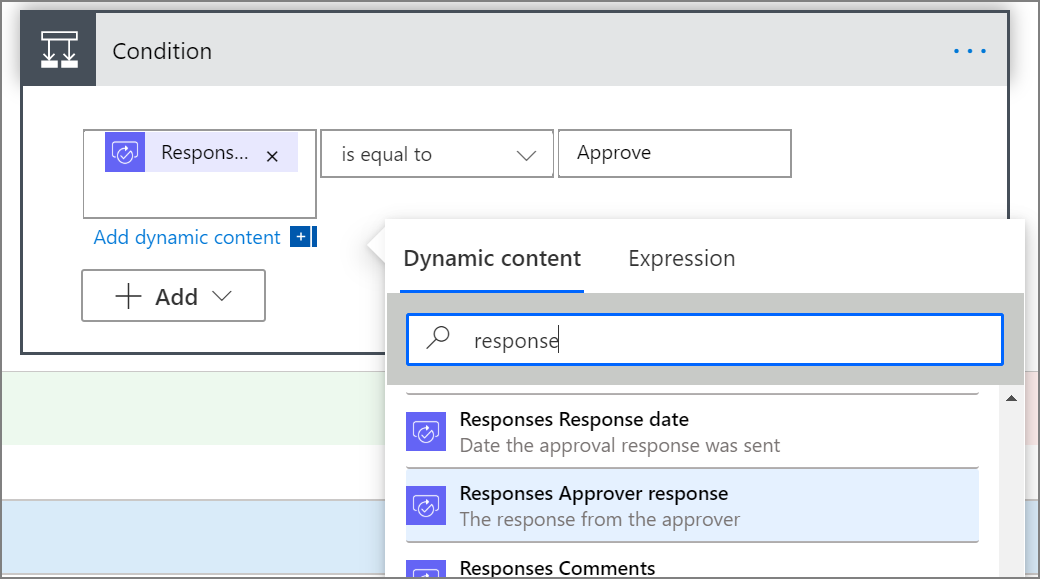
Select the first box on the Condition card, and then select the Response token from the Start and wait for an approval category in the dynamic content list.
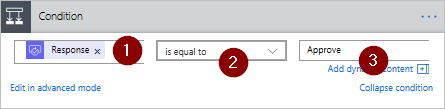
Confirm the list (in the middle of the Condition card) is set to is equal to.
Enter Approve (this text is case-sensitive) into the last box.
Your condition card should now resemble this example:
Note
This condition checks the response from the Start an approval action that goes to the employee's manager.
Repeat the preceding steps on the Start an approval 2 (the approval request to sales) and Start an approval 3 (the approval request to human resources) branches.
Add email actions to each branch
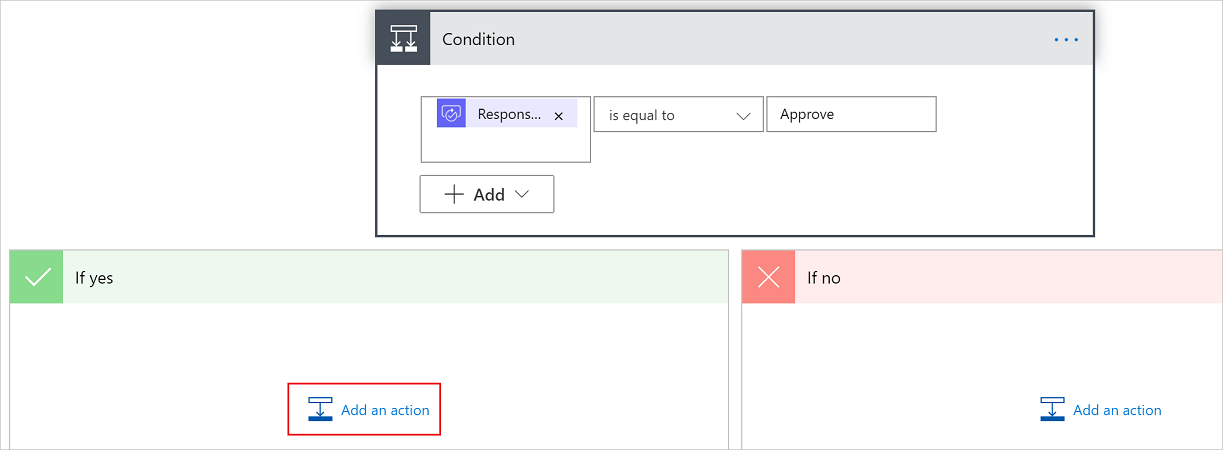
Perform the following steps on the IF YES side of the Condition branch.
Note: Your flow uses these steps to send an email when the request is approved:
Select Add an action on the If yes branch of the condition.
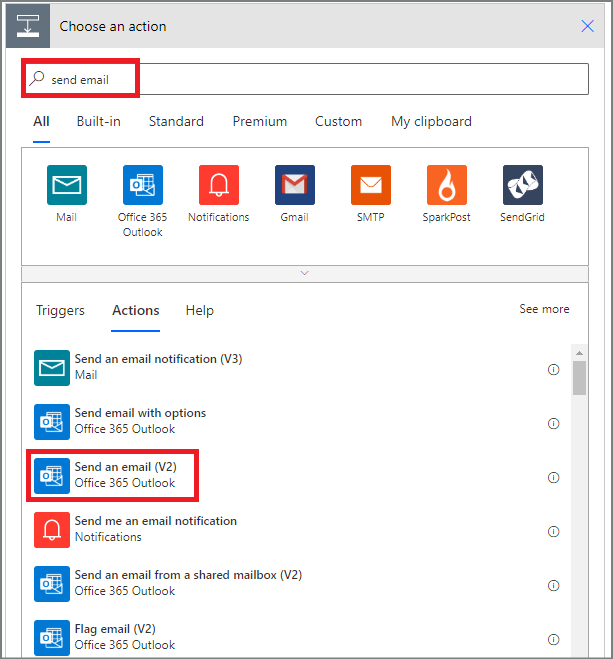
Enter send email into the search box on the Choose an action card.
Select the Send an email (V2) action.
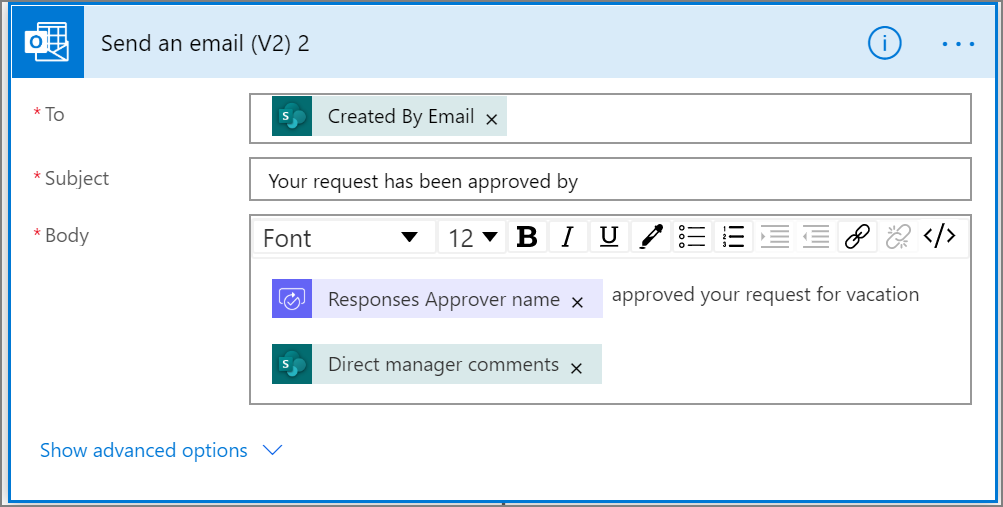
Configure the email card to suit your needs.
Note
To, Subject, and Body are required.
This card is a template for the email that is sent when the status of the vacation request changes.
In the Body box on the Send an email (V2) card, use the Comments token from the Approvals - Start an approval action.
To send an email when a request is rejected, use the IF NO side of the Condition branch, and then repeat the preceding steps to add a template for the rejection email.
Repeat the preceding steps on the Start and wait for an approval 2 (the approval request to sales) and Start and wait for an approval 3 (the approval request to human resources) branches.
Update the vacation request with the decision
Perform the following steps to update SharePoint when decisions are made.
Note: Be sure perform these steps on both the IF YES and the IF NO sides of the branch.
Select Add an action in the If yes branch.
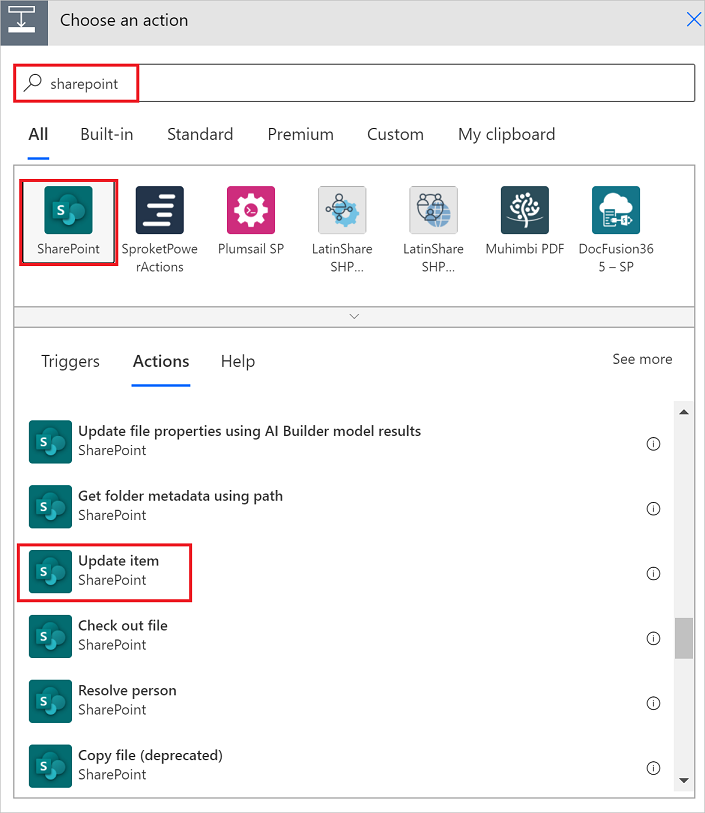
Enter SharePoint in the search box on the Choose an action card, select the SharePoint filter, and then select the Update item action.
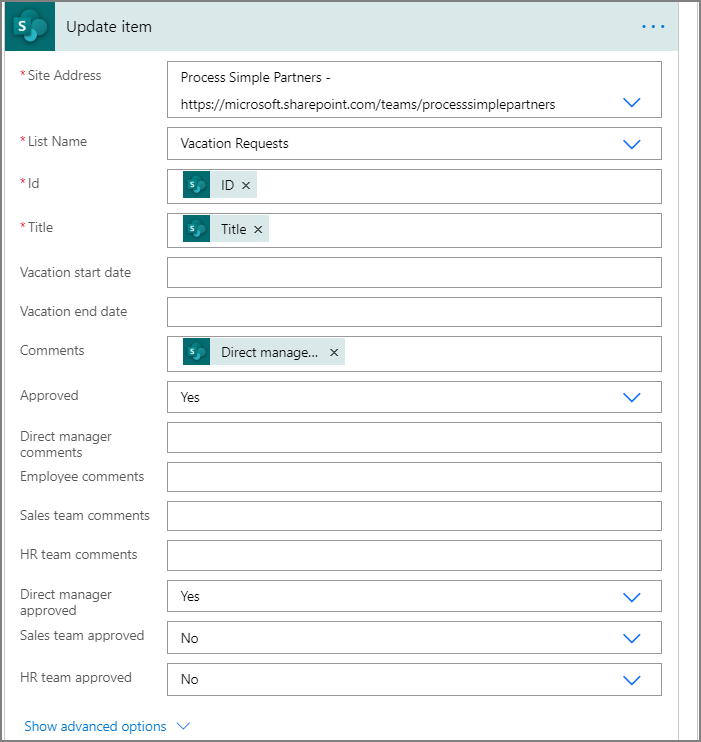
Configure the Update item card to suit your needs.
Repeat the preceding steps on the Start an approval 2 and Start an approval 3 branches.
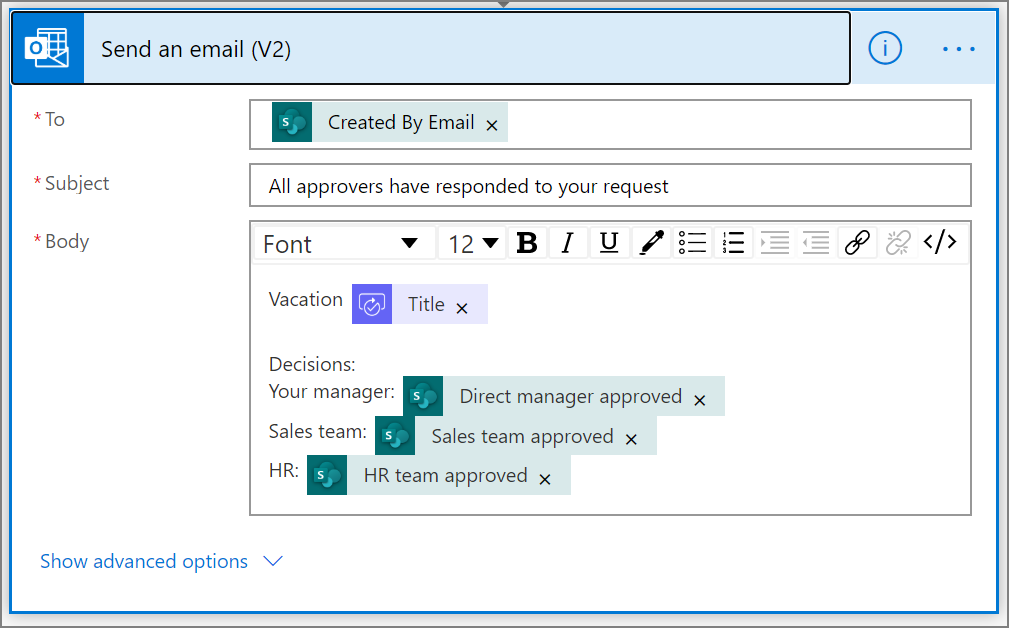
Complete the flow
Select +New step
Use the steps provided previously to send an email that summarizes the results of each approval. Send this email to the employee who requested vacation. Your card may resemble this example:
Learn more about modern approvals
Feedback
Coming soon: Throughout 2024 we will be phasing out GitHub Issues as the feedback mechanism for content and replacing it with a new feedback system. For more information see: https://aka.ms/ContentUserFeedback.
Submit and view feedback for