Configure custom indicators of compromise
Indicators of compromise provide early warnings and automatic remediation against well-known attacks. Administrators often want to create their own indicators of compromise to protect against new threats.
In Contoso, threat protection is functioning well but you have information about a new malware attack from a trusted security internet source. You have a hash that identifies an executable file, which you expect to see in emails and chat messages in the next few days. You want to use this hash to spot the file as soon as it enters your systems and prevent users from passing the file on or executing it.
Here, you'll learn how to use policies in Microsoft Defender for Cloud Apps to implement a custom indicator of compromise for a new threat.
What is an indicator of compromise?
When you try to intercept attacks against your network, it's essential to spot malicious activity early. One way you can configure Defender for Cloud Apps to respond quickly to attacks is to define indicators of compromise. An indicator of compromise is an artifact that, when observed, indicates an intrusion with a high level of confidence. Common indicators of compromise include:
- Virus signatures.
- Blocklisted IP addresses.
- MD5 hashes of known malware files.
Microsoft Defender for Cloud Apps includes a broad set of indicators for well-known viruses, IP addresses, and malware, and you can define the actions taken when each indicator of compromise is detected on your network. For example, you could delete a detected malware file or send it to a quarantine folder.
New threats arise all the time, so Defender for Cloud Apps allows you to define new indicators of compromise. For example, suppose a security professional you know has recently discovered a new malware file and noticed its potential to recruit compromised computers into a botnet. Your colleague has created and distributed an MD5 hash of the file. You can use this hash to spot the file as soon as it enters your network and take action to block its propagation and functionality.
Create a custom indicator of compromise
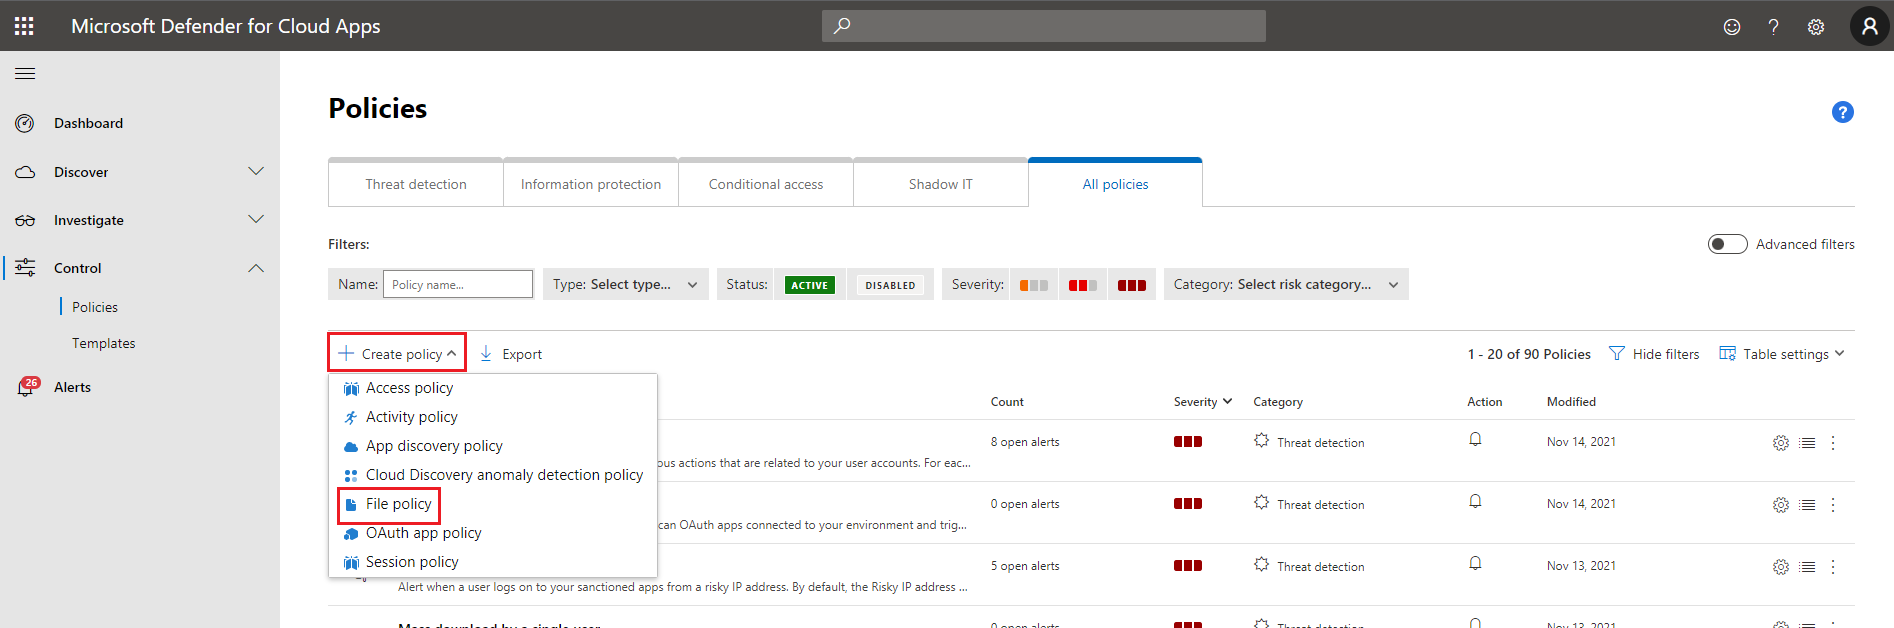
You can create a custom indicator of compromise in Microsoft Defender for Cloud Apps in the Polices section of the portal. Follow these steps to use an MD5 hash to protect against malware files:
Select Create policy and then select File policy.
In the Edit file policy page, in the Policy name and Description textboxes, enter information to describe this policy to other administrators.
In the Policy severity drop-down list, select a severity. This setting is used to determine whether the policy will send a notification when a matching file is detected.
In the Category drop-down list, select the most appropriate risk type. This setting associates this policy and its alerts with that risk type, which helps you to search for them later.
In the Create a filter for the files this policy will act on box, select File ID, and then select is in the drop-down lists. Then enter the file hash in the third box.

You can add multiple file hashes with OR conditions to intercept several different files.
To filter the policy to work in specific folders, use the first Apply to drop-down list. If you want the policy to work throughout your discovered network, select all files.
To filter the policy to apply to specific file owners, user the second Apply to drop-down list. If you want the policy to work for all files regardless of their owner, select all file owners.
Use the Alerts section to govern how Defender for Cloud Apps uses alerts when a file matches this policy. For example, you can specify a daily alert limit to avoid flooding mailboxes and choose emails, test messages, or Power Automate as delivery methods.

Use the Governance actions section to remove the file from circulation. The actions you can take depend on the system where the file is stored. For example, if the file is found in Microsoft SharePoint Online, you can move the file to the recycle bin, or place it into quarantine.
To complete the policy, select Update.

Investigate results
Once the policy is created and updated, Microsoft Defender for Cloud Apps starts intercepting matching files and taking the governance actions that you specified. When files are deleted or quarantined by these actions, you prevent them from spreading through your organization and protect your users automatically.
It is useful, however, to monitor matched files to assess the effectiveness of your policy and gain information about active threats to your network. In the Microsoft Defender for Cloud Apps, matched files will be displayed in the Alerts section of the portal. You can see where the file was found, the policy that was matched, and the governance actions that were taken.
If you have integrated Microsoft Defender for Cloud Apps with Microsoft Sentinel, the same alerts can be investigated in Azure portal, under Microsoft Sentinel workspaces/Threat management/Incidents.