Exercise - Detect threats with Microsoft Sentinel analytics
As a security engineer working for Contoso, you recently noticed that a significant number of VMs have been deleted from your Azure subscription. You want to analyze this occurrence and be alerted when a similar activity occurs in the future. You decide to implement an analytics rule to create an incident when someone deletes an existing VM.
Exercise: Threat detection with Microsoft Sentinel Analytics
In this exercise, you'll explore a Microsoft Sentinel analytics rule and perform the following tasks:
- Create an incident rule from an existing template.
- Invoke an incident and review the associated actions.
- Create an analytics rule from a rule template.
Note
In order to complete this exercise, you must have completed Exercise Setup unit in Unit 2. If you have not done so, complete it now, and then continue with the exercise steps.
Task 1: Create an analytics rule from the analytics rule wizard
In the Azure portal, search for and select Microsoft Sentinel, and then select the previously created Microsoft Sentinel workspace.
On the Microsoft Sentinel menu, under Configuration , select Analytics.
On the Microsoft Sentinel | Analytics header bar, select Create and then select Scheduled query rule.
On the General tab, enter the input values in the following table, and then select Next: Set rule logic
Name Azure VM Deletion. Description A simple detection to alert when someone deletes Azure Virtual Machine. Tactics From the Tactics drop-down menu, select Impact. Severity Select the Severity drop-down menu select Medium. Status Ensure the status is Enabled. You can select Disabled to disable a rule if it generates large numbers of false positives. 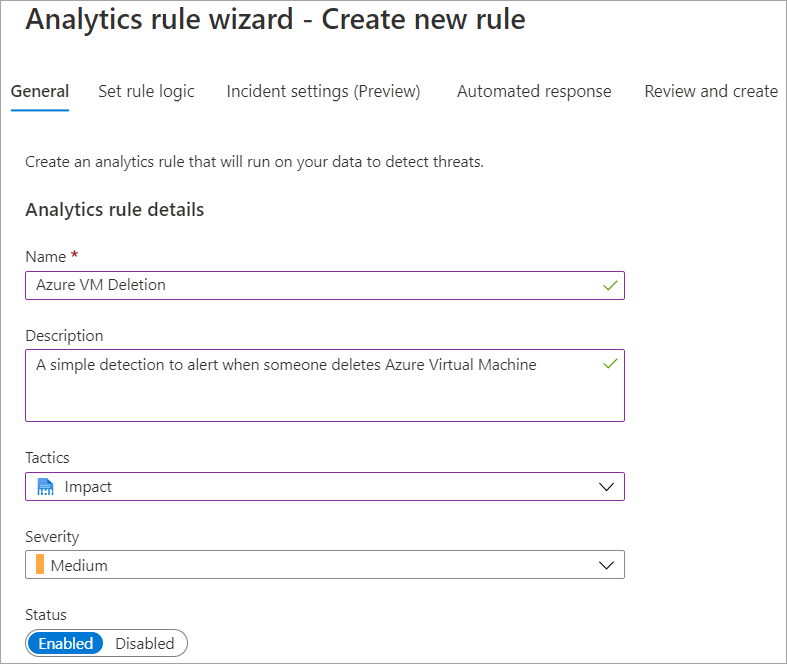
On the Set rule logic tab, copy and paste the following code into the Rule query text box:
AzureActivity
| where OperationNameValue == "MICROSOFT.COMPUTE/VIRTUALMACHINES/DELETE"
| where ActivityStatusValue == "Success"
In the Results simulation pane, select Test with current data, and then observe the results.
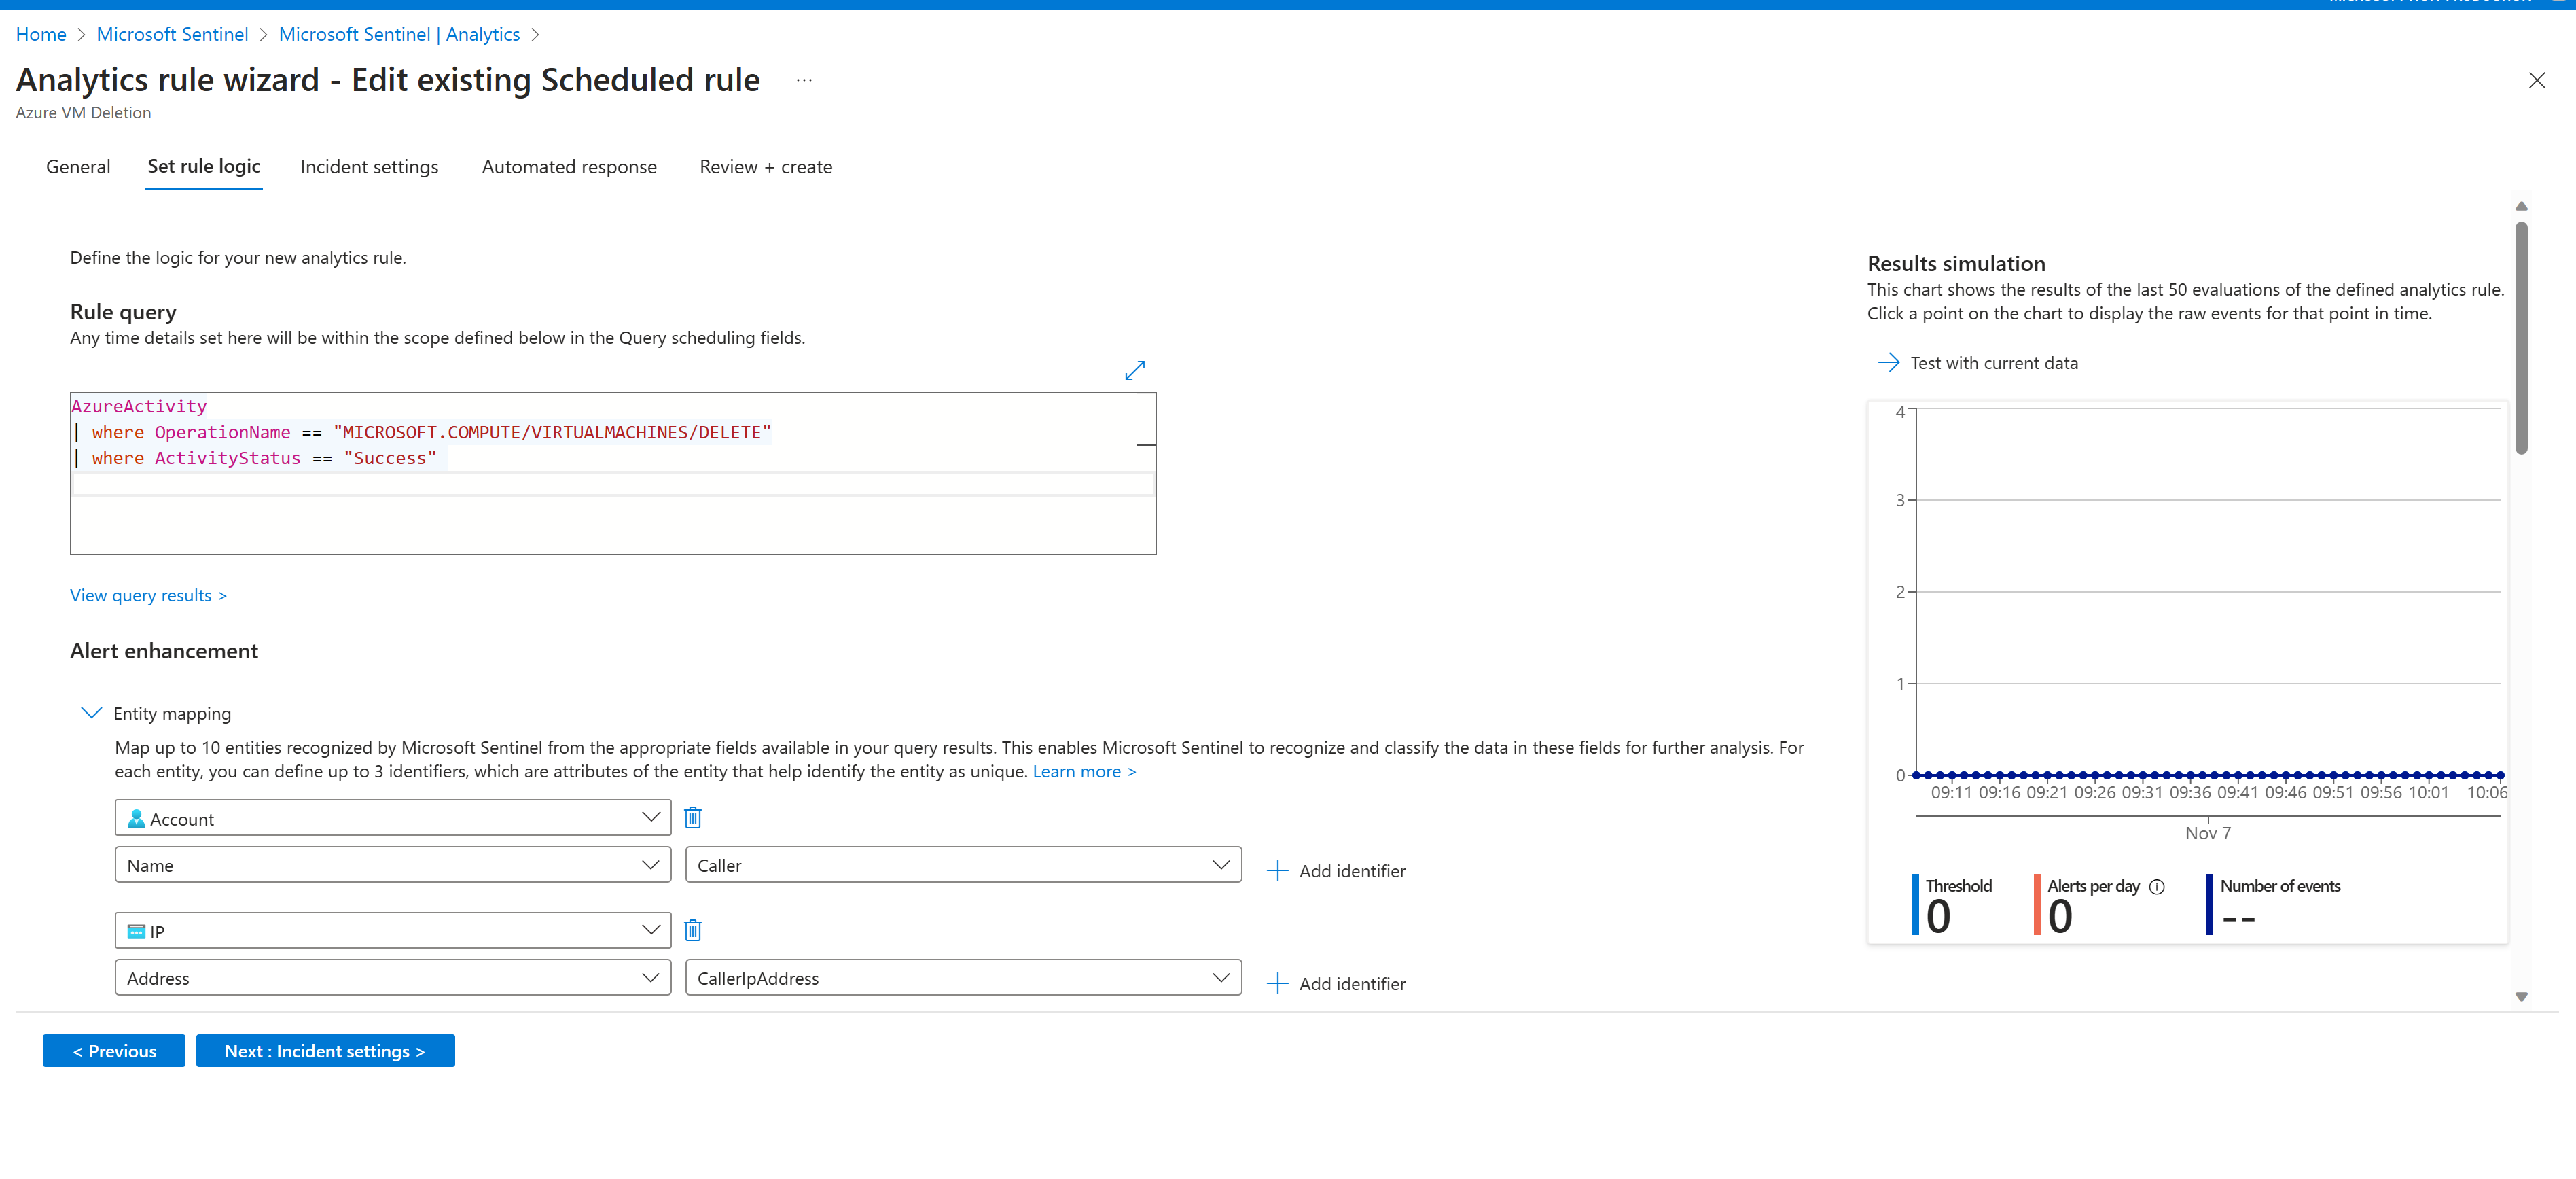
In the Alert enhancement section under Entity Mapping, map the entities that are returned as part of the query rule and that you can use to perform in-depth analysis.
In the Query Scheduling section, configure how often the query should run, and how far in history to search. Select query to run on every 5 minutes, and accept the default history of 5 hours.
In the Alert threshold section, specify the number of positive results that can be returned for the rule before an alert gets generated. Accept the default values.
In the Event grouping section, accept the default Group all events into a single alert.
In the Suppression section, set Stop running the Query after the alert is generated to On.
Accept the default values of 5 hours and then select Next: Incident setting (Preview).
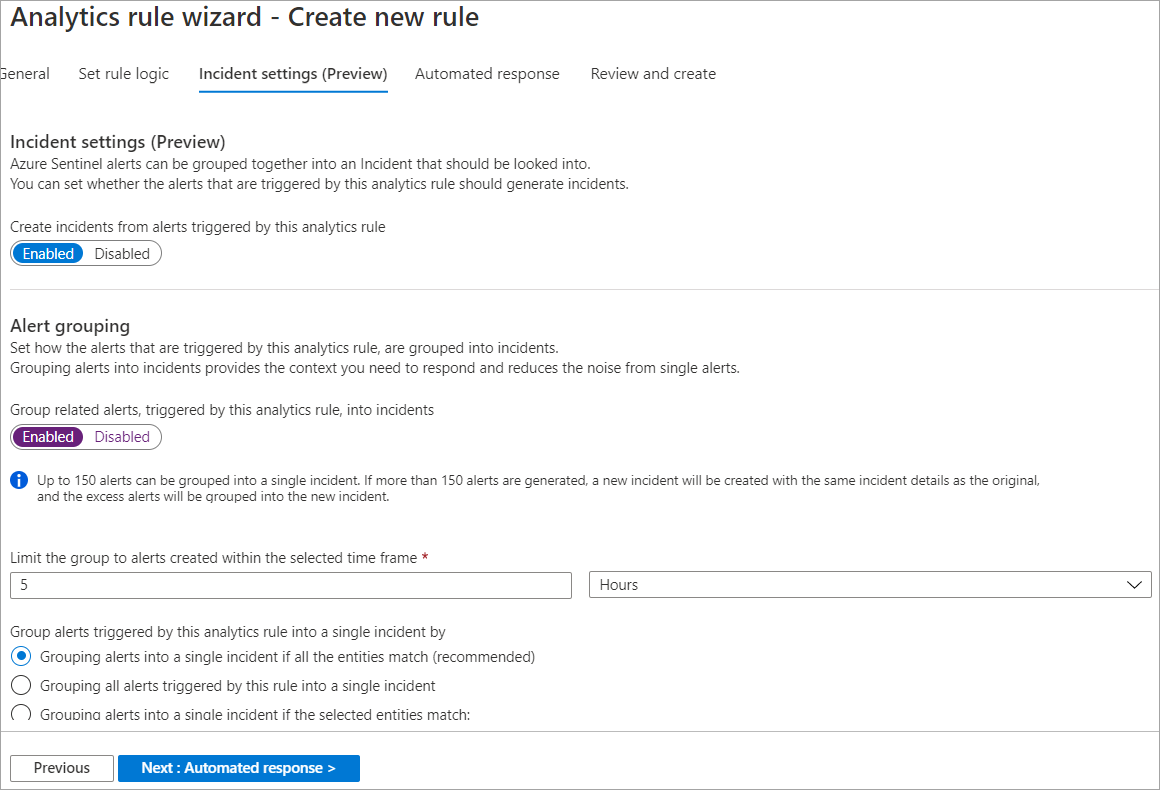
In the Incident setting tab, ensure that Enabled is selected for creation of incidents from alerts triggered by this analytics rule.
In the Alert grouping section, select Enabled to group related alerts into incidents, and ensure that Grouping alerts into a single incident if all the entities match (recommended) is selected.
Ensure that Reopen closed matching incidents is Disabled, and then select Next: Automated response.
In the Automated response pane, select a playbook to run automatically when the alert is generated. Only the playbooks that contain Logic App Microsoft Sentinel connector are displayed.
Select Next: Review.
In the Review and create page, verify that the validation was successful, and then select Save.

Task 2: Invoke an incident and review the associated actions
- In the Azure portal, select Home and in the Search omnibox, enter virtual machines, and then select Enter.
- On the Virtual machines page, locate and select the simple-vm virtual machine that you created in the resource group for this exercise, and then on the header bar, select Delete. In the Delete virtual machine prompt, select Yes.
- In the Delete virtual machine prompt, select OK to delete the virtual machine.
Note
This task creates an incident based on the analytics rule that you created in Task 1. Incident creation can take up to 15 minutes. You can proceed with rest of the steps of this unit and then observe the results at later time.
Task 3: Create an analytics rule from an existing template
In the Azure portal, select Home, select Microsoft Sentinel, and, then select the Microsoft Sentinel workspace you created in the Unit 2 of this module.
Open Microsoft Sentinel, in the left menu under Configuration, select Analytics.
On the Analytics pane, select Rule templates tab.
In the search field, enter Create incidents based on Microsoft Defender for Cloud and then select that rule template.
In the details pane, select Create rule.
In the General pane, observe the name of the analytics rule, and verify that the Status of the rule is Enabled.
In the Analytics rule logic section, verify that the Microsoft security service shows Microsoft Defender for Cloud is selected.
In the Filter by severity section, select Custom, and then in the drop-down menu, select High and Medium.
If you want additional filters for the alerts from Microsoft Defender for Cloud, you can add text in Include specific alerts and Exclude specific alerts.
Select Next: Automated response and then select Next: Review.
On the Review and Create page, select Create.
Results
After completing this exercise, you'll have created an incident rule from an existing template and created a scheduled query rule using your own query code.
After you've finished with the exercise, you should delete resources to avoid incurring costs.
Clean up the resources
- In the Azure portal, search for Resource groups.
- Select azure-sentinel-rg.
- On the header bar, select Delete resource group.
- In the TYPE THE RESOURCE GROUP NAME: field, enter the name of the resource group azure-sentinel-rg and select Delete.