Preparing the storage for the container information
Create a table
As Linda, the first step is to create a table that will store the data about the containers. (See Create a custom table)
Go to https://make.powerapps.com and open the "Data" menu and "Tables" submenu. Now click the "+New Table" button which will open a side panel to enter the information about the table. We will use Container Shipment as display name and click on "Create".
Add fields
The second step is to add fields that will store the data about each container. As said in the introduction unit, we need to store several information about the container. We will create the following fields in this table:
The container's identifier is a textual data, we will use the built-in Name field. (See Types of fields)
The Weight is a numerical data, modeled as Whole Number type in Microsoft Dataverse.
The Price is a currency data, modeled as Currency type in Dataverse.
The Origin and Destination are location data, to make it simple we will use an Option Set with following values New York, Shanghai, San Francisco, Cape Town, Delhi, each corresponding to a port where the company is operating. An advanced design would be to create a separate Dock table to enter more information data like country/region, zip code... and create a relationship with Container Shipment. (See Create an Option set)
Shipping Date and Arrival Date will store the date and hour of shipping from origin and arrival to destination, we will use Dataverse's Date and Time.
Is Fragile will indicate if the container is fragile or not, we use a Two Option for this.
Delivery State will track the container progresses using an Option Set with following values Waiting, In Transit, Delivered with default value Waiting.
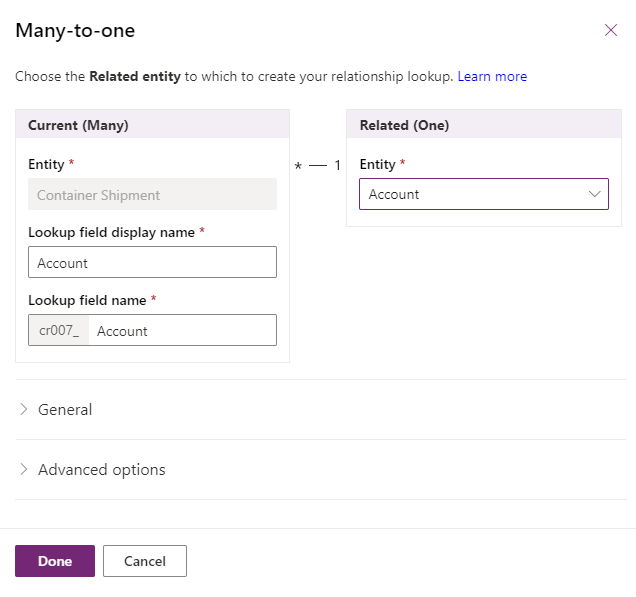
Eventually for "Customer", Microsoft Power Platform provide some built-in tables like Account or Contact. We will use Account here and will create a Many-to-one relationship using the "Relationship" tab and "+Add relationship" button. (see Create a relationship between tables)
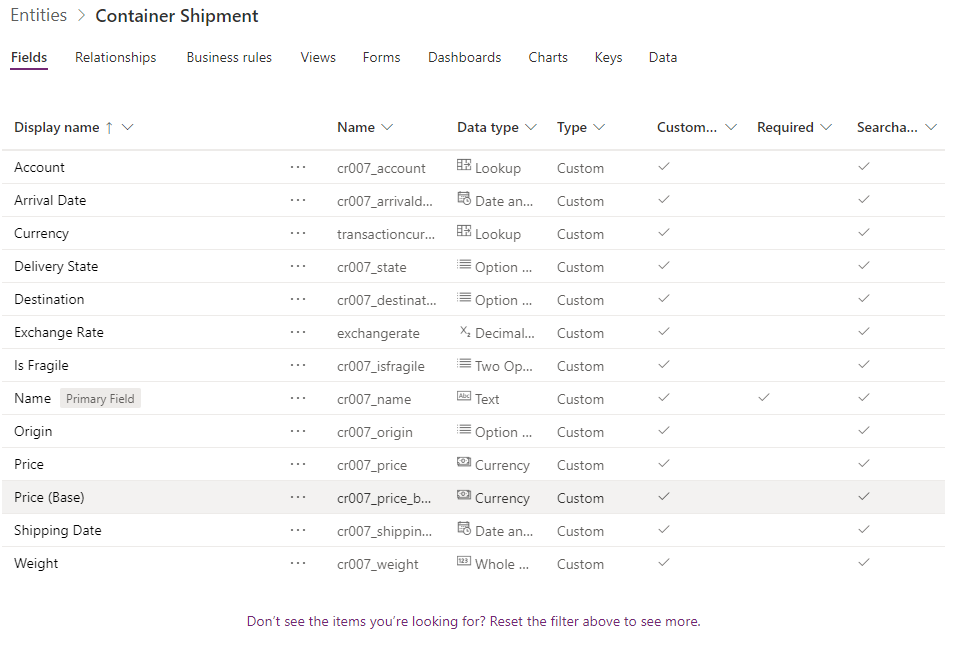
We end with following table structure. (Some fields are automatically added by Dataverse to manage currencies)
You can add some customers in the Account table using the "Edit from Excel" button. (See Open table data in Excel or Import or export data from Dataverse)
Summary
We have successfully created a table that will store the information about the container. We are now ready to create the container tracking application.