Exercise - General purpose high availability
In the previous unit, you learned about the high-availability architecture of Azure SQL. In this exercise, you'll learn how the General Purpose tier of Azure SQL Database behaves similarly to a failover cluster instance on-premises. This functionality can be time consuming or tricky to set up on-premises, but you get it out of the box with Azure SQL.
In this exercise, you'll use the ostress tool that you might have used in the previous module to create a workload. You'll then initiate a failover by using the Azure PowerShell module in Azure Cloud Shell. Finally, you'll view the effect the failover has on the ostress workload.
Basic high availability in the Azure SQL General Purpose service tier
In this exercise, you'll complete the following steps:
- Run the ostress workload.
- Confirm that the environment is properly configured.
- Use PowerShell to initiate a failover of Azure SQL Database.
- View the results in ostress.
- Look for signs in the portal that a failover occurred.
Run the ostress workload
The first step is to create a long-running workload. This workload allows you to see how a failover affects the ability to read and write data, and how long a failover takes in the General Purpose service tier for Azure SQL Database. You'll use ostress.
Open a new Command Prompt window on your local computer. Use
cdto go to the directory in the repository you cloned or downloaded earlier that contains the availability module. For example, you might use this command:cd C:\Users\username\mslearn-azure-sql-fundamentals\05-AvailabilityThe ostress executable file is in this folder. (It's small.) The ostress workload connects and runs a simple query 50,000 times.
Use the following ostress script to run the workload. Replace
serverNamewith the name of your Azure SQL Database logical server. Replacepasswordwith your password..\ostress.exe -S"serverName.database.windows.net" -Q"SELECT COUNT(*) FROM SalesLT.Customer" -U"cloudadmin" -d"AdventureWorks" -P"password" -n1 -r50000If your workload is running properly, you should see the result of the query,
847, repeatedly appearing in the Command Prompt window.If you want to stop running the ostress workload before it's done, you can select Ctrl+C in the terminal.
If you want to run the workload again, you can run the command again.
Use PowerShell in Azure Cloud Shell to initiate a failover and observe the results
In the Azure Cloud Shell terminal on the right side of this page, run this PowerShell script to configure your environment:
$resourceGroup = "<rgn>Sandbox resource group name</rgn>"
$database = "AdventureWorks"
$server = Get-AzureRmSqlServer -ResourceGroupName $resourceGroup
$server = $server.ServerName

# Specify your default resource group and Azure SQL Database logical server
az configure --defaults group=$resourceGroup sql-server=$server

# Confirm the defaults are set
az configure --list-defaults
Configure your windows so that you can see this browser and the Command Prompt window at the same time.
Run this code in the Azure Cloud Shell terminal:
# Create a failover
Invoke-AzSqlDatabaseFailover -ResourceGroupName $resourceGroup `
    -ServerName $server `
    -DatabaseName $database
Observe the results in ostress from the Command Prompt window. While this command is running, you should observe any changes that appear in the Command Prompt window. You'll notice that you can't access the database while the failover occurs. The failover will finish after about 30 seconds, and you'll see that the workload runs successfully again. The retry logic in your application is important because if Azure fails over (for a number of reasons), you don't want the application to fail or experience downtime for longer than it takes for the failover to occur.
This ability to create a failover on command can be useful in certain scenarios. Note that the service throttles you from doing so too often. Run the following command to try another failover:
# Create a failover again
Invoke-AzSqlDatabaseFailover -ResourceGroupName $resourceGroup `
    -ServerName $server `
    -DatabaseName $database
You'll see an error similar to this one:
Invoke-AzSqlDatabaseFailover: Long running operation failed with status 'Failed'. Additional Info:'There was a recent failover on the database or pool if database belongs in an elastic pool. At least 15 minutes must pass between database failovers.'You can now stop the workload in the Command Prompt window by selecting the window and then selecting Ctrl+C. You can leave the window open, because you'll use the same workload in the next exercise.
You might wonder if there's a way to check whether a failover occurred. There's currently no clear "Failover occurred" message, but the Resource Health can be a good indicator.
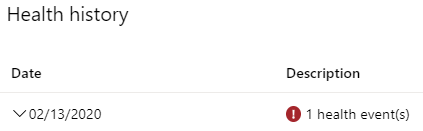
In the Azure portal, go to your Azure SQL database. In the left pane, under Help, select Resource Health. Between 5 and 15 minutes after a failover, you might see a health event similar the one shown in the following screenshot. This event can indicate several things, but one possibility is that something has happened and Azure has failed over.