Exercise - Use source code in Visual Studio Code
In this scenario, you have been asked to create an account management app for your organization. You decided to create a canvas app and to make the app source available in text format to comply with the organization's legal requirements. Your company's development policies require that all assets that are created by developers are stored in the source control repository. Source code should be committed to the repository in text format, wherever possible, to simplify the process of collaborating in a project team environment and to make the source available for automatic scanning and differencing.
Requirements
To complete this exercise, you need to have a Microsoft Dataverse environment with database installed.
Objectives
The goal of this exercise is for you to learn how to:
Edit a canvas application in Visual Studio Code.
Package a canvas application in Visual Studio Code.
Upload a canvas application to Power Apps Studio.
Create and initialize local and remote Git repositories.
Synchronize local and remote repositories and work with changes.
Prerequisite
Make sure that you have completed the prior lab from this module before starting this exercise.
Exercise 1: Edit the application
In this exercise, you'll edit the account manager application in Visual Studio Code.
Task: Edit the app
In this task, you'll edit the application in Visual Studio Code.
Open Visual Studio Code.
If the Learn lab account manager folder doesn't open automatically, select File > Open Folder. Locate and open the Learn lab account manager folder.
Expand the src folder, expand the Src folder, and then select BrowseScreen1.fx.yaml file.
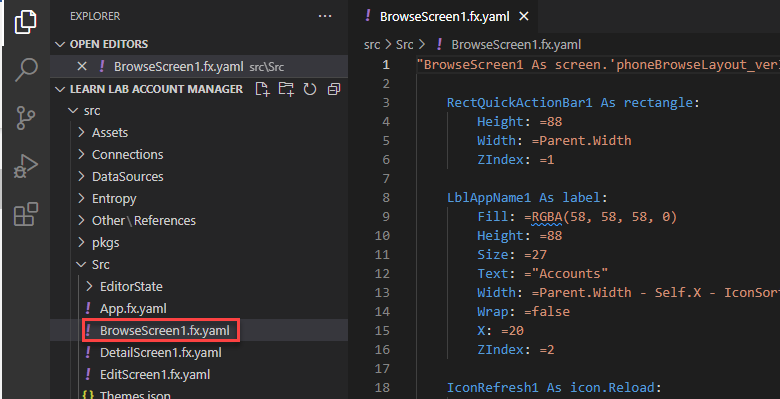
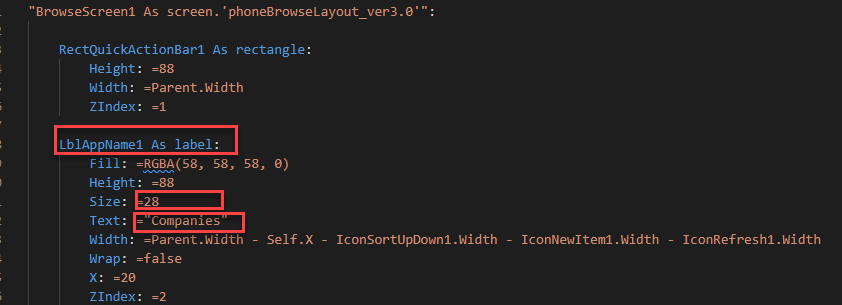
Locate LblAppName1.
Change the Text value of LblAppName1 to Companies and the Size to 28.
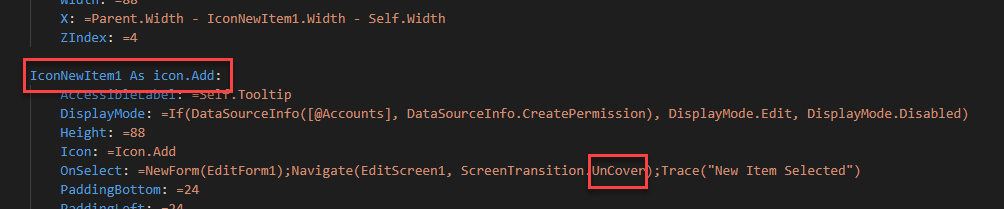
Locate IconNewItem1.
Change the Navigate formula transition from None to CoverRight, and then add the following Trace() expression.
;Trace("New Item Selected")
Select the DetailScreen1.fx.yaml file.
Locate LblAppName2.
Change the Text value of LblAppName2 to Companies and the Size to 28.
Select the EditScreen1.fx.yaml file.
Locate LblAppName3.
Change the Text value of LblAppName3 to Companies and the Size to 28.
Select File > Save all.


Exercise 2: Pack and upload
In this exercise, you'll package the application and upload it to your environment.
Task: Pack and upload
In this task, you'll package and upload the application.
Open Terminal and then run the following command.
pac canvas pack --msapp "Account manager.msapp" --sources src
You might receive a warning message stating, Warning PA2001: Checksum mismatch. You can safely ignore this message.
Switch to browser, go to Power Apps maker portal, and then make sure that you are in the correct environment.
Select Apps.
Select the Account manager app and then select Edit.
Select File > Open > Browse.

Select the Account manager.msapp file that is located in the Learn lab account manager folder and then select Open.

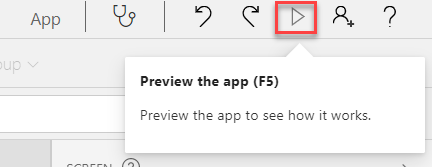
Select Preview the app.
The label text should show the changes that you made in Visual Studio Code. Select the plus (+) icon to add a new account.
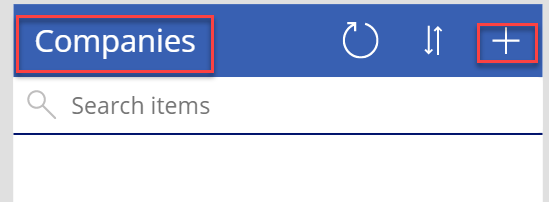
The label text should show the changes that you made in Visual Studio Code. Fill out the form and then select Save.
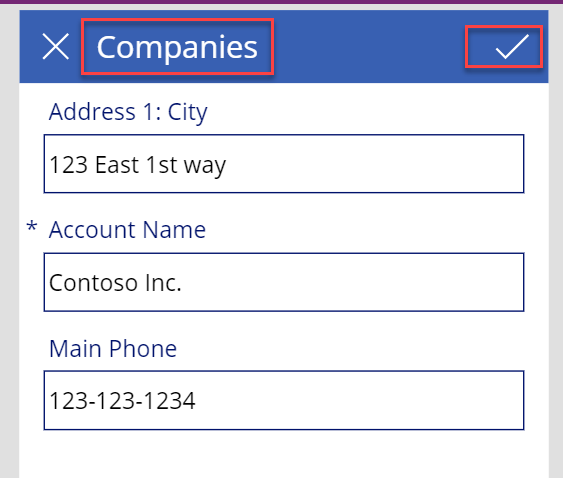
Select to open the new account.
The label text should show the changes that you made. Close the app preview.

Select File > Save.
Select Publish.
Select Publish this version and then wait for the publishing process to complete.


Exercise 3: GitHub (Optional)
In this exercise, you'll create a new repository in GitHub, initialize the repository, and then work with changes.
Task 1: Initialize the remote repository
In this task, you'll initialize the remote repository.
Go to GitHub and sign in. If time is your first, select Sign up and then follow the prompts to complete the sign-up process.
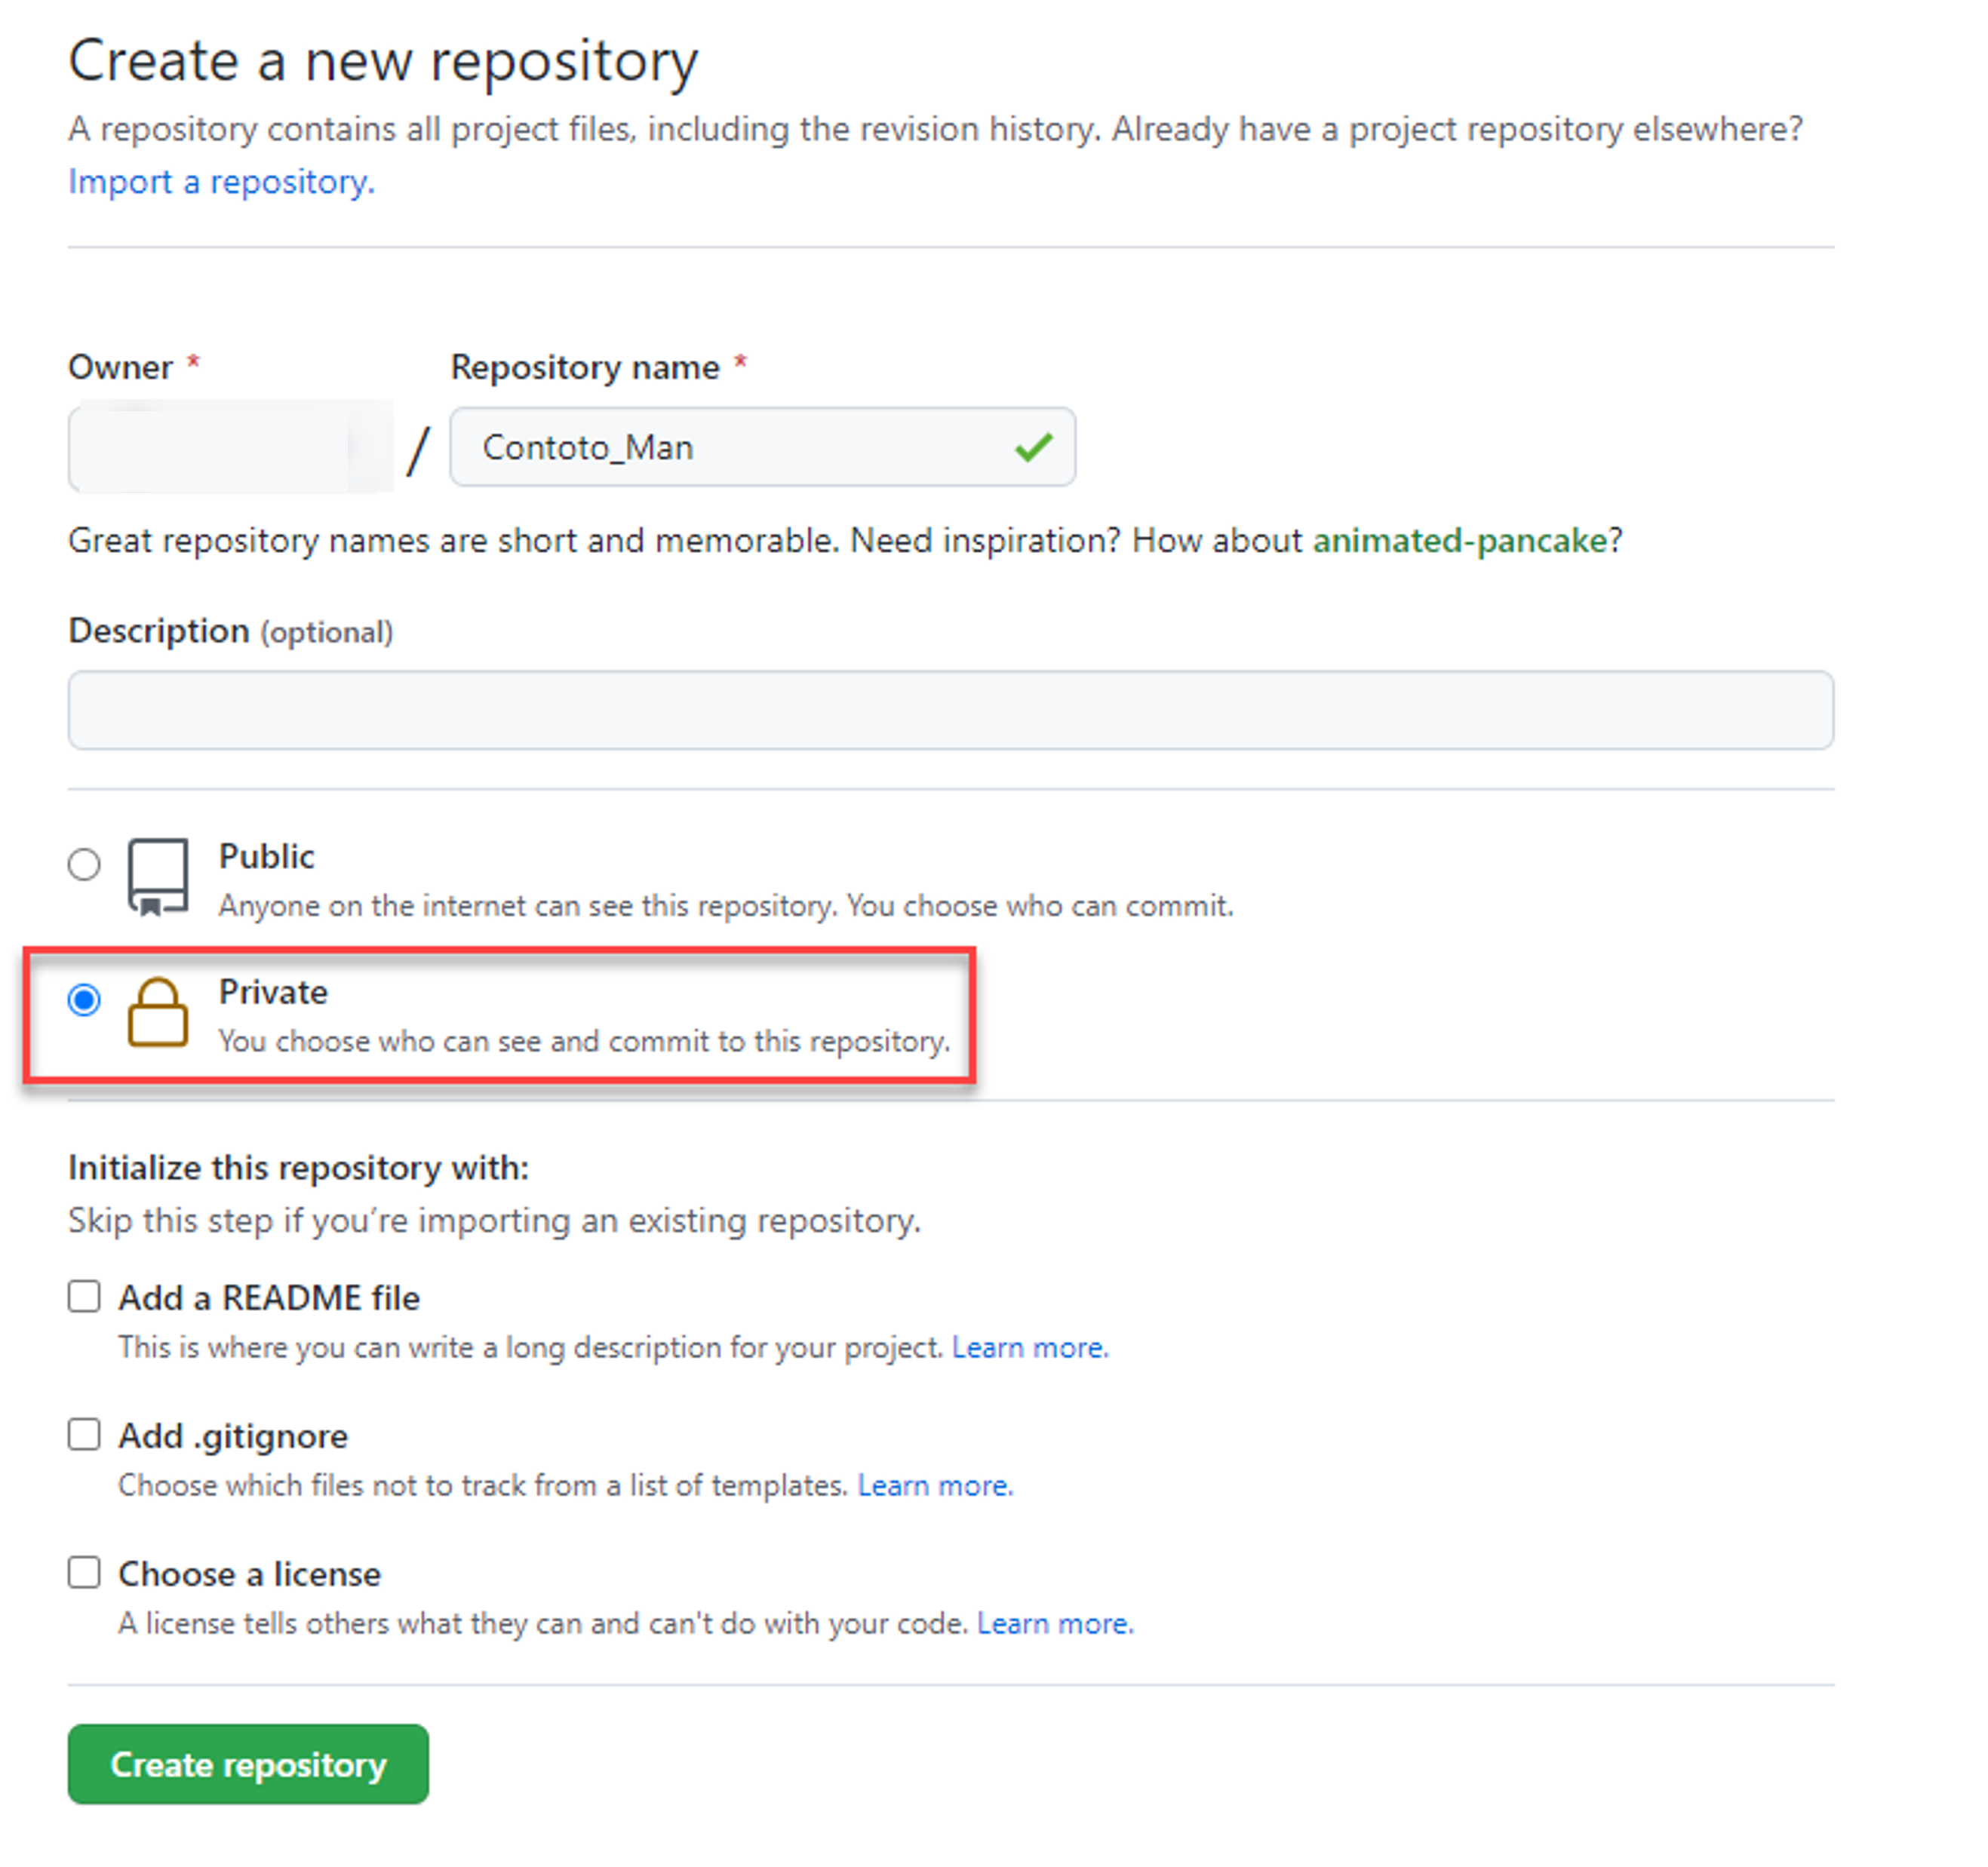
Select the plus (+) button and then select New repository.

Enter Contoto_Man for the Repository name, select Private, and then select Create repository.
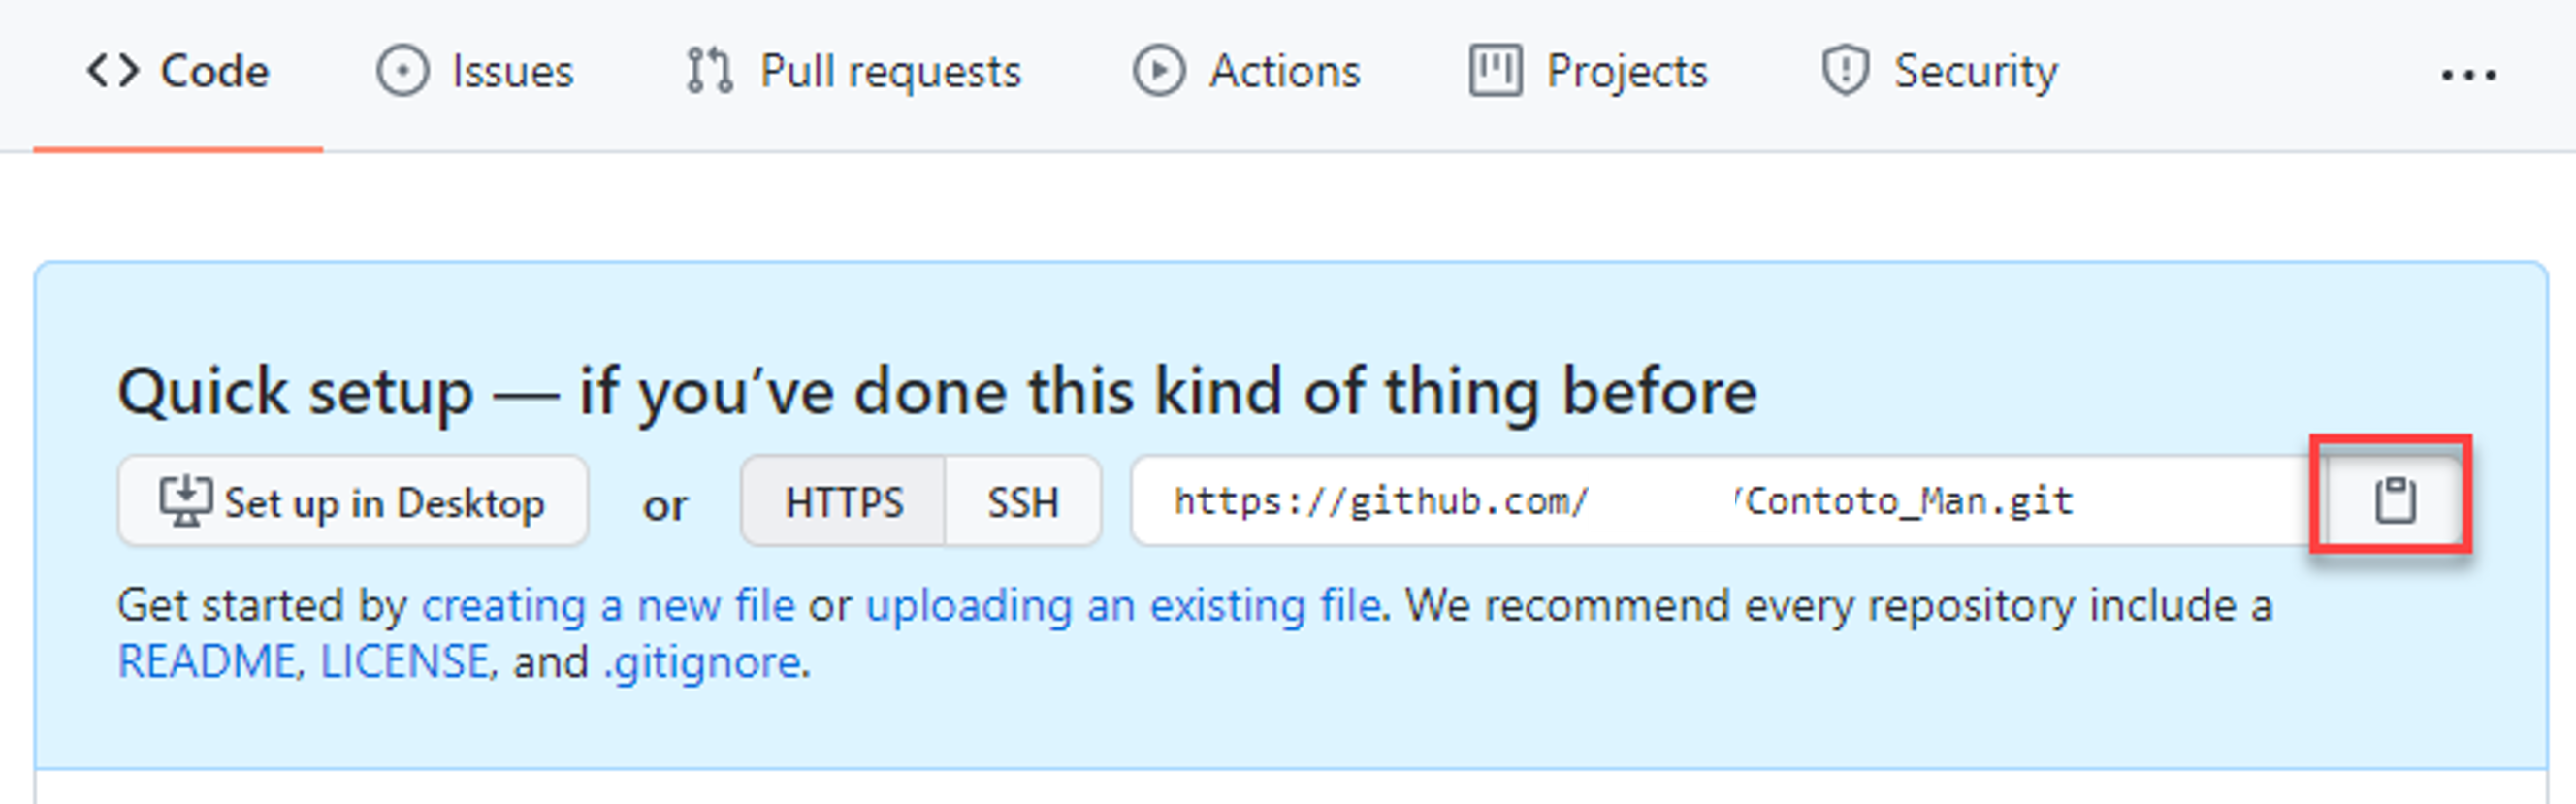
Copy the URL and then paste it in Notepad to use later.


Task 2: Initialize the local repository
In this task, you'll initialize the local repository.
Open Visual Studio Code.
If the Learn lab account manager folder doesn't open automatically, select File > Open Folder. Locate and open the Learn lab account manager folder.
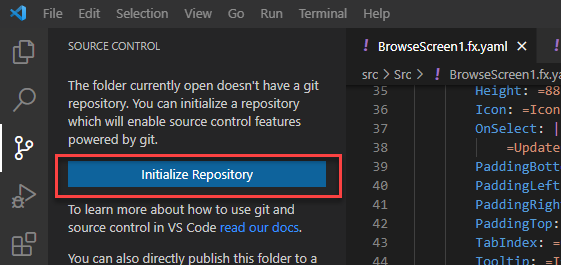
Select the View menu and then select SCM (source control manager).
Select Initialize Repository.
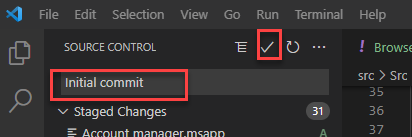
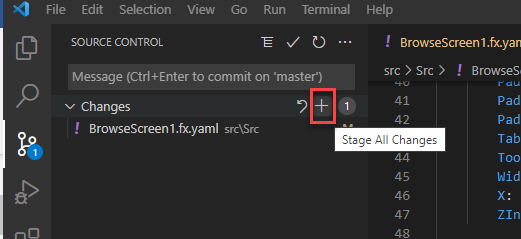
Hover the cursor over the Changes option and then select the plus (+) icon to Stage All Changes.

Type Initial commit for the message and then select Commit (checkbox button).


Task 3: Add and sync a remote repository
In this task, you'll add a remote repository and then sync the repository.
Select the ellipsis (...) button and then select Remote > Add Remote.
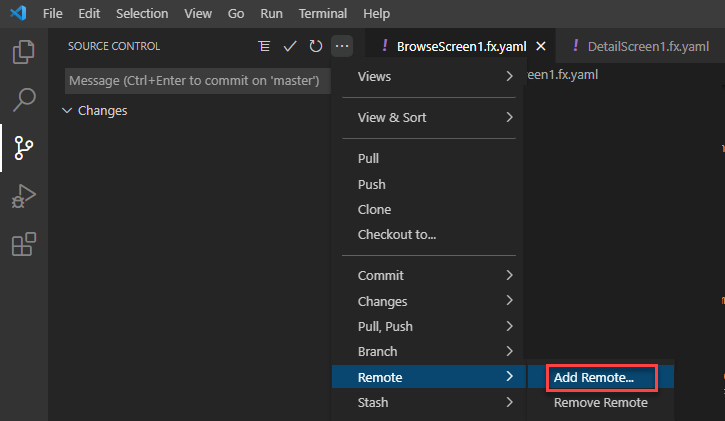
Paste the repository URL that you copied previously and then select Add remote from URL. Sign in if prompted.

Type Origin as the remote name and then press the Enter key.

Select the ellipsis (...) button and then select Pull, Push > Sync.
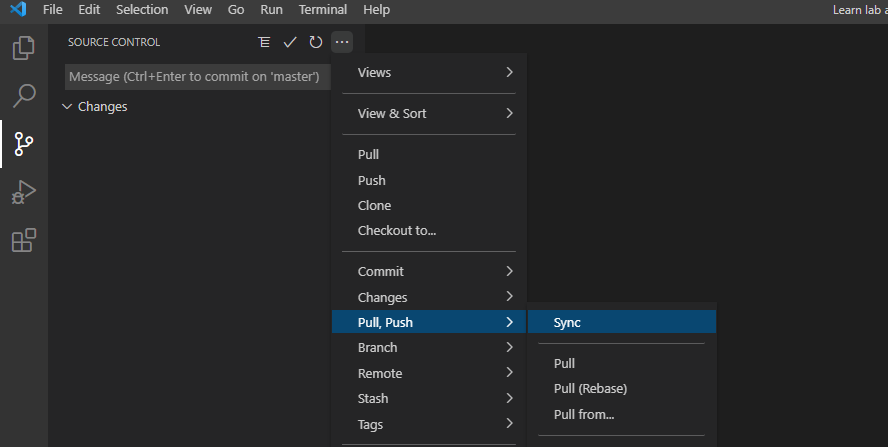
Select OK.
Go to GitHub and open the Contoso_Man repository.
Select to open the src folder.

Examine the contents of the folder.


Task 4: Work with changes
In this task, you'll work with the changes.
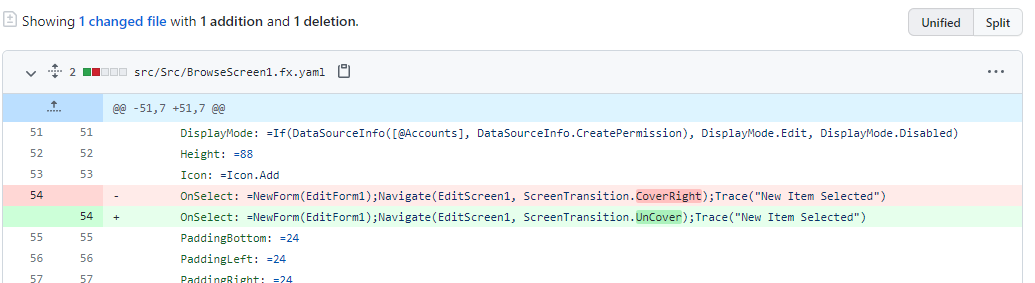
Switch to Visual Studio Code and then select the BrowseScreen1.fx.yaml file.
Locate IconNewItem1 and then change the Navigate formula transition from CoverRight to UnCover.
Select File > Save all.
Select Source Control > Stage all changes.
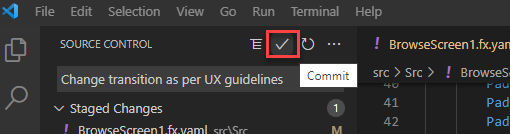
Type Change transition as per UX guidelines for the message and then select Commit (checkbox icon).
Select the ellipsis (...) button and then select Push.
Return to GitHub and open the Contoso_Man repository.
Select to open the commit.

Review the changes.