Work with existing resources
Bicep files often need to refer to resources that were created elsewhere. These resources might be created manually, maybe by a colleague using the Azure portal. Or they might be created in another Bicep file. There are many reasons why you need to refer to these resources, such as:
- You're adding an SQL database into an Azure SQL logical server instance that someone already created.
- You're configuring diagnostics settings for resources that are defined in another Bicep module.
- You have to securely access the keys for a storage account that was manually deployed into your subscription.
Bicep provides the existing keyword for you to use in these situations.
Note
The commands in this unit are shown to illustrate concepts. Don't run the commands yet. You'll practice what you learn here soon.
Refer to existing resources
Within a Bicep file, you can define a resource that already exists. The declaration looks similar to a normal resource definition, but there are a few key differences. In the following example of an existing resource definition, the definition refers to a storage account named toydesigndocs. The storage account is in the same resource group that your Bicep template is deploying resources to.
resource storageAccount 'Microsoft.Storage/storageAccounts@2019-06-01' existing = {
  name: 'toydesigndocs'
}
Let's look closely at what makes up this definition:
As you would with a normal resource, you include the
resourcekeyword, a symbolic name, and the resource type and API version.Note
Remember, the symbolic name is used only within this Bicep file. If you create this resource by using one Bicep file and refer to it by using the
existingresource in a different Bicep file, the symbolic names don't have to match.The
existingkeyword indicates to Bicep that this resource definition is a reference to an already-created resource, and that Bicep shouldn't try to deploy it.The
nameproperty is the Azure resource name of the storage account that was previously deployed.You don't need to specify the
location,sku, orproperties, because the template doesn't deploy the resource. It merely references an existing resource. Think of it as a placeholder resource.
Refer to child resources
You can refer to an existing child resource, too. Use the same kind of syntax that you used when you deployed a child resource. The following example shows how you can refer to an existing subnet, which is a child resource of a virtual network. The example uses a nested child resource, as shown here:
resource vnet 'Microsoft.Network/virtualNetworks@2020-11-01' existing = {
  name: 'toy-design-vnet'

  resource managementSubnet 'subnets' existing = {
    name: 'management'
  }
}
Notice that both the parent and child resource have the existing keyword applied.
You can then refer to the subnet by using the same :: operator that you use for other nested child resources:
output managementSubnetResourceId string = vnet::managementSubnet.id
Refer to resources outside the resource group
Often, you need to refer to resources in a different resource group. For example, if you have a virtual network in a centralized resource group, you might want to deploy a virtual machine into that virtual network in its own resource group. You can use the scope keyword to refer to existing resources in a different resource group. The following example shows how you could refer to a virtual network named toy-design-vnet within the networking-rg resource group:
resource vnet 'Microsoft.Network/virtualNetworks@2020-11-01' existing = {
  scope: resourceGroup('networking-rg')
  name: 'toy-design-vnet'
}
Notice that the scope uses the resourceGroup() keyword to refer to the resource group that contains the virtual network.
You can even refer to resources within a different Azure subscription, as long as the subscription is within your Microsoft Entra tenant. If your networking team provisions the virtual network in a different subscription, the template could refer to it, as in this example:
resource vnet 'Microsoft.Network/virtualNetworks@2020-11-01' existing = {
  scope: resourceGroup('f0750bbe-ea75-4ae5-b24d-a92ca601da2c', 'networking-rg')
  name: 'toy-design-vnet'
}
Notice that the scope uses the resourceGroup() keyword to refer to the Azure subscription ID (f0750bbe-ea75-4ae5-b24d-a92ca601da2c) and resource group name that contains the virtual network.
Now that you understand how to refer to existing resources, let's look at how you can use this capability in your templates.
Add child and extension resources to an existing resource
You can add a child resource to an already-created parent resource by using a combination of the existing keyword and the parent keyword. The following example template creates an Azure SQL database within a server that already exists:
resource server 'Microsoft.Sql/servers@2020-11-01-preview' existing = {
  name: serverName
}

resource database 'Microsoft.Sql/servers/databases@2020-11-01-preview' = {
  parent: server
  name: databaseName
  location: location
  sku: {
    name: 'Standard'
    tier: 'Standard'
  }
}
If you need to deploy an extension resource to an existing resource, you can use the scope keyword. Here's a template that uses the existing keyword and the scope keyword to add a resource lock to a storage account that already exists:
resource storageAccount 'Microsoft.Storage/storageAccounts@2019-06-01' existing = {
  name: 'toydesigndocs'
}

resource lockResource 'Microsoft.Authorization/locks@2016-09-01' = {
  scope: storageAccount
  name: 'DontDelete'
  properties: {
    level: 'CanNotDelete'
    notes: 'Prevents deletion of the toy design documents storage account.'
  }
}
Refer to an existing resource's properties
Resources often need to refer to the properties of other resources. For example, if you deploy an application, it might need to know the keys or connection information for another resource. By using the existing keyword, you get access to the properties of the resource that you're referring to.
Tip
It's a best practice to look up keys from other resources in this way instead of passing them around through outputs. You'll always get the most up-to-date data. Also, importantly, outputs are not designed to handle secure data such as keys.
The way that you access the information about a resource depends on the type of information you're getting. If it's a property that isn't secure, you ordinarily use only the properties of the resource. The following example template deploys an Azure Functions application, and uses the access details (instrumentation key) for an Application Insights instance that was already created:
resource applicationInsights 'Microsoft.Insights/components@2018-05-01-preview' existing = {
  name: applicationInsightsName
}

resource functionApp 'Microsoft.Web/sites@2020-06-01' = {
  name: functionAppName
  location: location
  kind: 'functionapp'
  properties: {
    siteConfig: {
      appSettings: [
        // ...
        {
          name: 'APPINSIGHTS_INSTRUMENTATIONKEY'
          value: applicationInsights.properties.InstrumentationKey
        }
      ]
    }
  }
}
In this example, because the instrumentation key isn't considered sensitive data, it's available in the properties of the resource. When you need to access secure data, such as the credentials to use to access a resource, use the listKeys() function, as shown in the following code:
resource storageAccount 'Microsoft.Storage/storageAccounts@2019-06-01' existing = {
  name: storageAccountName
}

resource functionApp 'Microsoft.Web/sites@2020-06-01' = {
  name: functionAppName
  location: location
  kind: 'functionapp'
  properties: {
    siteConfig: {
      appSettings: [
        // ...
        {
          name: 'StorageAccountKey'
          value: storageAccount.listKeys().keys[0].value
        }
      ]
    }
  }
}
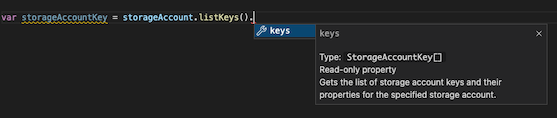
Notice that the listKeys function returns a keys array. The Bicep code retrieves the value property from the first item in the keys array. Each resource type has different information available from the listKeys() function. The Bicep extension for Visual Studio Code gives you hints to help you to understand the data that each resource's listKeys() function returns. The following screenshot shows the listKeys() function's output for a storage account:
Some resources support other functions, too. Visual Studio Code's IntelliSense lists the functions available for each resource. In the following screenshot, you can see that storage accounts provide functions named listAccountSas() and listServiceSas() in addition to listKeys():

Important
The listKeys() function provides access to sensitive data about the resource. This means that the user or service principal that runs the deployment needs to have the appropriate level of permission on the resource. This is usually the Contributor built-in role, or a custom role that assigns the appropriate permission.