Exercise - Use the Azure portal to run a quantum program
Have an Azure subscription
To access Azure portal you need an Azure subscription. If you don't have an Azure subscription, create a free account before you begin.
Create a quantum workspace
A quantum workspace is a container for your quantum programs and resources. If you want to run quantum programs using Azure Quantum, you need to create a quantum workspace.
- Sign in to the Azure portal, using the credentials for your Azure subscription.
- Select Create a resource and then search for Azure Quantum. On the results page, you should see a tile for the Azure Quantum service.
- Select Azure Quantum and then select Create. A form to create a workspace will open.
- Select a subscription to associate with the new workspace.
- Select Quick create.
- Enter a name and select the region for the workspace.
- Select Create.
Note
Deployment of your workspace may take a few minutes. The status and deployment details will be updated in the portal.
Manage your quantum workspace
The Azure portal allows you to manage your quantum workspace. You can view the details of your workspace, manage your Azure Quantum credits, list your quantum jobs, see the status of the quantum computing providers you have selected, and more.
For example, the following steps show you how to view your workspace details and check your Azure Quantum credits.
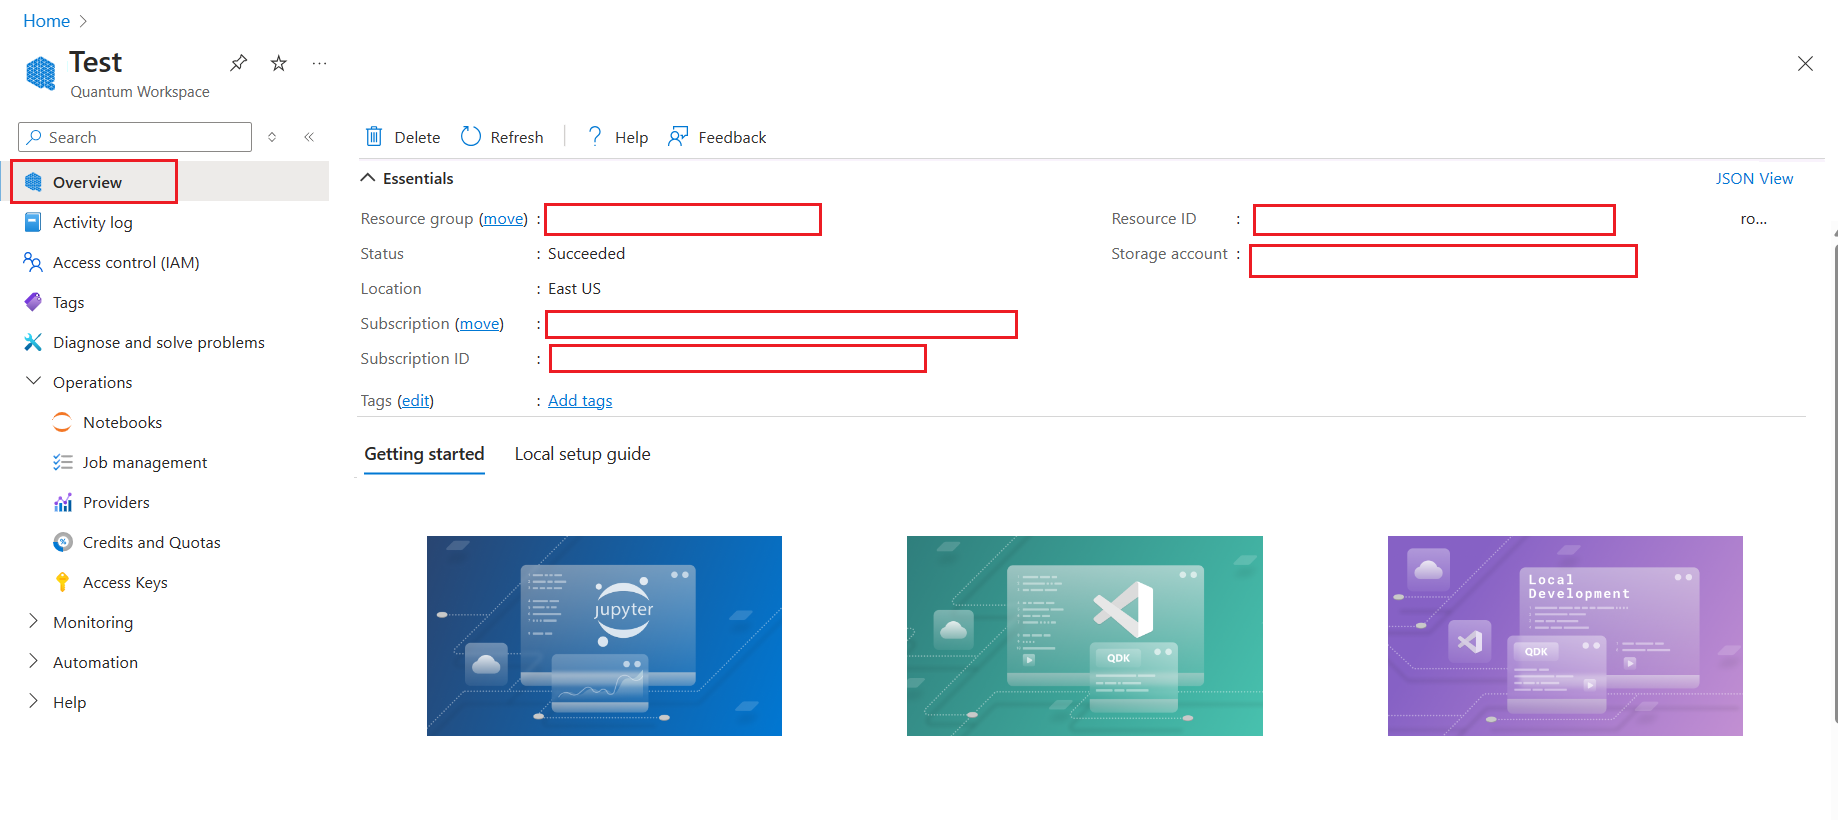
Retrieve your workspace details
For some tasks like connecting to your Azure Quantum workspace, you may need you quantum workspace details, such as the resource ID and the location.
Select your Azure Quantum workspace in the Azure portal.
Select Overview in the left pane.
The details of your workspace are displayed. For example, you can find the Resource ID and the Location of your workspace here.
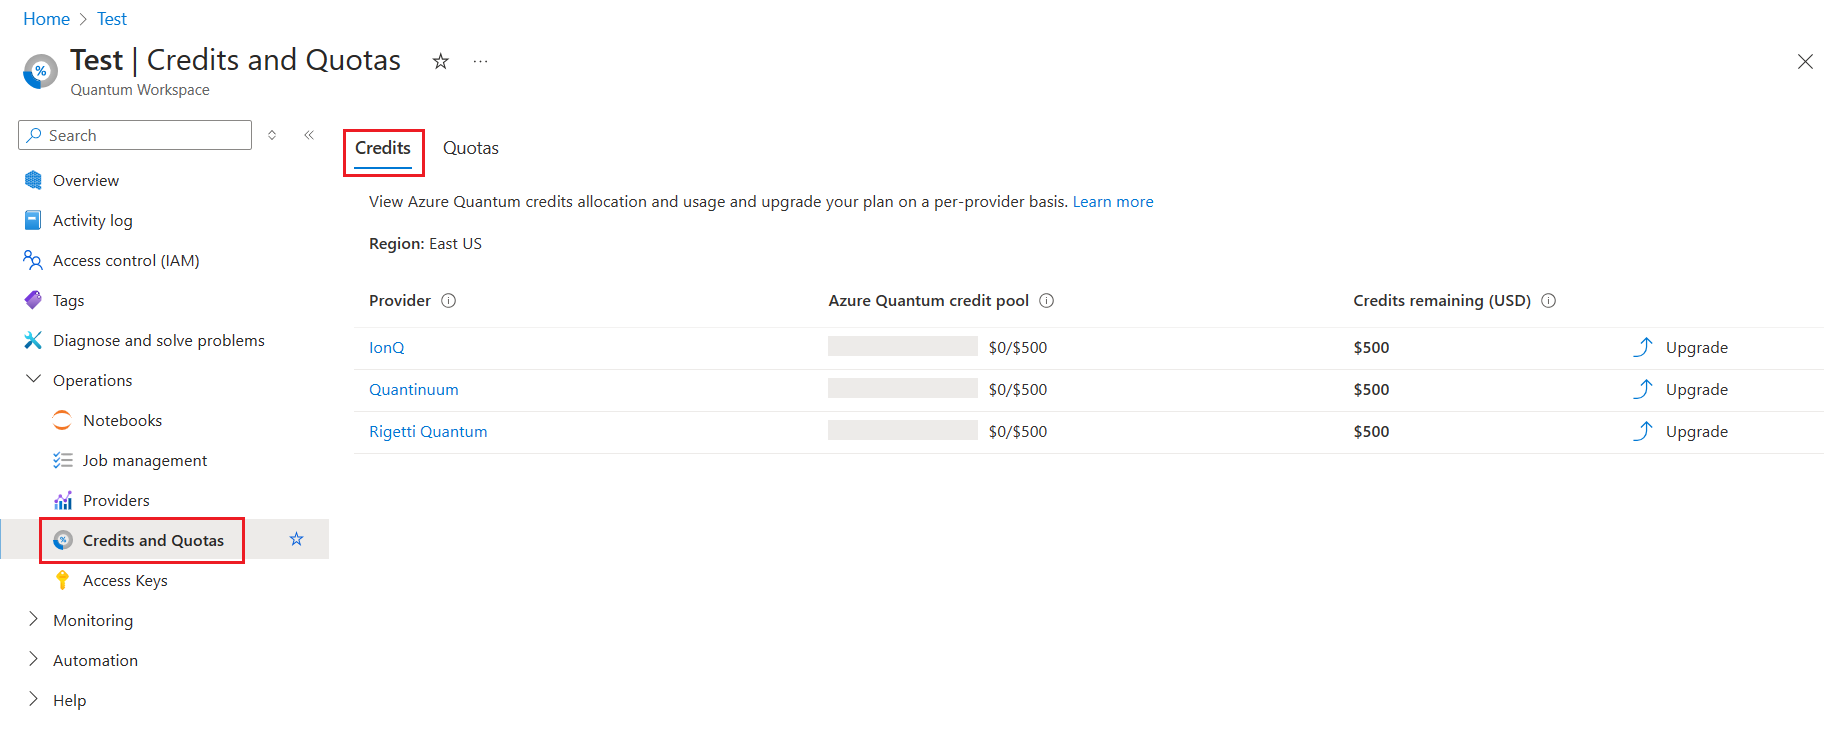
View your Azure Quantum credits
When you create an Azure Quantum workspace for the first time, you get free USD500 in Azure Quantum Credits for use in each of the quantum computing providers.
You can check your remaining Azure Quantum credits in the Azure portal.
Select your Azure Quantum workspace in the Azure portal.
Select Credits and Quotas in the left pane.
Your remaining credits are displayed in the Credits section. You can check the remaining credits for each of the quantum computing providers you have selected for your workspace.
Run a quantum program using Azure Quantum notebooks
The Azure Quantum portal includes a notebook gallery with sample notebooks You can use these notebooks to run your own quantum programs.
Select your Azure Quantum workspace in the Azure portal.
Select Notebooks, and then select Sample gallery.
You can select any sample notebook. For example, select Hello, world: Q#. You can choose the provider you want to use for running the notebook, for example, IonQ.
Click on Copy to my notebooks.
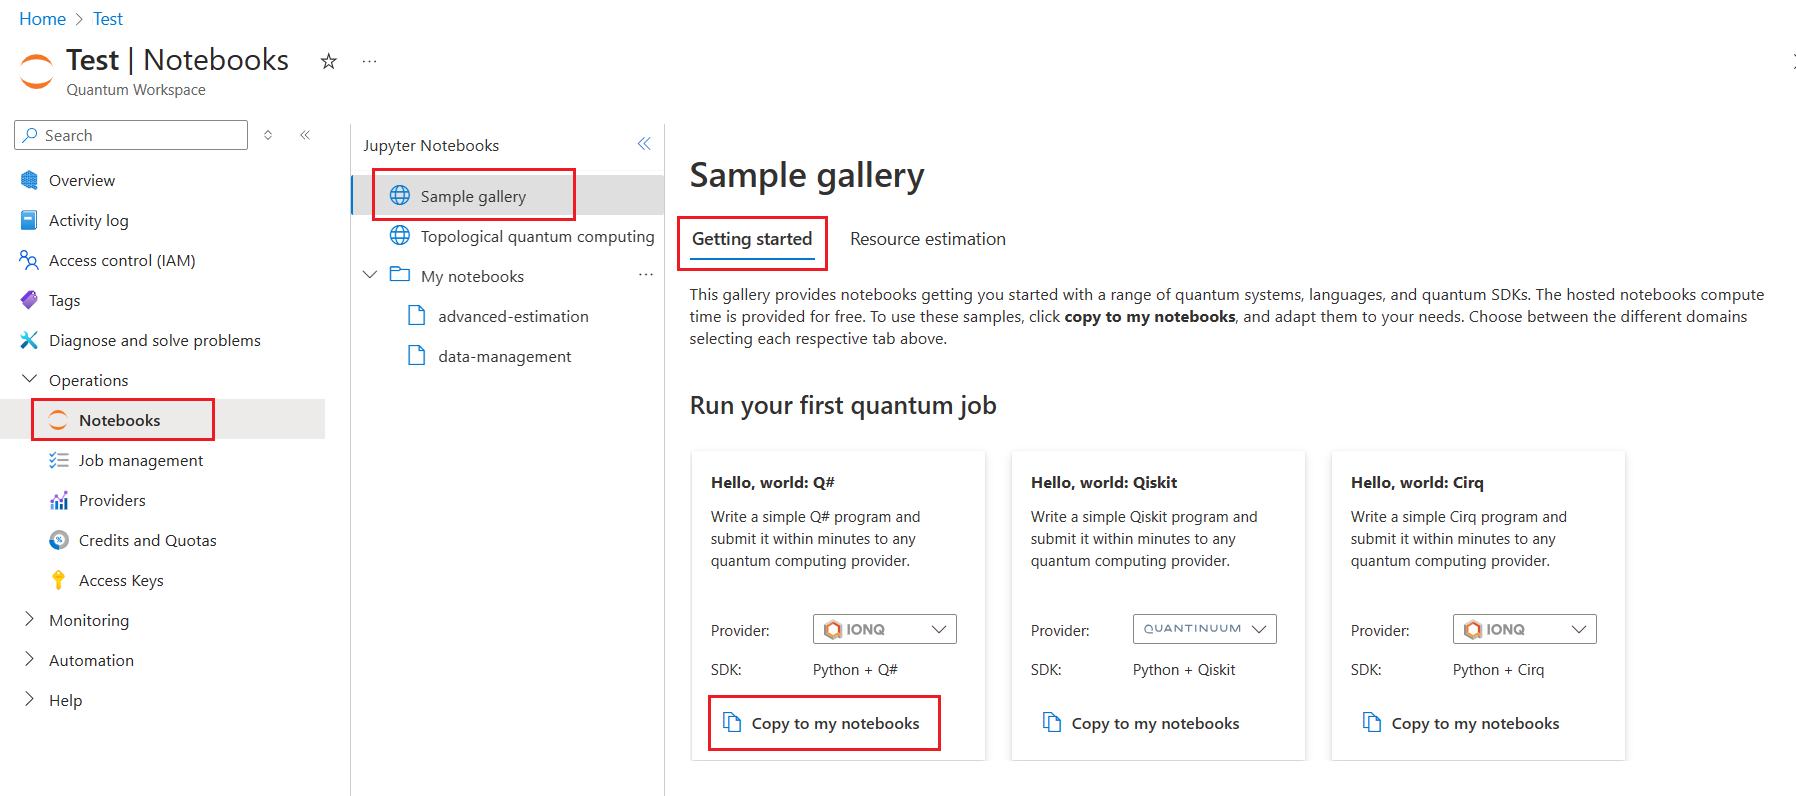
The notebook can be found under My notebooks.
Open the notebook and click on Run all to run the quantum program.