Configure grids
The Power Apps grid control allows users to view, open, and edit records from views and subgrids. In addition to inline editing, the control provides other capabilities. Capabilities include:
- A modern data browsing experience via infinite scrolling, allowing users to scroll indefinitely through data until they find the records they're interested in.
- An ability to customize the visual appearance of columns for specific needs.
To add the grid control to views for a table, select Solutions from the Power Apps maker portal. You can look for and select your solution under Solutions. A good place to start is your Common Data Services Default Solution, if you don't have a solution already built.
Inside of the Solution you see a view of the Objects that are part of the solution. These objects include Apps, Chatbots, Choices, Cloud flows, Dashboards, Site maps, and Tables. To begin using the grid control, we need to find an app that is in your solution. You can quickly sort your Objects by selecting Apps to display all of the apps that are part of the solution.
Note
If you do not have a model-driven app in your solution, you can get to the Forms editor from your list of Dataverse Tables and select the Forms option from the Tables dashboard view for your table.
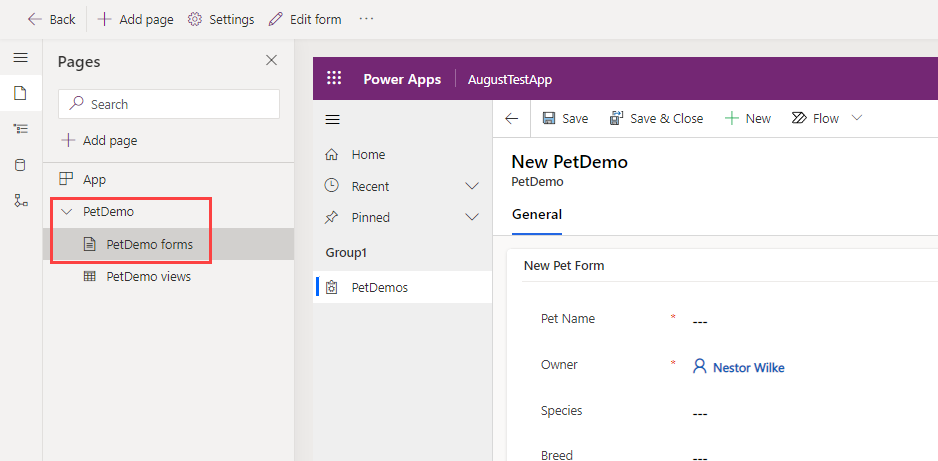
Once you've selected your app, we need to get to the form editor for your model-driven app. When your app opens, you see the home screen of your app in the canvas area. On the left side of your screen is a Pages panel with the names of any tables that are connected to your app. Select the table name to expand it. In the example here, we have selected our PetDemo table, and we're going to select Pet forms.
On the right side of your screen is a panel showing the forms already part of this app. When you hover your mouse over the name of your form you see an Edit pencil appear (if you don't see that, you can select the ellipsis next to the form name). Select the icon to edit your form.
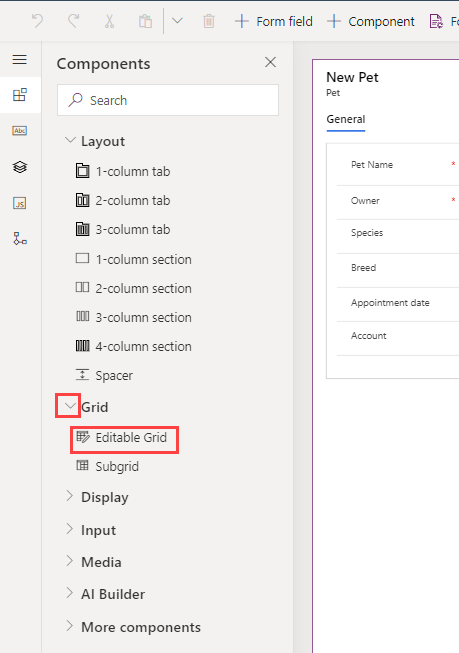
This action opens up the form editor for the selected table. In your form edit canvas, select the area of the canvas where you wish to place a grid control. Then select the Components menu from the left navigation rail (or Component from the command bar) and expand the Grid option. (Alternatively, you can input grid in the search field at the top of the panel.) Select Editable Grid.
In the pop-up pane called Add Editable Grid, you can select the table you want to link to this control. There are other options you can pick, such as the View or Layout. If you scroll all the way down the pane, you can select which device this component appears on including Web, Mobile and Tablet. When you're satisfied with your choices, select Done.
Your new editable grid appears on the form canvas. See how the properties pane appears to the right of your form canvas, with numerous customizable options. Once you're satisfied with the settings, you can Save and publish to record the changes.
To return to your model-driven app, you can select Back from the top left of the command ribbon.


